
|
On This Page |
|---|
Introduction
Below you will find an example of our D2L integration guide that you can review.
HelioCampus-D2L Brightspace Setup Guide
(v8 – 02/26/2024)
This document covers requirements for HelioCampus - D2L Brightspace (D2L) integration. A D2L Brightspace Administrator working with a HelioCampus integration technician can complete requirements for the HelioCampus Tool. There may be additional personnel required for unforeseen circumstances such as client network or server restrictions.
Data Feed Requirements
-
In the Course Section file of the data feed set to HelioCampus the following ID needs to be included in the “ExternalLmsId” field in course section file:
-
Course Offering Code - This is the data is populated in the Course Offering Code field that your institution sends in the data feed to D2L.
-
For example, it could be a concatenation of something like term code, subject code, course number, and section number i.e. 202010.ENG.101.1
-
-
Course Context ID - This is the internal ID assigned to a Course by D2L once it is created.
-
If your institution plans on sending this code the institution will need to pull those IDs from D2L and then insert them into the Course Section sent to HelioCampus.
-
Also, if your institution plans on using this code be sure to notify your HelioCampus integration contact.
-
-
HelioCampus LTI Tool
The HelioCampus LTI Tool allows students and instructors the ability to view a HelioCampus course syllabus within a related course and complete assessment forms.
Please choose if you are going to use an LTI 1.1 or LTI 1.3 integration with HelioCampus, follow the chosen LTI method’s guide from the links below then return to this guide to complete the REST integration.
HelioCampus Oauth2 Configuration
A D2L Oath2 Key/Secret is a required part of the Oauth2 process where instructors can grant permission to import related data from D2L into HelioCampus for assessment.
Create Oauth2 Configuration
-
Login to your D2L account as an administrator
-
Click the Admin Tools gear icon
-
Click Manage Extensibility under Organization Related
-
Click OAuth 2.0
-
Click Register an app
-
Enter the following information:
-
Application Name: HelioCampus D2L Integration
-
Redirect URI field: https://<HelioCampus_URL>/index.cfm/page/AefisLmsIntegration.authCallback
-
Scope: Paste the following: core:*:* enrollments:enrollment:read grades:gradeobjects:read quizzing:access:read quizzing:attempts:read quizzing:quizzes:read datasets:bds:read
-
Access Token Lifetime: Paste the following: 72000
-
Prompt for user consent: Check this box
-
Enable refresh tokens: Check this box
-
Select the I accept the Non-Commercial Developer Agreement check box
-
Click Register
-
Make a note of the values in the Client ID and Client secret fields
-
-
The URL for your D2L instance i.e. https://d2l.institution.edu
-
The Oauth2 Client ID and Client Key you created in the steps above.
-
If you are going to use the optional D2L Course Context ID
Service Account
This section will walk you through creating a service account for the REST API calls HelioCampus will use to gather information from your institution’s D2L environment to HelioCampus for assessment purposes. A D2L Administrator and HelioCampus Institutional Admin at your institution will need to complete the following.
Create the service account role in D2L:
The following should be completed by a D2L Administrator
First, you will need to create a role in D2L for the service account.
-
Login to your D2L account as an administrator
-
Click the Admin Tools gear icon
-
Click Roles and Permissions under Security
-
Click Create/Copy
-
Click Start Fresh
-
Name: HelioCampus Service Role or a name that follows your institution’s role naming convention
-
Enable Cascading Role: Check this box
-
Role Alias: HelioCampus Service Role or a name that follows your institution’s role naming convention
-
Tool Behavior Options: Leave all options unchecked
-
Classlist Display Options: Leave all options unchecked
-
Course Access Options:
-
Access:
-
Access inactive courses: Leave unchecked
-
Access past courses: Optionally check this box, if you desire for HelioCampus to be able access past courses for assessment purposes.
-
Access future courses: Leave unchecked
-
-
Sections:
-
Choose None of the above
-
-
Groups:
-
Choose None of the above
-
-
-
Click Save
-
Edit Role Interactions:
|
Role Interaction |
Permission(s) |
|---|---|
|
Search for 'HelioCampus Service Role' |
Allow at a minimum your Super Administrator and members of the role itself to be able to search for users of the service role in all org unit types. |
|
Impersonate 'HelioCampus Service Role' |
Allow at a minimum your Super Administrator and members of the role itself to be able to impersonate users of the service role in all org unit types. |
|
Enroll 'HelioCampus Service Role' |
Allow at a minimum your Super Administrator and members of the role itself to be able to enroll users of the service role in all org unit types. |
|
Role Switch 'HelioCampus Service Role' |
Allow at a minimum your Super Administrator and members of the role itself to be able to role switch the service role in all org unit types. |
|
See External Email Addresses for 'HelioCampus Service Role' |
Allow at a minimum your Super Administrator and members of the role itself to be able to view external email addresses for users of the service role in all org unit types. |
|
See Internal Email Addresses for 'HelioCampus Service Role' |
Allow at a minimum your Super Administrator and members of the role itself to be able to view internal email addresses for users of the service role in all org unit types. |
|
Make ePortfolio Content Available to 'HelioCampus Service Role' |
Allow at a minimum your Super Administrator and members of the role itself to be able to provide ePortfolio content to users of the service role in all org unit types. |
|
See Parent Child Relationships for 'HelioCampus Service Role' |
Allow at a minimum your Super Administrator and members of the role itself to be able to view parent child relationships for users of the service role in all org unit types. |
13. Click Save
14. Find the HelioCampus Service Role on the Role List page
15. Click the chevron next to HelioCampus Service Role
16. Click Edit permissions
a. You will need to grant certain permissions within a few tools to allow HelioCampus to make the required REST API calls with this role.
b. Below are listed the tools and which permission(s) should be granted within each tool. Please complete the following by choosing the tool under Filter by Tool, clicking Apply Filter, selecting the proper permission(s), click Save, and repeat for all tools. Once completed click Save and Close.
|
Tool |
Permission(s) |
OrgUnit |
|---|---|---|
|
Assignments |
See and Manage Assignment Submission Folders |
Enable at Organization & Course Offering levels |
|
View Submitted Files |
Enable at Organization & Course Offering levels |
|
|
View Feedback |
Enable at Organization & Course Offering levels |
|
|
Rubrics |
See Rubrics |
Enable at Organization & Course Offering levels |
|
Classlist |
Has Access to the Classlist |
Enable at Organization & Course Offering levels |
|
See Classlist Report |
Enable at Organization & Course Offering levels |
|
|
View Group Enrollments |
Enable at Organization & Course Offering levels |
|
|
Content |
View Course Content |
Enable at Organization & Course Offering levels |
|
Search Content |
Enable at Organization & Course Offering levels |
|
|
View Content that is Not Released |
Enable at Organization & Course Offering levels |
|
|
Grades |
See the Grades tool |
Enable at Course Offering levels |
|
Export Grades |
Enable at Course Offering levels |
|
|
See user grade values (API Only) |
Enable at Course Offering levels |
|
|
Org Unit Editor |
Can Create and Edit Org Units |
Enable at Organization level |
|
Quizzes |
View Quizzes |
Enable at Organization & Course Offering levels |
|
See Stats for Any Quiz |
Enable at Organization & Course Offering levels |
|
|
View Quiz Setup |
Enable at Organization & Course Offering levels |
|
|
Grade Submitted Quizzes |
Enable at Organization & Course Offering levels |
|
|
User Information Privacy |
See First Names |
Enable at Organization & Course Offering levels |
|
See Last Names |
Enable at Organization & Course Offering levels |
|
|
See Usernames |
Enable at Organization & Course Offering levels |
|
|
See Org Defined IDs |
Enable at Organization & Course Offering levels |
|
|
See Email Addresses |
Enable at Organization & Course Offering levels |
|
|
Users |
View User Enrollments |
Enable at Organization & Course Offering levels |
|
Search for: At a minimum add the role the students are included in, this is typically the Learner role |
Enable at Organization & Course Offering levels |
Create service account user in D2L
-
Login to your D2L account as an administrator
-
Click the Admin Tools gear icon
-
Click Users under User Related
-
Click New User
-
Legal First Name: HelioCampus
-
Legal Last Name: Service Account
-
Email: heliocampusservice@XXXXX
-
This does not need to be a real email address, as long as you use the same email address when you create the account in HelioCampus
-
-
Username: Input the desired username or allow the system to auto-create it.
-
Role: Choose the HelioCampus Service Role or the name that follows your institution’s role naming convention
-
Password: Choose Manually set password and create a password meeting your password requirements. This password will not be provided to HelioCampus.
-
Active: Check this box
-
Notification Number: Choose No notification number
Create the service account in HelioCampus
*The following should be completed by a HelioCampus Institutional Admin
First, you will need to create the service account that was created in D2L on your HelioCampus application.
Once you have logged on to HelioCampus complete the following to add the service account:
-
Click the hamburger menu on the top left of HelioCampus
-
Scroll down to the Admin Tools section of the menu
-
Click User Accounts
-
Click ADD USER towards the top right
-
Choose Local User
-
Click Next
-
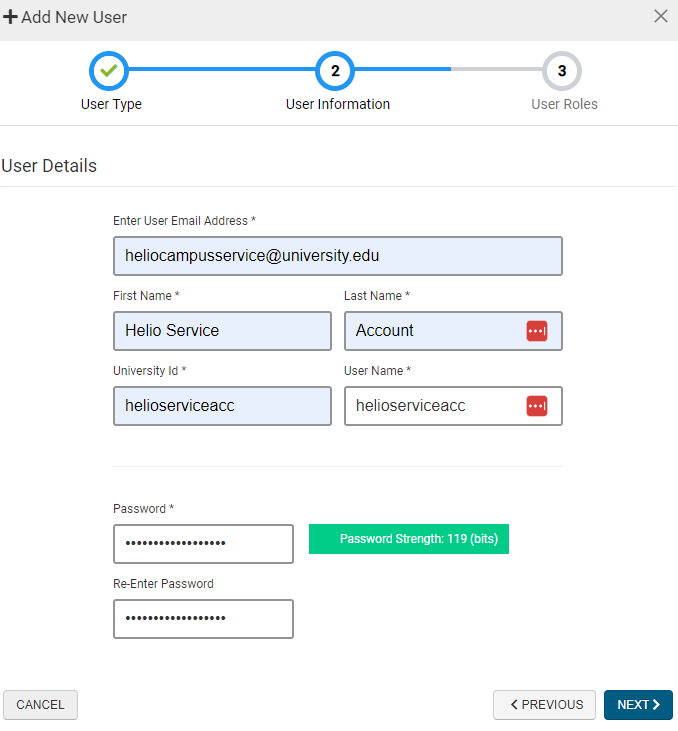
Fill in the User Details with the service account information from D2L above
-
Email Address
-
First Name
-
Last Name
-
University ID
-
If the Service account you created does not have SIS ID in D2L you can place the email address here.
-
-
Username
-
Password (You need to add a password for the service account on HelioCampus)
-
-
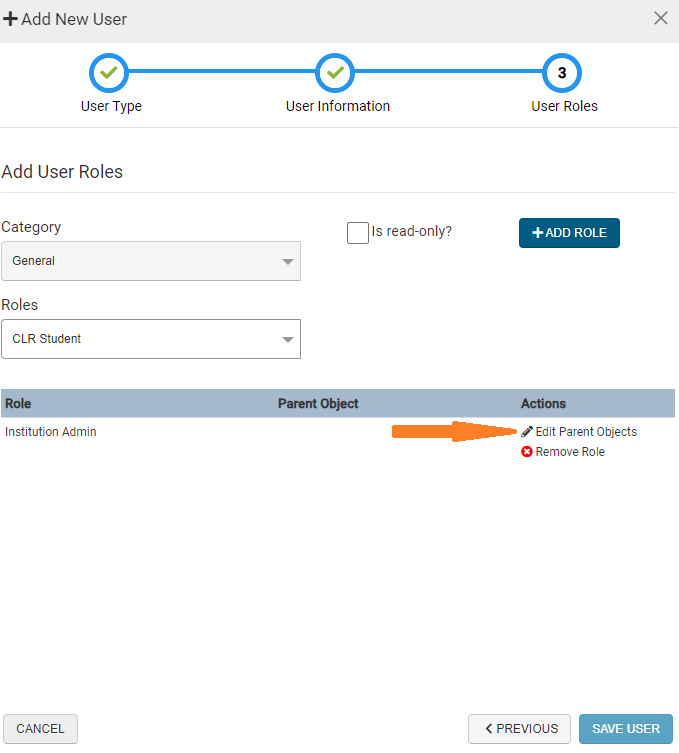
Click Next
-
From the drop-down menu choose Institutional Admin
-
Click Add Role

-
Click Edit Parent Objects
-
Click your Institution under Available Institutions on the left
-
Click the arrow pointing right to move it to Selected Institutions
-
Click OK
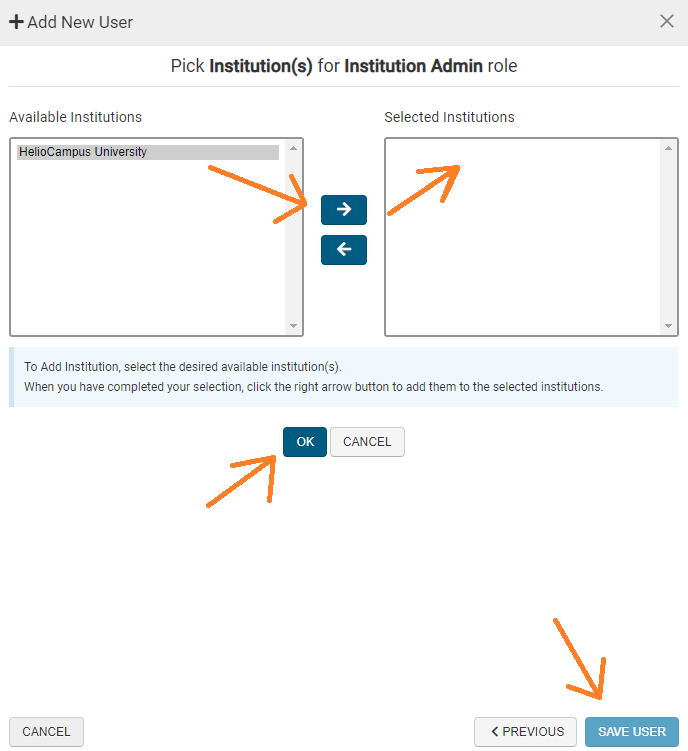
-
Click Save User and click Save again to create the service account
-
The service account is ready for the authorization step
Authorize the service account from HelioCampus on D2L
The following can be completed by a D2L Administrator or HelioCampus Institution Administrator if the HelioCampus Institution Administrator can impersonate the service account in HelioCampus
The last step is to do the REST API authorization with D2L using the service accounts you created in D2L and HelioCampus.
-
Login to your D2L account as an administrator
-
Act as the service account
-
Open a Course in D2L that also exists in HelioCampus
-
Now open a new tab from your internet browser and go to your HelioCampus platform and put “/?login” at the end of the URL (i.e university.heliocampus.net/?login)
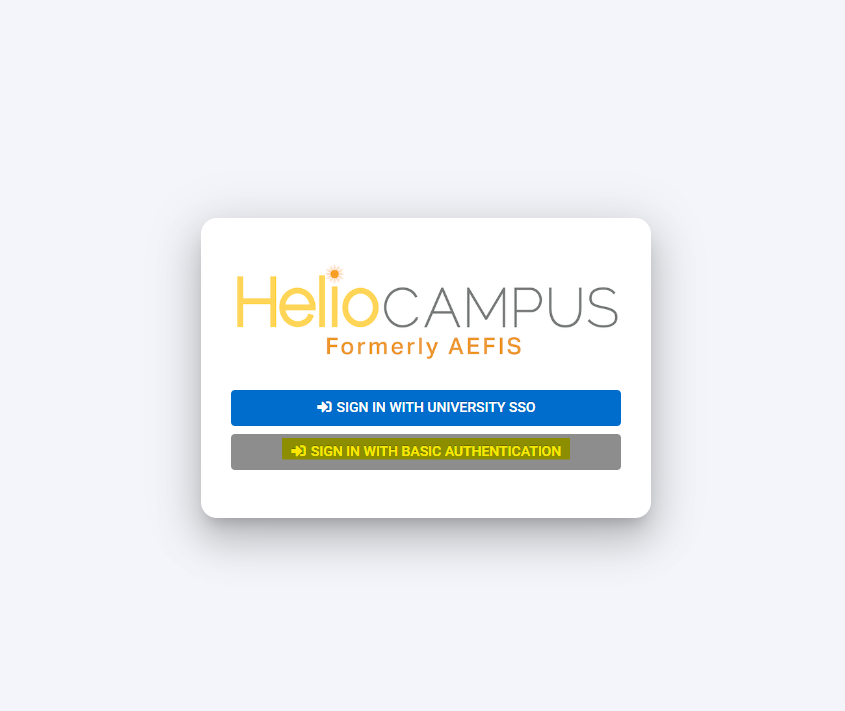
-
Click “SIGN IN WITH BASIC AUTHENTICATION”
-
Enter the credentials of the service account that you have created in the HelioCampus platform and click sign-in
-
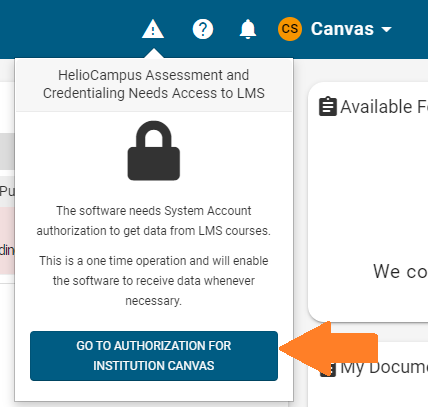
Once you login into the platform you should see the image below, if not click the hazard icon towards the top right of the page
-
Click GO TO AUTHORIZATION
-
Make sure that the highlighted area in the image below displays information about the D2L service account.
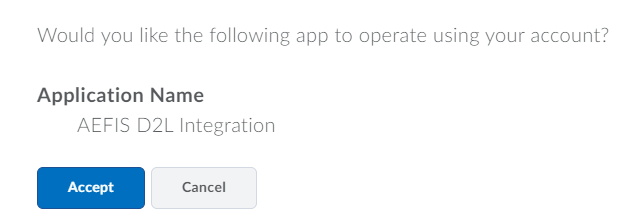
-
Click Accept
-
You will be redirected back to HelioCampus
LMS Integration Troubleshooting
This troubleshooting guide aims to assist users in resolving common issues encountered while using LMS-HelioCampus. If you encounter a problem not addressed here, please contact support@heliocampus.com for further assistance.
D2L ExternalLmsID → Course Offering Code
Why is my HelioCampus section not accessible via the LMS/not pulling assignments?
We receive information about your course sections via your data files. As a part of that, for each section, we receive what’s called the Course Offering Code field from LMS. We map this to our field called “ExternalLMSID.” It is the LMS’s unique key for each section. We need that field to be able to match up information in our platform with information coming to us from your LMS. So when you try to refresh assignments, our platform asks the LMS, “What assignment information do you have with this Course Offering Code?”
Should you be having issues with seeing refreshed/updated LMS Assignments, it is recommended to examine the Course Offering Code (again, that we map to ExternalLMSID) appearing for these course sections. If these values do not match, the Integration cannot connect the LMS and HelioCampus A&C Platform.
As a next step - we’d like you to log into LMS and go to the course sections in question, view the Course Offering Code, and confirm whether or not they appear like the IDs below. The Course Offering Code is on the Course/Co-Curricular Activity Settings page of the HelioCampus A&C Platform. Should you have trouble finding it, someone at your institution who handles LMS should be able to help you if you can’t find it. If these IDs are not the actual Course Offering Codes for these sections in LMS, we need to figure out why they are coming to us via your data file. That may require us to have a discussion with whomever at your institution was responsible for setting up the data files.
Examples:
EDU 261 400 - ExternalLMSID: 2023SP-INST-EDU261-400
EDU 261 401 - ExternalLMSID: 2023SP-INST-EDU261-401
BIO 3061 4120 - ExternalLMSID: 2023FA-INST-BIO3061-4120
Why is the HelioCampus section showing an "Invalid Access Token" error when I try to refresh assignments?
Should you receive an "Invalid Access Token" error message when attempting to refresh LMS Assignments into the HelioCampus A&C Platform, reauthorization of the expired access token must be completed. Authorization Tokens are required to ensure appropriate security and permissions through the API Integration.
To address this issue, please notify the HelioCampus A&C team. Our team will delete the current expired token, and then your LMS service account will need to be re-authorized.
Here is our documentation, which includes the steps for the re-authorization: Legacy D2L Brightspace Integration | Authorize the service account from HelioCampus on D2L. This action should be completed by the LMS Administrator or an Institutional Administrator who has login access to the LMS System Account.
It is possible for our team to bypass the LTI step to recreate the token, however, it must be noted that adding the service account to the Keycloak realm is essential. This is because a manual user login to the HelioCampus system is a necessary step in completing the reauthorization process. For more information on this bypass method, please reach out to the HelioCampus A&C team.