
Product Tip
Adding and removing roles in bulk is limited to Institution Admins and cannot be utilized by other user roles. Additionally, to preserve Student Information System (SIS) Integrity, Course Section Directors, Instructors, Teaching Assistants, and Preceptors cannot be added or removed in bulk to course or co-curricular sections unless the HelioCampus team enables this functionality. Please contact Support for assistance.
Add or Remove Roles via Platform
📙 Knowledge Base Tip: This process does not change depending on whether roles are added or removed. Screenshots in this section display the process for adding roles and are the same for the removal process.
-
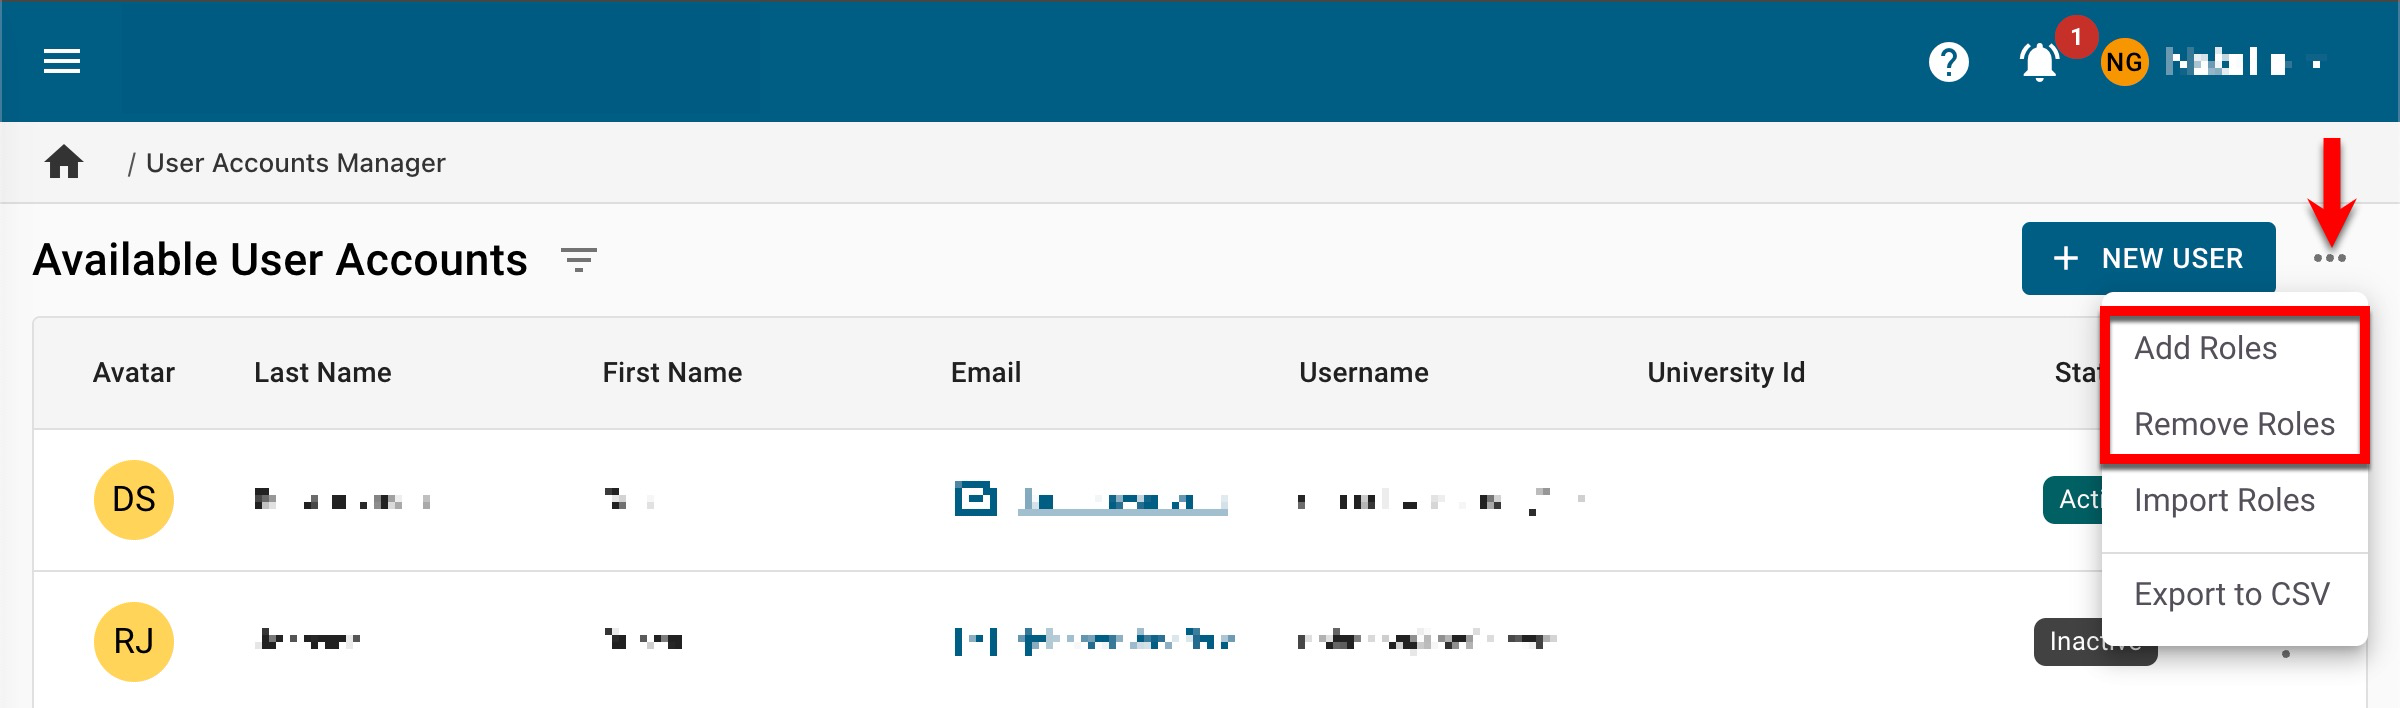
To add or remove roles in bulk via the platform interface, navigate to Main Menu > Admin Tools > User Accounts Manager and select Add Roles or Remove Roles from the kebab menu.
-
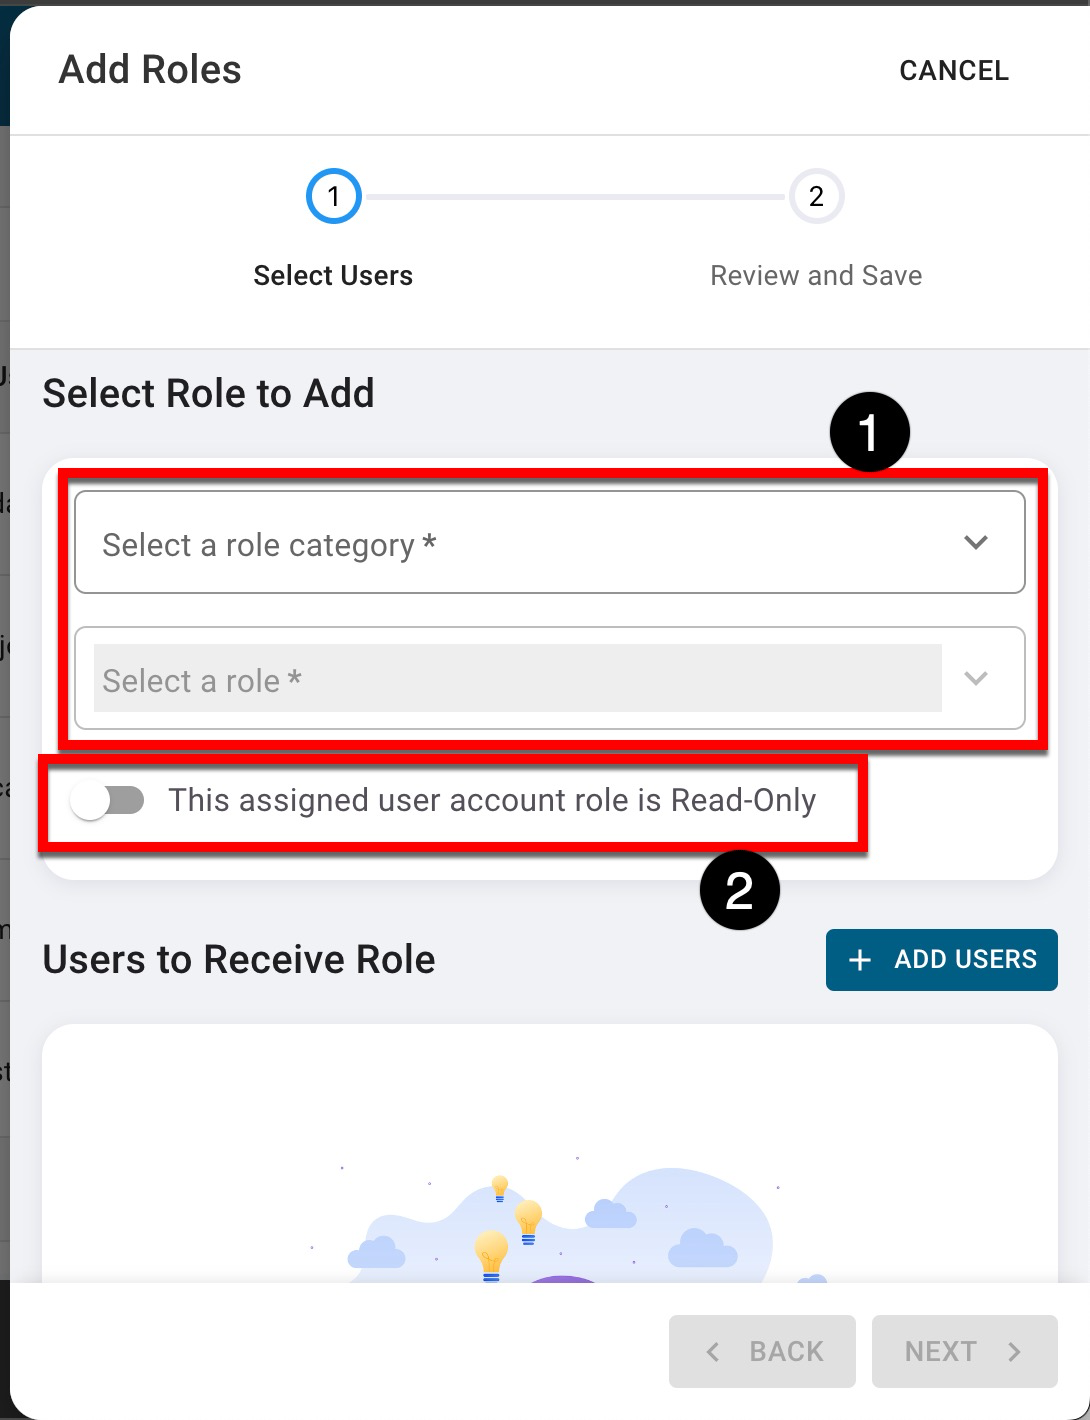
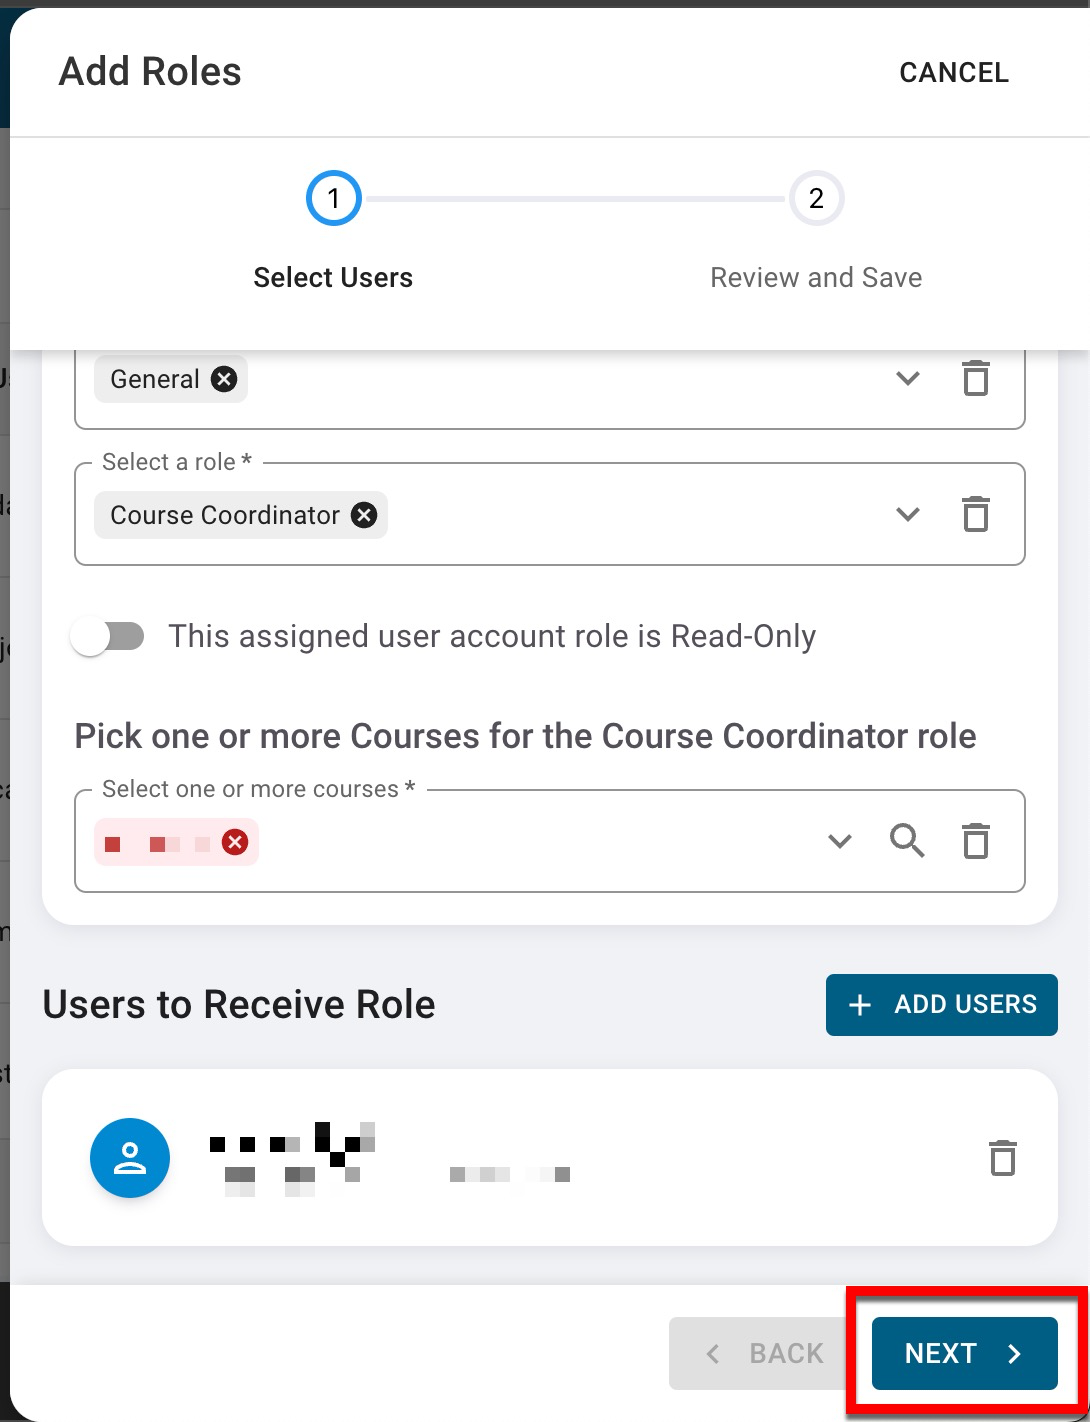
Select the category and subsequent role (1) via the Add Roles or Remove Roles drawer.
When adding roles, enabling This Assigned User Account Role is Read-Only (2) will add roles to a user account as read-only.
-
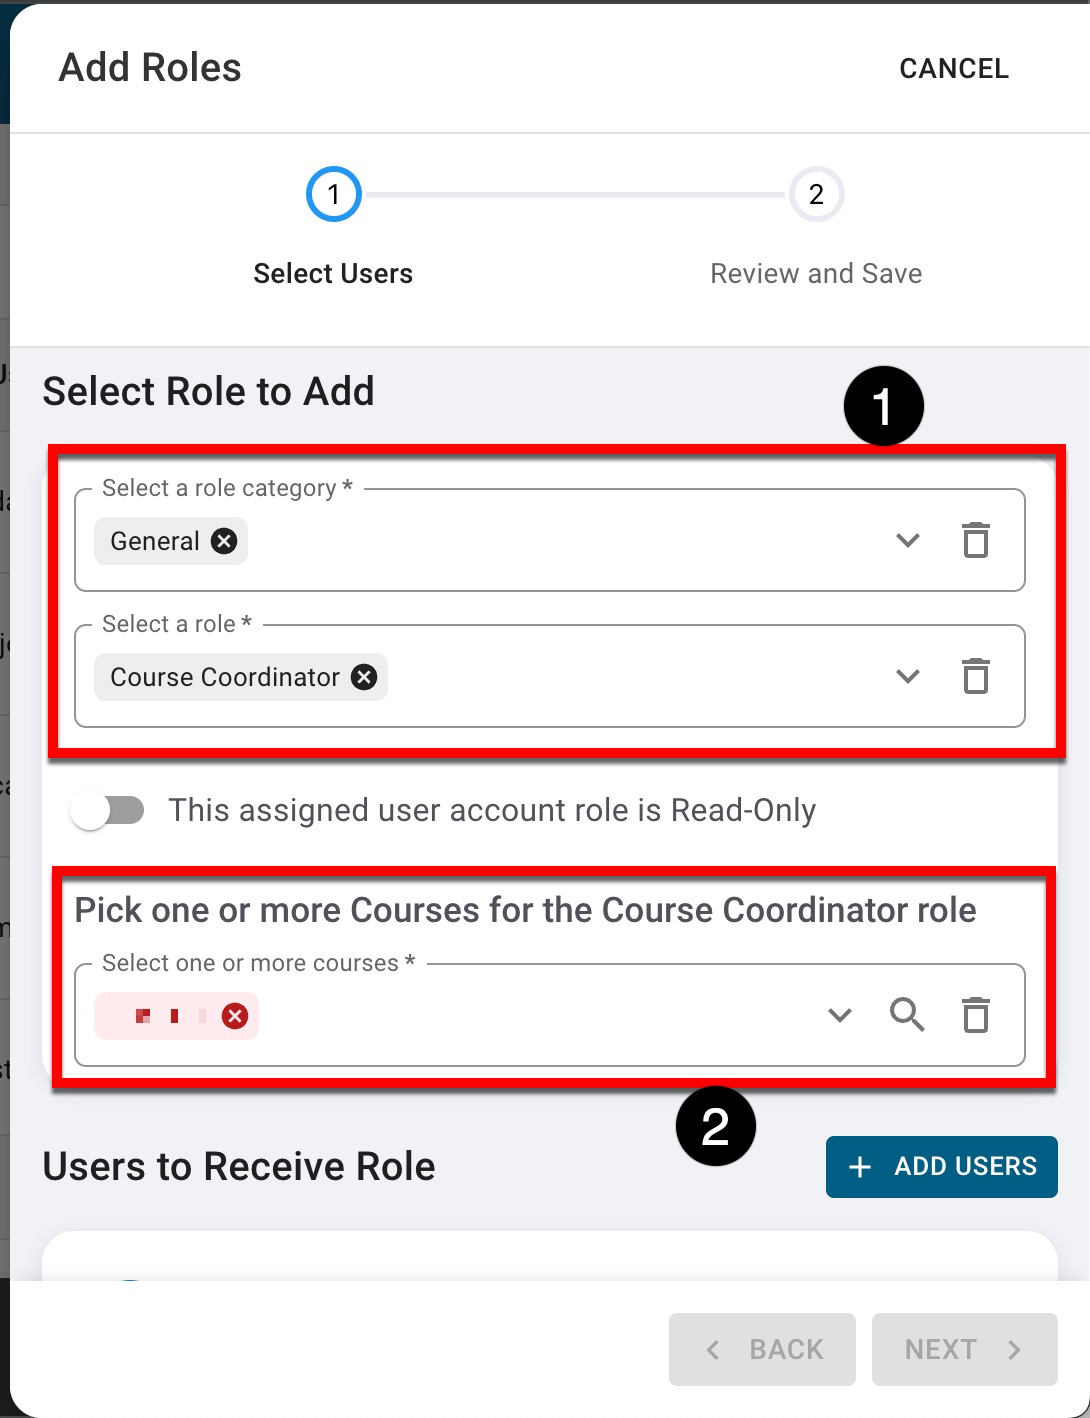
Additional fields may be displayed for further selection depending on the category and role selection. In the example below, because the Course Coordinator role is being added (1), one or more courses must be selected (2).
-
-
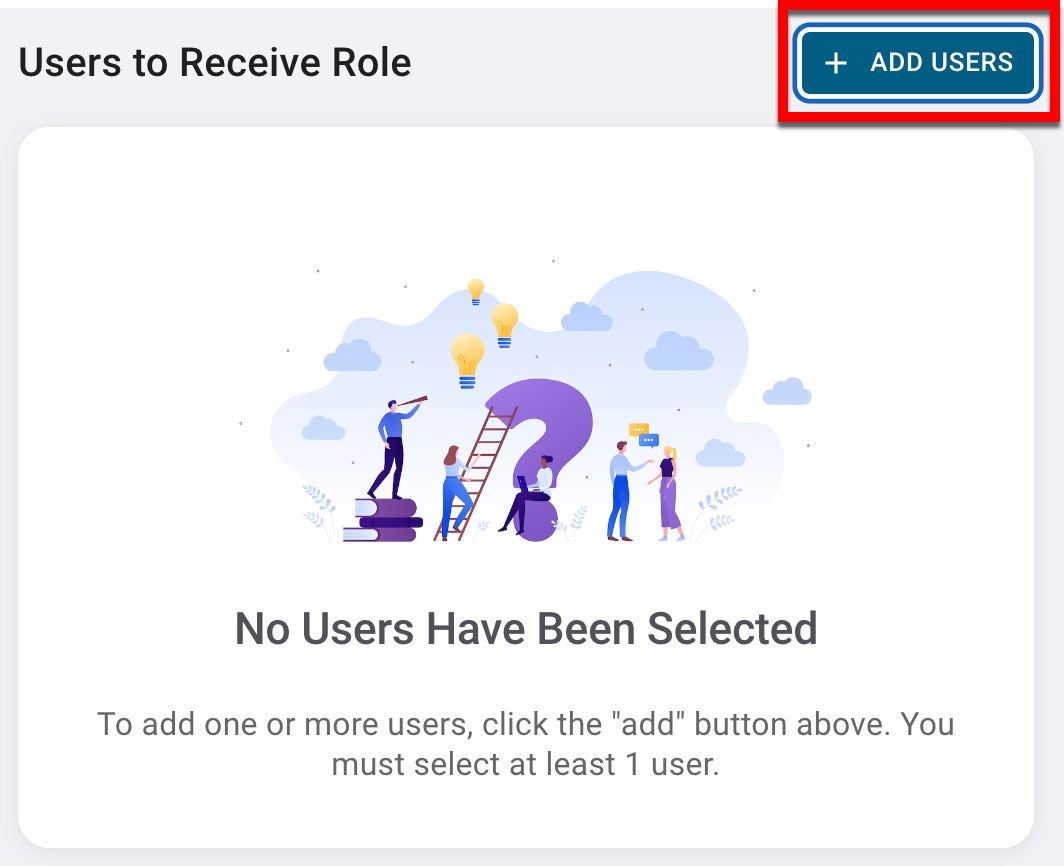
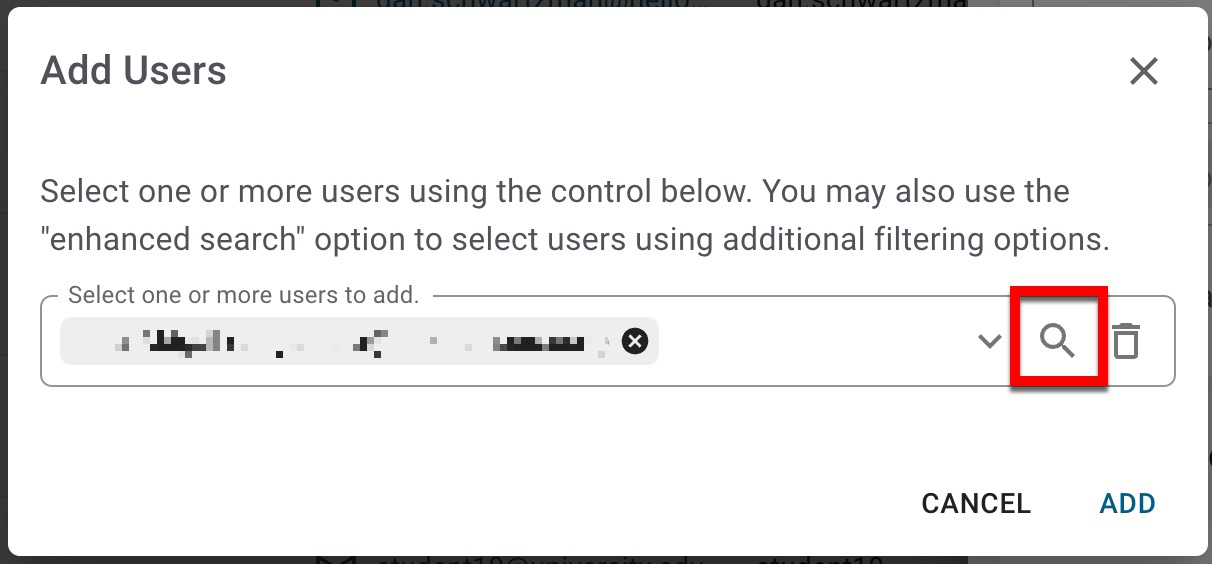
To search for a user, click Add User.
-
Via the Add Users pop-up, type to search for and select one or more user(s) and click Add when all users have been selected; the enhanced search can be used for additional filtering options.
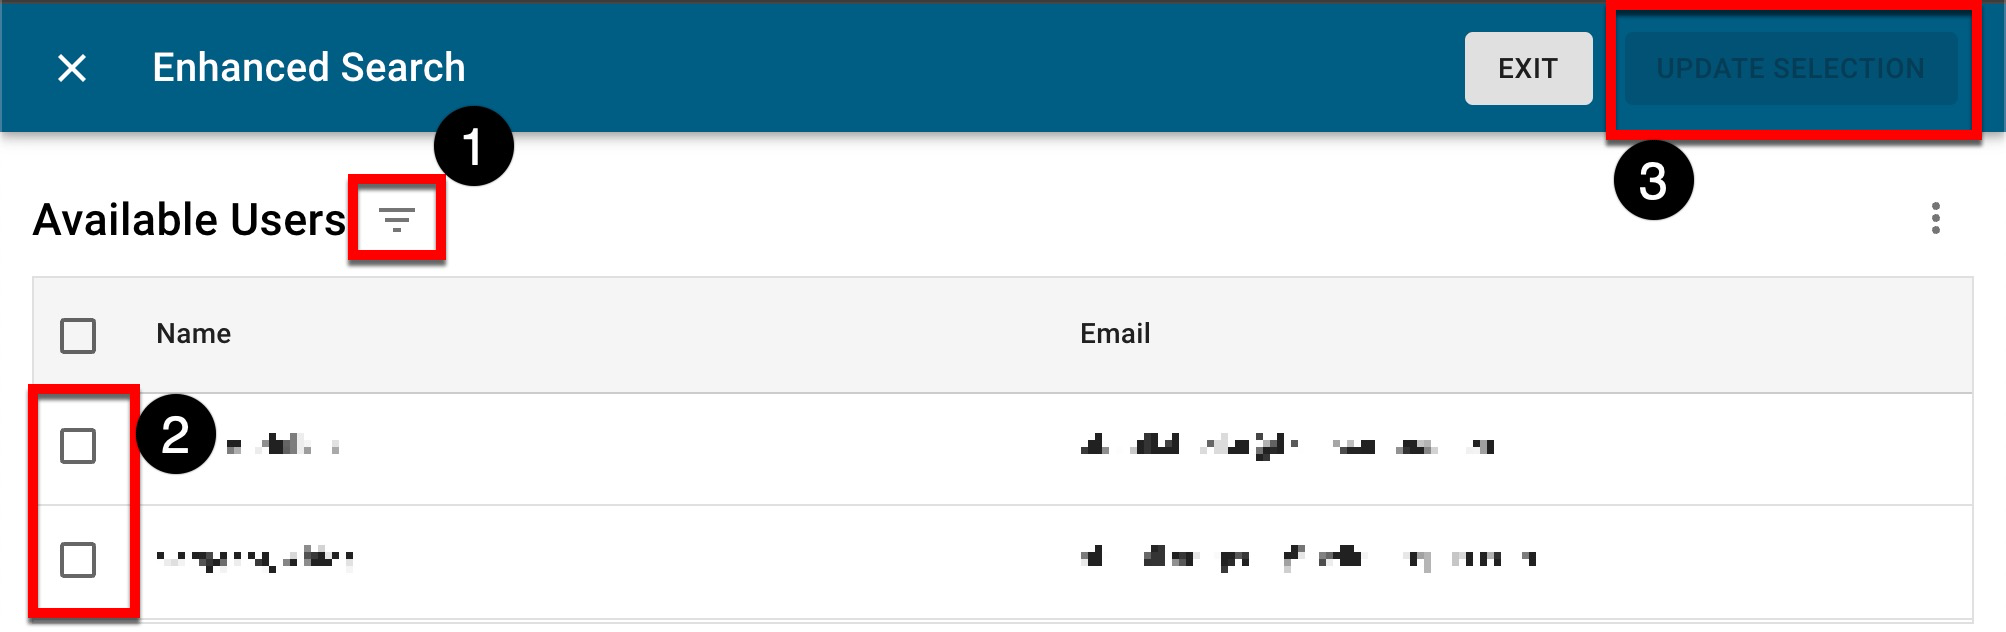
The enhanced search functionality provides additional filtering functionality (1) and allows for multi-select (2). Once users have been selected, the Update Selection button (3) will be available to add the selected users.
-
-
Click Next to proceed to the Review and Save step.
-
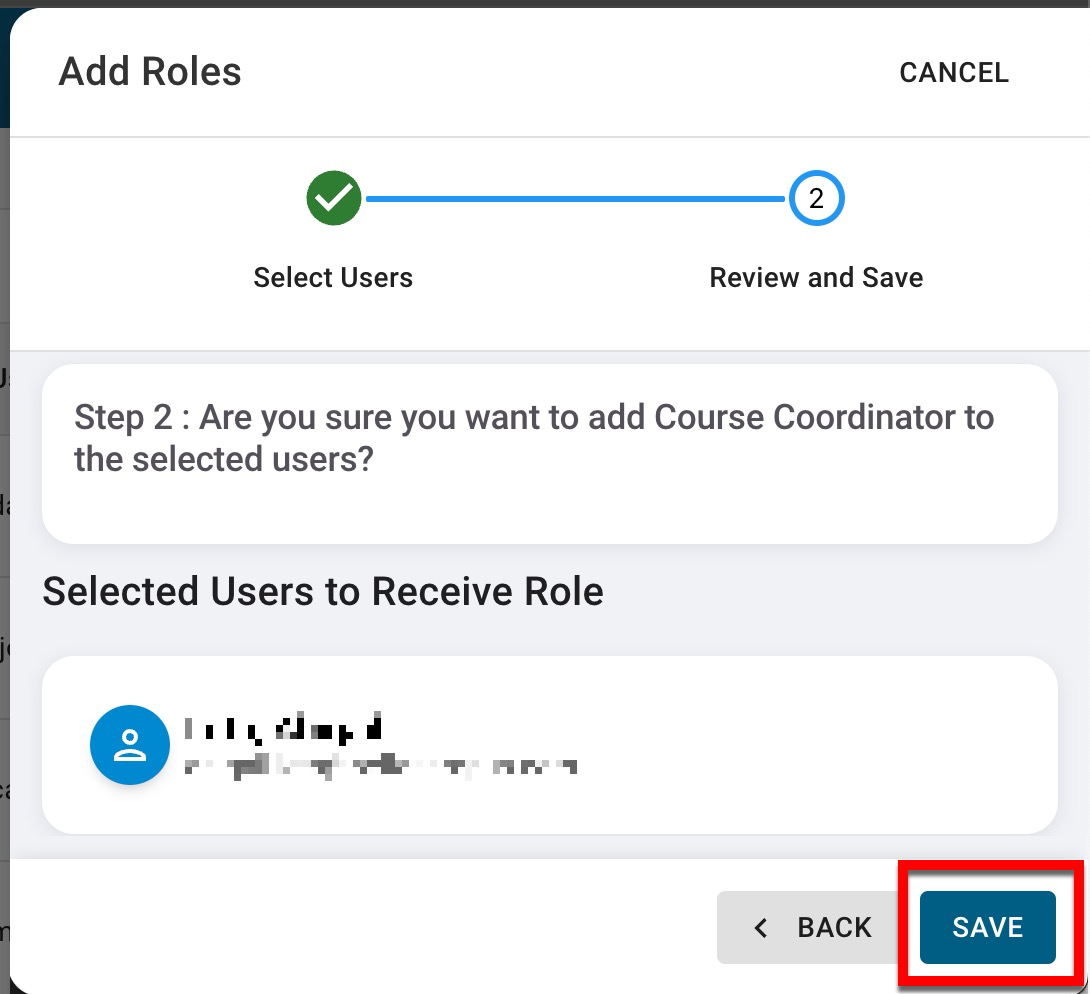
To add or remove roles to the selected user(s), click Save.
Add or Remove Roles via Template
-
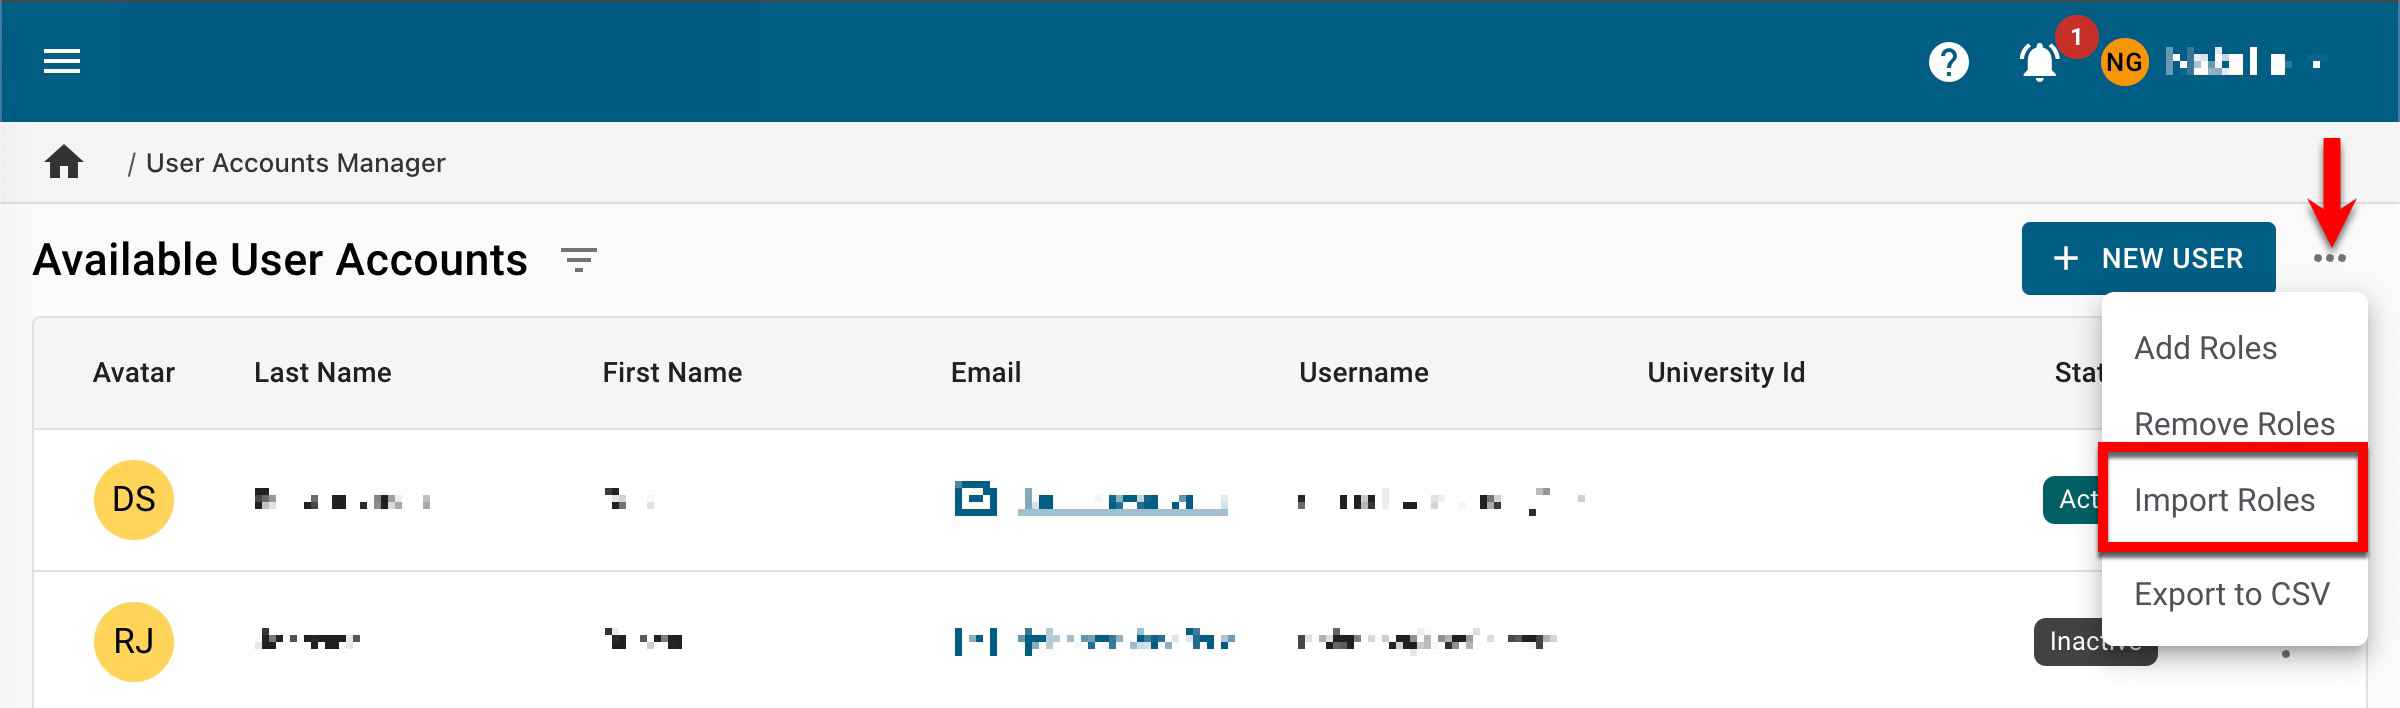
To add or remove roles in bulk via a template export/import process, navigate to Main Menu > Admin Tools > User Accounts Manager and select Import Roles from the kebab menu.
-
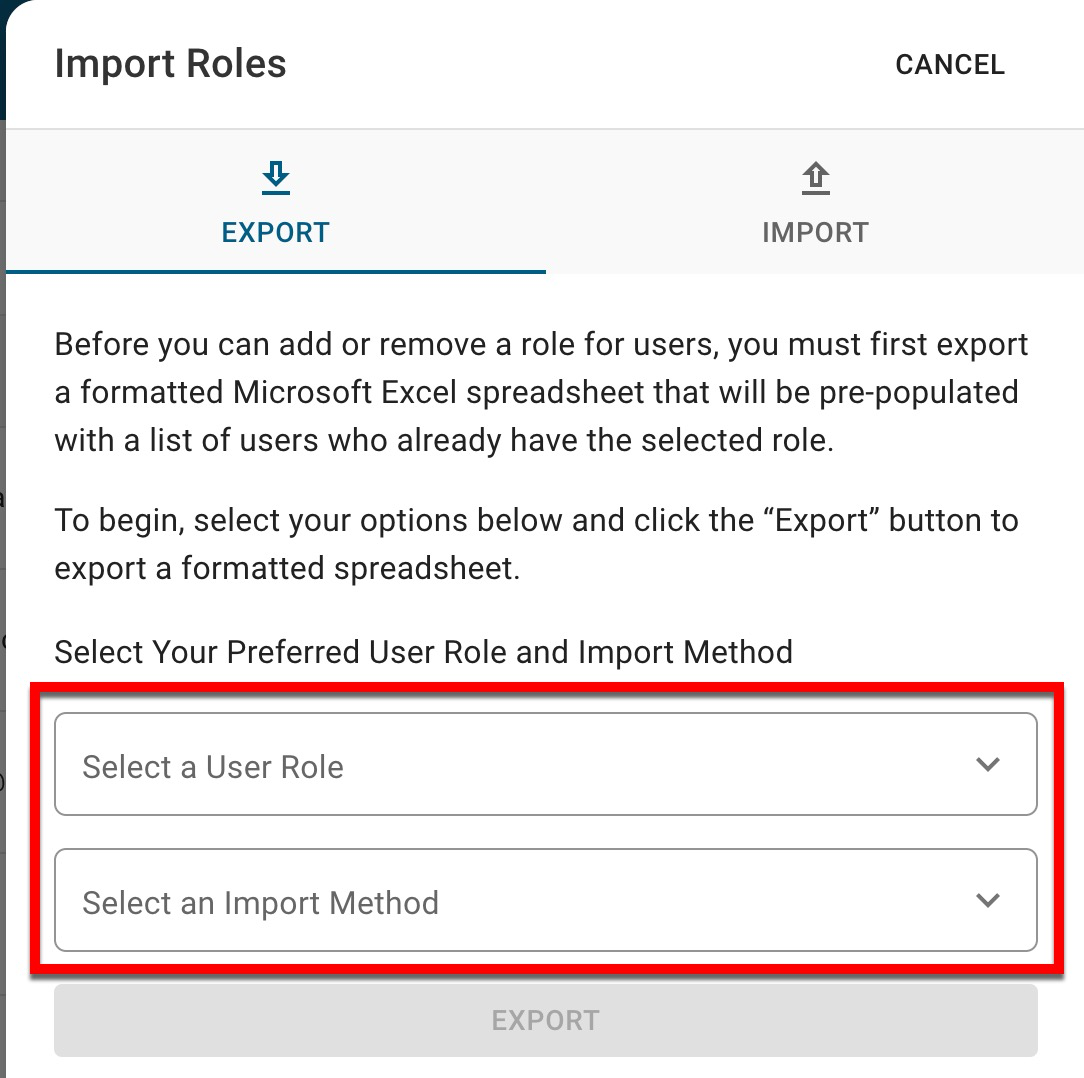
Via the Import Roles drawer, choose the role and import method and click Export to download a pre-populated list of users already assigned the selected role.
-
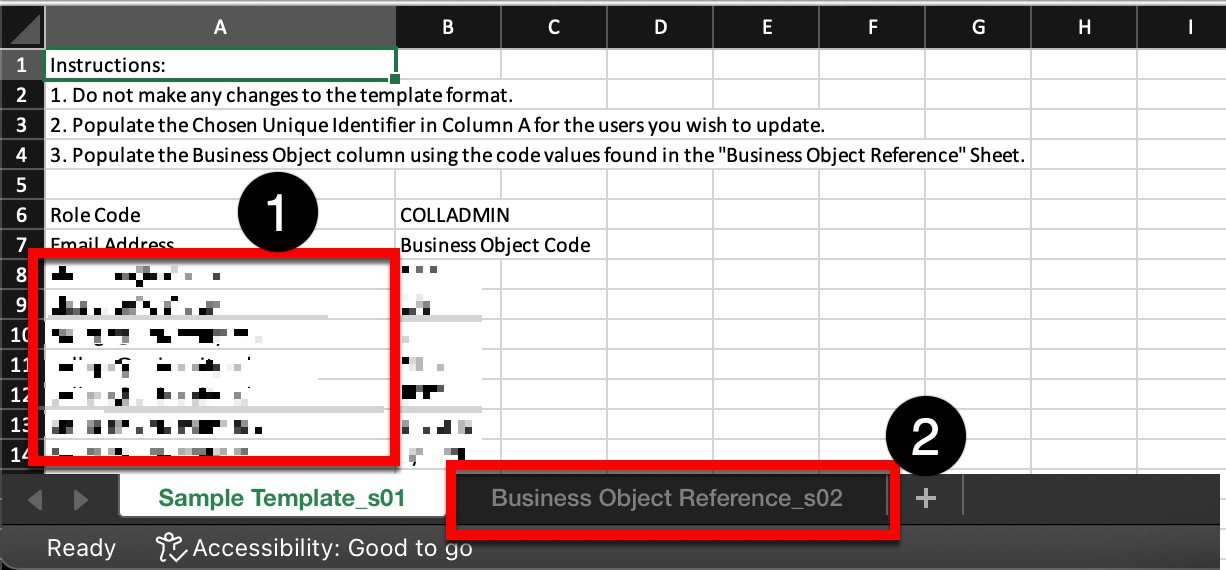
In the downloaded template, add or remove rows as needed. In the example below, the chosen role was College Admin; column A displays the unique identifier for each user already assigned the role, and column B shows the associated business object code. The Business Object Reference sheet (2) provides a legend for the Business Object Codes.
-
To assign users a role, add a new row to the spreadsheet with the user’s unique identifier and applicable associated business object code.
-
To remove a role from users, delete the corresponding row that refers to the user(s).
-
-
Once the template is ready for upload, navigate to Main Menu > Admin Tools > User Accounts Manager and select Import Roles from the kebab menu.
-
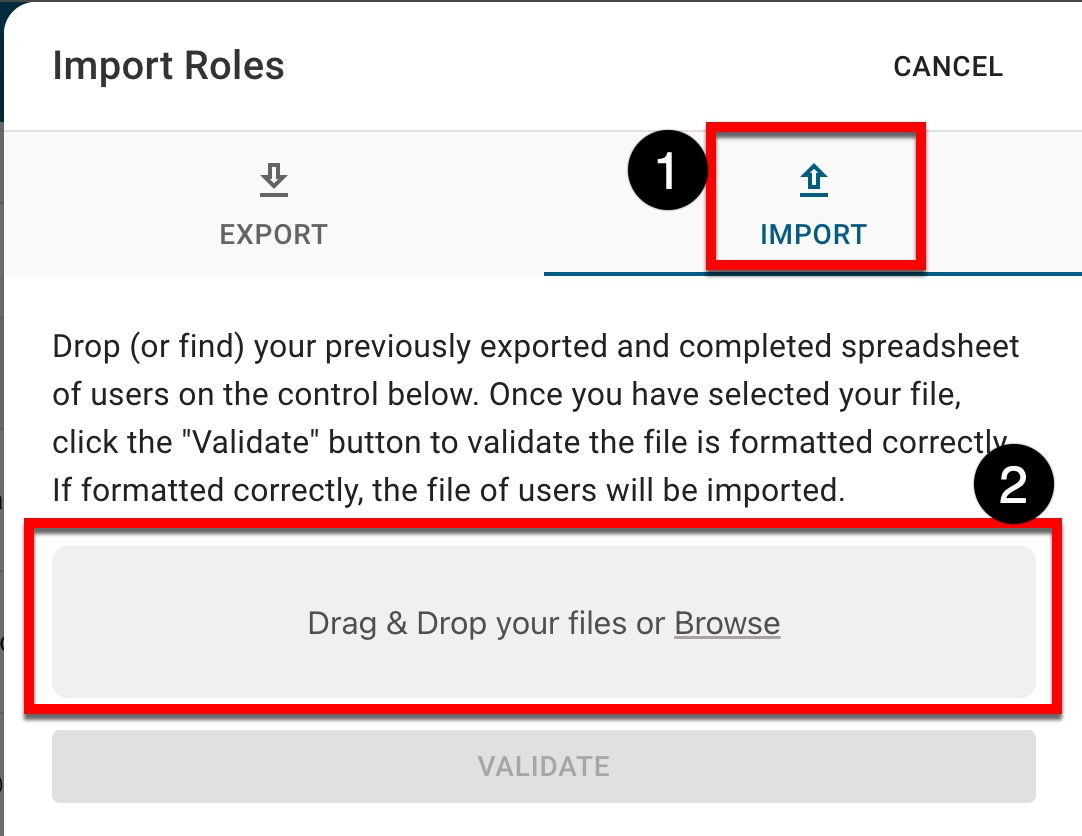
Via the Import Roles drawer, select the Import tab (1). The template can be dragged and dropped to the drawer, or Browse can be clicked to open the computer’s file explorer and search for and select it (2).
-
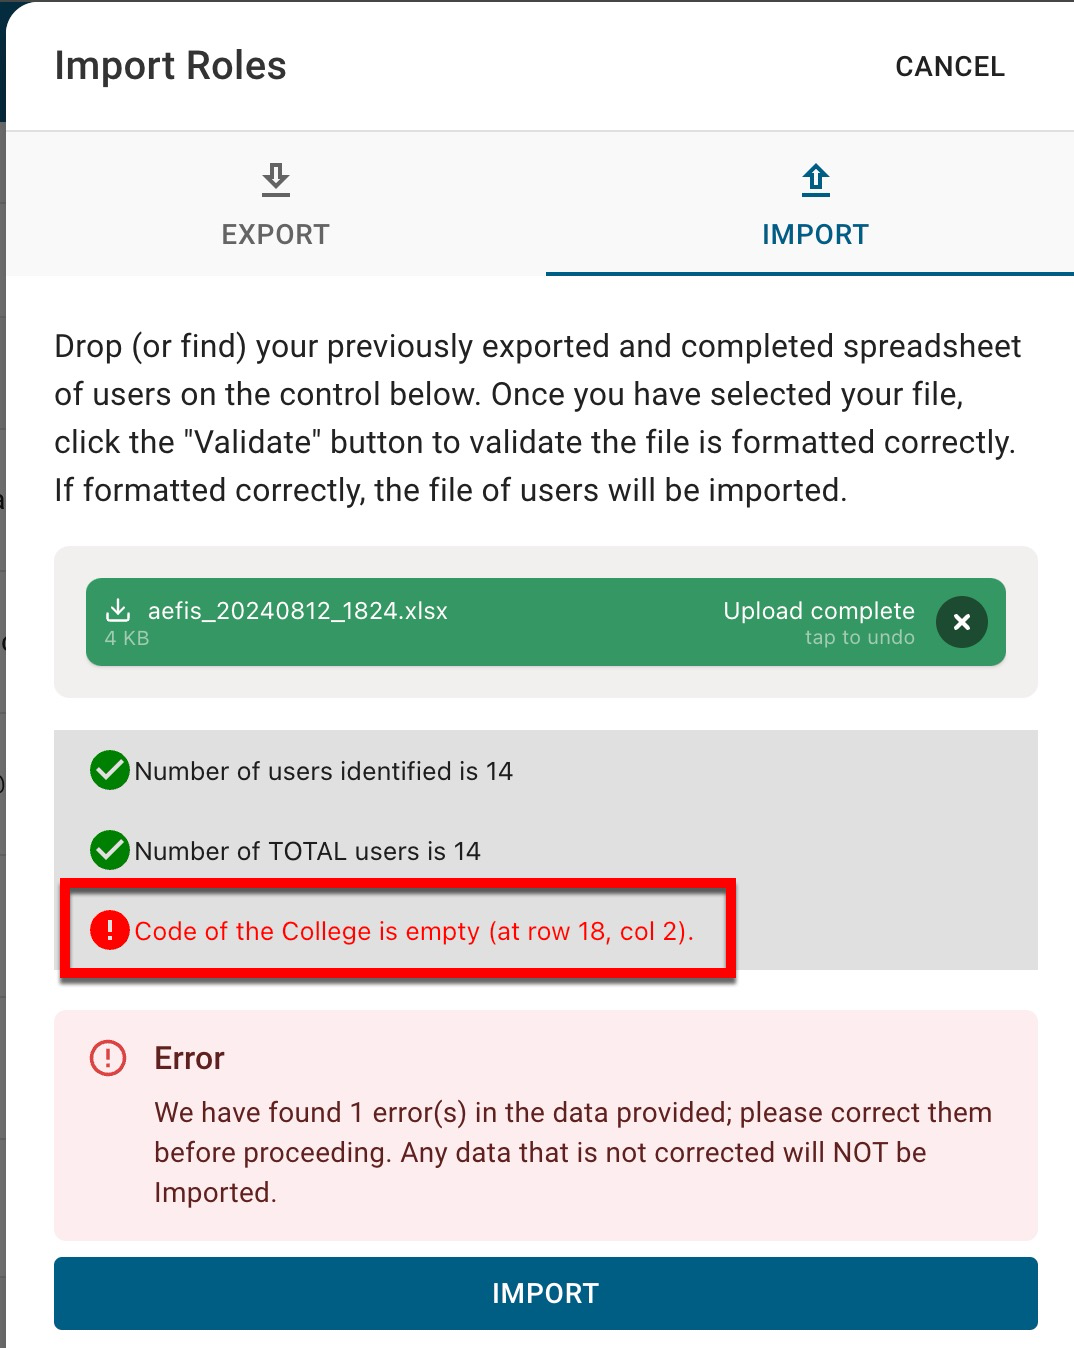
Once the file upload is complete, click Validate.

-
If errors are found on the template during validation, the platform will display each error’s row and cell location. Once errors have been corrected, the template should be reuploaded and validated again.
-
-
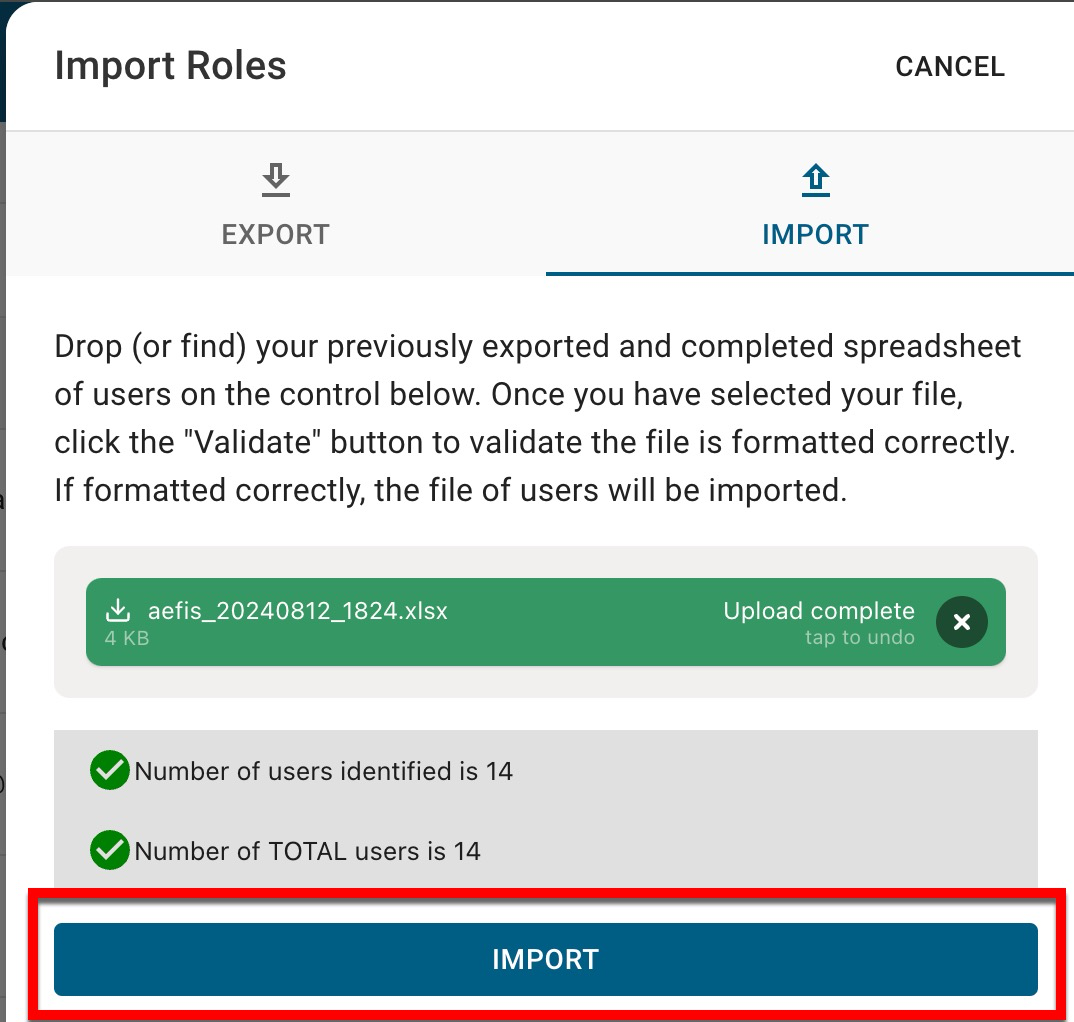
Once validation is complete and no errors have been found, click Import.
-
-
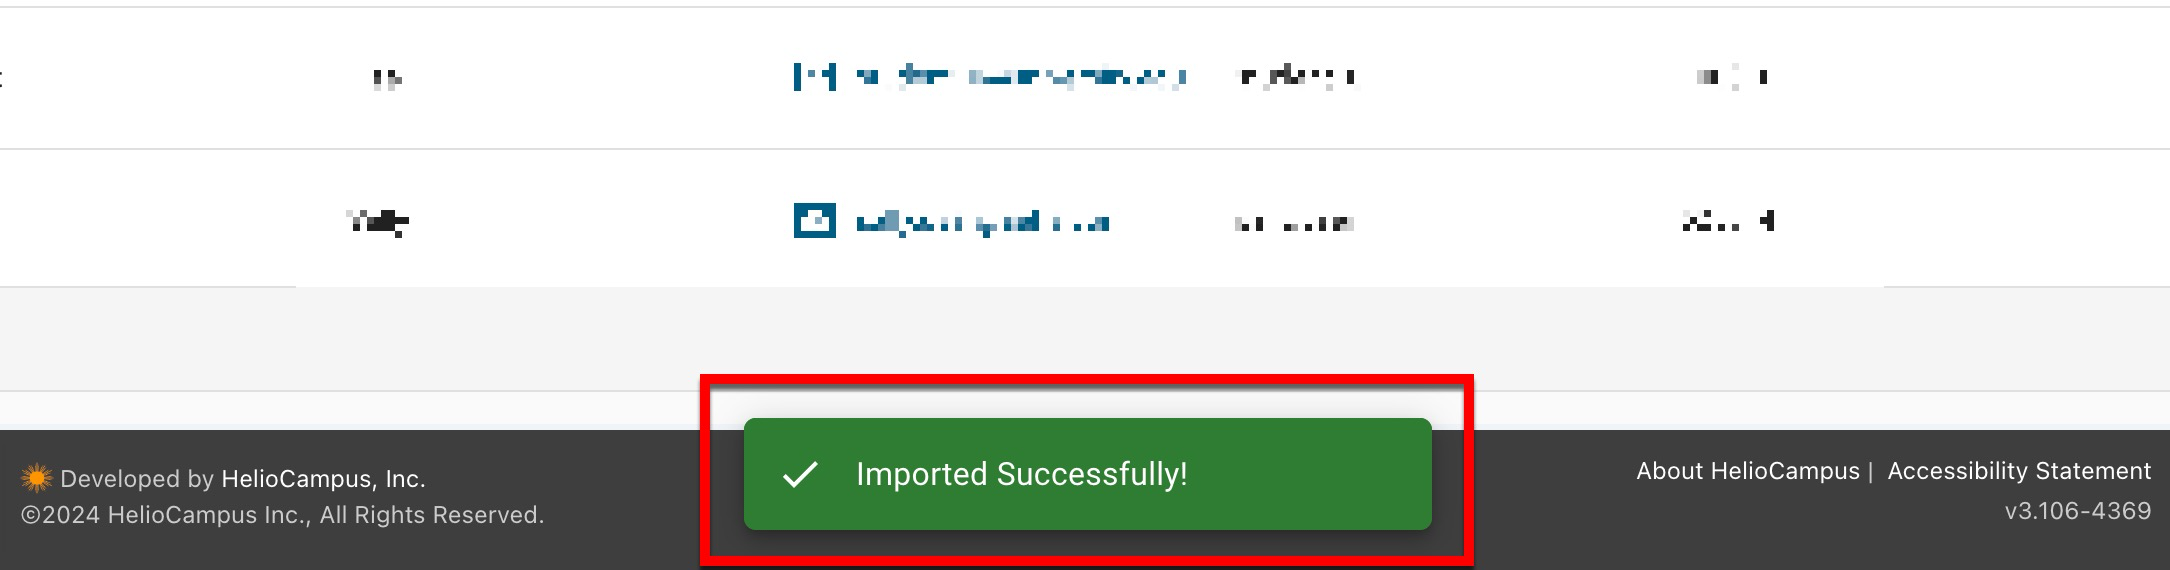
Once imported, the User Accounts Manager will display a success message.
📔 Additional Resources