📙 Knowledge Base Tip: Review the External User Groups article before creating or revising user groups.
Create a User Group
-
Navigate to Main Menu > External User Groups and click +Add User Group.

-
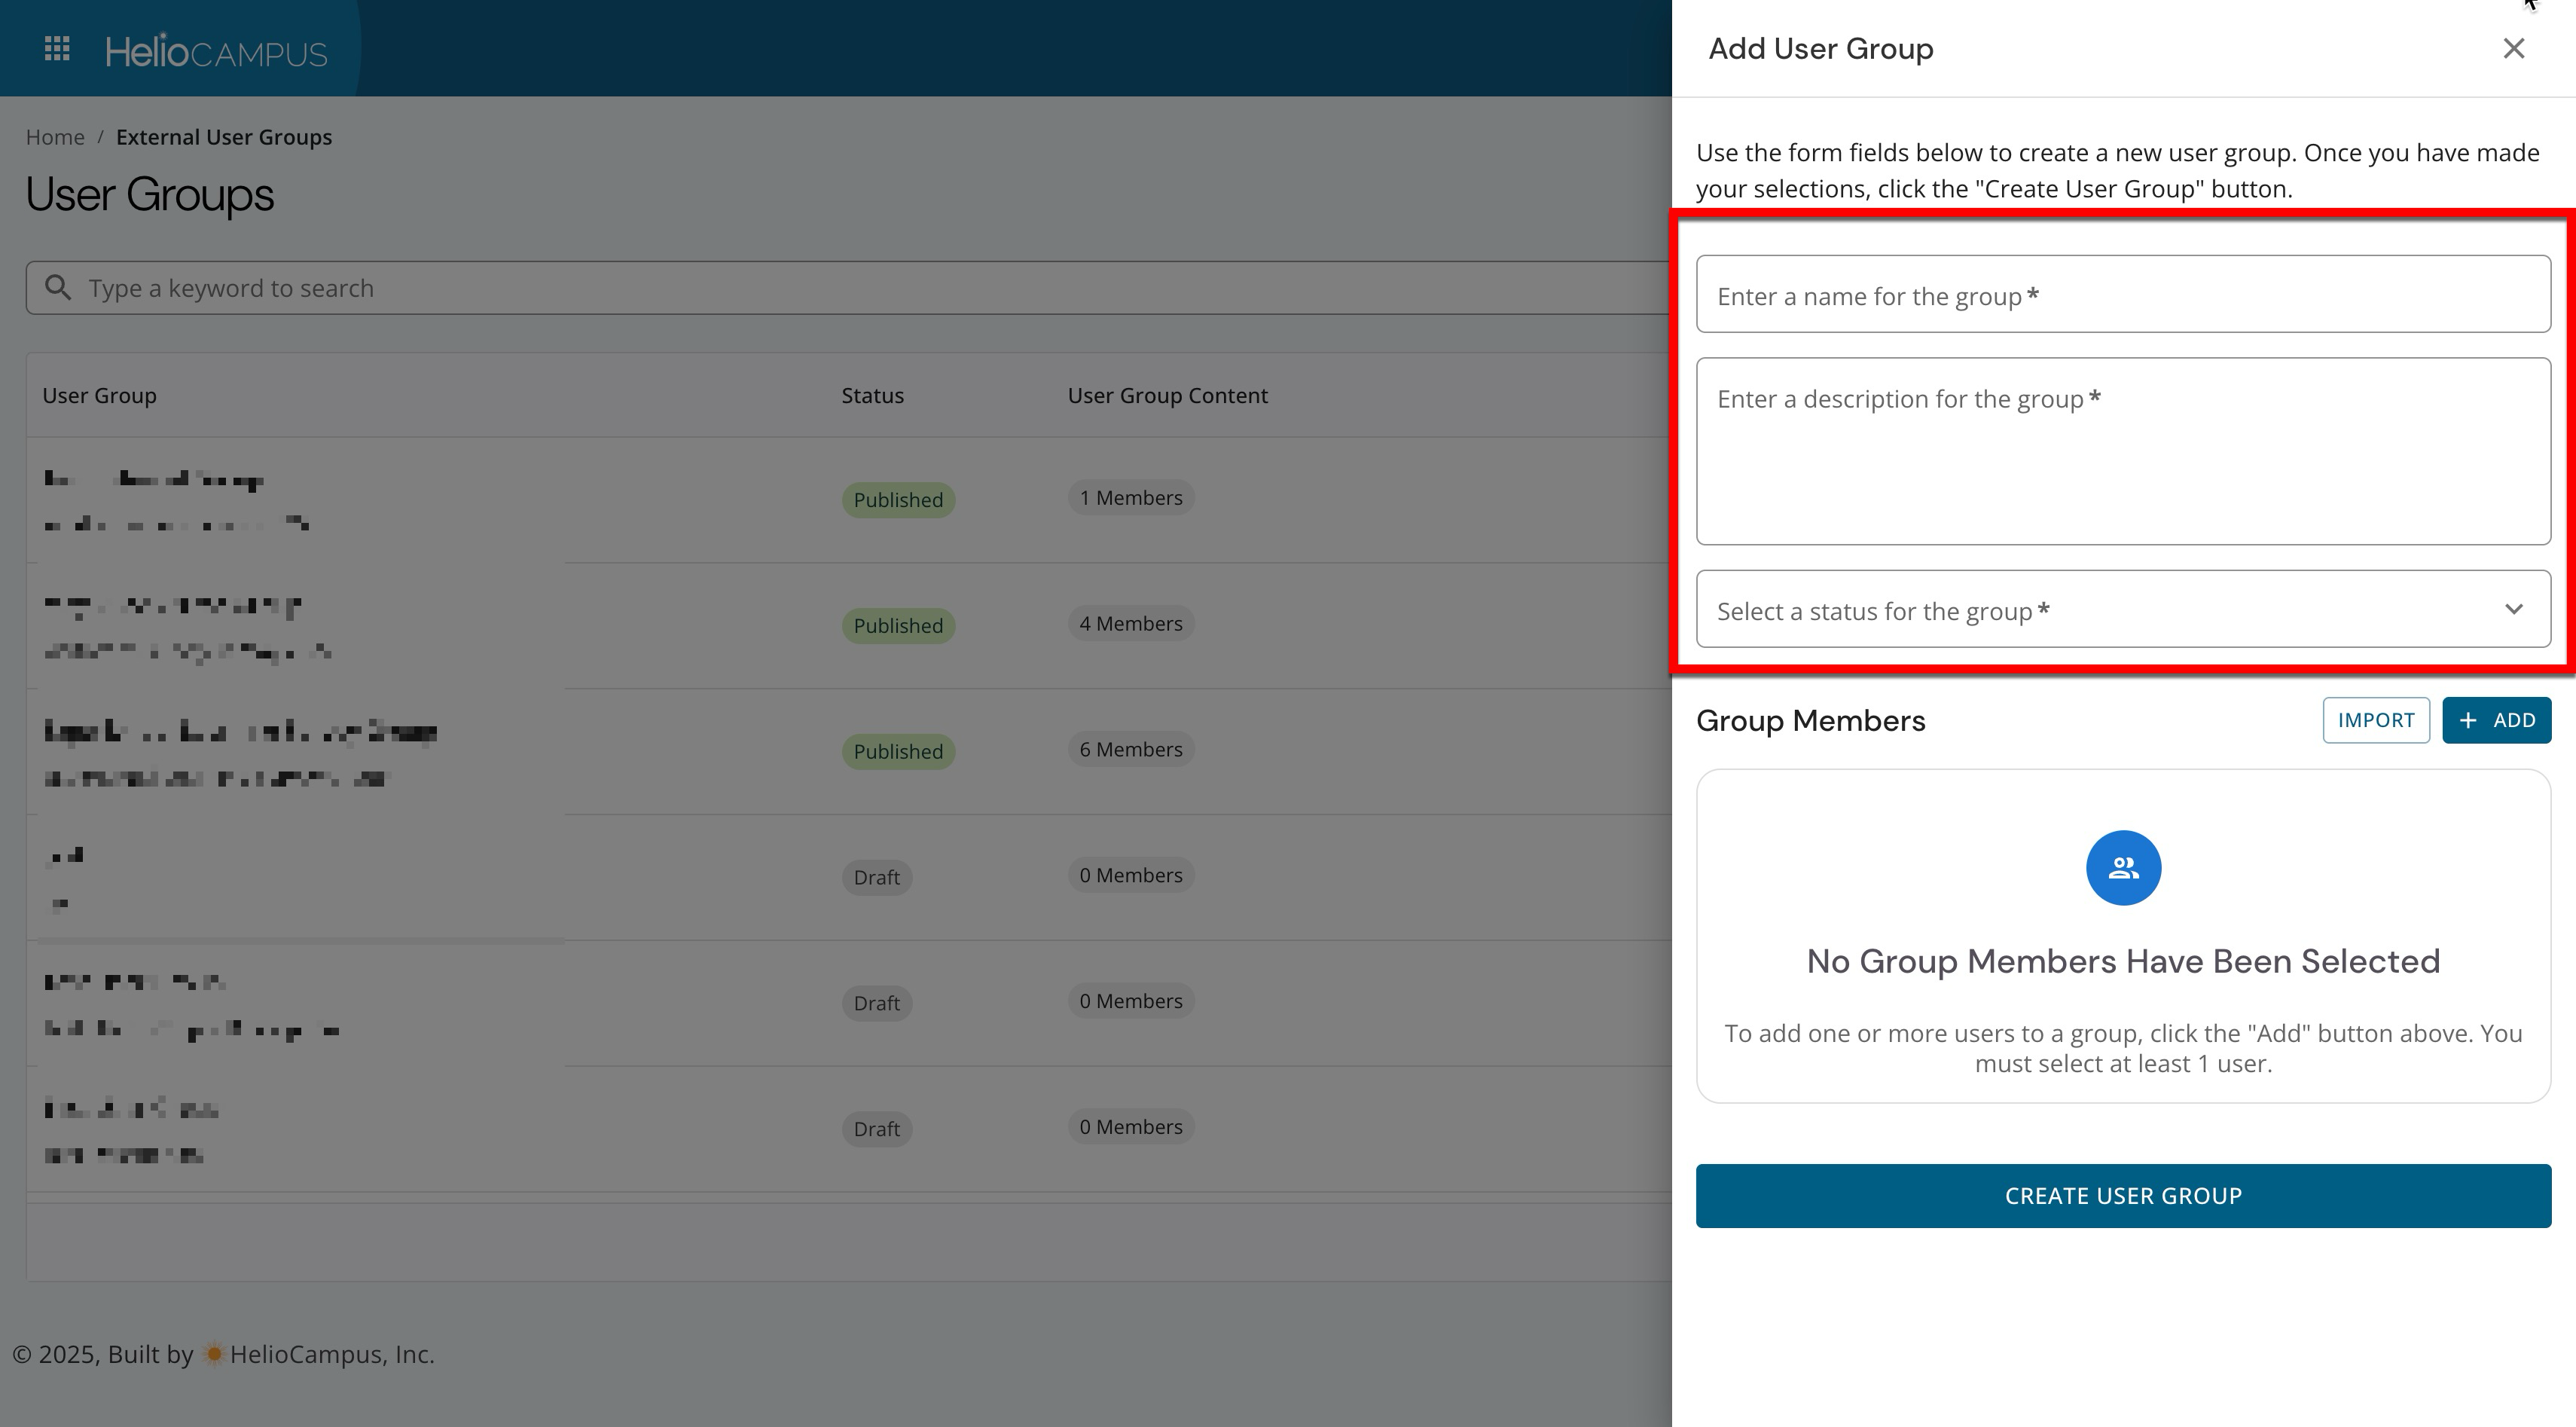
In the New User Group pop-up, enter the user group's name and description, then select the group's status. User groups created in Published status cannot be edited post-creation.
-
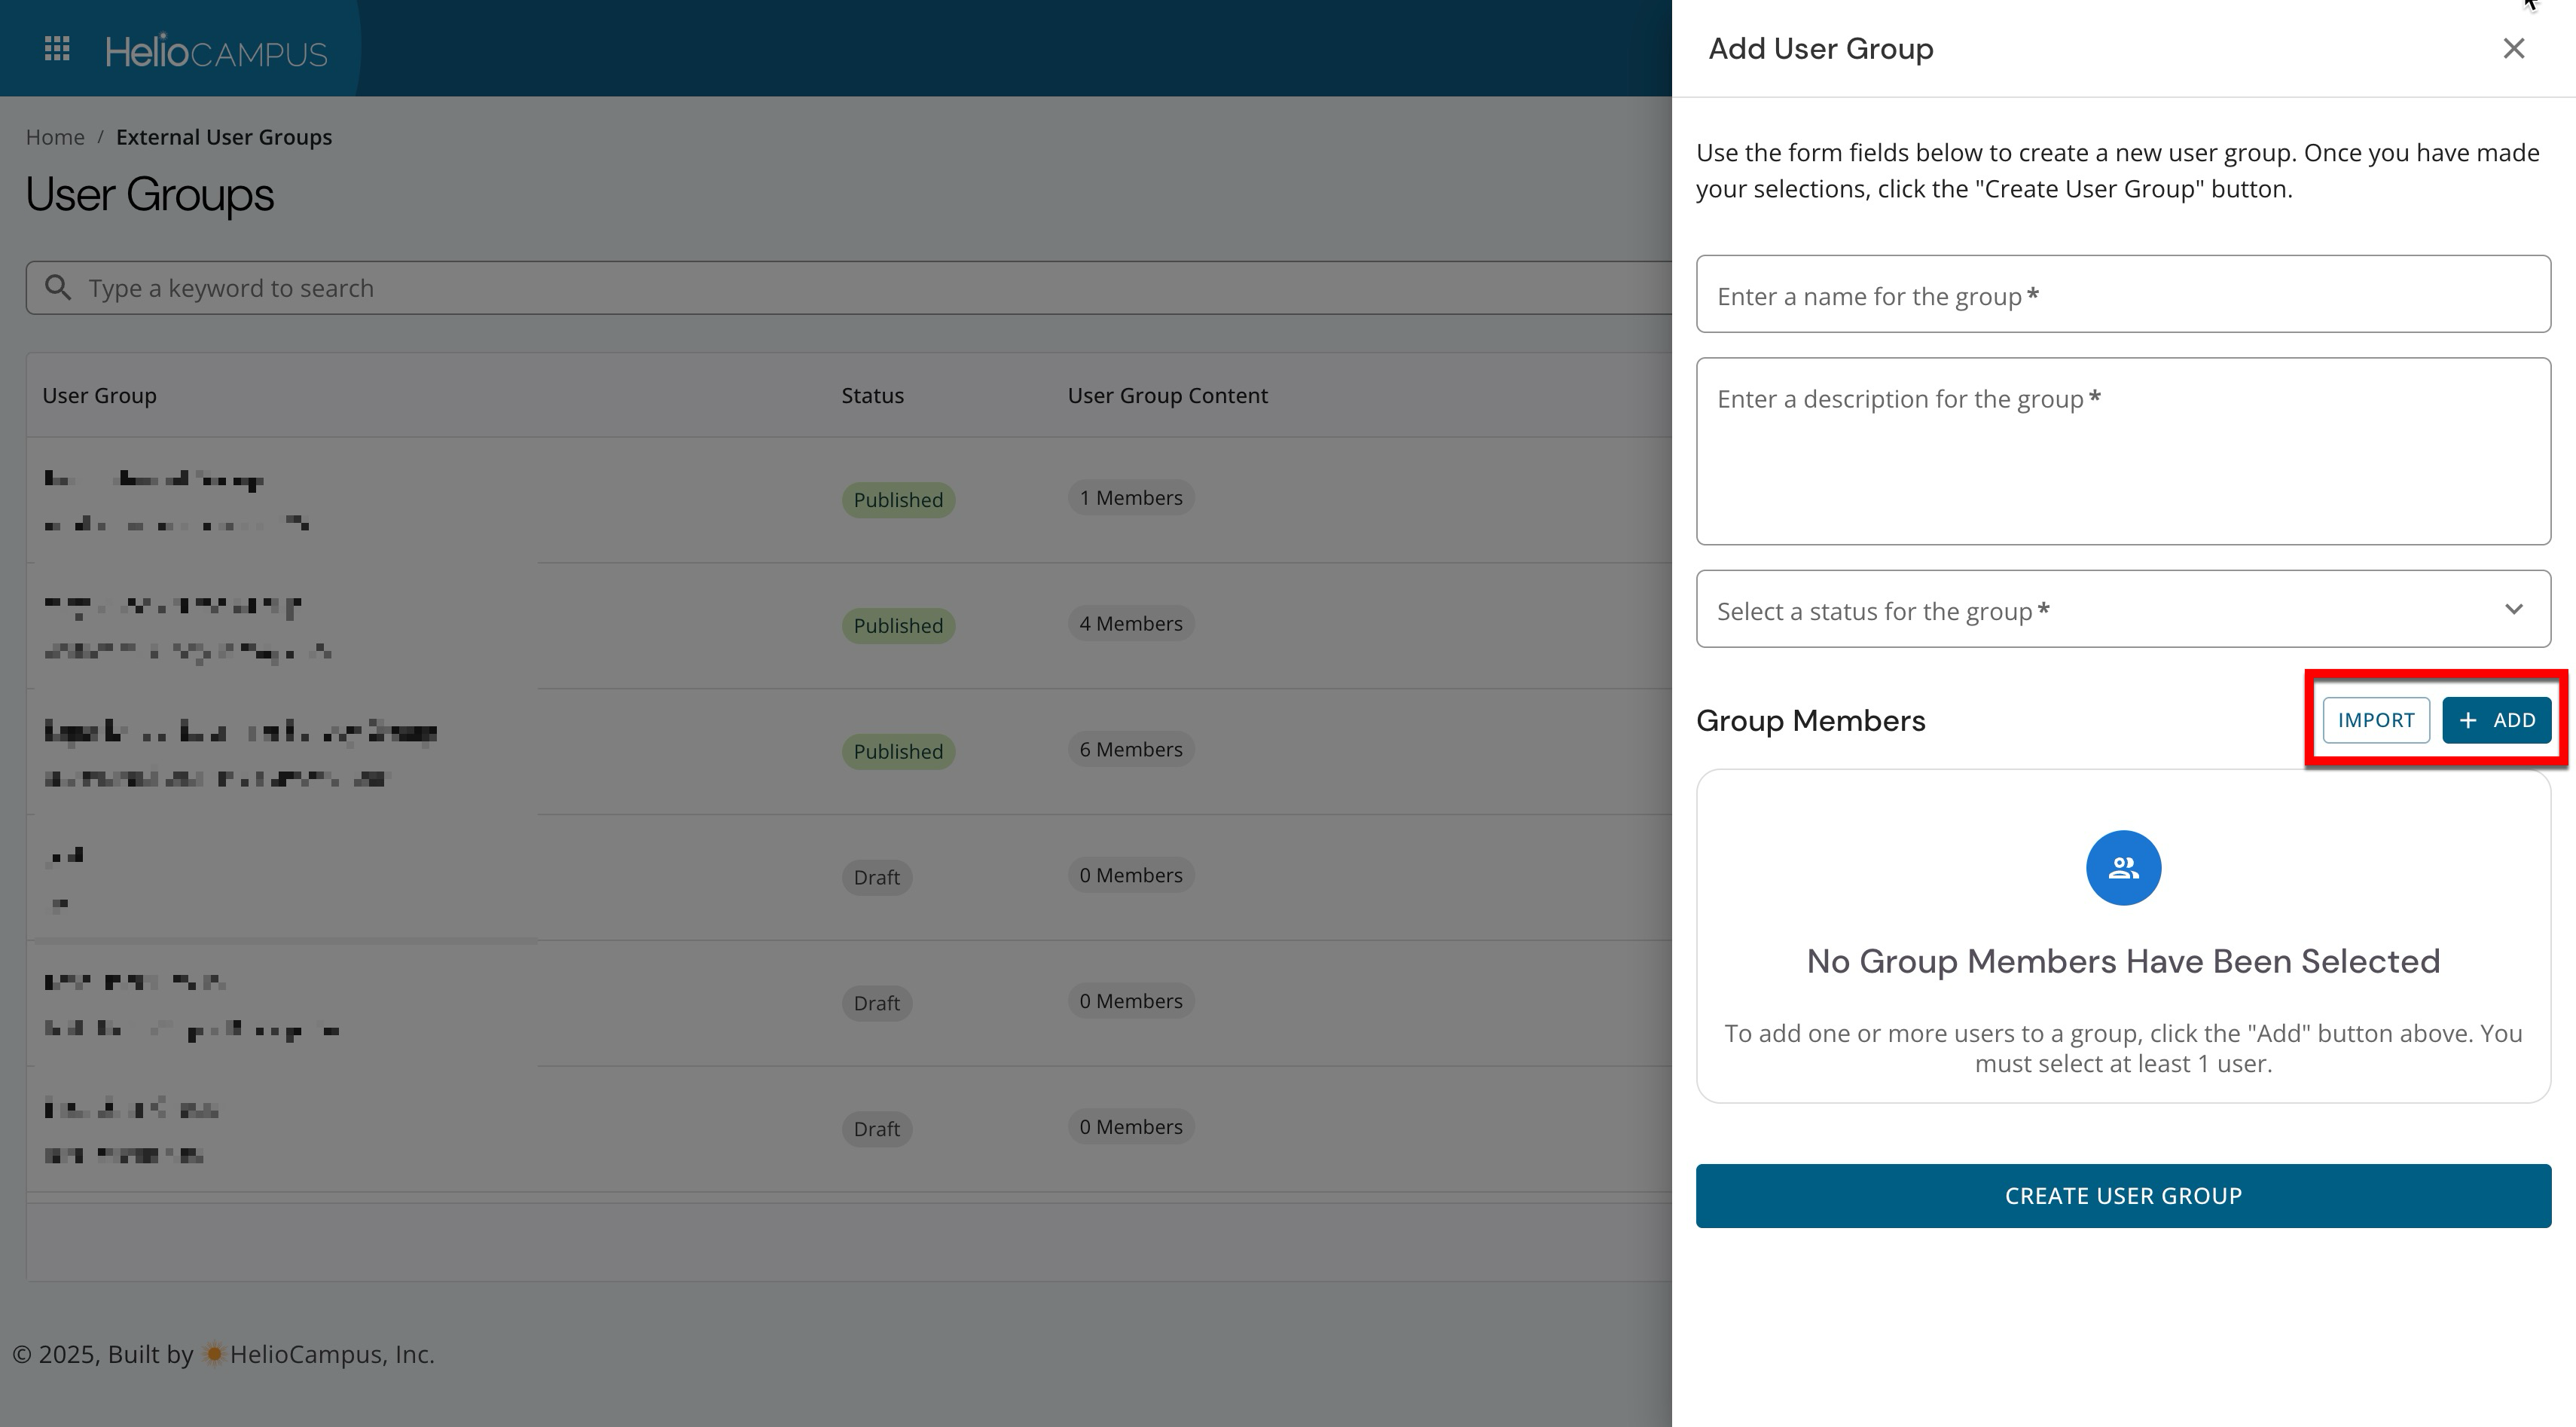
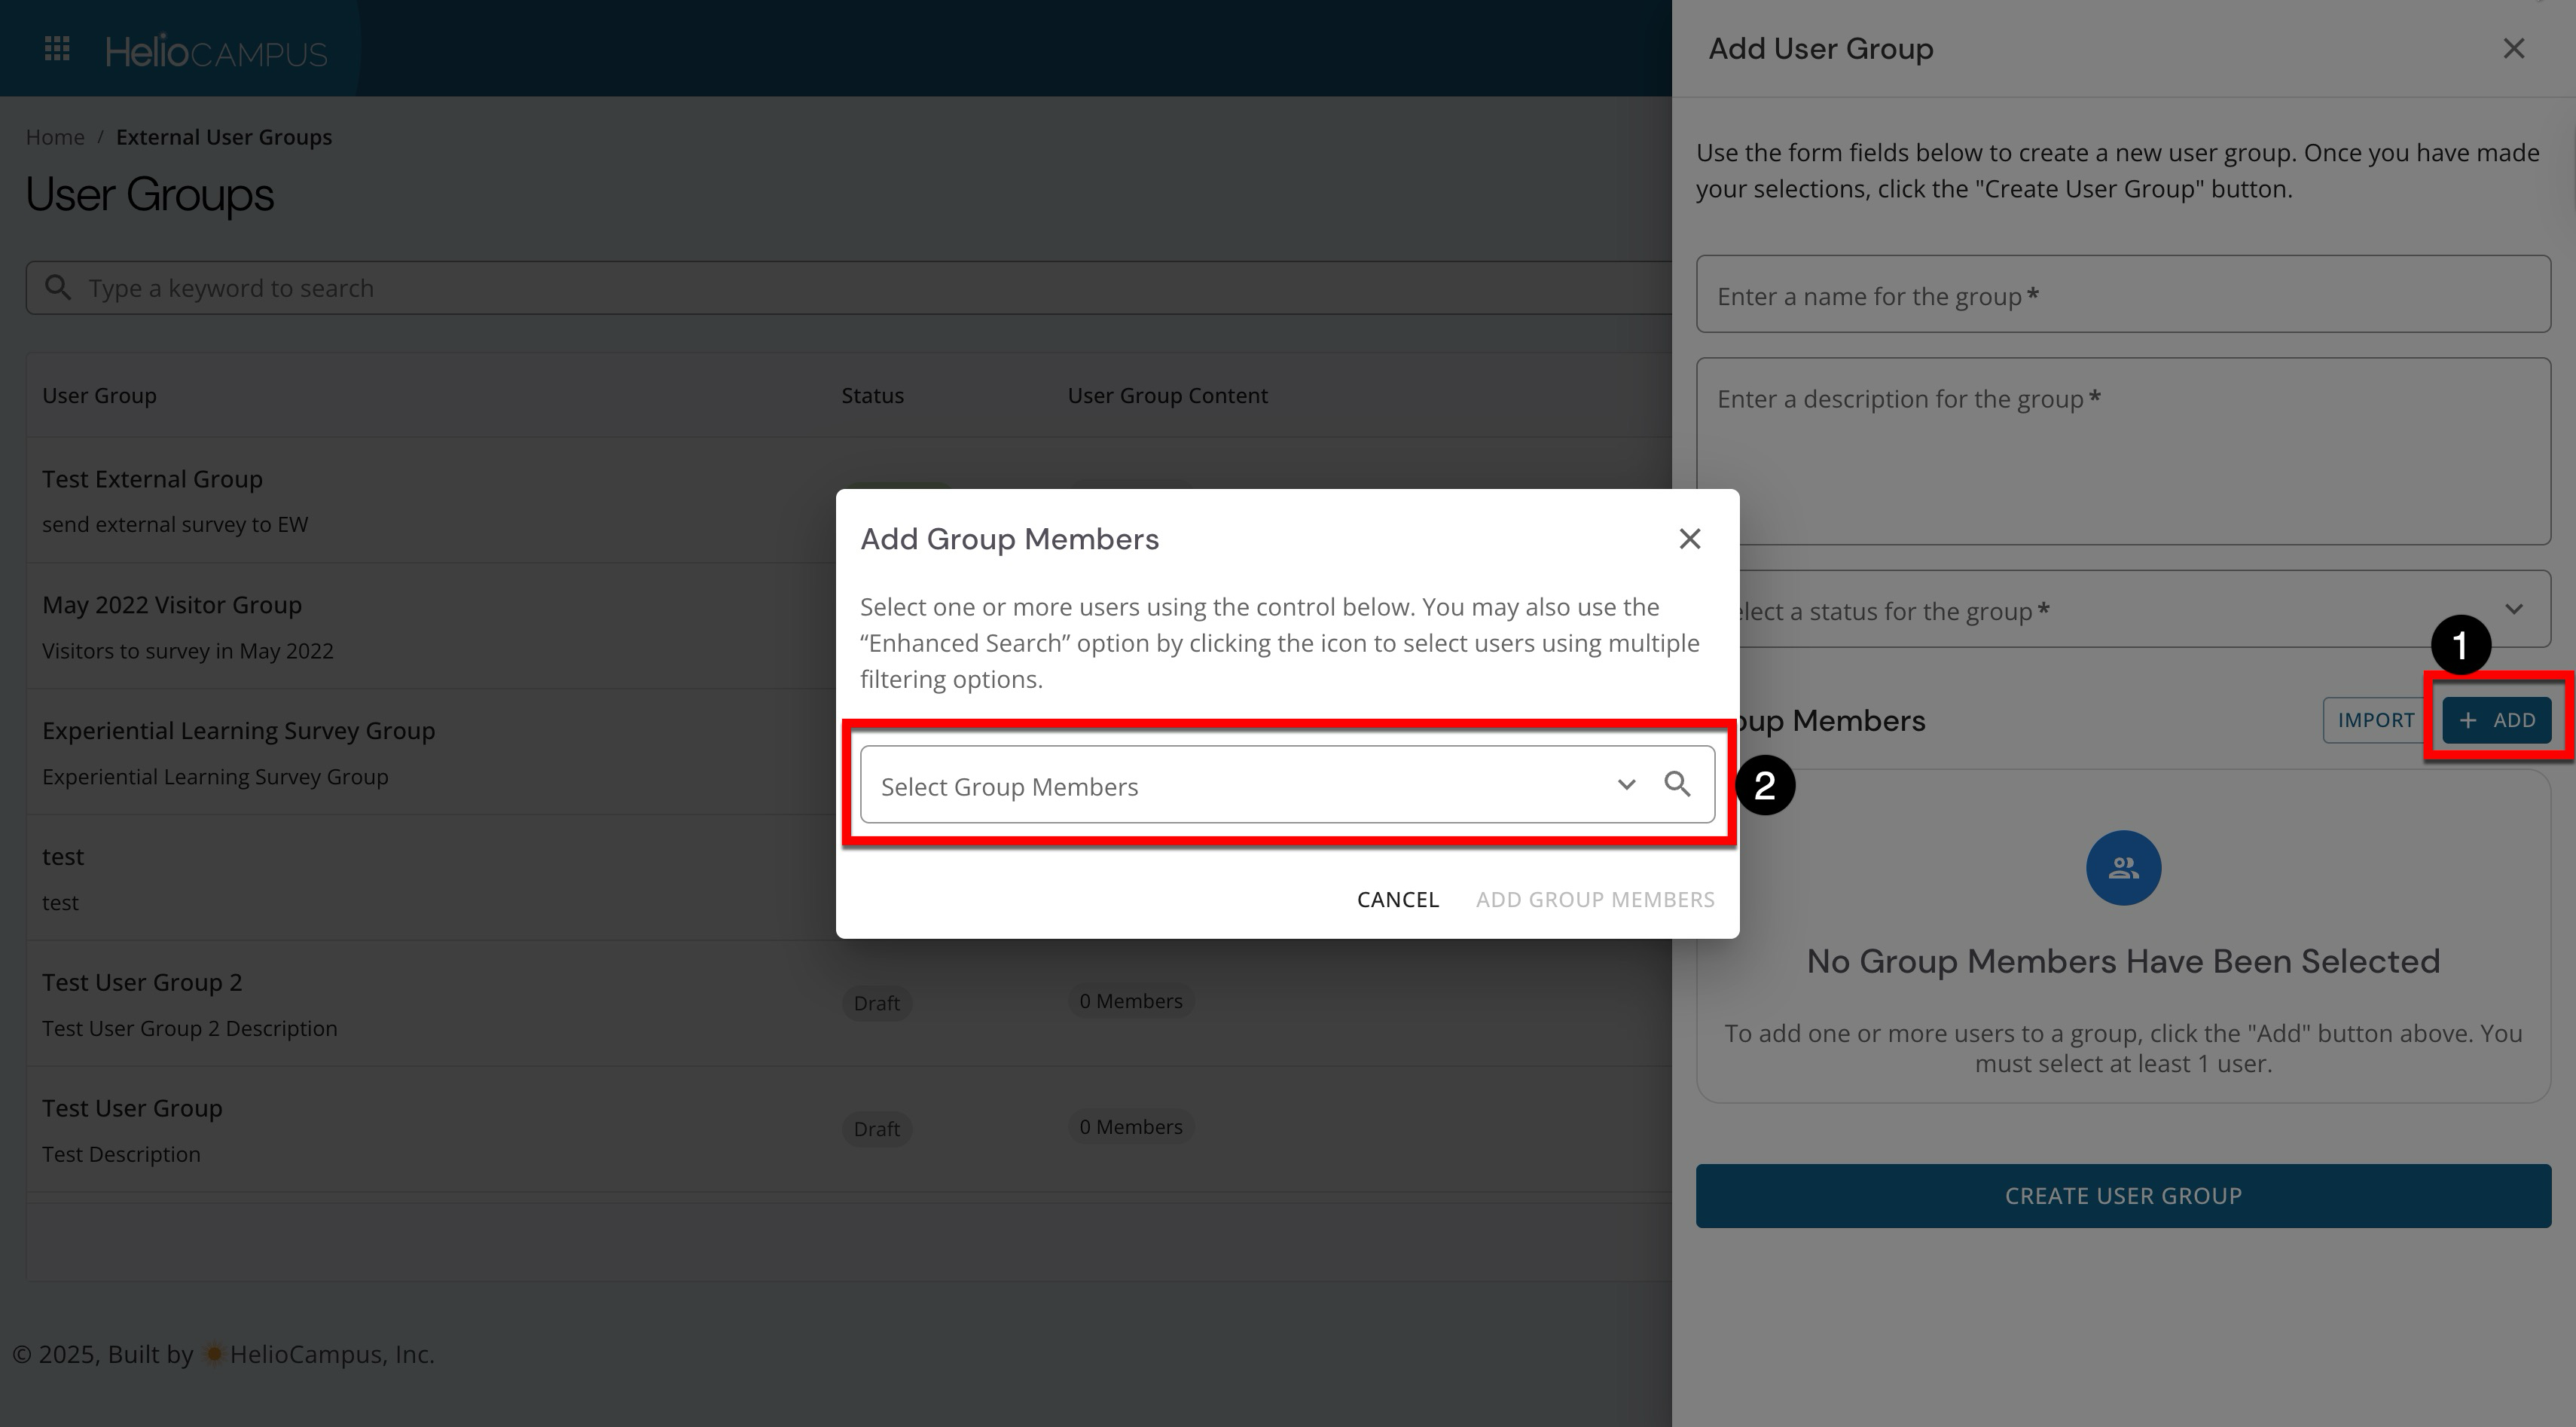
Users can be added to a group via a templated import process for adding external users or by searching for and adding platform users.
-
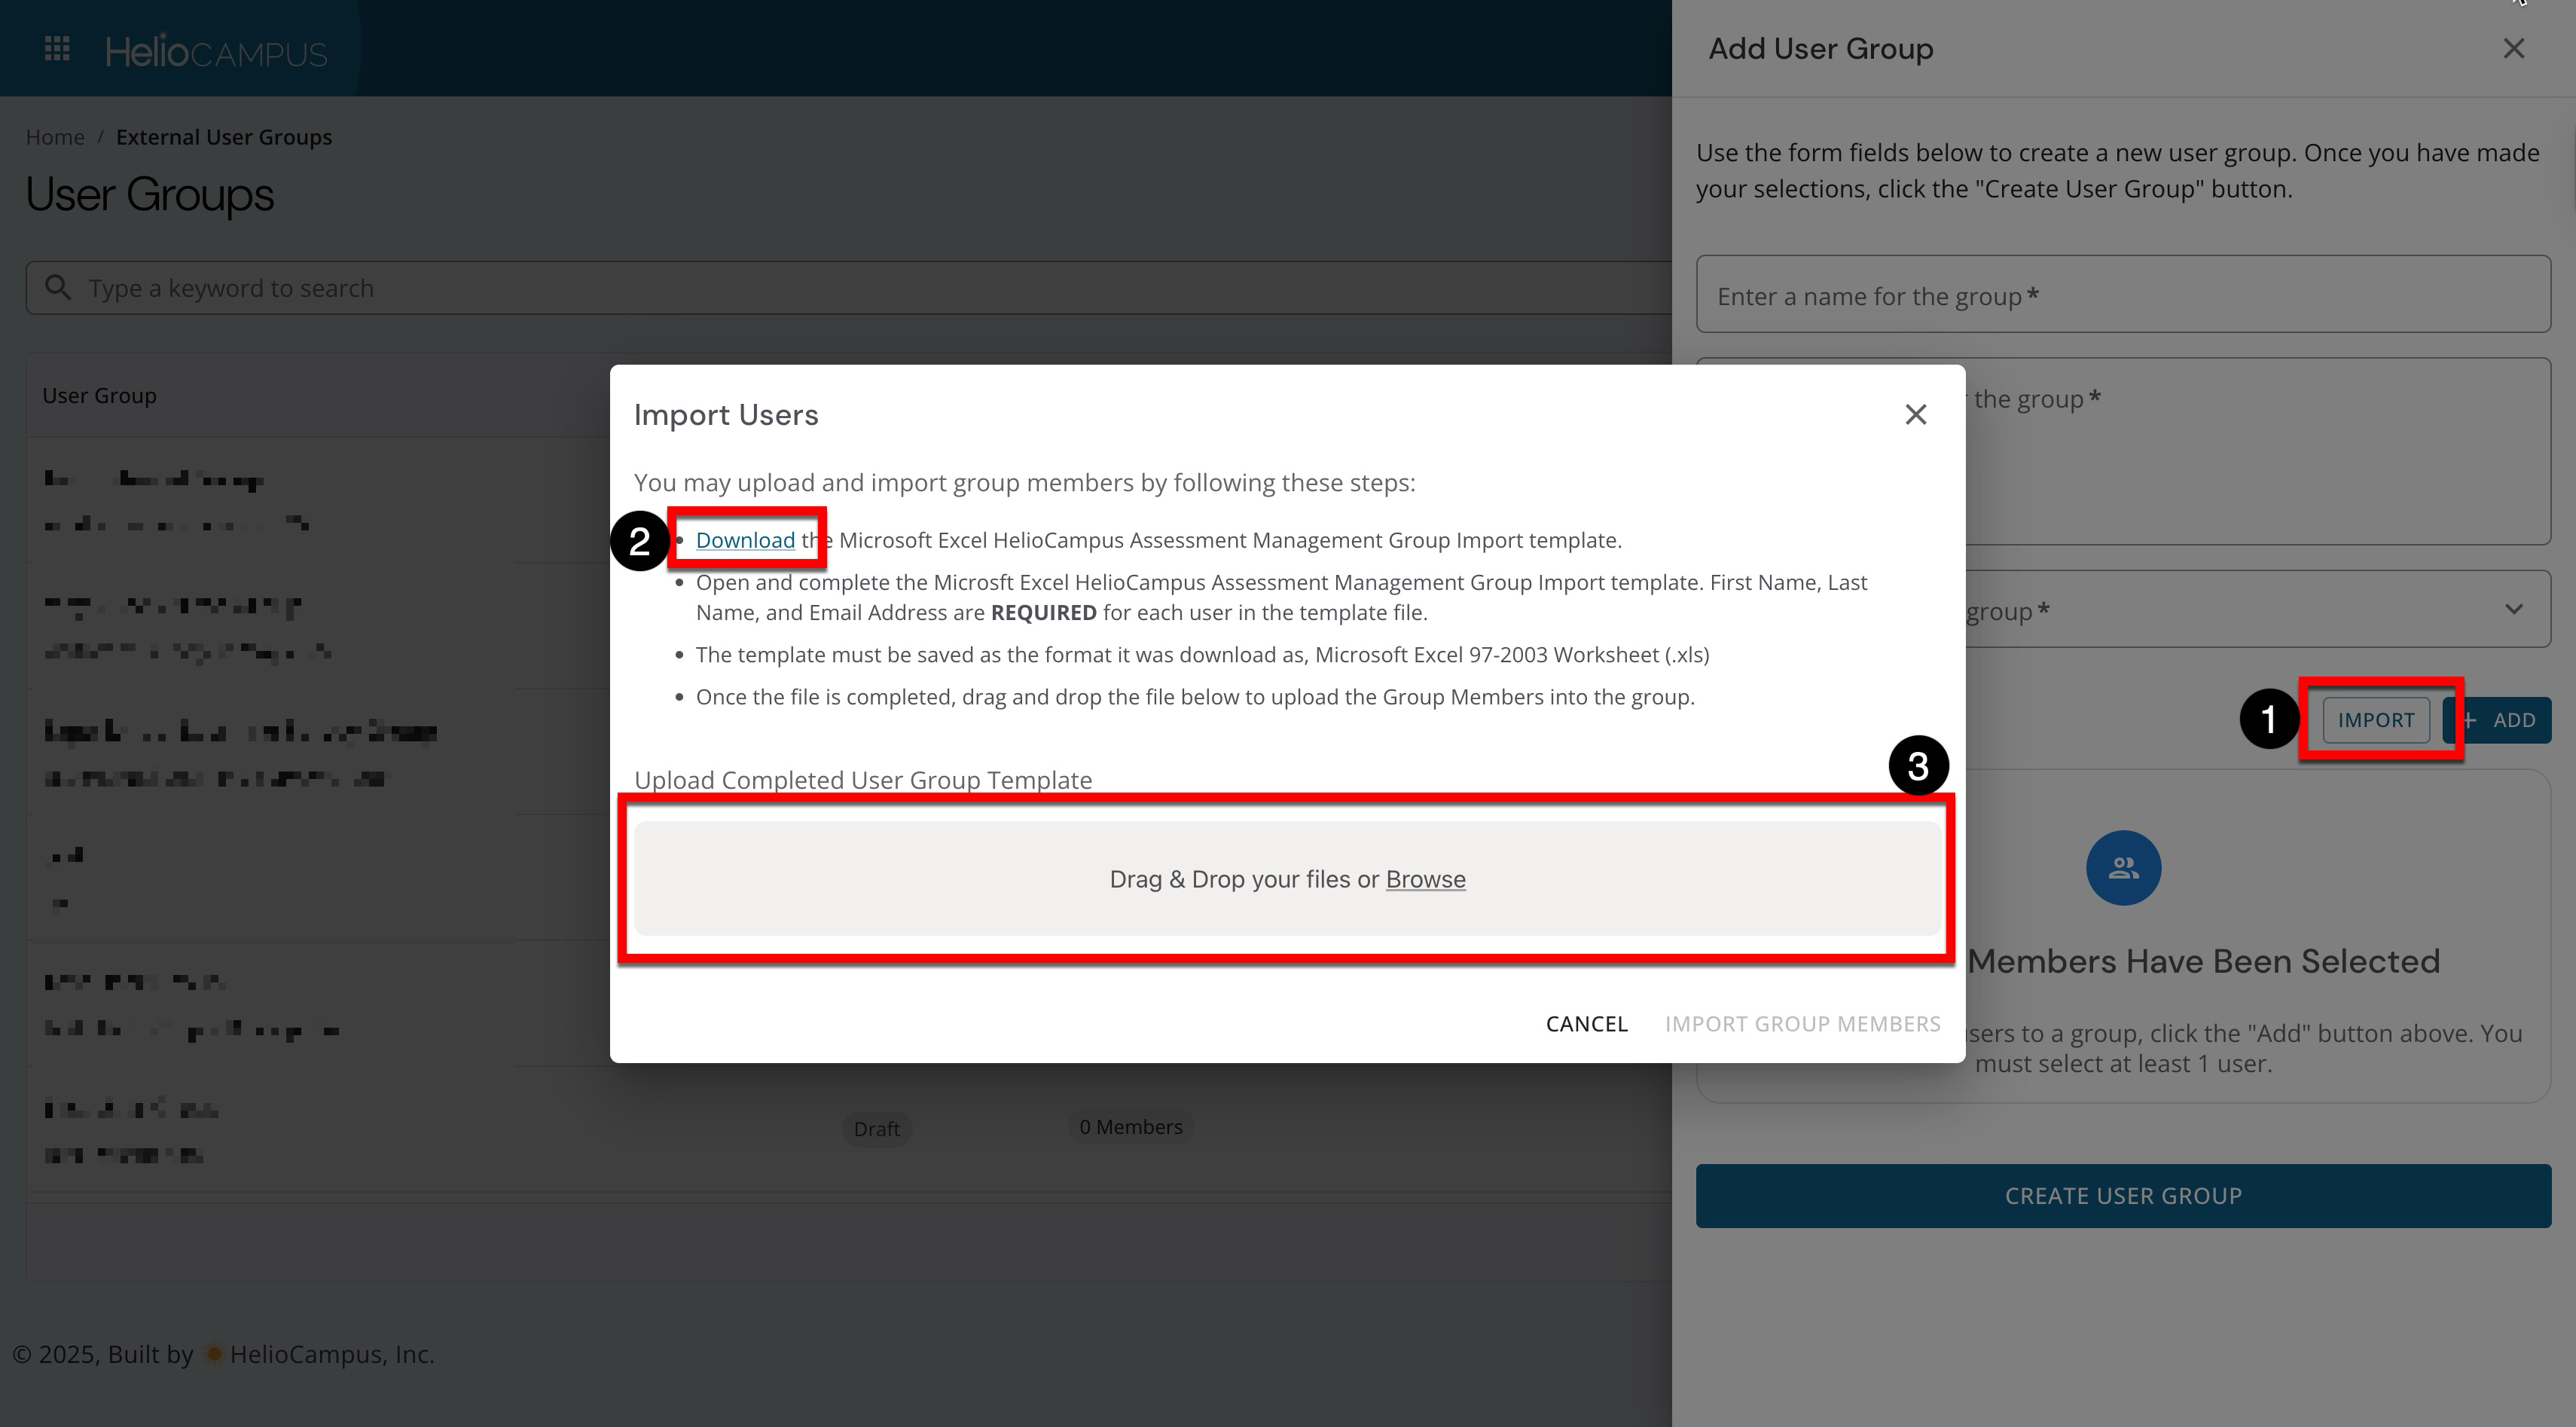
When Import is clicked (1), a group import template can be downloaded (2) for adding external user email addresses and imported (3) to add the users to the group.
-
When Add is clicked (1), platform users can be searched for and selected (2) to be added to the group.
-
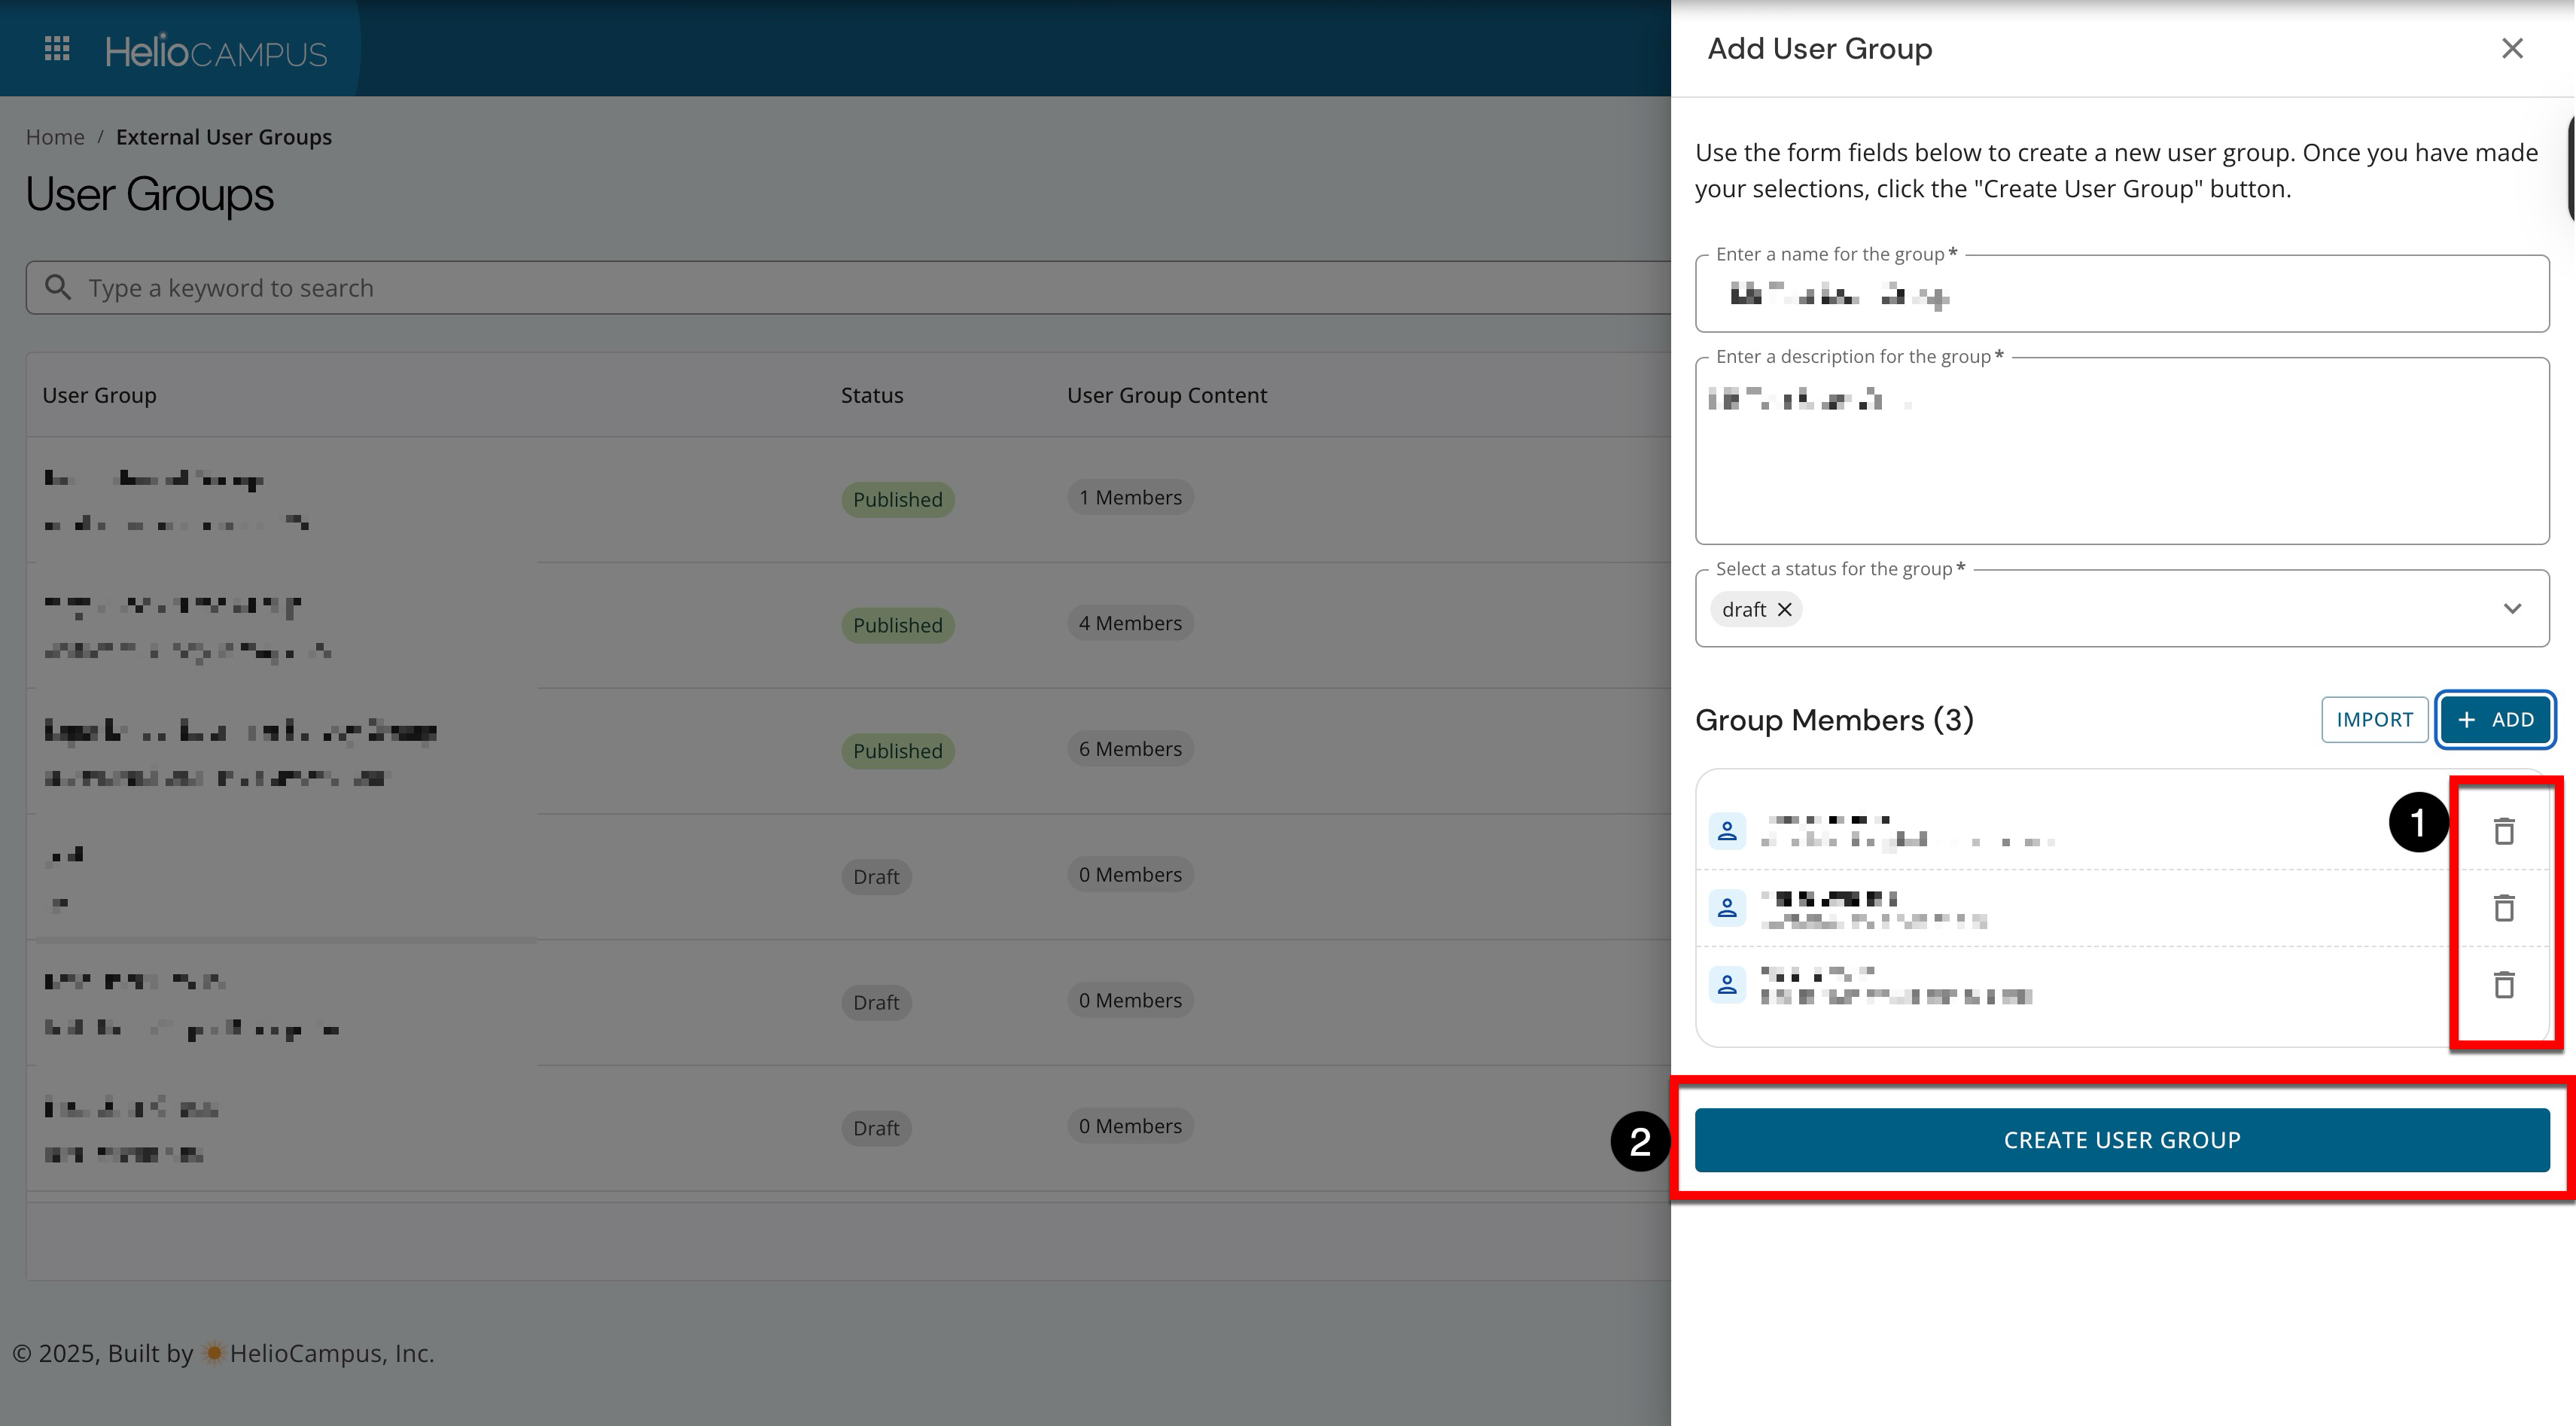
-
The selected users will display and can be removed if any were selected in error (1). Click Create User Group (2) to complete the creation process.