
📙 Knowledge Base Tip: Reading the Learning Journey and My Learning Journey articles is recommended before creating stories.
How to Create a Story
-
To create a story, navigate to Main Menu > My Learning Journey, and click Create Story.
💡 Product Tip: Students can also access the My Learning Journey page by clicking View All My Stories from the Learning Journey dashboard widget. Learn more!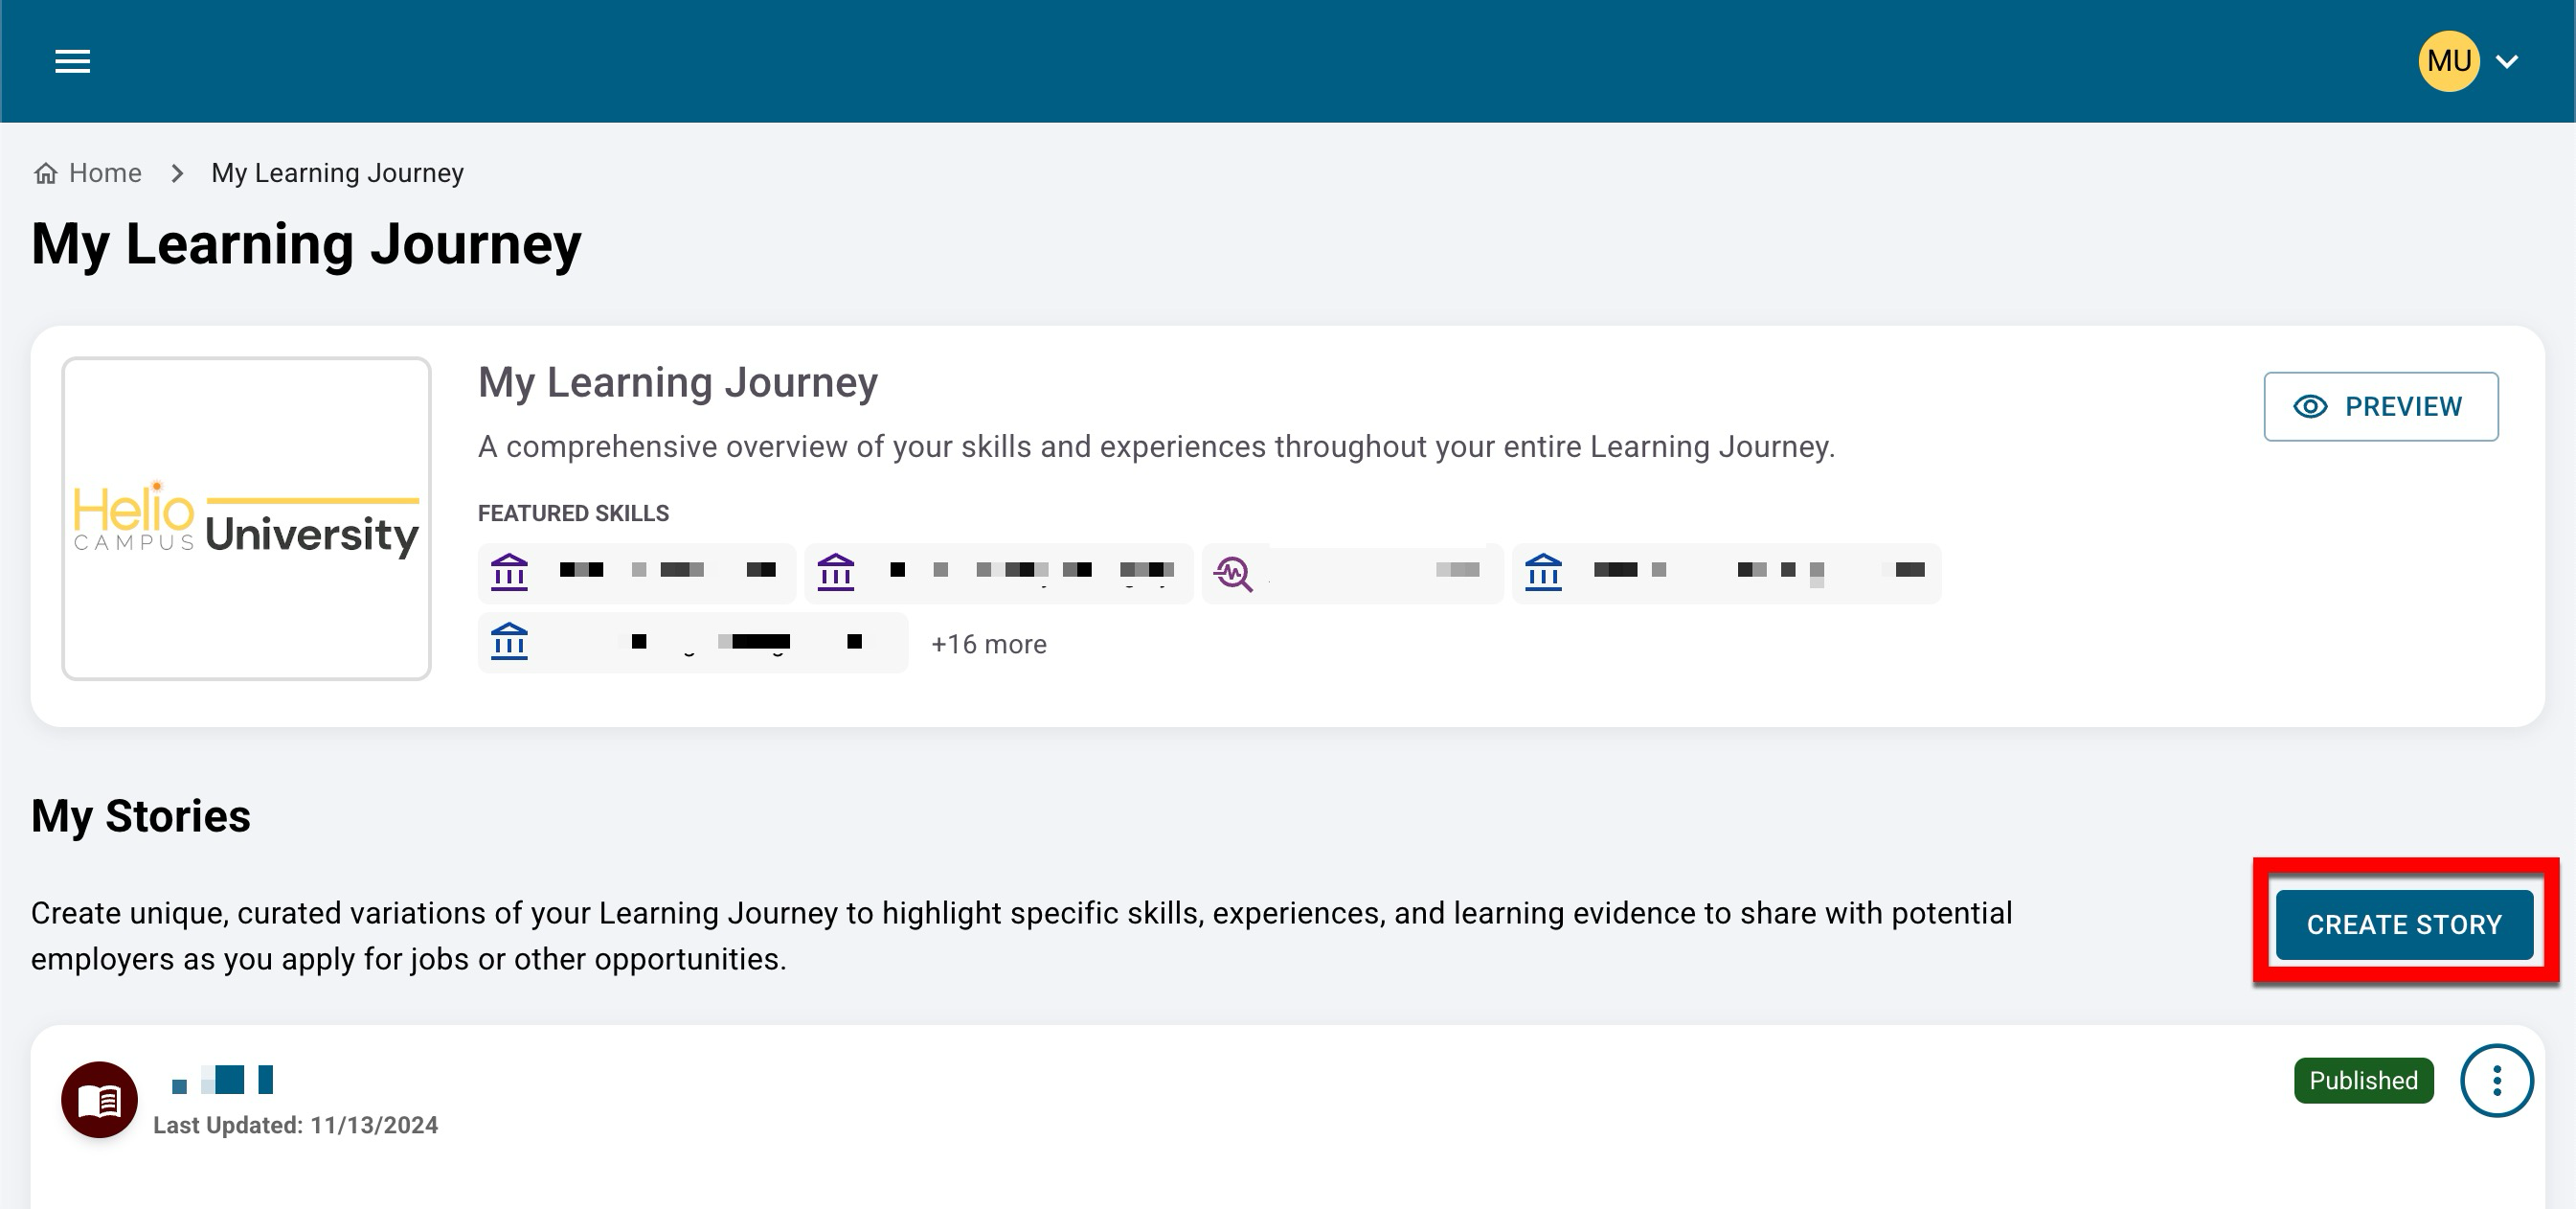
-
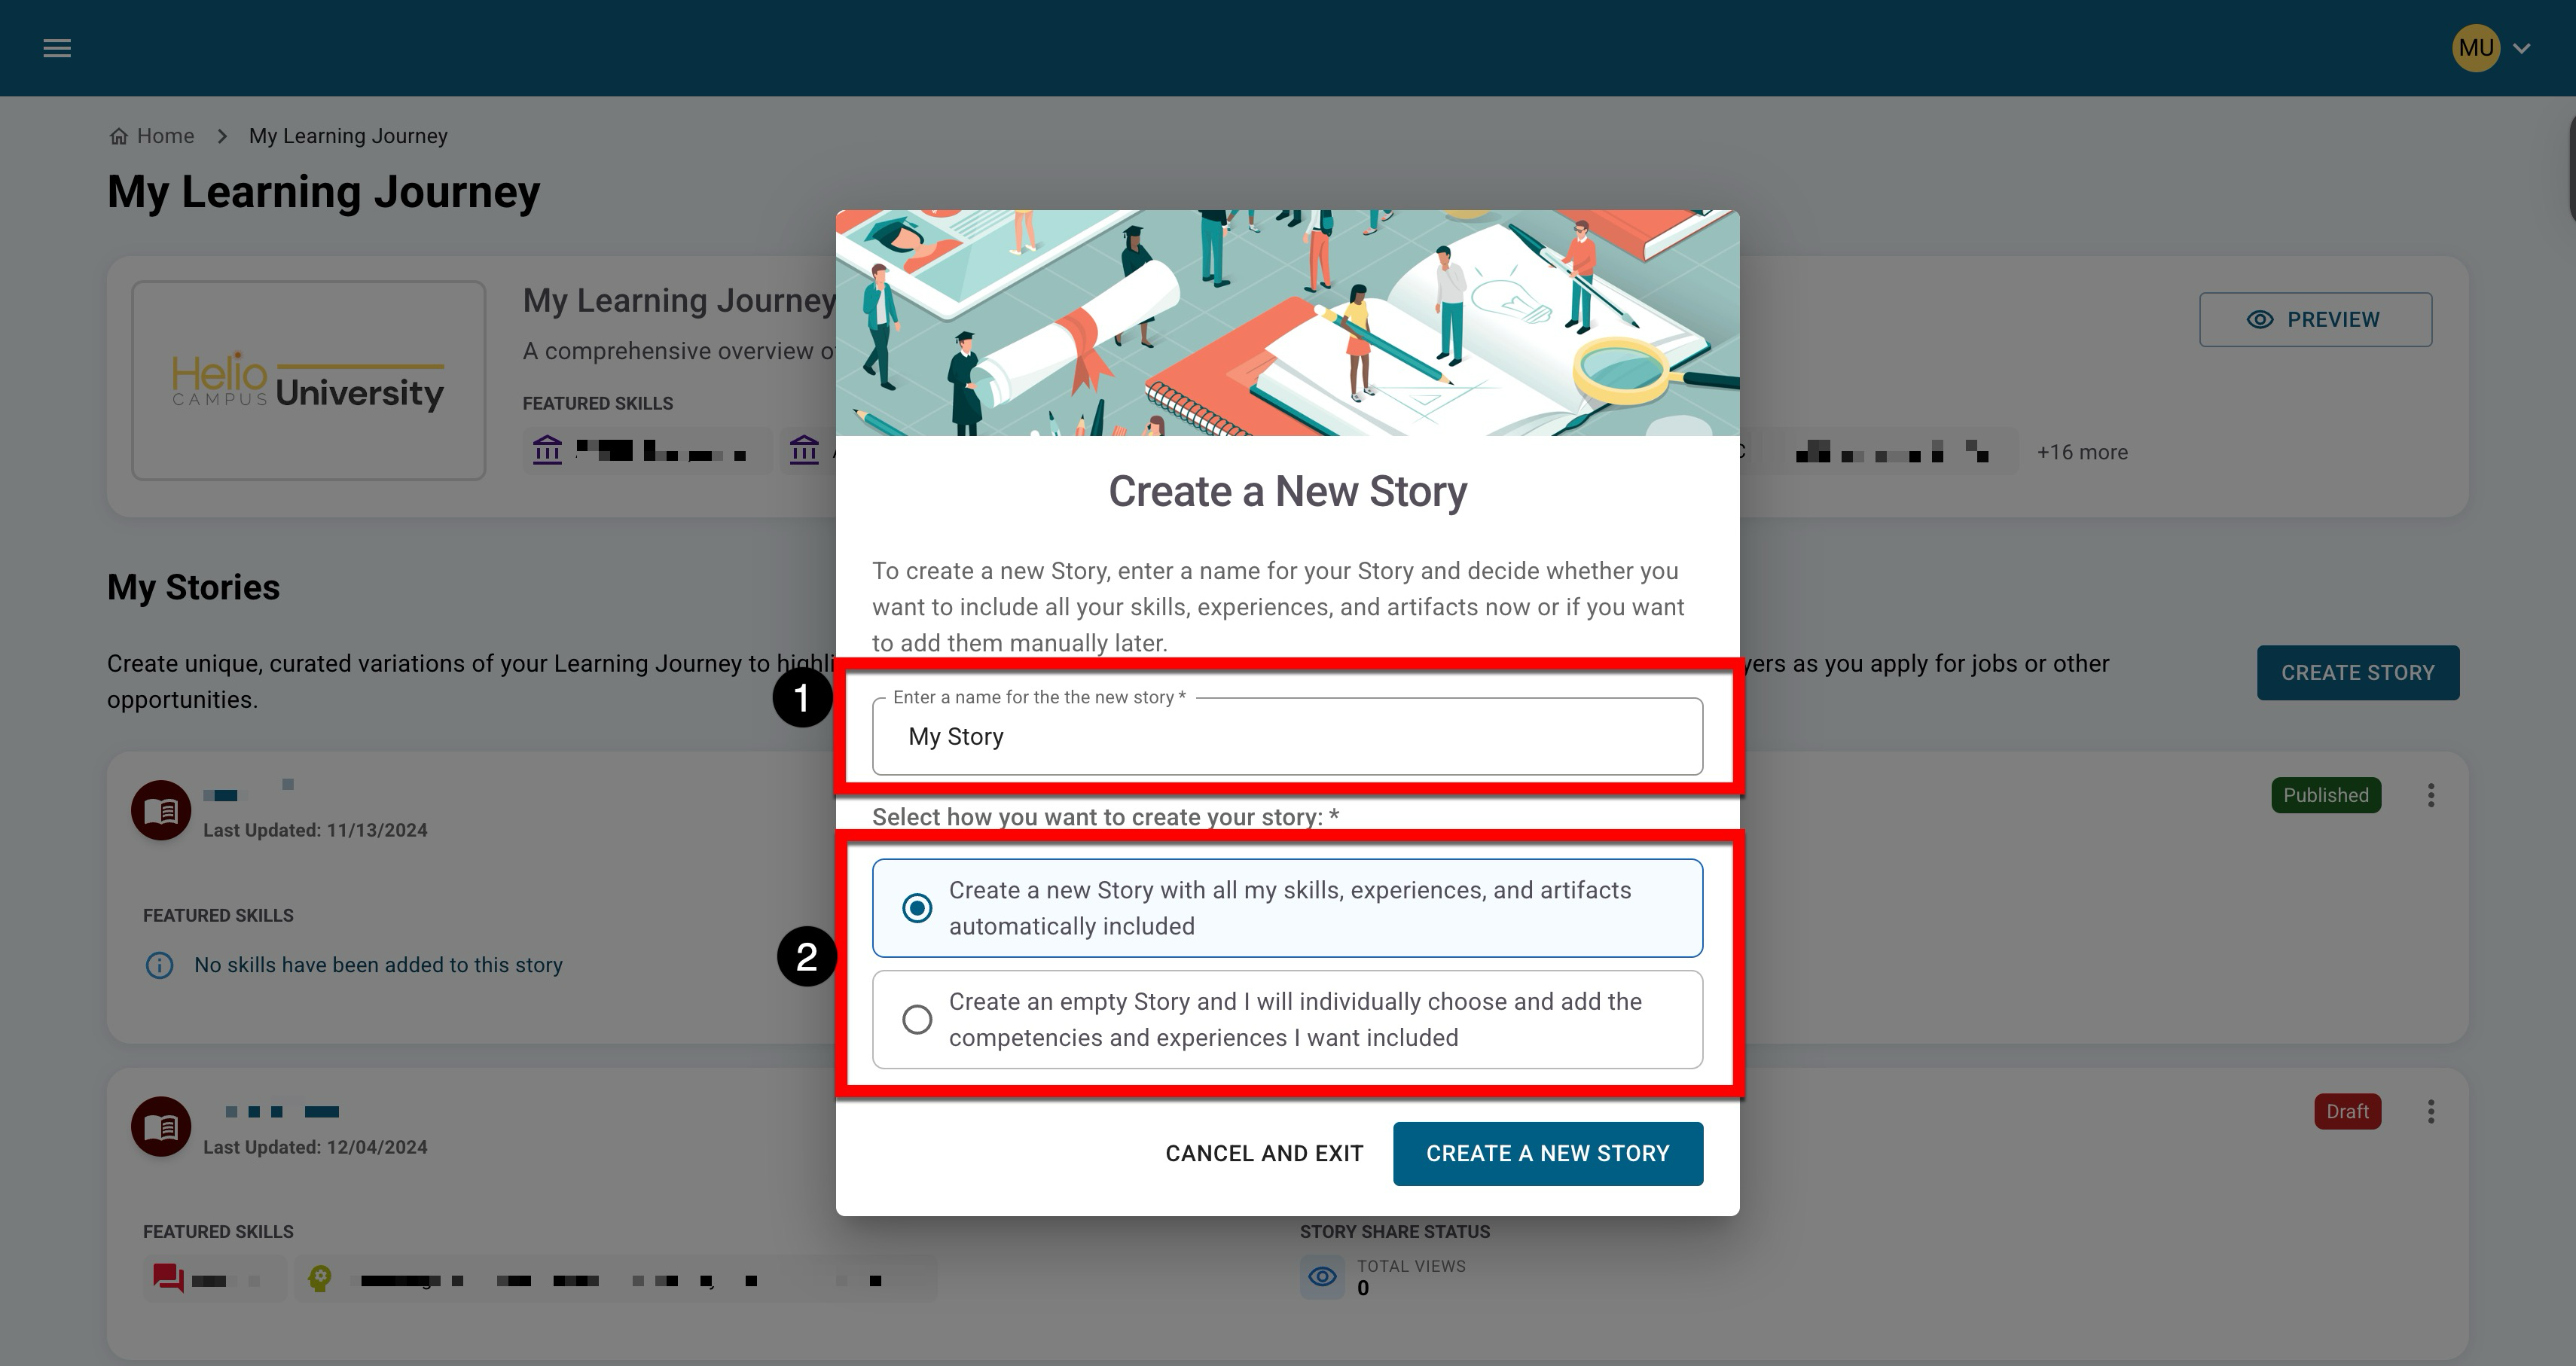
When stories are created, the name is required (1), and a story can be created as blank or prefilled (2):
-
New Stories: These are prefilled stories where all skills, experiences, and badges are automatically added during creation, all of which can be customized post-creation.
-
Empty Stories: These are blank stories where skills, experiences, and badges are manually selected and added to post creation. Story details and introduction (if applicable) can be customized.
-
-
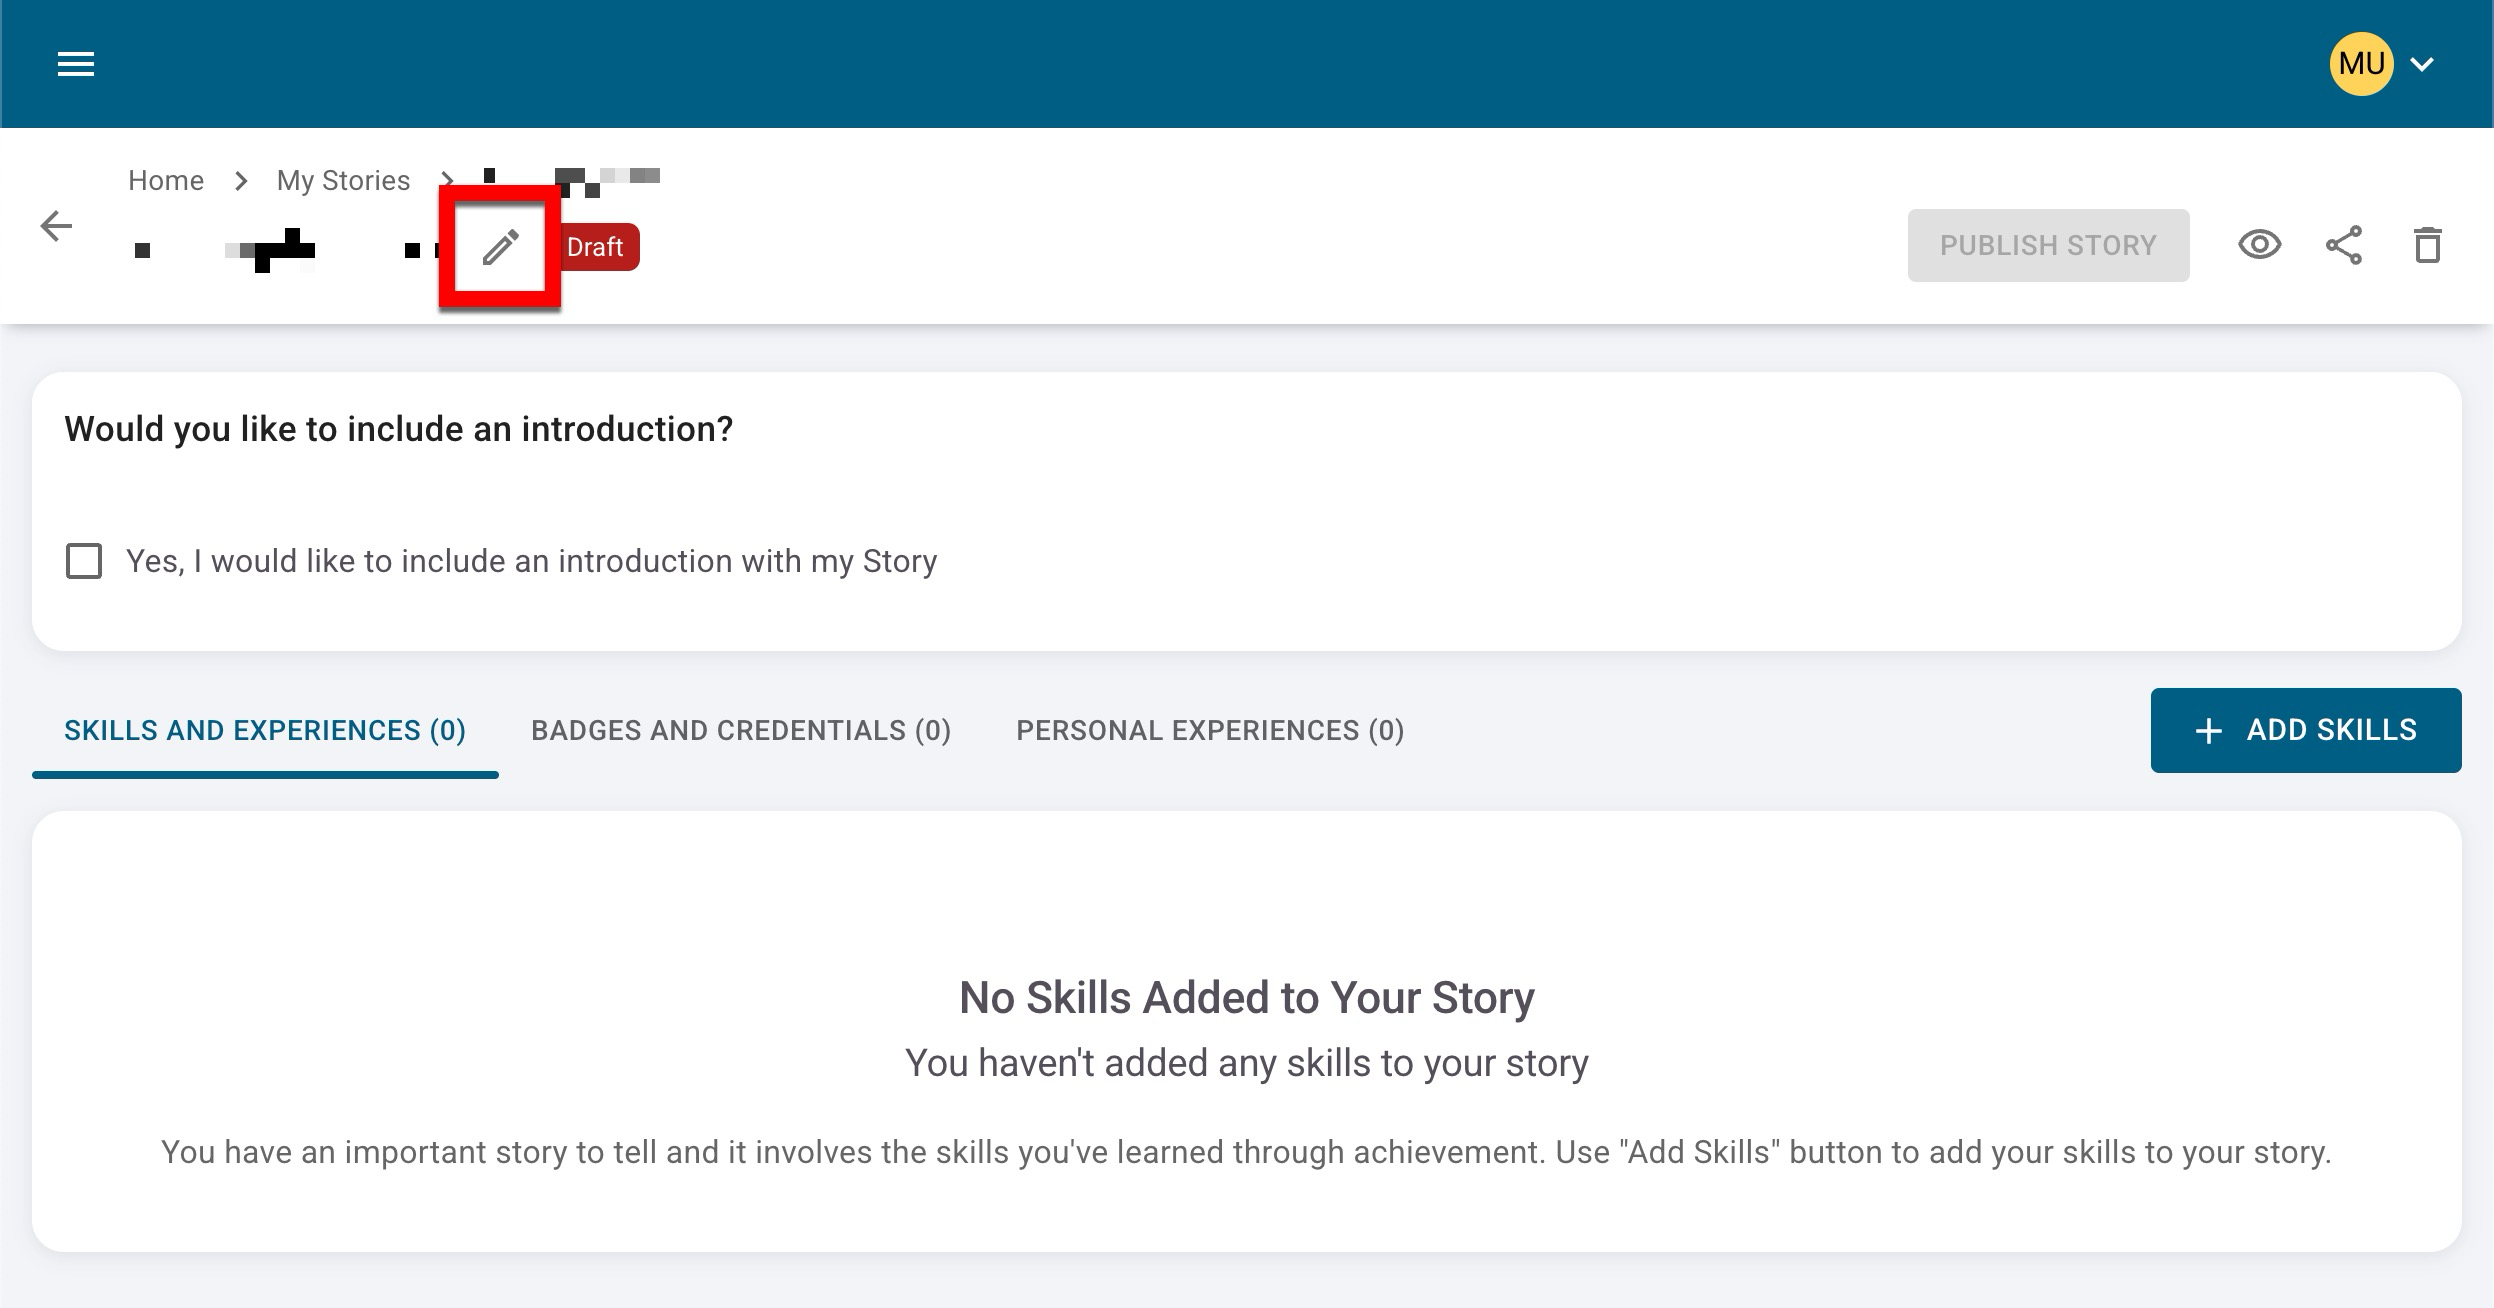
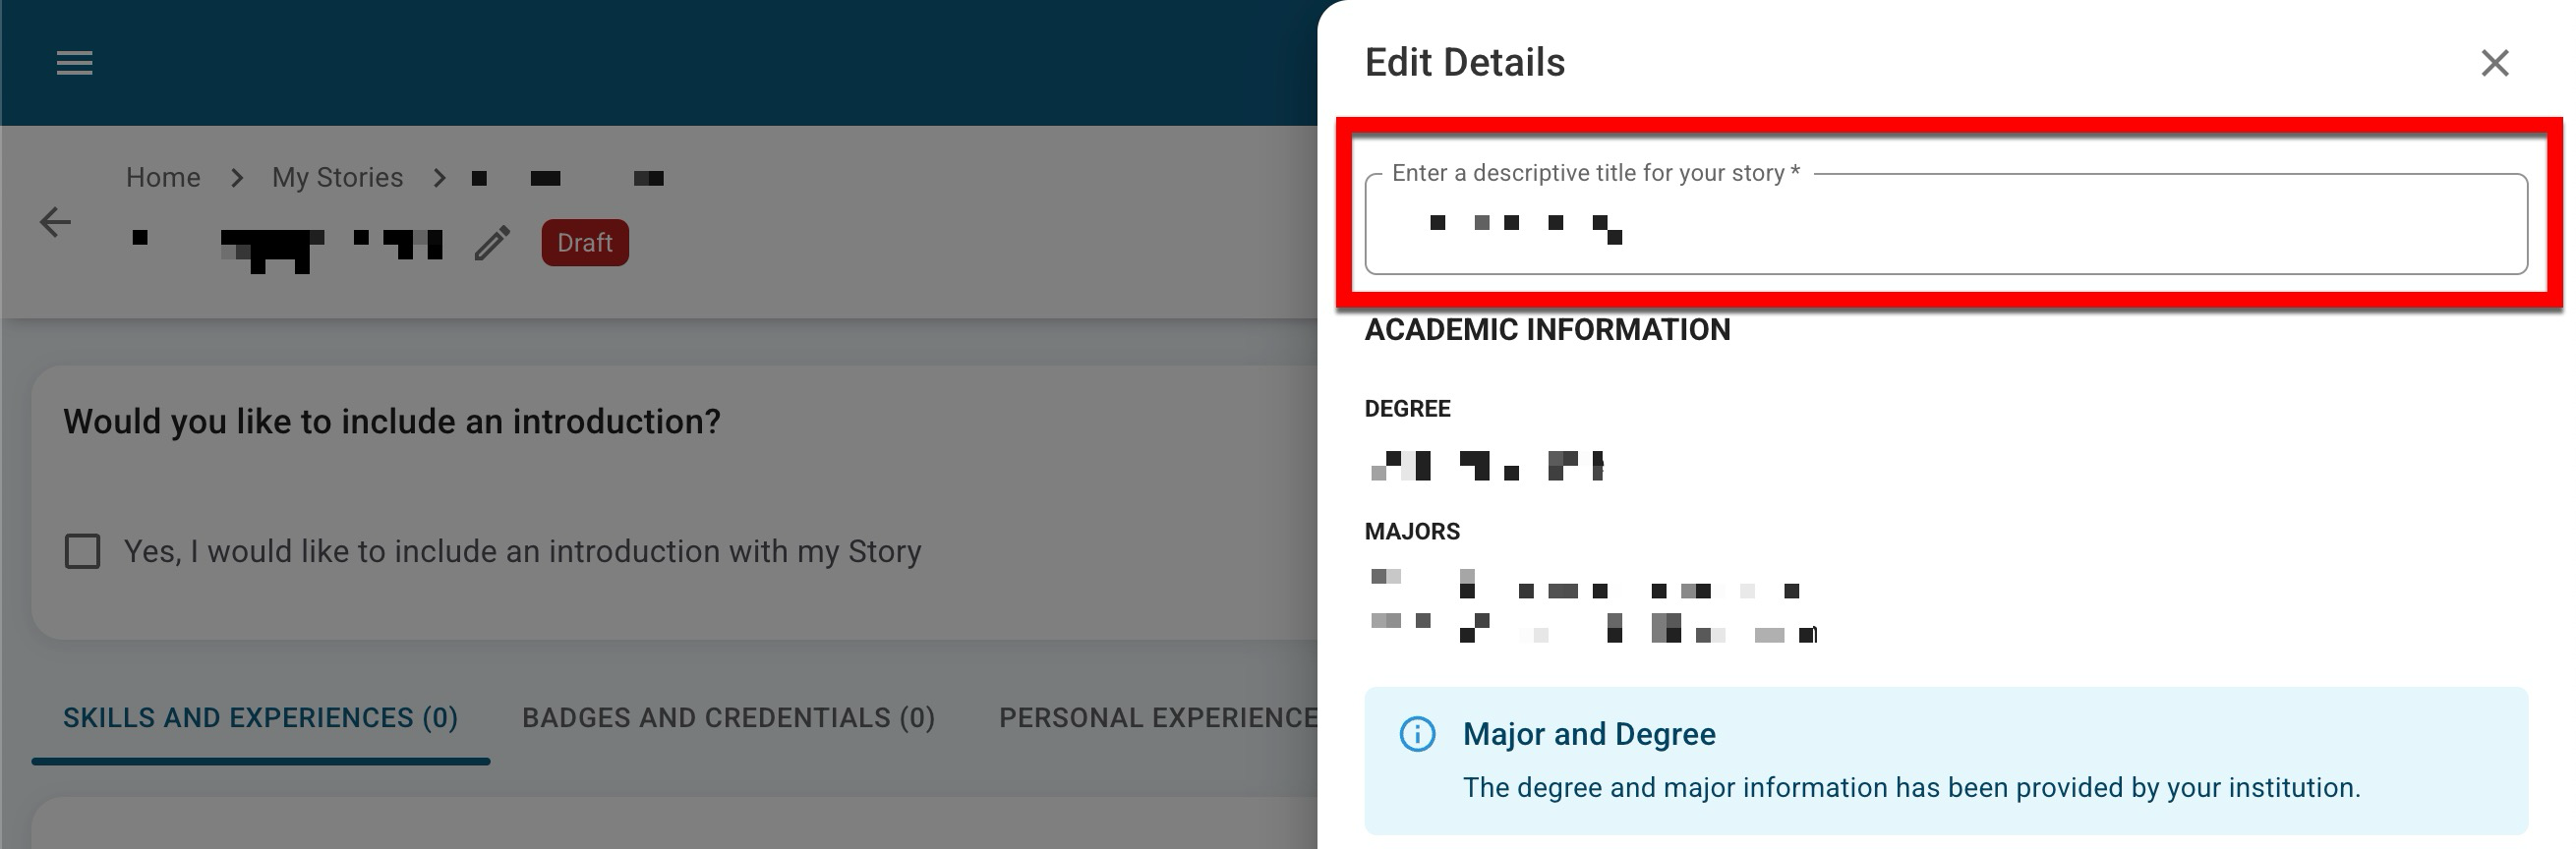
Once created, stories will be automatically displayed for customization; throughout customization, stories auto-save after each change. The story title and social and contact links can be edited by clicking the pencil icon (1) to open the Edit Story Details drawer.
-
Via the Edit Story Details drawer, the story title can be customized.
-
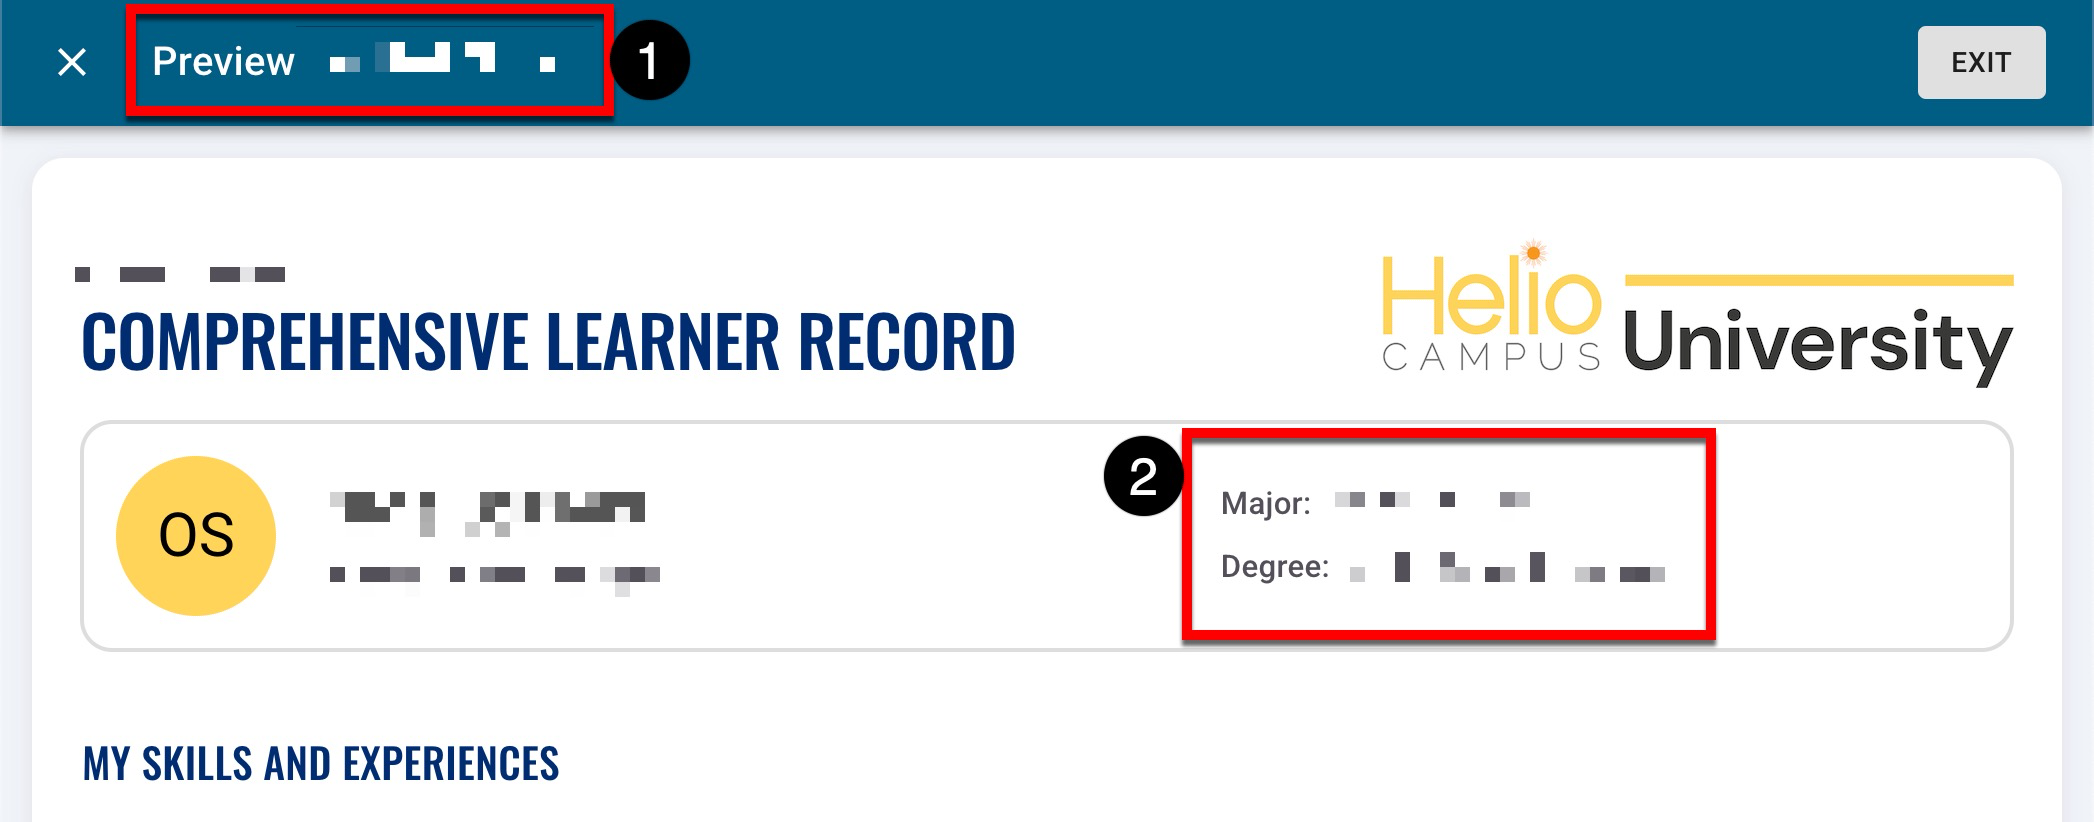
When previewing or viewing a learning journey, the title will be displayed in the preview title banner (1). The academic information is displayed on the Comprehensive Learner Record (2) next to the name and contact information.
Academic information will only be displayed if it is included in the data files imported to HelioCampus. Learn more about data files.
-
-
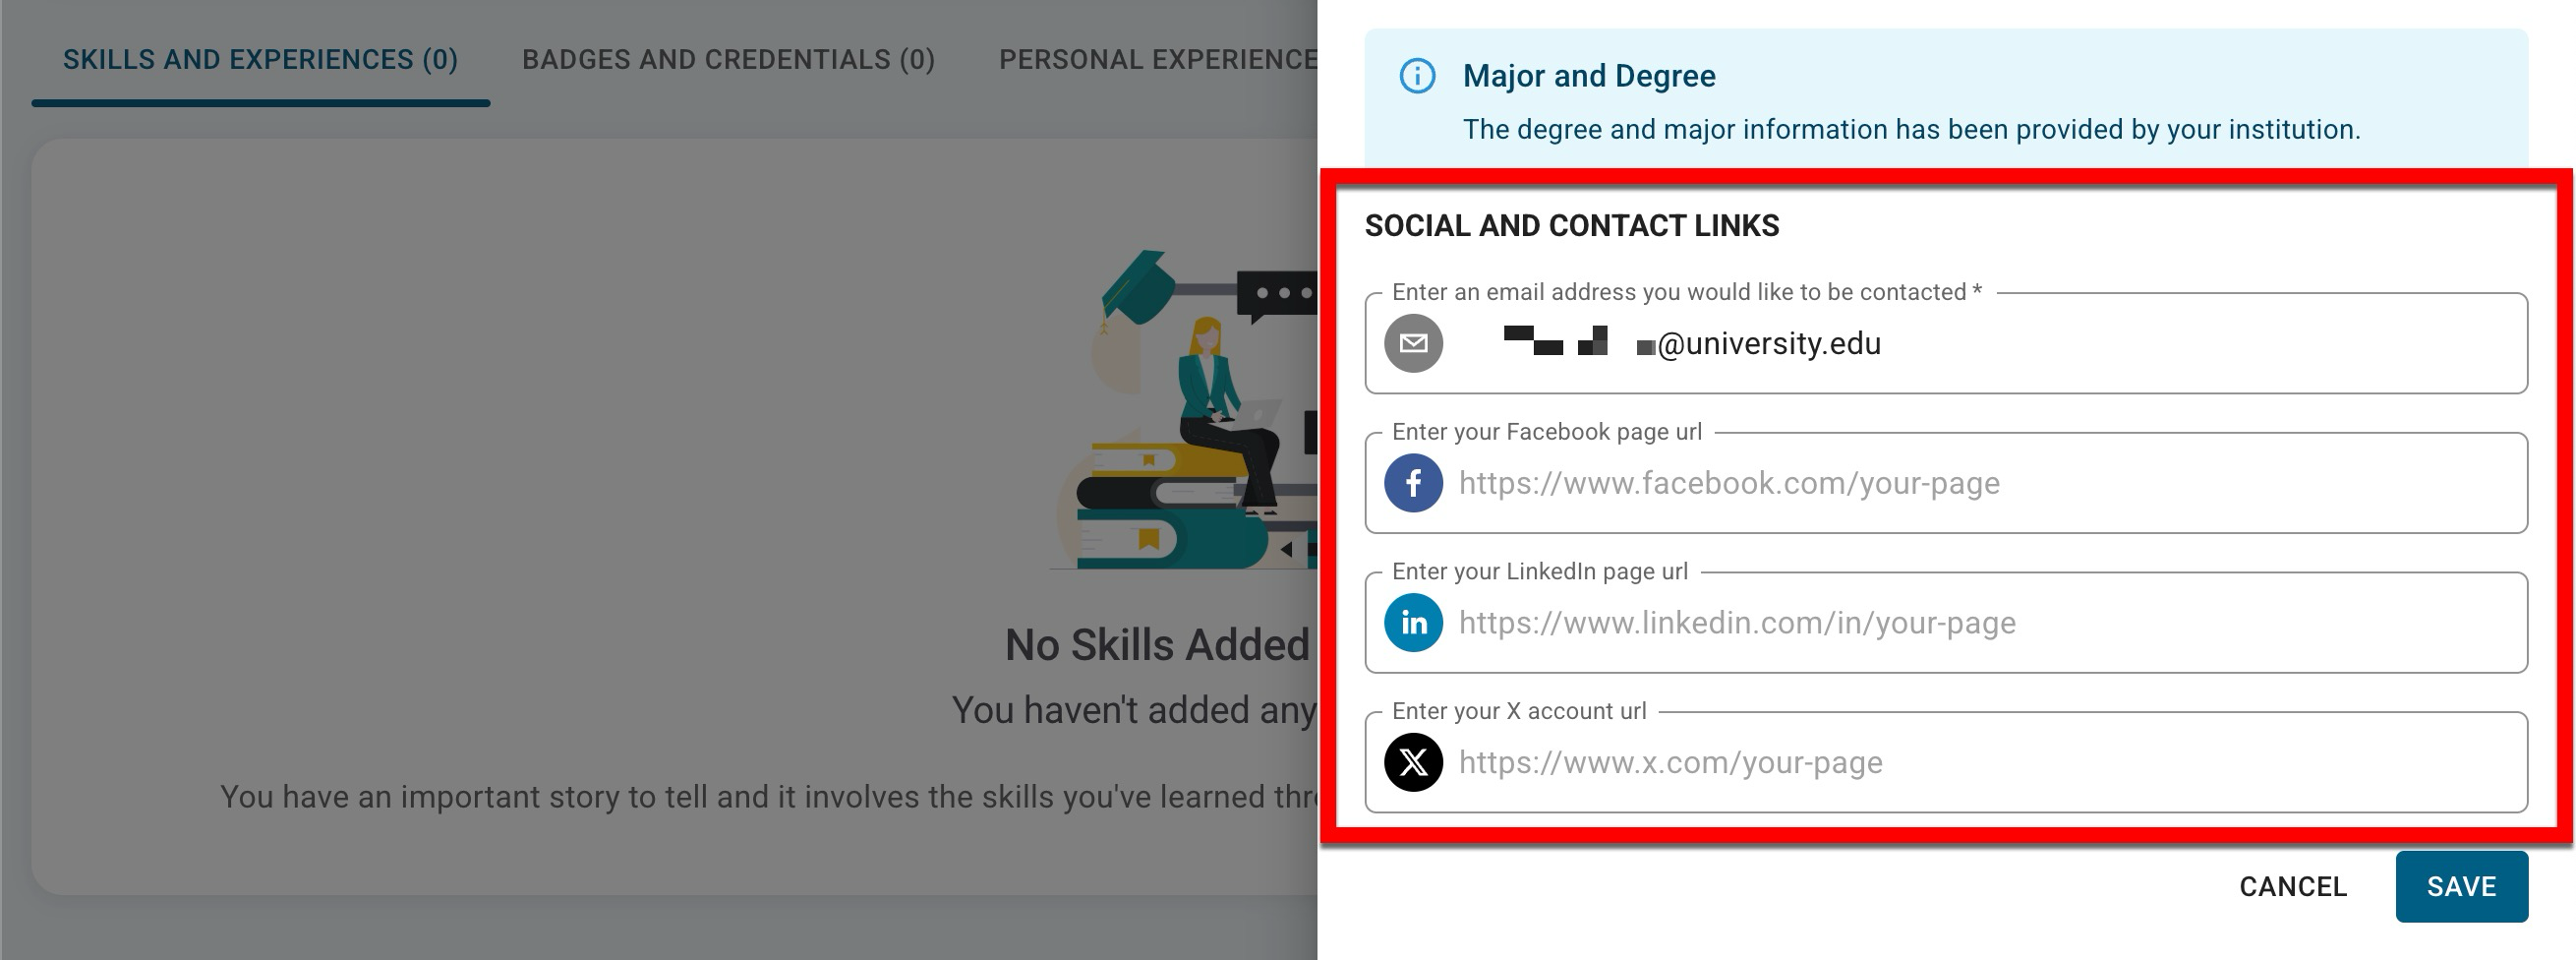
By default, the Institution student email will be entered as the point of contact for the story once it is shared, although this can be changed as desired. Once a story is shared, viewers will use this email for any questions they may have. Additionally, popular social media URLs can be added.
-
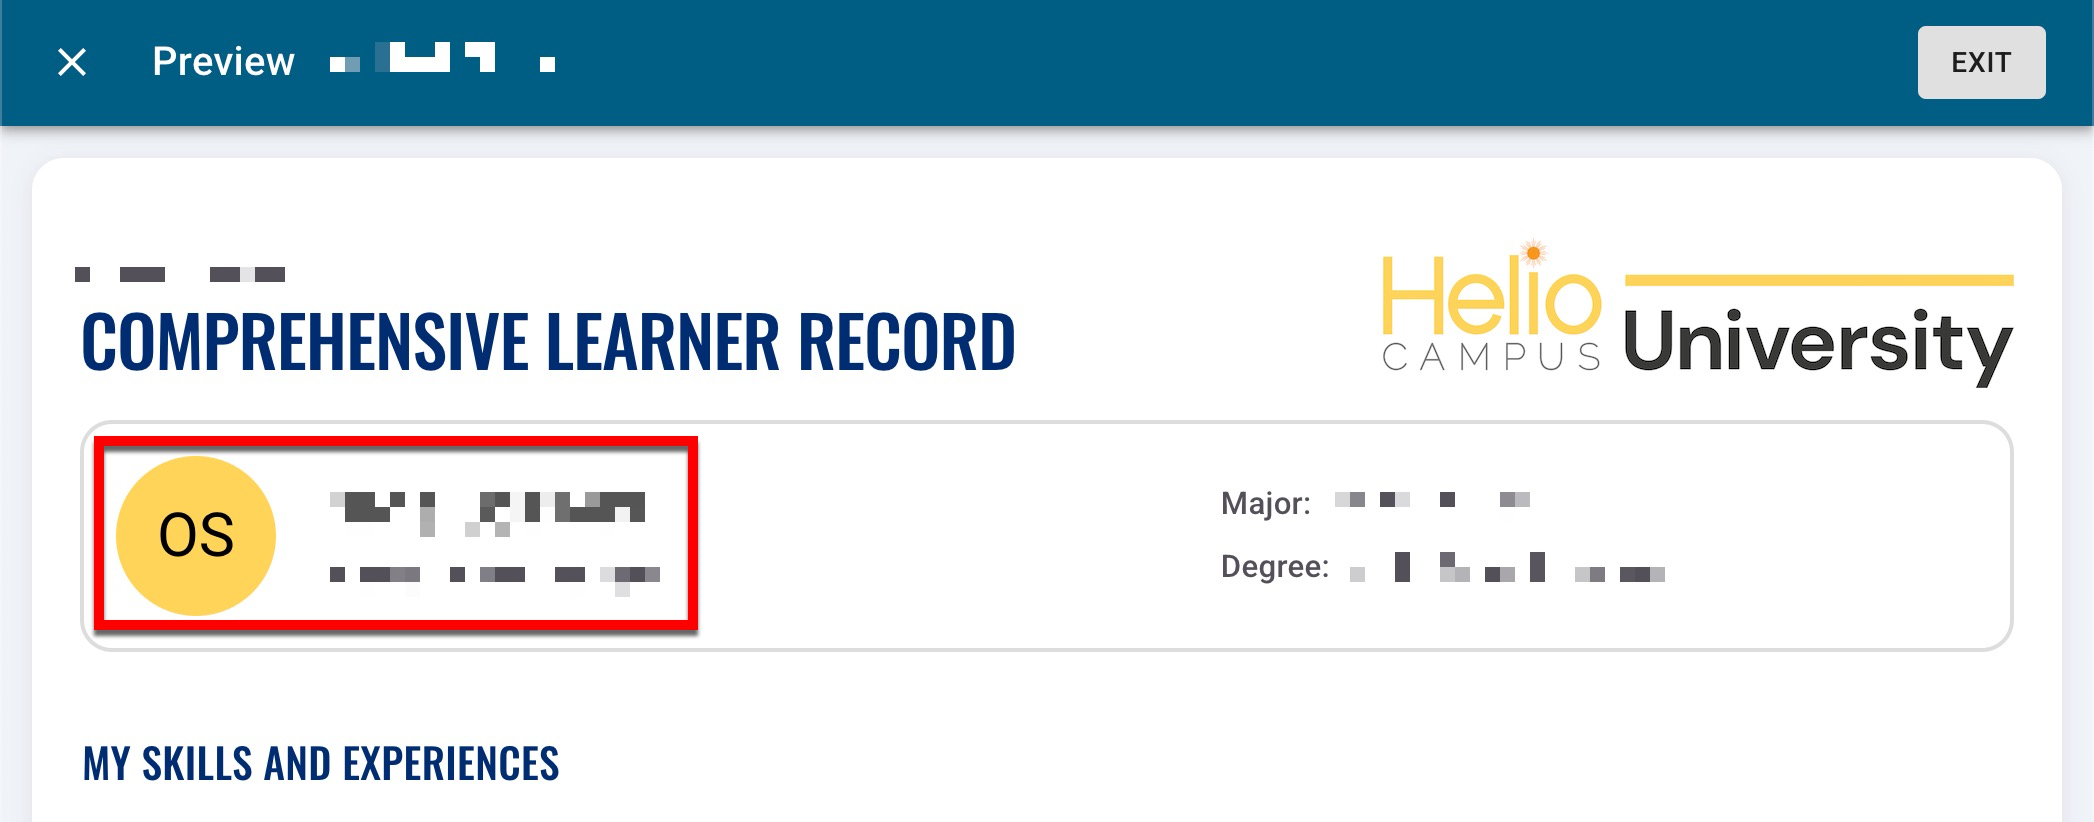
When previewing or viewing a learning journey, the contact email address is displayed below the student's name.
-
-
-
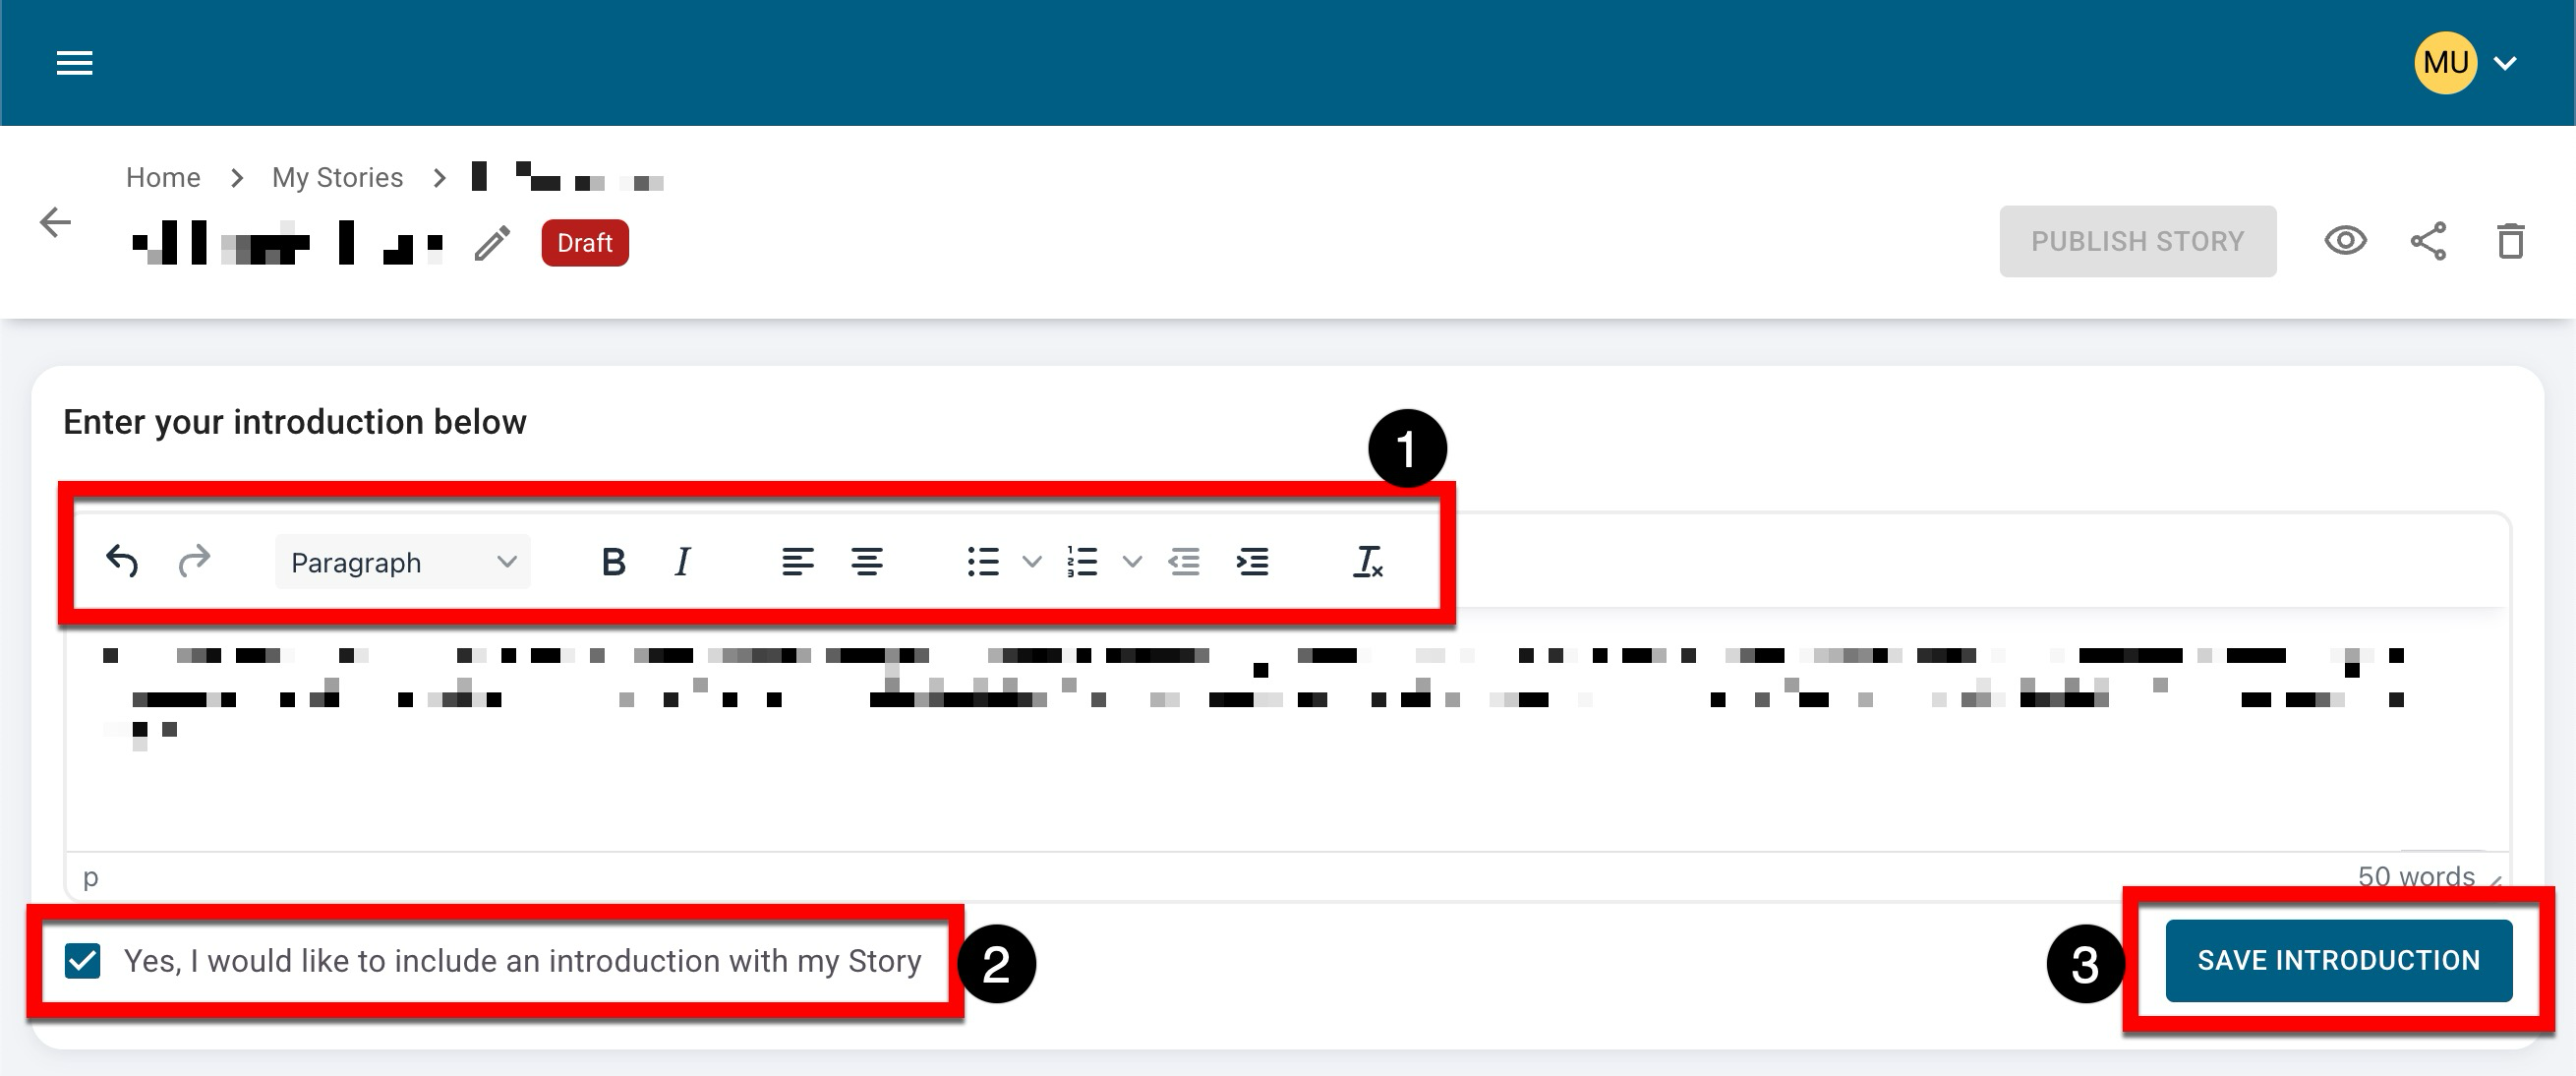
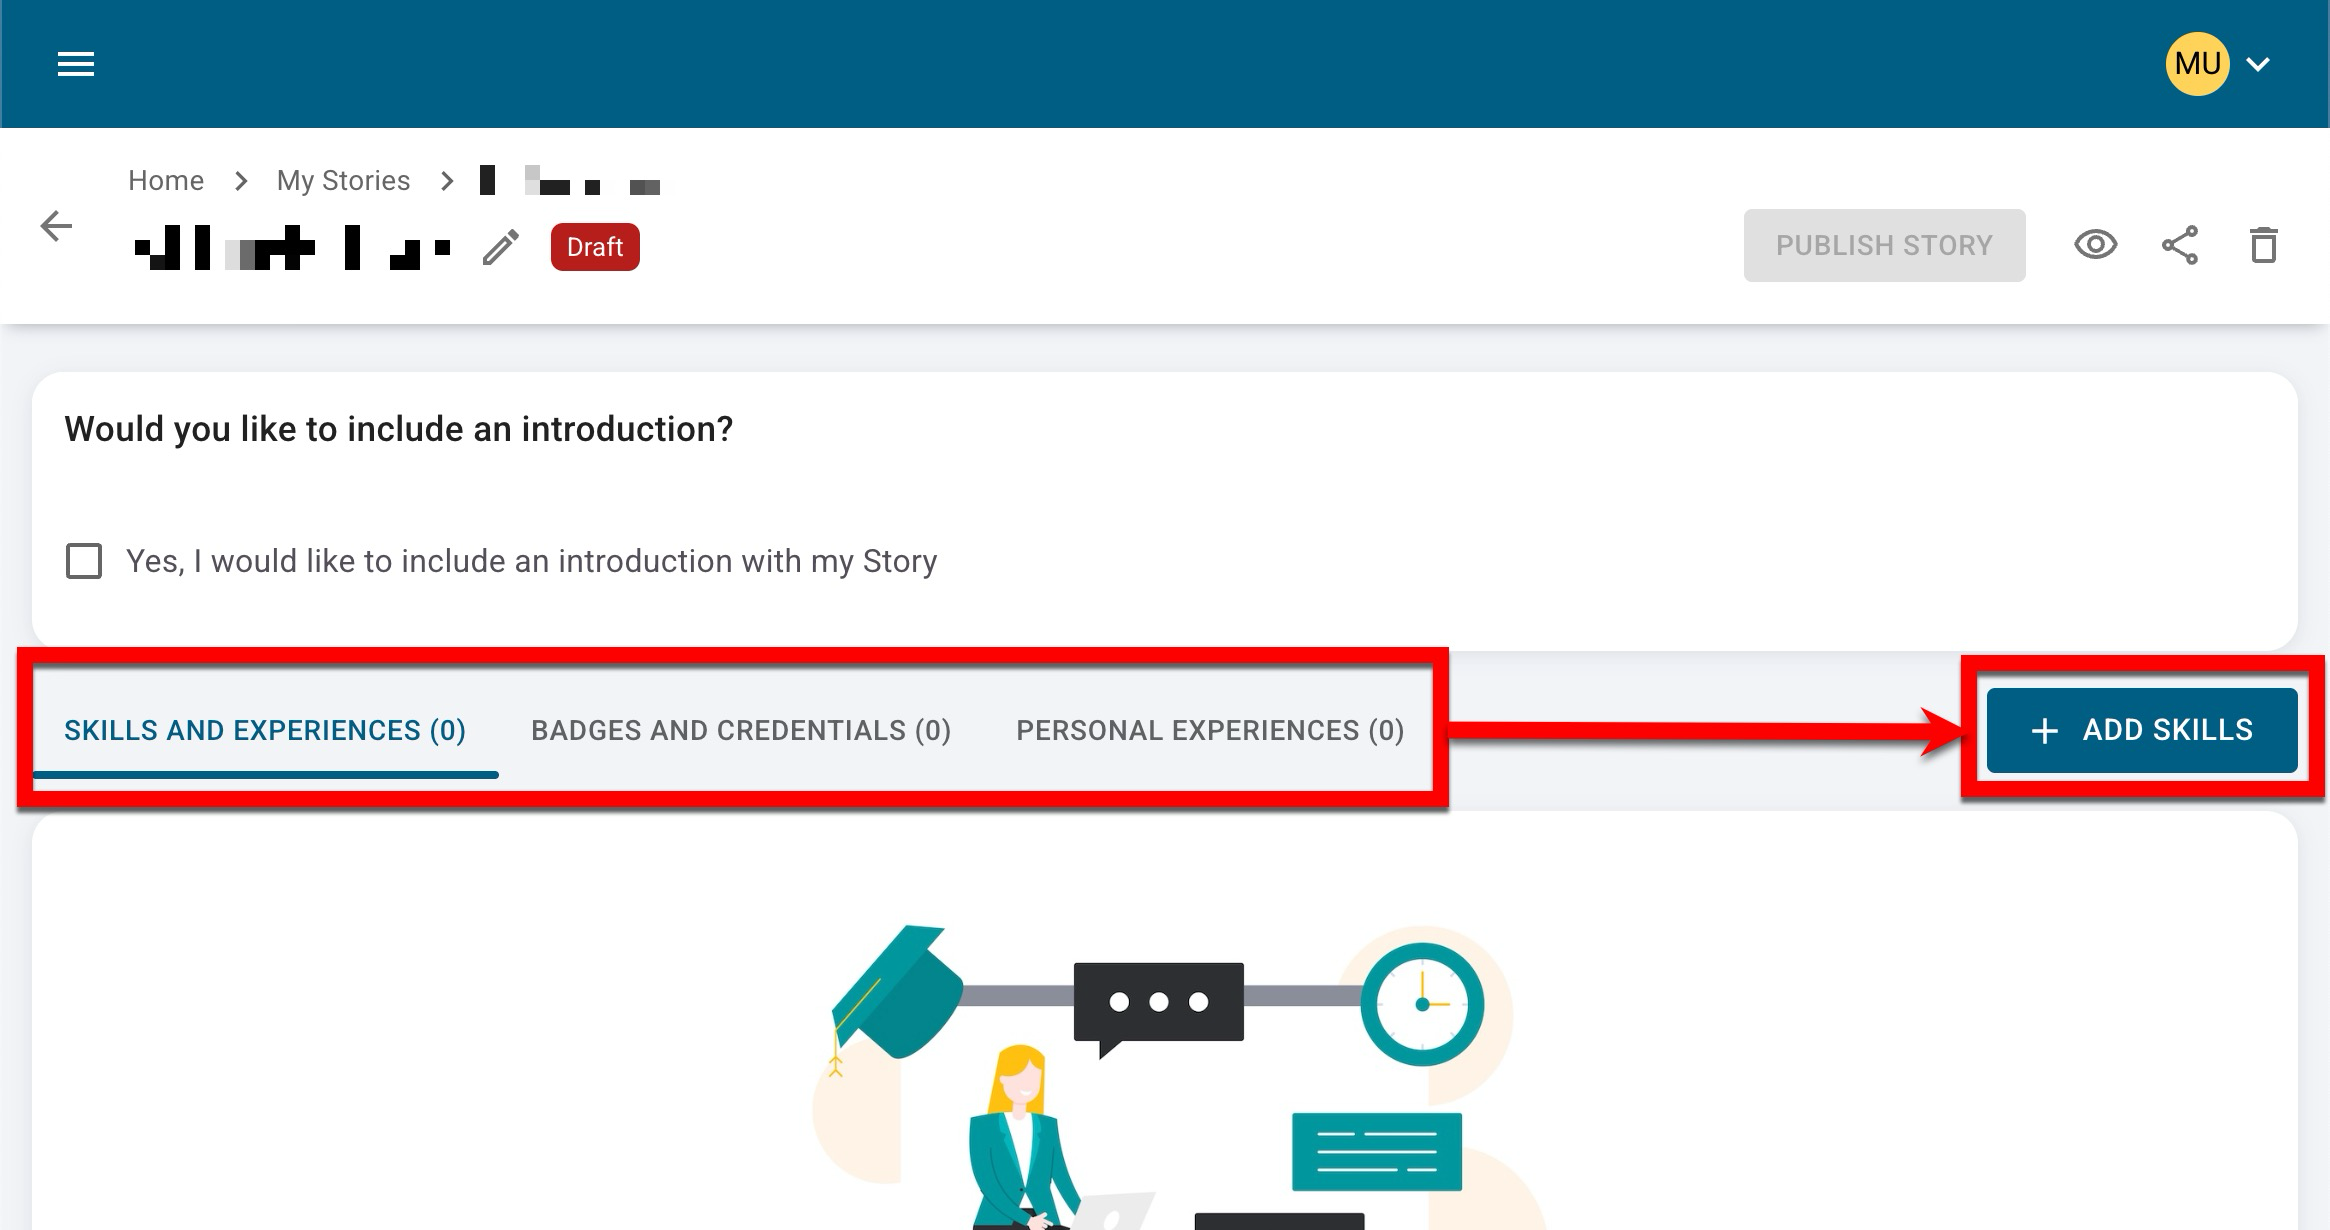
After customizing story details, an introduction can be optionally enabled for the story. By default, it is disabled.
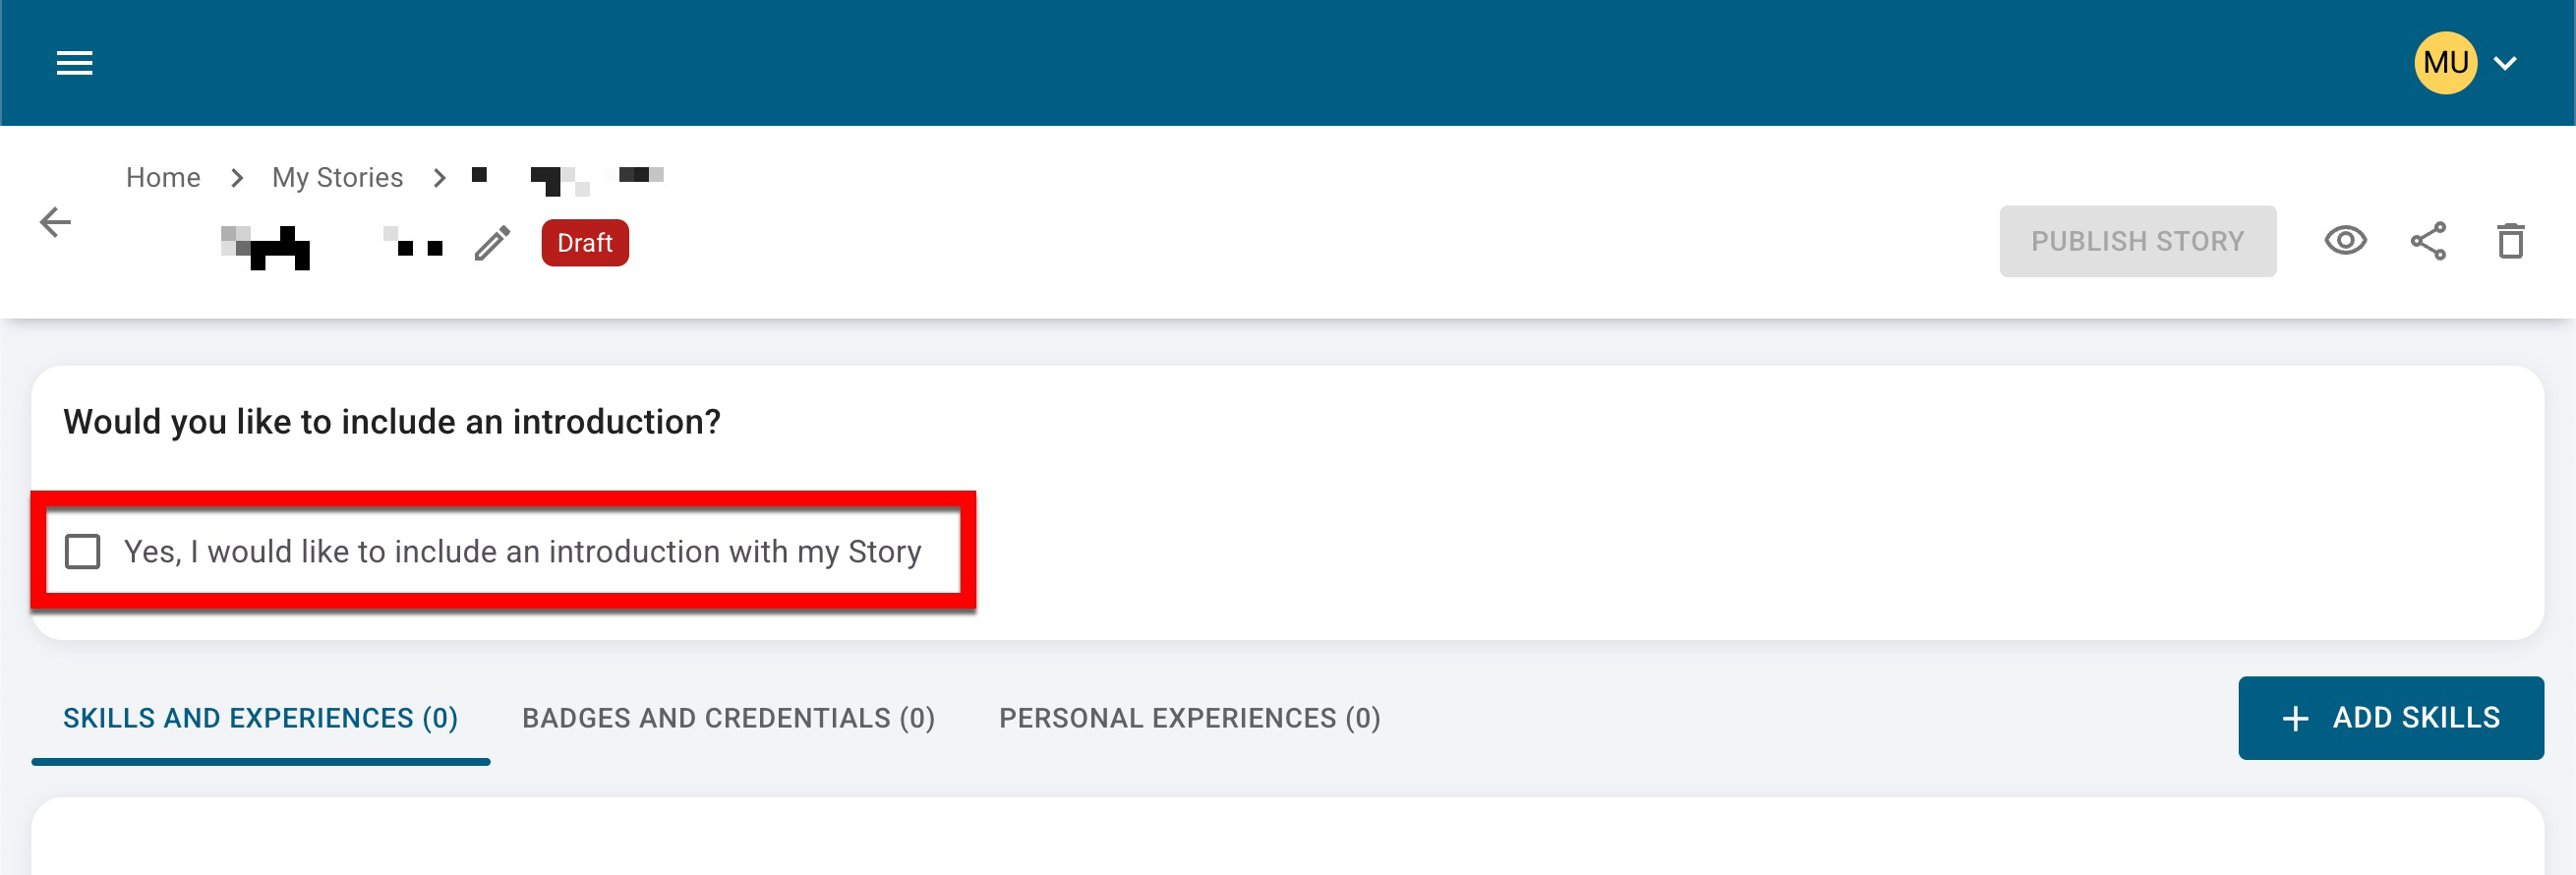
-
When enabled (1), standard text editing functionality is made available (2). Once a story introduction has been written, click Save Story Introduction (3).
-
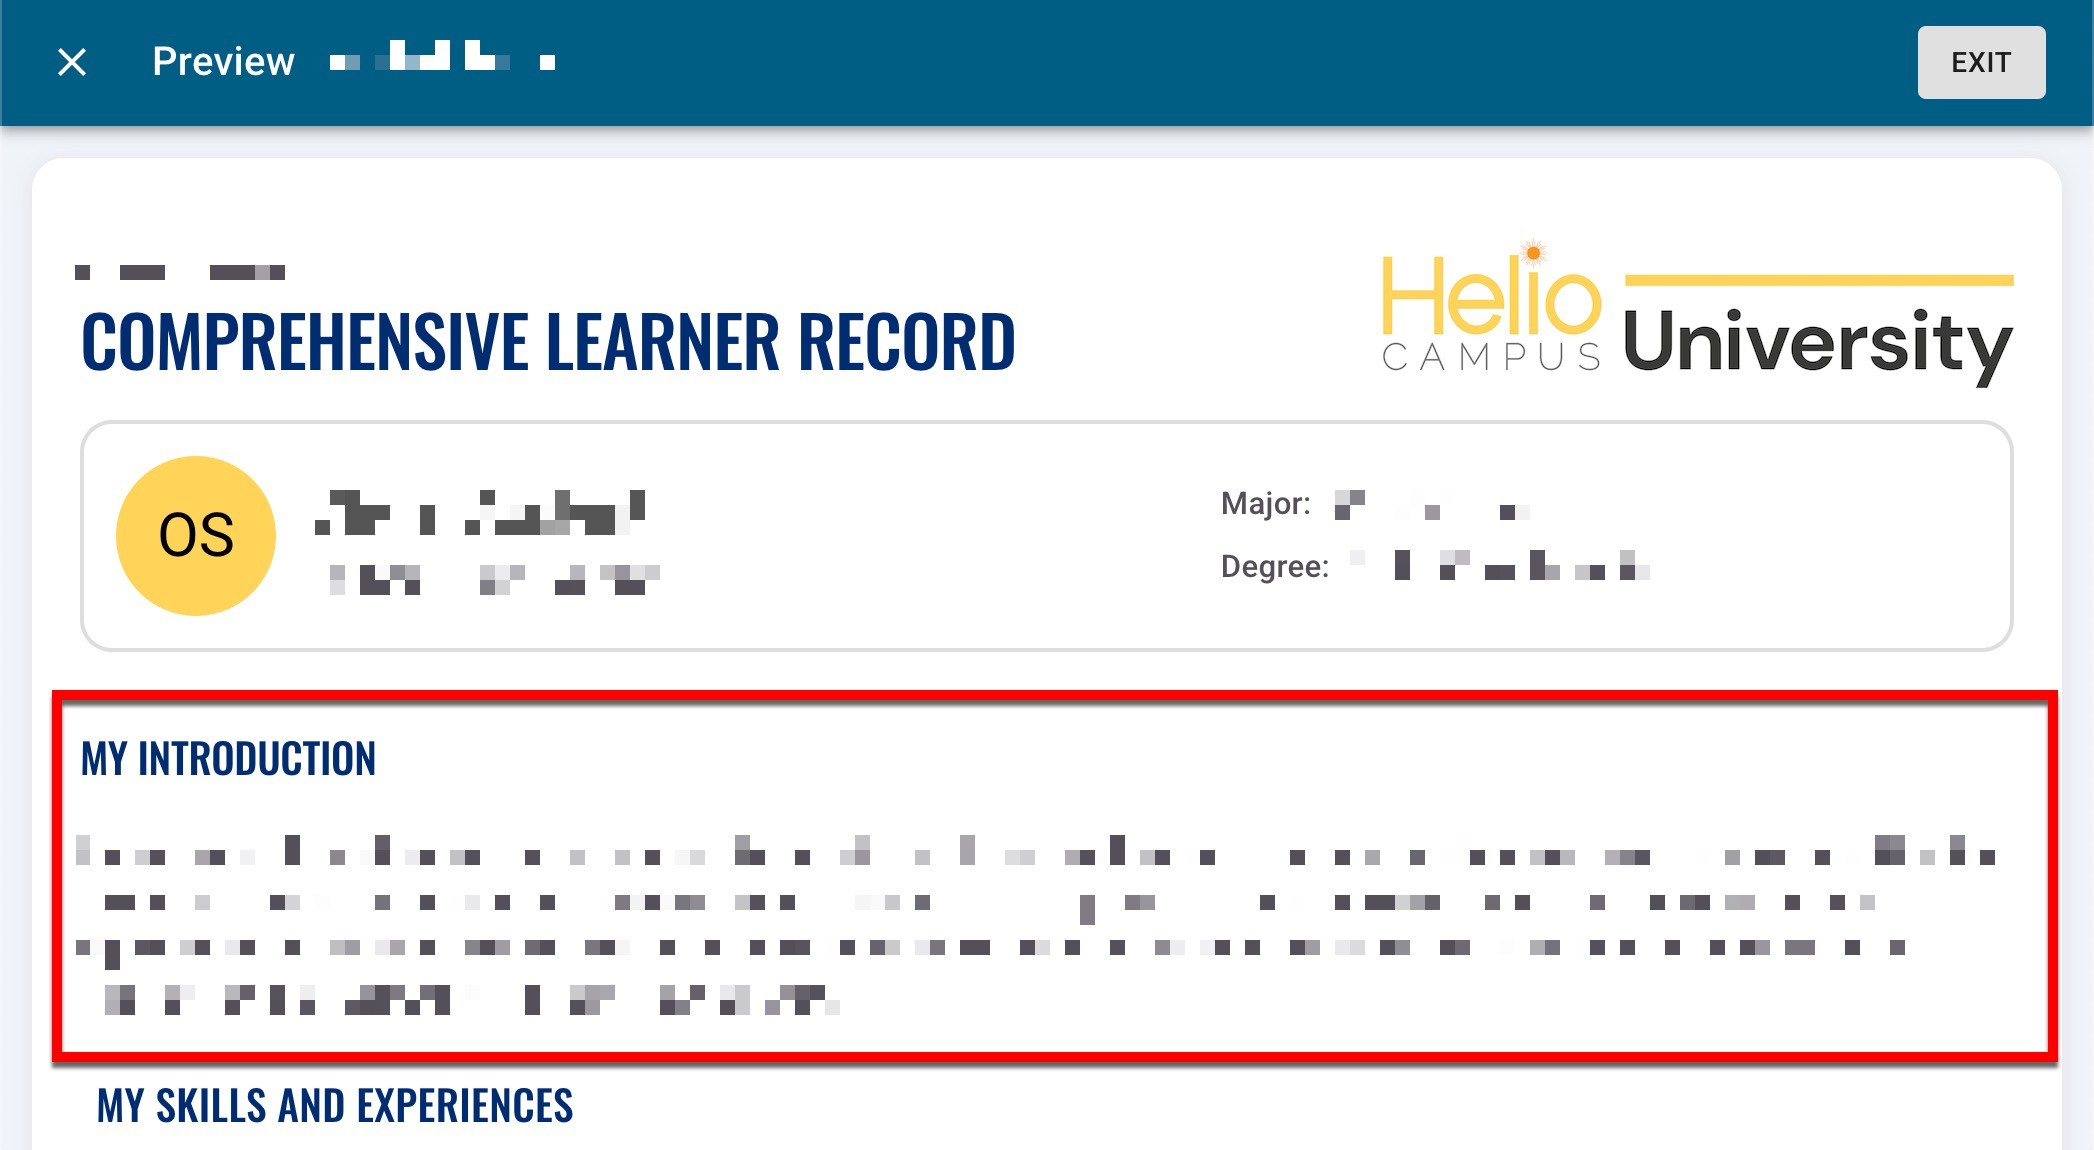
When utilizing and previewing or viewing a learning journey, the story introduction is displayed directly below the student's details.
-
-
-
Next, add digital credentials by navigating through the tabs. Skills and experiences, badges, and personal experiences can be added by clicking the add option.
-
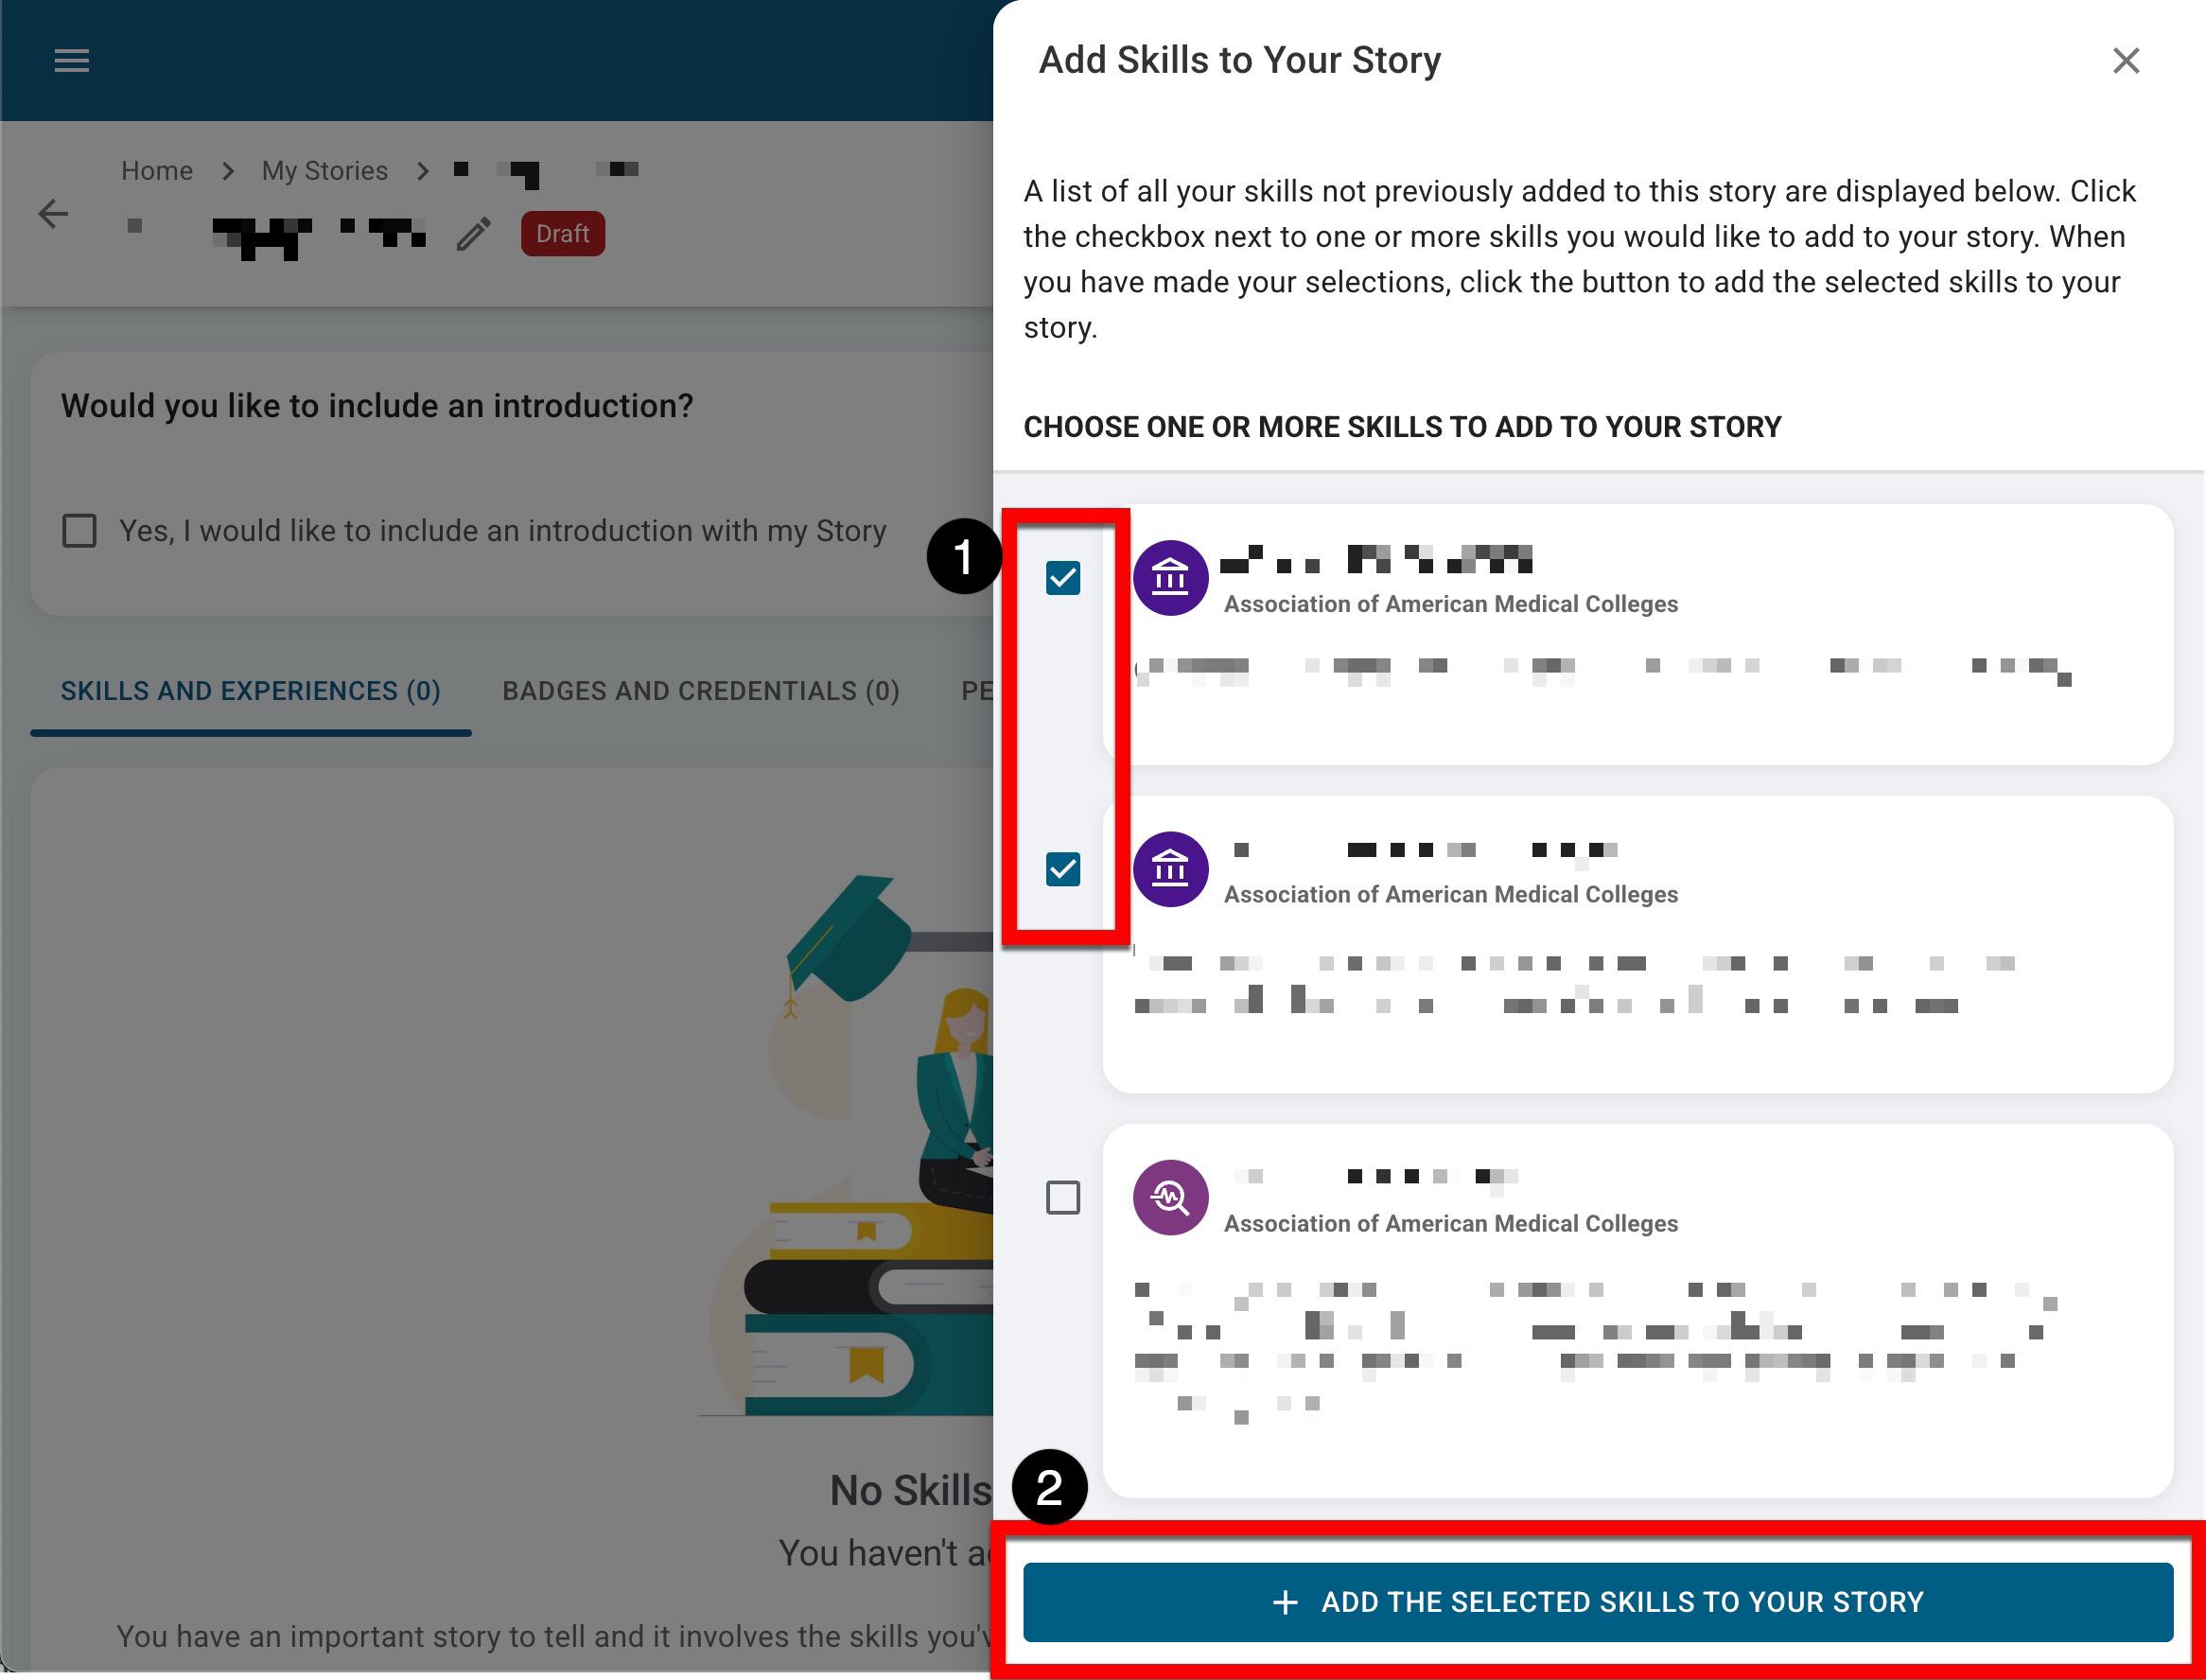
Via the drawer, make the selections to add to the story. Multiple selections can be made (1), and when selections are complete, click Add the Selected Skills to Your Story (2).
-
When adding skills, the skills displayed for selection are the same as those displayed on the Skills page. These skills are outcomes for which a student completed an assignment and was then assessed as part of a program assessment.
-
The badges displayed for selection are the same as those displayed on the Badges page, and these are the badges that a student has been awarded.
-
The personal experiences displayed are the same as those displayed on the Experiences page, and these are experiences that a student has manually uploaded.
-
-
-
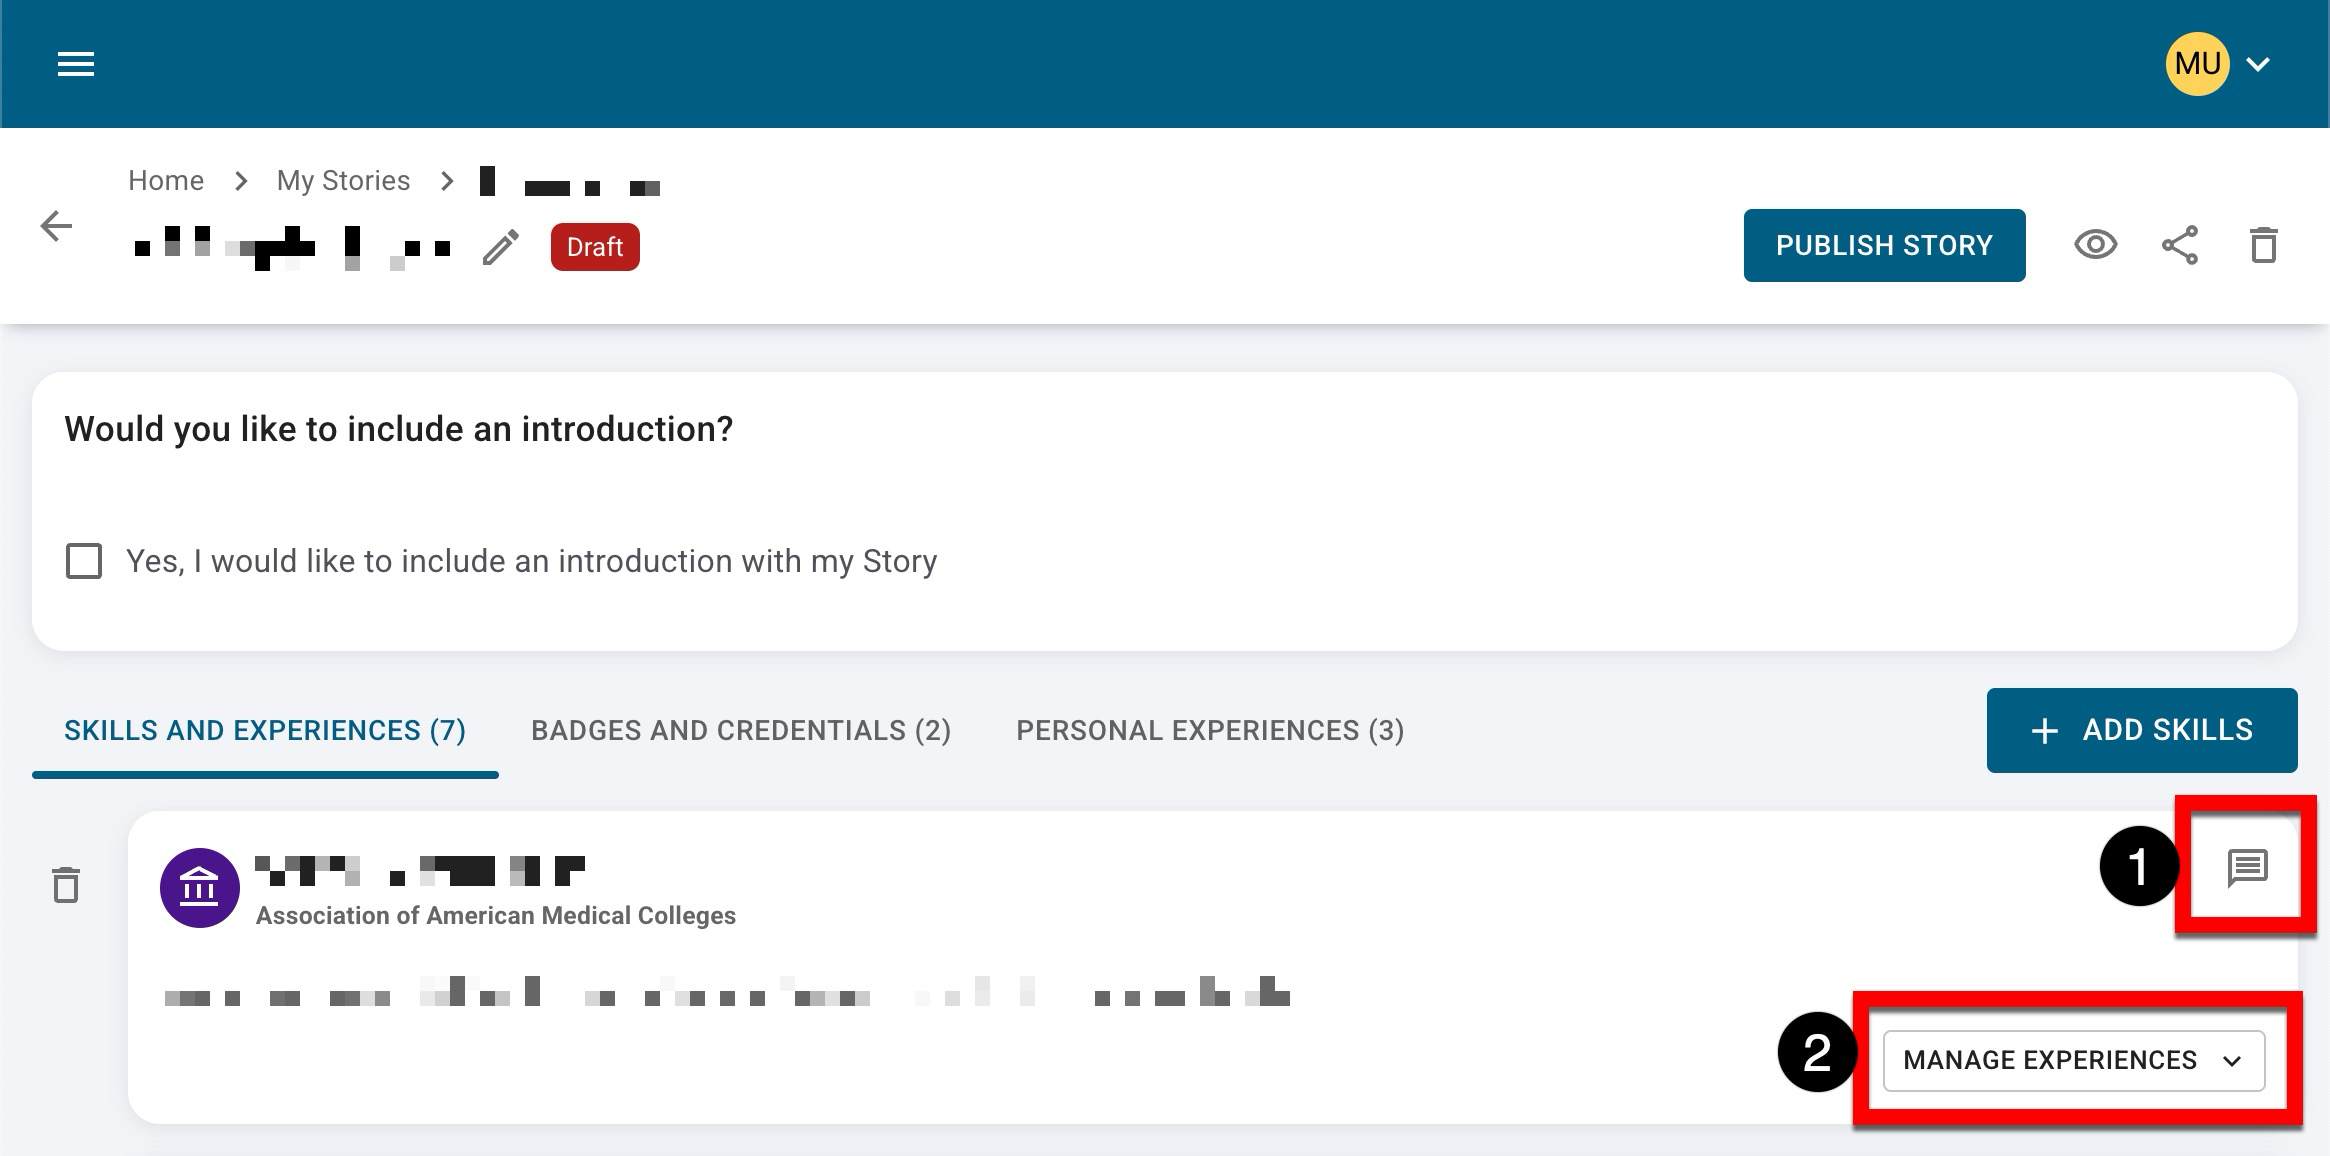
Once digital credentials have been added, reflections can be added (1) to express thoughts or provide additional context to viewers of the story. Click Manage Experiences (2) to decide which experiences associated with the credential should be included in the story.
-
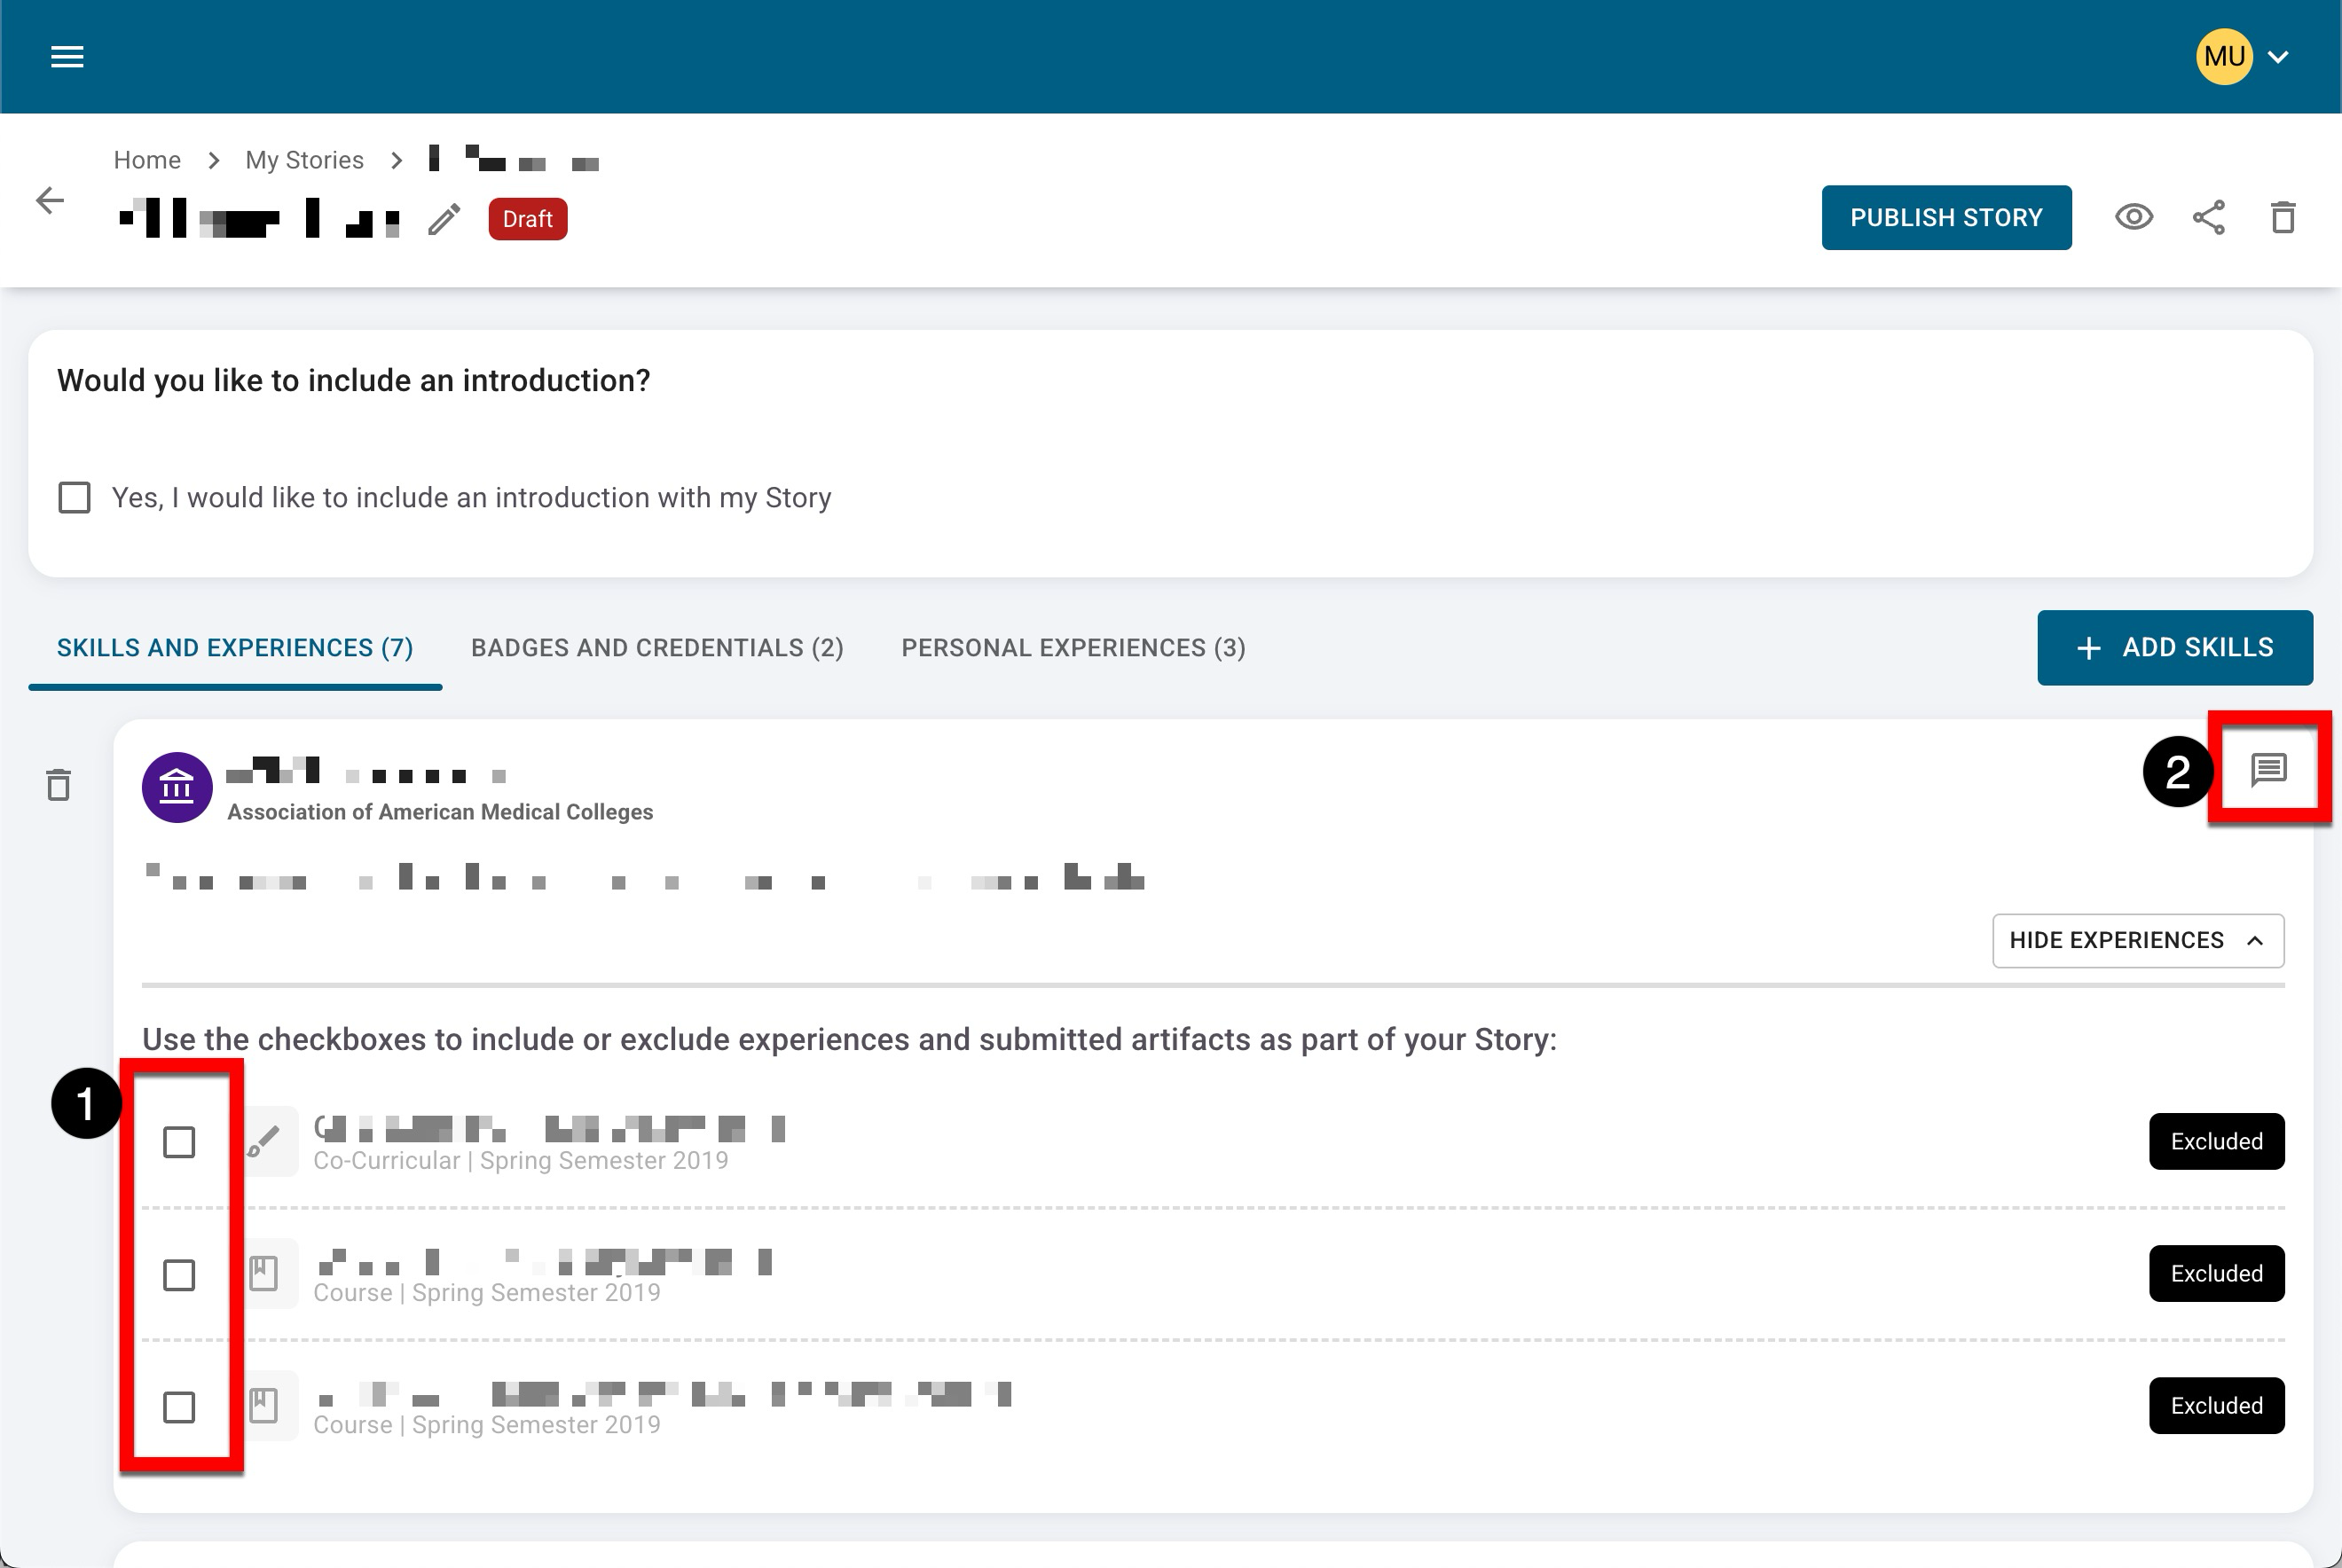
When including a digital credential, the associated artifact can be included or excluded (1); by default, they are excluded. Reflections can be added to (2) to express thoughts or provide additional context to viewers of the story.
-
-
Stories can be customized further while in Draft status until they are published. Learn more about publishing and sharing stories.