
The Outcomes Library stores all outcomes, excluding PLO or CLO levels; this includes outcomes for Institutions, Colleges, Departments, External (Accreditor), Administrative Divisions, and Administrative Units. Outcomes can be grouped into outcome sets, which can be associated with programs and related to Program Learning Outcomes (PLOs) or mapped directly to courses and Course Learning Outcomes (CLOs). Outcome sets can also be included in Data Collection for assessment planning and reporting. Utilization of the Outcomes Library is limited to Institution, College, and Department Admins.
|
|
|---|---|
|
1 |
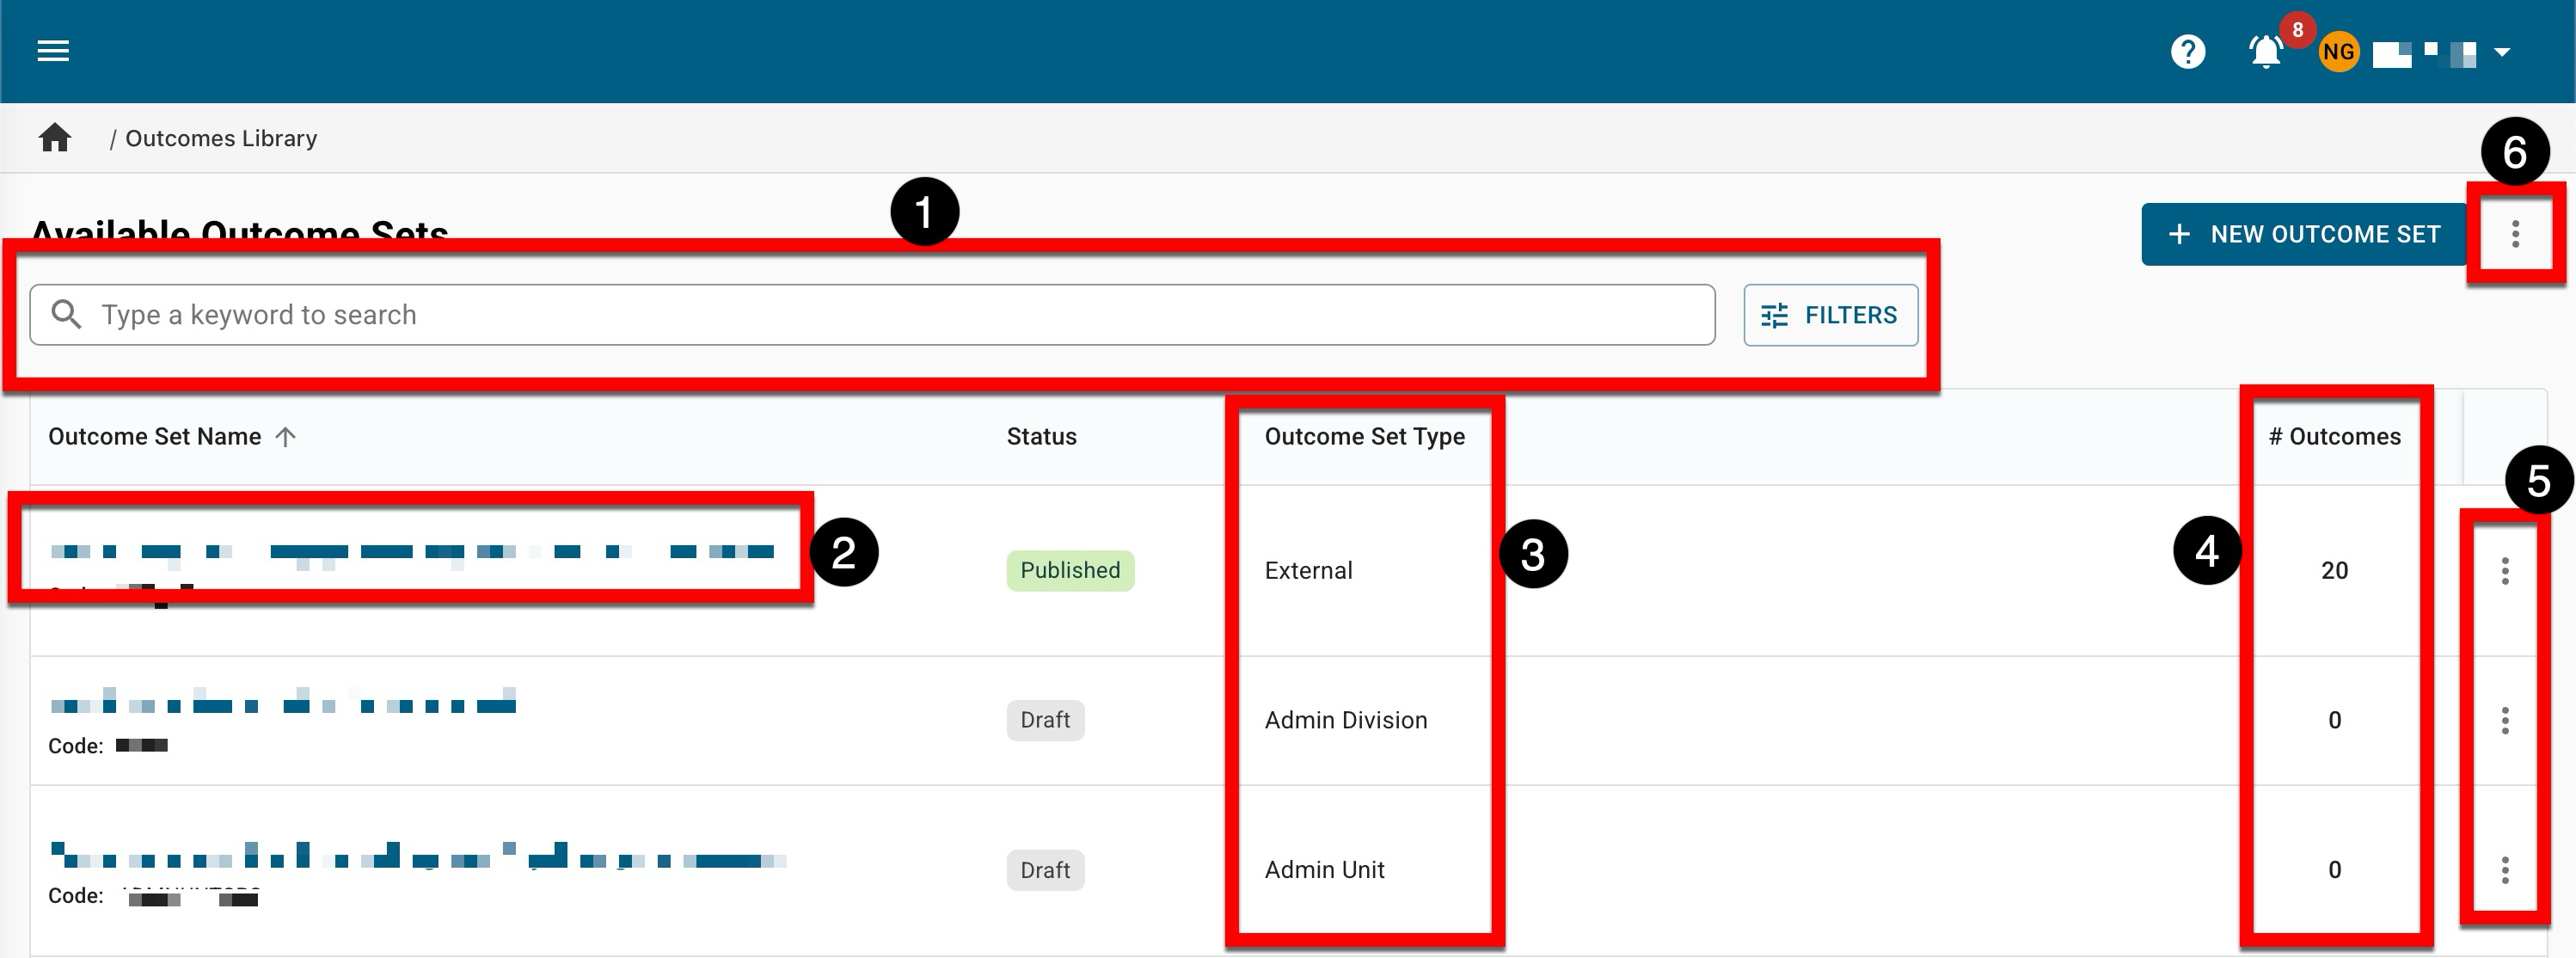
Search functionality is available, and by clicking the Filters option, specific filters can be applied. Once filters have been applied, they will display below the search bar and can be removed individually (1) or in bulk (2). 
|
|
2 |
Clicking the name of an outcome set will display the Outcome Set Homepage. |
|
3 |
When outcome sets are created, they are assigned a type; the Outcomes Library Manager is colored-coded based on the type of outcome set.
|
|
4 |
The number of outcomes added to an outcome set via the Outcome Designer. |
|
5 |
By expanding the kebab and selecting View Details, a drawer will open to display quick glance information, including the owner, related student outcomes, associated program, and more. |
|
6 |
The Outcomes Library can be exported to CSV format. |
Outcome Set Statuses
|
Draft |
When an outcome set is first created, it will be in Draft status. In this status, edits can be performed via the Details and Outcome Designer pages. Via the Outcome Set Homepage, Publish can be clicked to transition an outcome set to Published status. 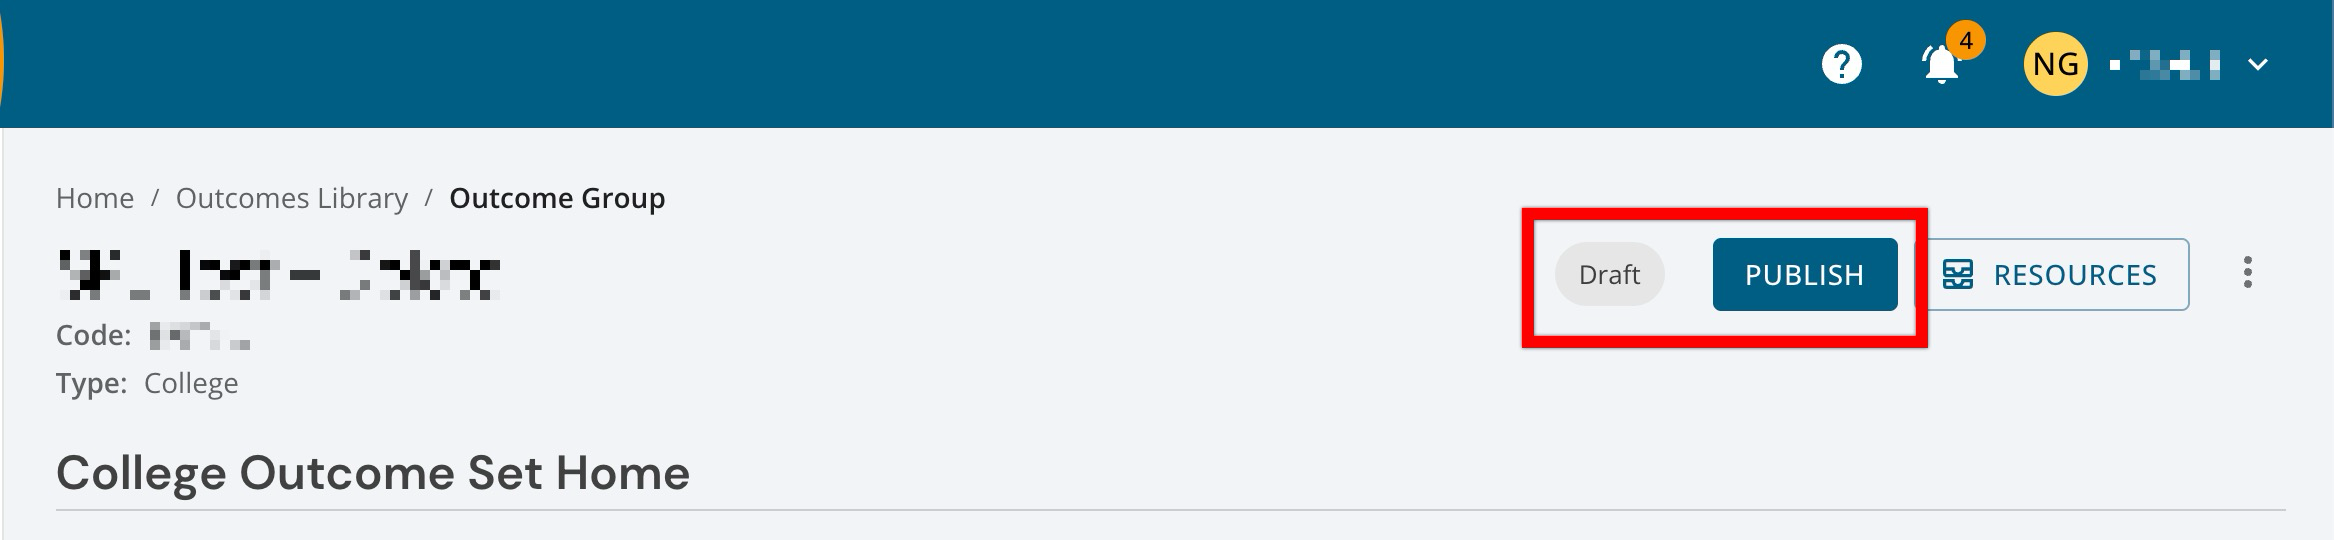
|
|
Published |
In Published status, no edits can be made to the Details or Outcome Designer pages. To edit a published outcome set, click Revise on the Outcome Set Homepage to transition it to In Revision status. 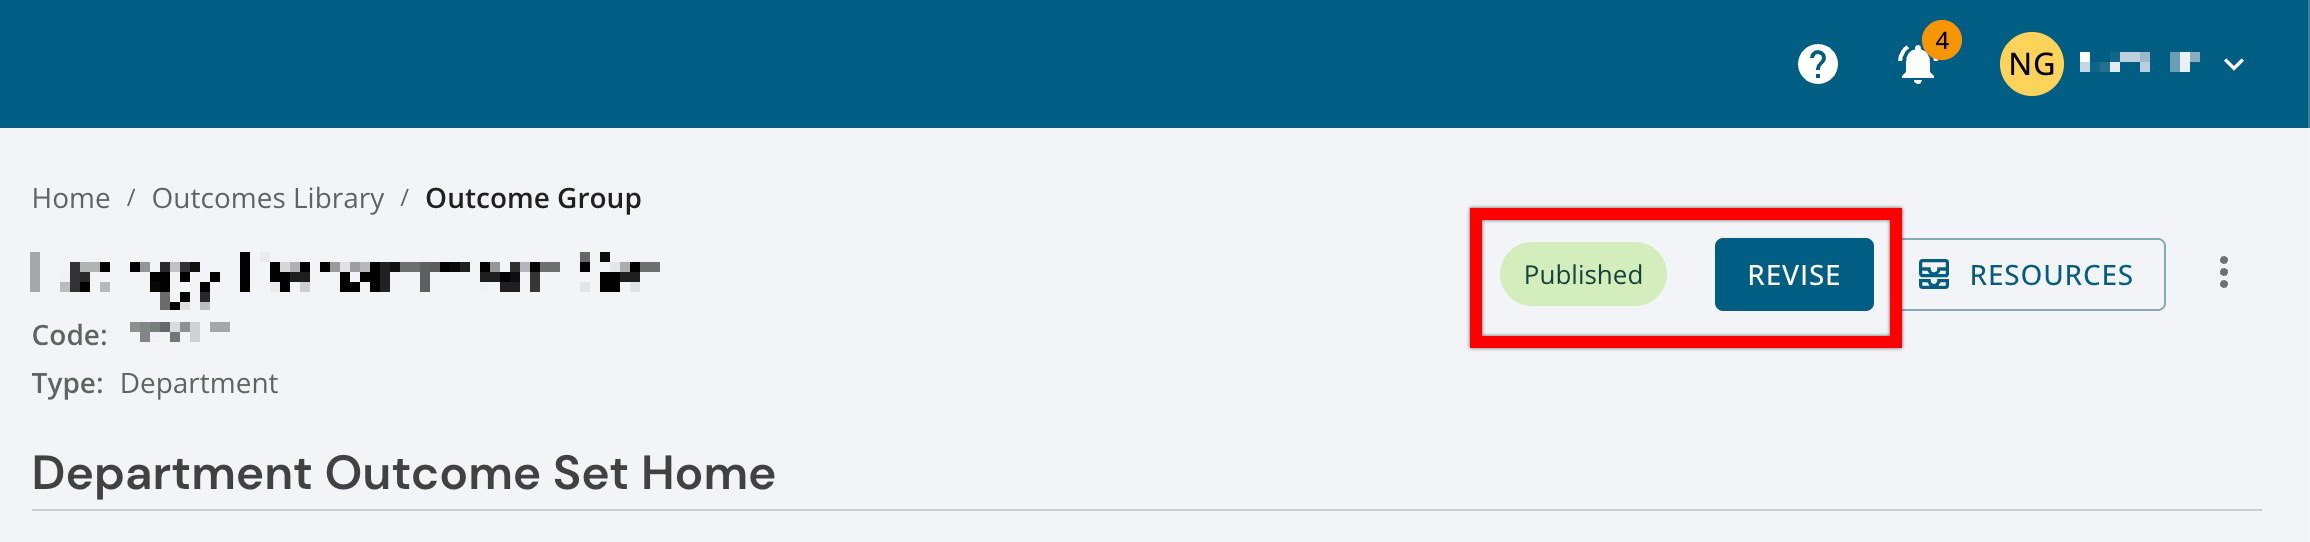
Once in revision, the Outcome Sets Library will display two versions of the same outcome set, one in Published status and one in In Revision status. 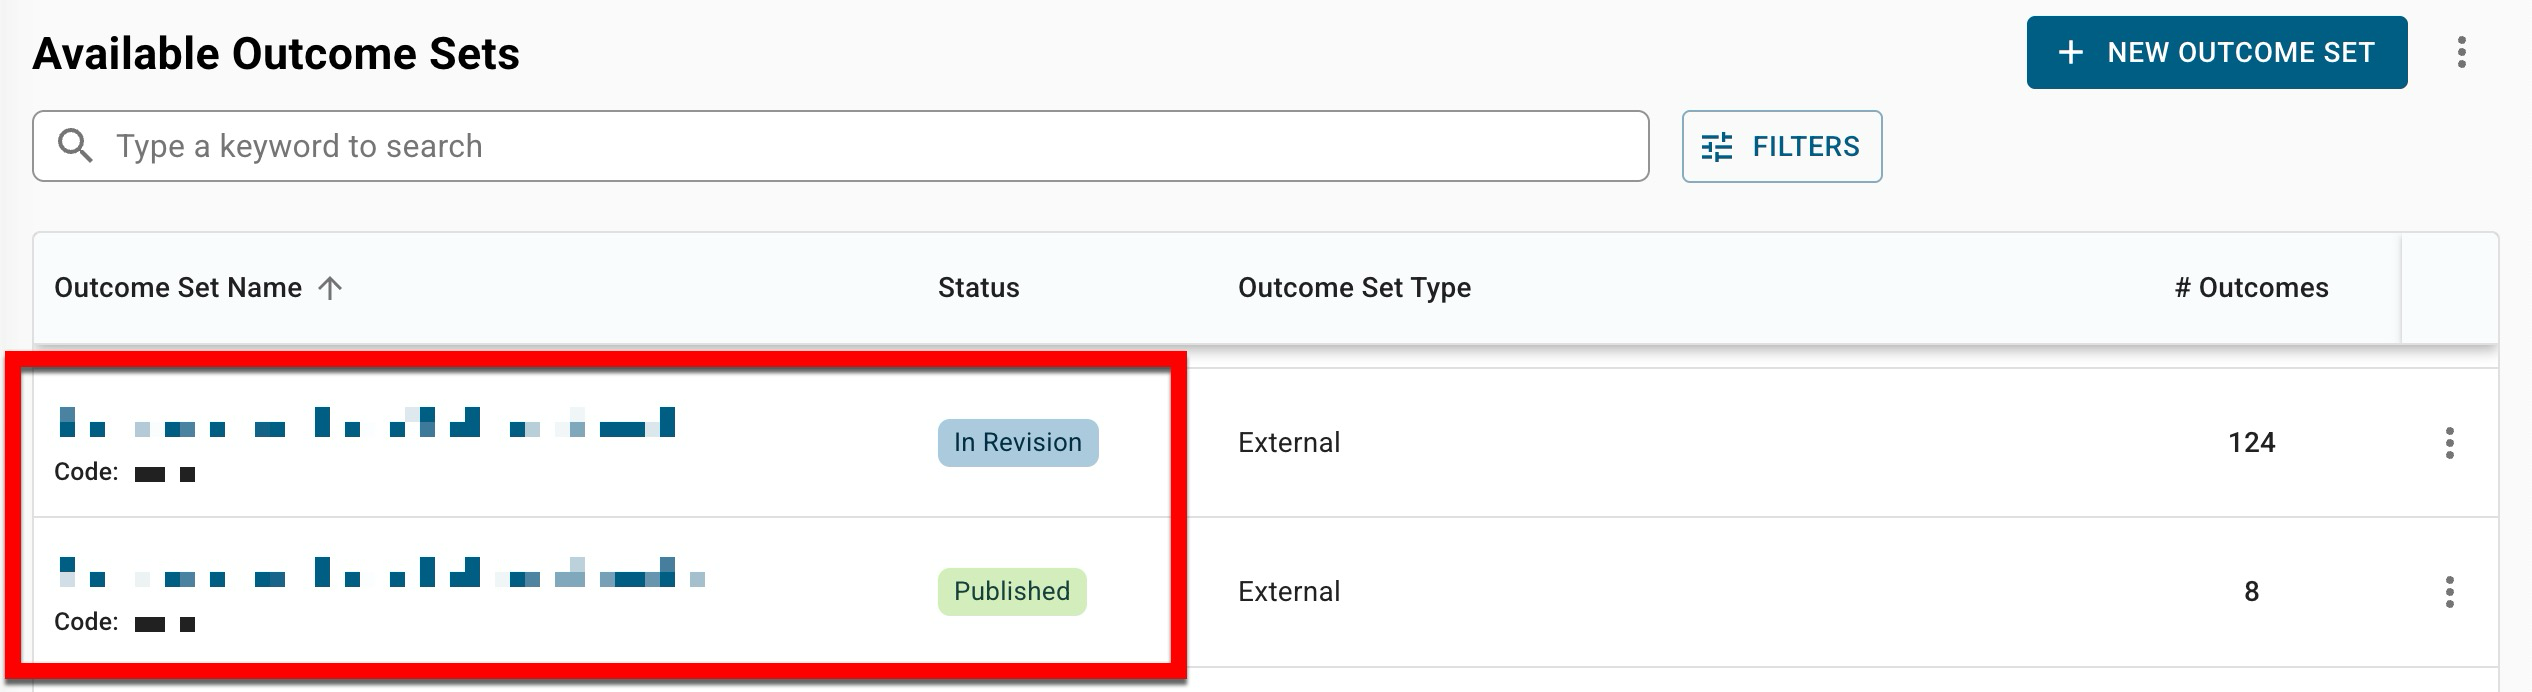
If the published version is viewed for an outcome set that is currently in revision, the Revised Version Available link on the Outcome Set Homepage can be clicked to navigate to the revision. 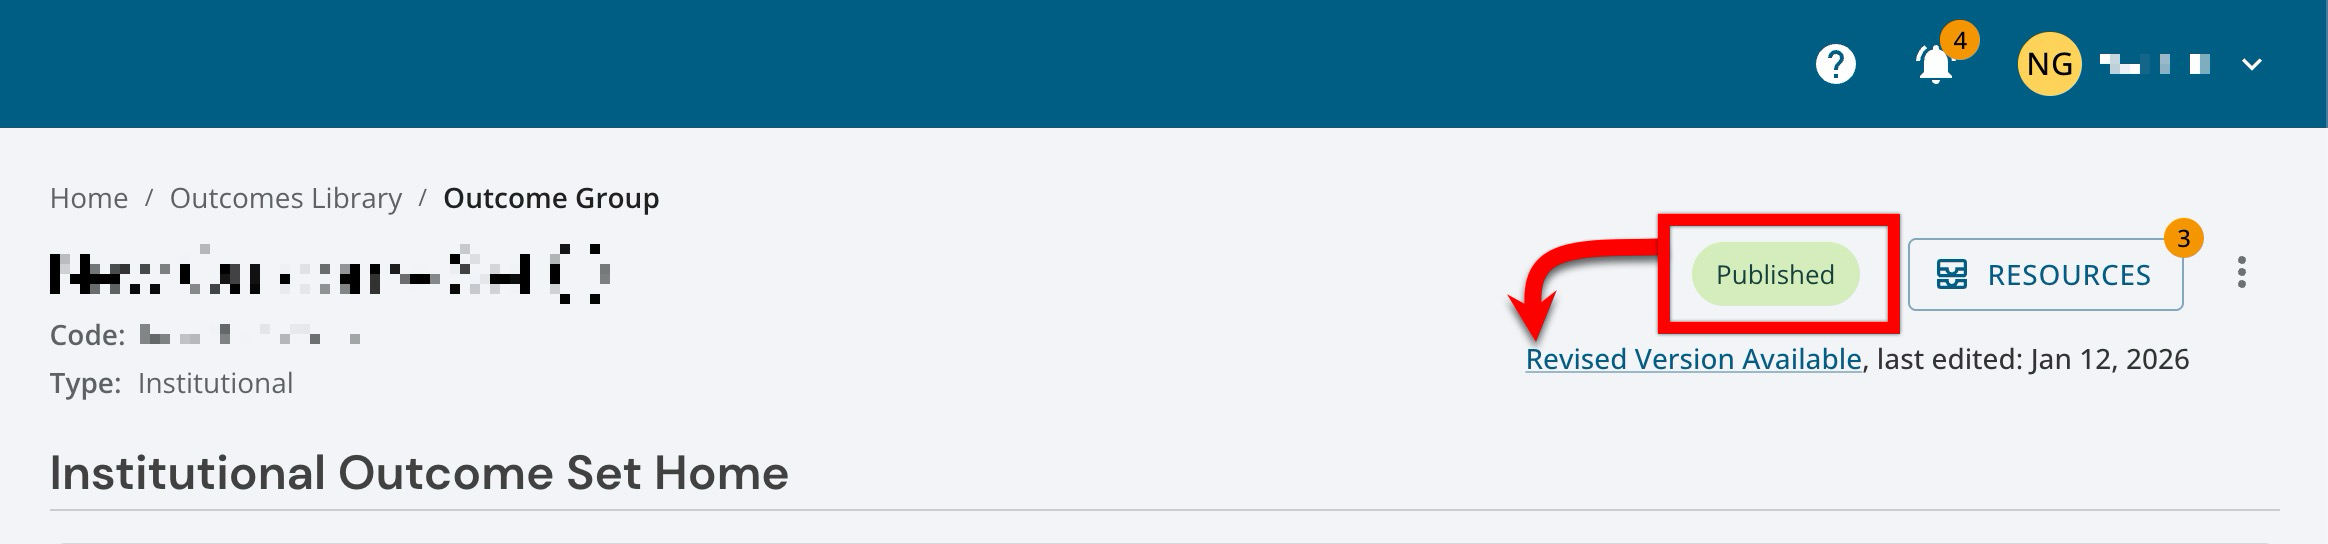
Published outcome sets cannot be deleted, although they can be archived via the Outcome Set Homepage. 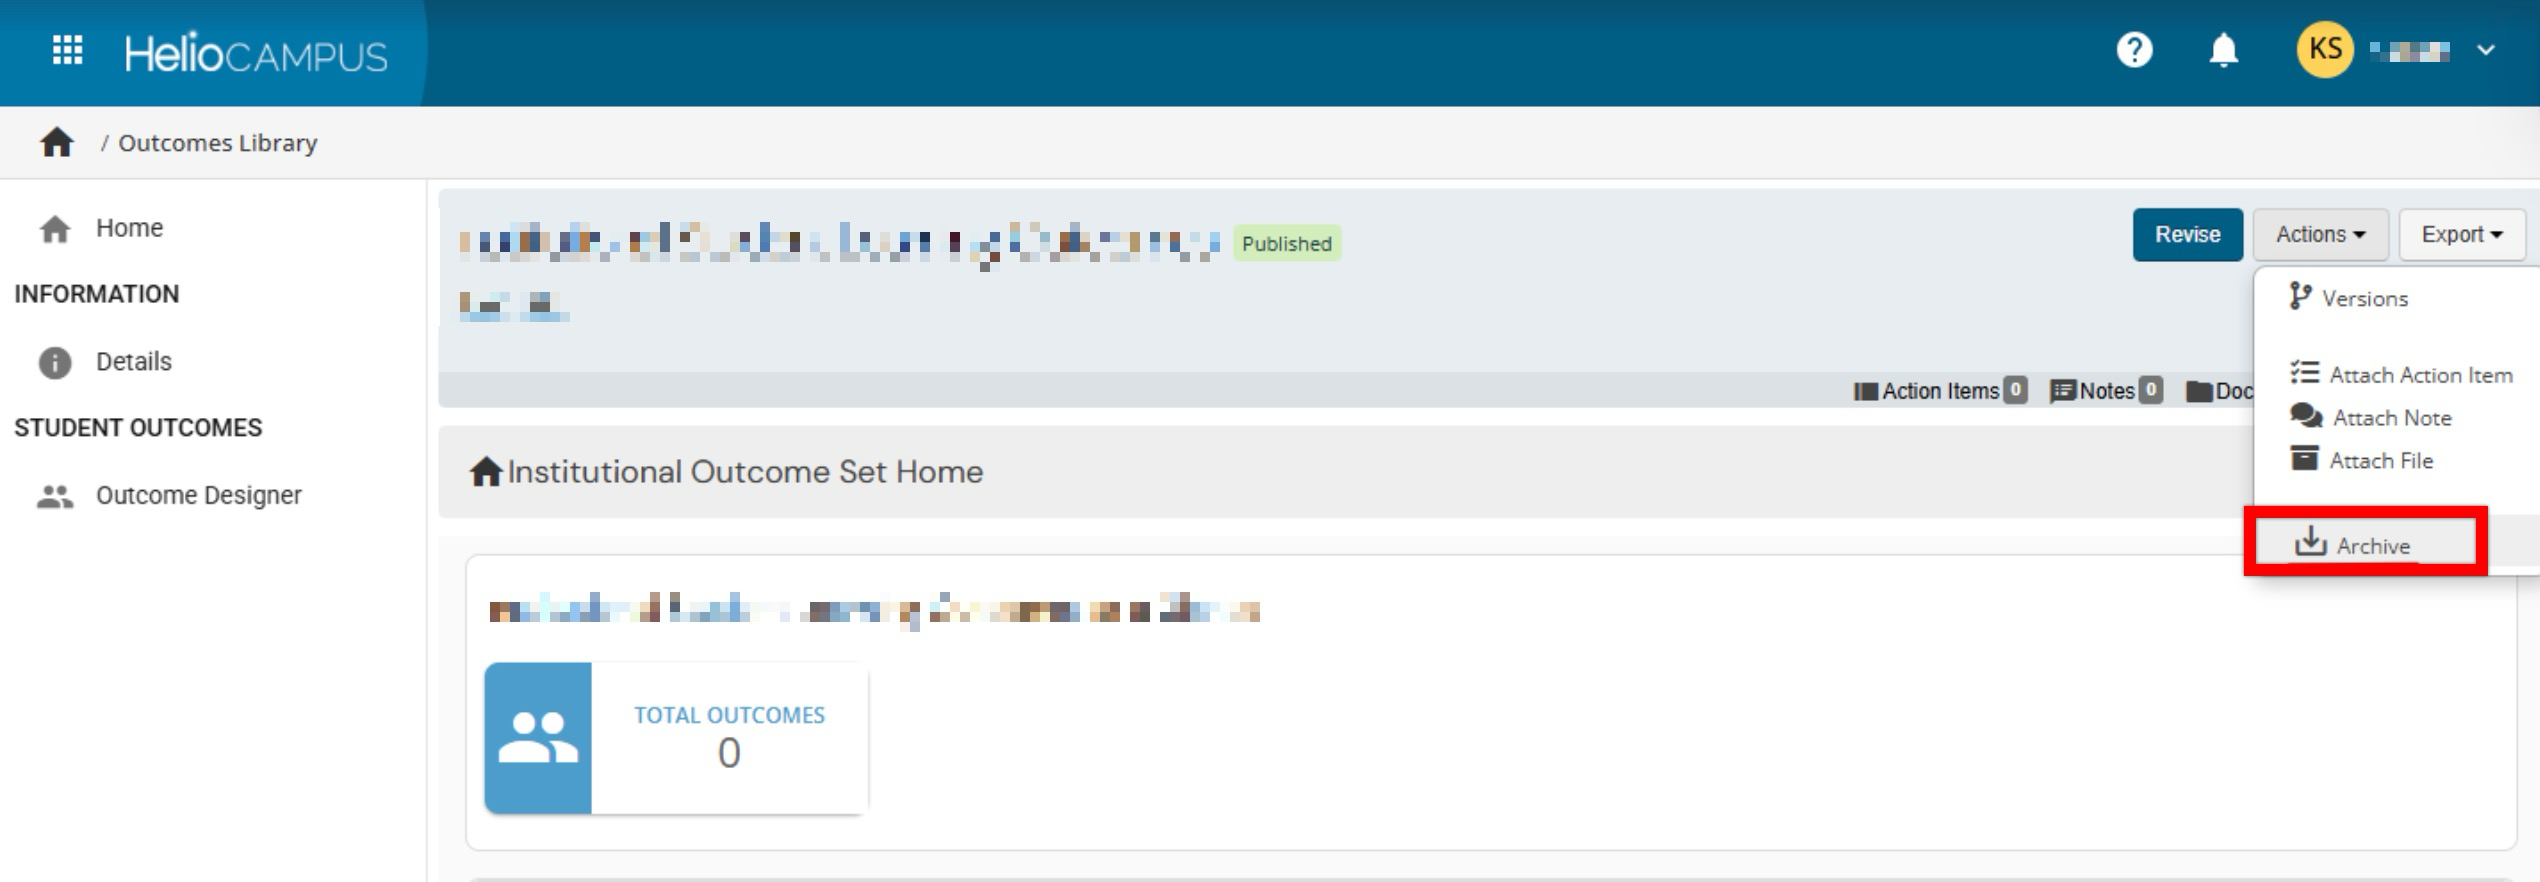
|
|
In Revision |
While in In Revision status, edits can be made to the Details page except for the Outcome Set field(s) used to define the outcome set type. During revision, edits can be made to associated outcomes via the Outcome Designer page. Once edits are complete, revised outcome sets can be published via the Outcome Set Homepage by clicking Publish. Clicking the Revised Version Available link on the Outcome Set Homepage will navigate to the published version. 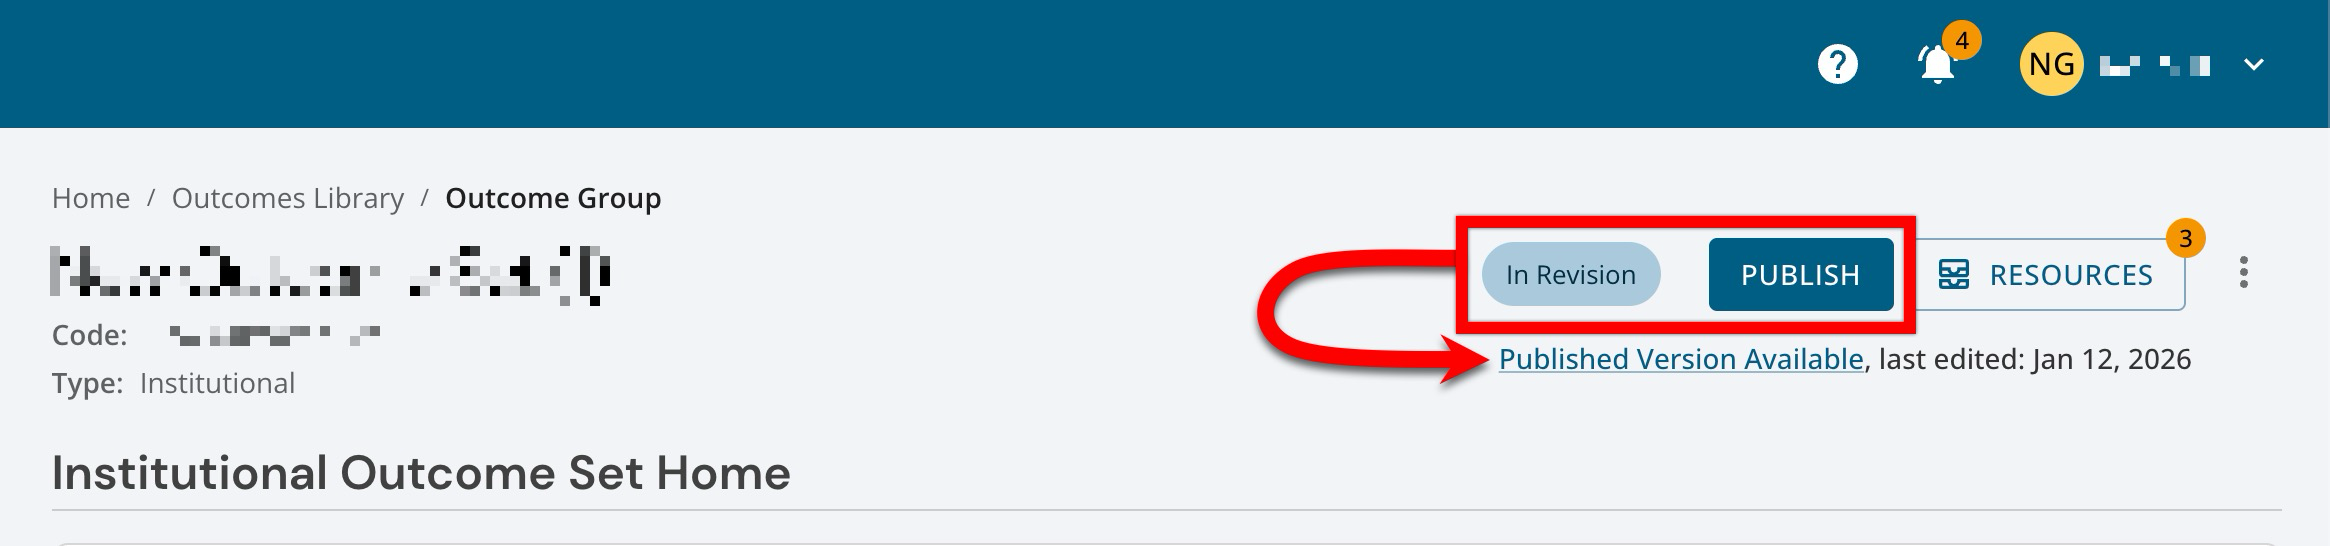
Product Tip Revising outcome sets will not affect previously collected assessment data. To update associated programs with revised and republished outcome sets, the Program Outcome Sets page should be updated for each associated program. |
|
Archived |
This status is an irreversible status, and archived outcome sets cannot be used in Program Assessment. |
Outcome Set Homepage
|
|
|---|---|
|
1 |
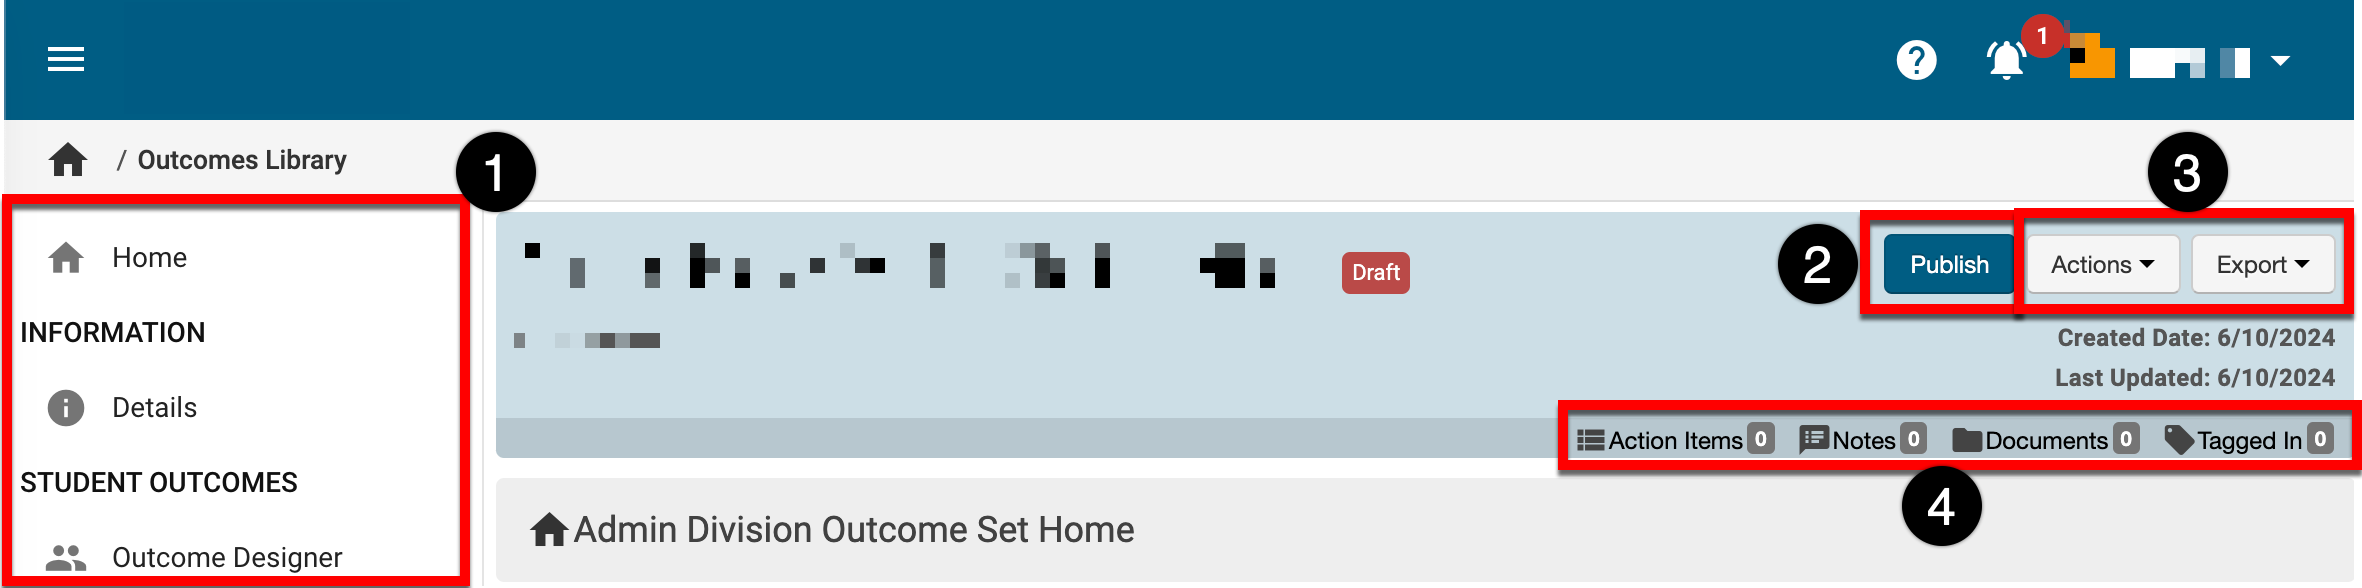
The left-hand menu can be used to navigate through configuration pages for an outcome set: Details: Outcome set information such as code and name can be edited while in Draft or In Revision status. Outcome Designer: In Draft or In Revision status, outcomes can be created and associated with an outcome set. |
|
2 |
Depending on the status of an outcome set, the actionable button will either allow for publication or revision of an outcome set. |
|
3 |
Expanding the Actions drop-down allows users to view past versions of an outcome set by selecting Versions. Action items, notes, and files can be attached to an outcome set by selecting the applicable Attach option. Selecting Delete will permanently delete an outcome set, which is an irreversible action. |
|
4 |
The count of action items, notes, documents, and locations where an outcome set has been tagged. This information can be viewed in more detail by scrolling to the bottom of the Outcome Set Homepage; each tab (1) can be clicked to view existing items. New items, notes, documents, and tags can be added by clicking the Add button. 
|