Institutions can access reports to support data-driven decision-making by navigating to Main Menu> Report Library. The Report Library includes a series of reports that users (primarily faculty and Admins) can easily configure to gather data on recurring sets of specifications or institutional interests. Some reports are available at the press of a button, while others offer a deeper dive into data for closer analysis. Users assigned read-only access to the Report Library do not have access to the standard export and download functionality. Users assigned the read-only user role cannot export any report outputs.
All reports are designed to meet WCAG 2.2 Level AA accessibility standards. This means reports are built to support accessible navigation, readable structure, appropriate color contrast, keyboard accessibility, and compatibility with assistive technologies.
|
|
|---|---|
|
1 |
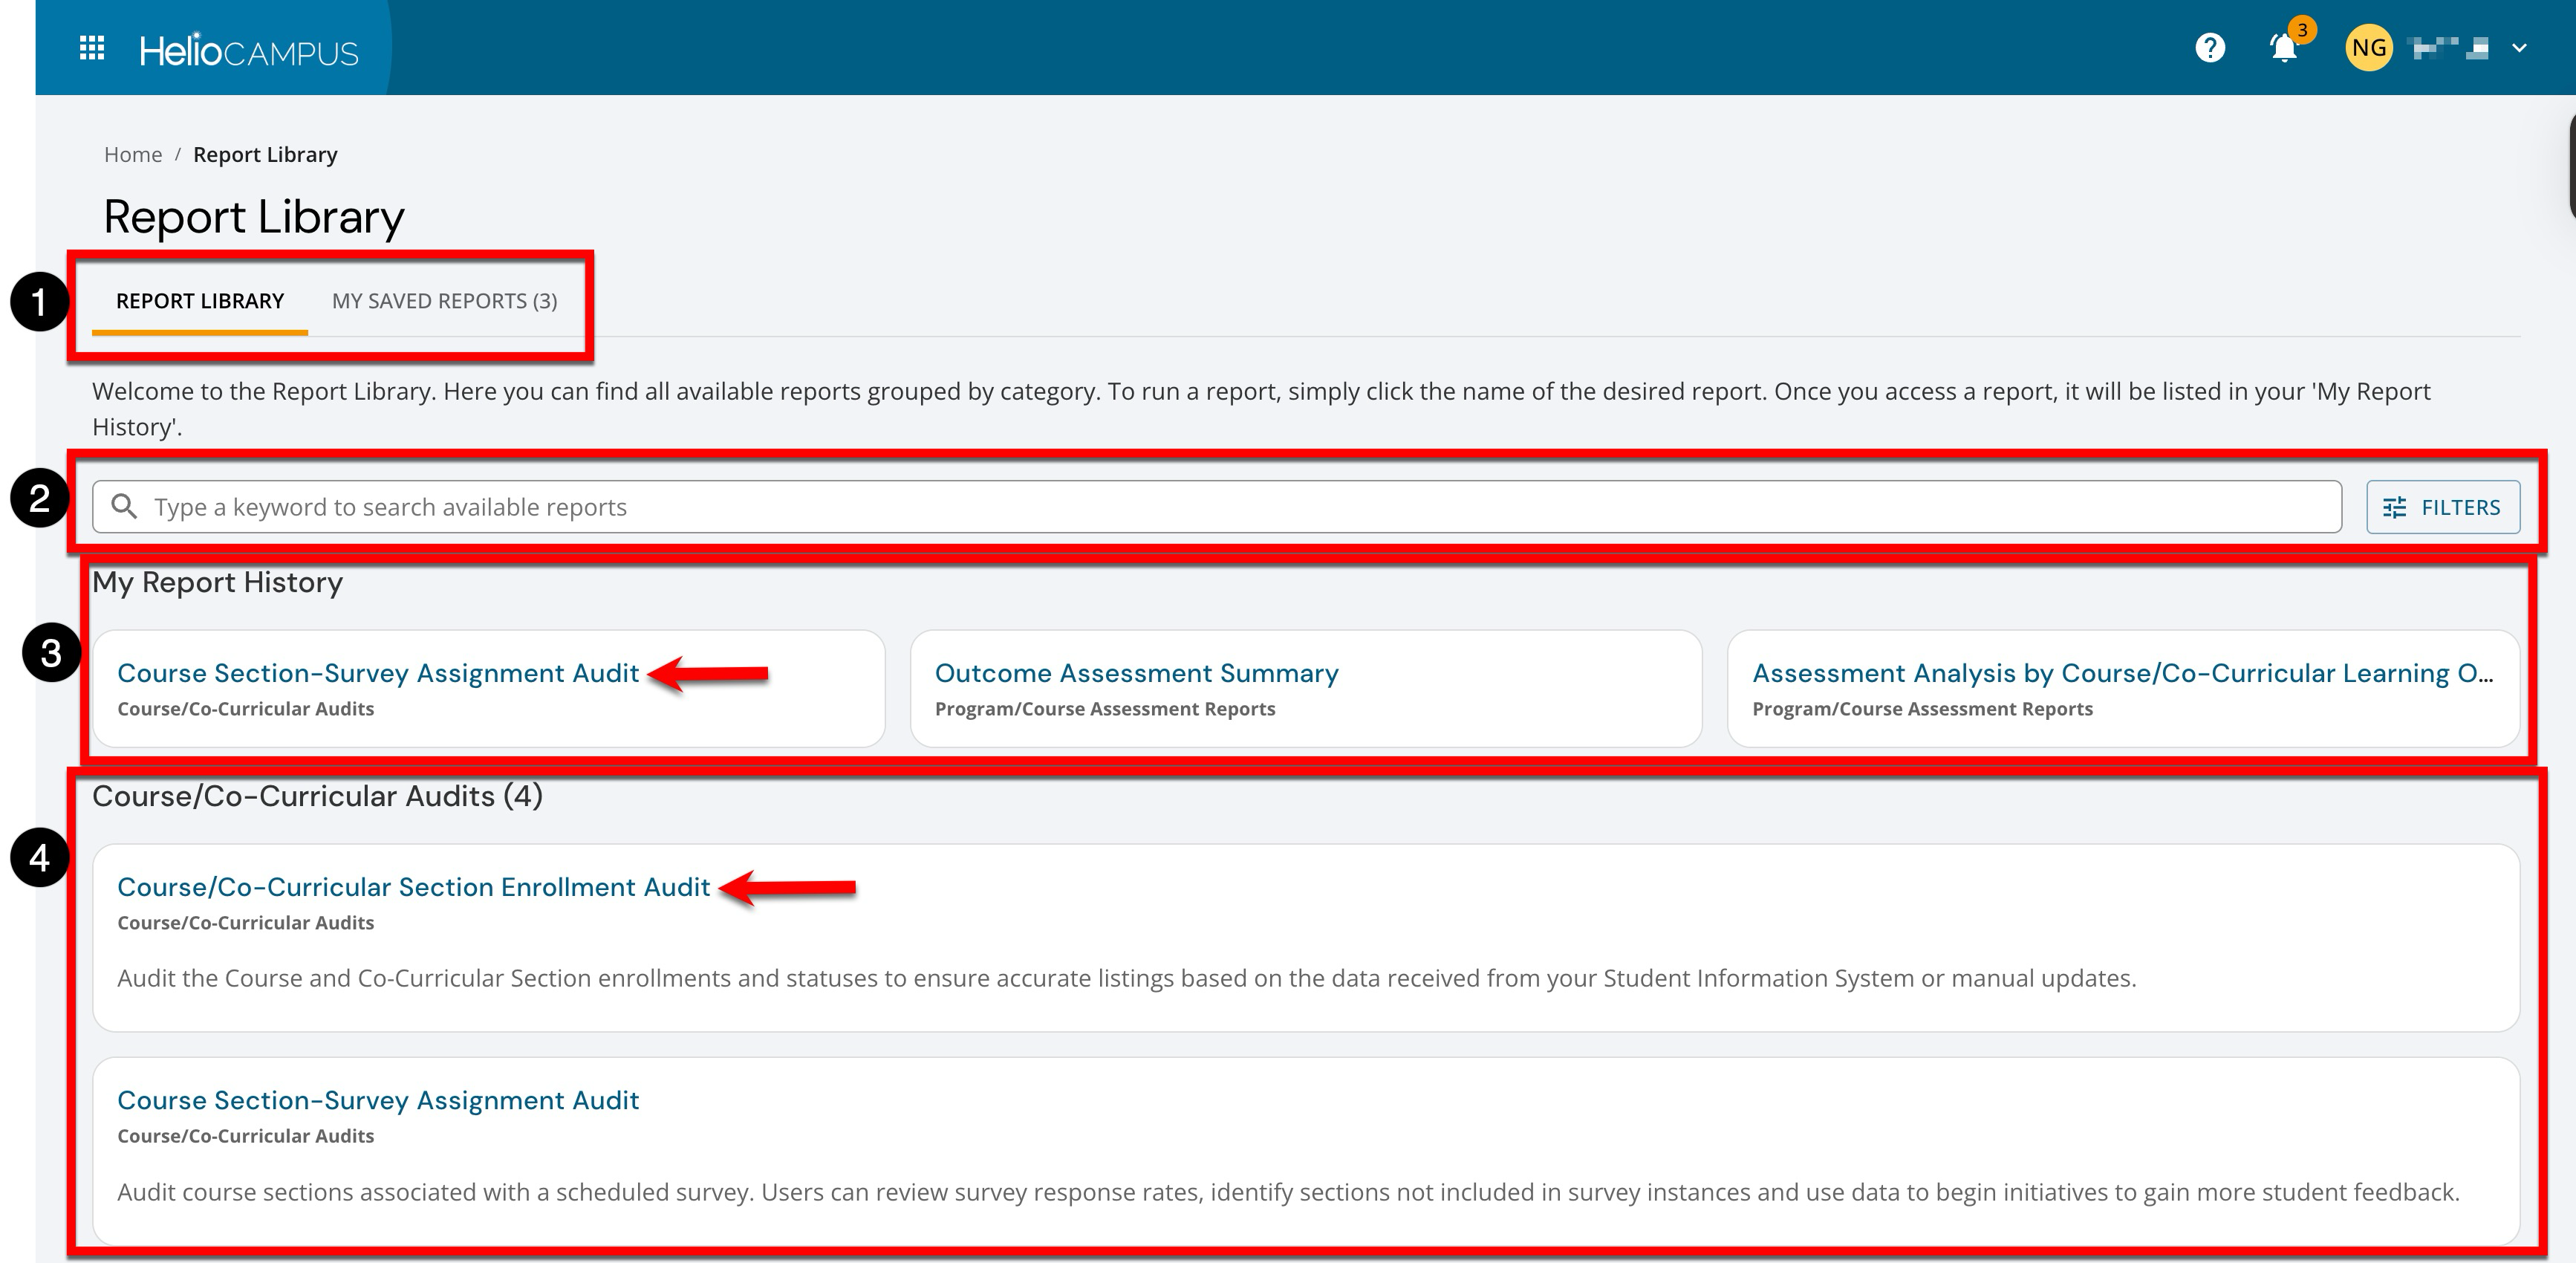
Tabs can be used to switch the display between the Report Library and the My Saved Reports pages. |
|
2 |
Search functionality is available, and clicking the Filters option allows specific filters to be applied. Once filters have been applied, they will display below the search bar and can be removed individually (1) or in bulk (2). 
|
|
3 |
My Report History will display up to the last six previously viewed reports. Clicking a report name displays the report parameters that can be configured, along with the option to run/generate the report. |
|
4 |
Categories organize reports, and each category shows the total count of reports available in that category. Clicking a report name displays the report parameters that can be configured, along with the option to run/generate the report. |
Saving Report Parameters
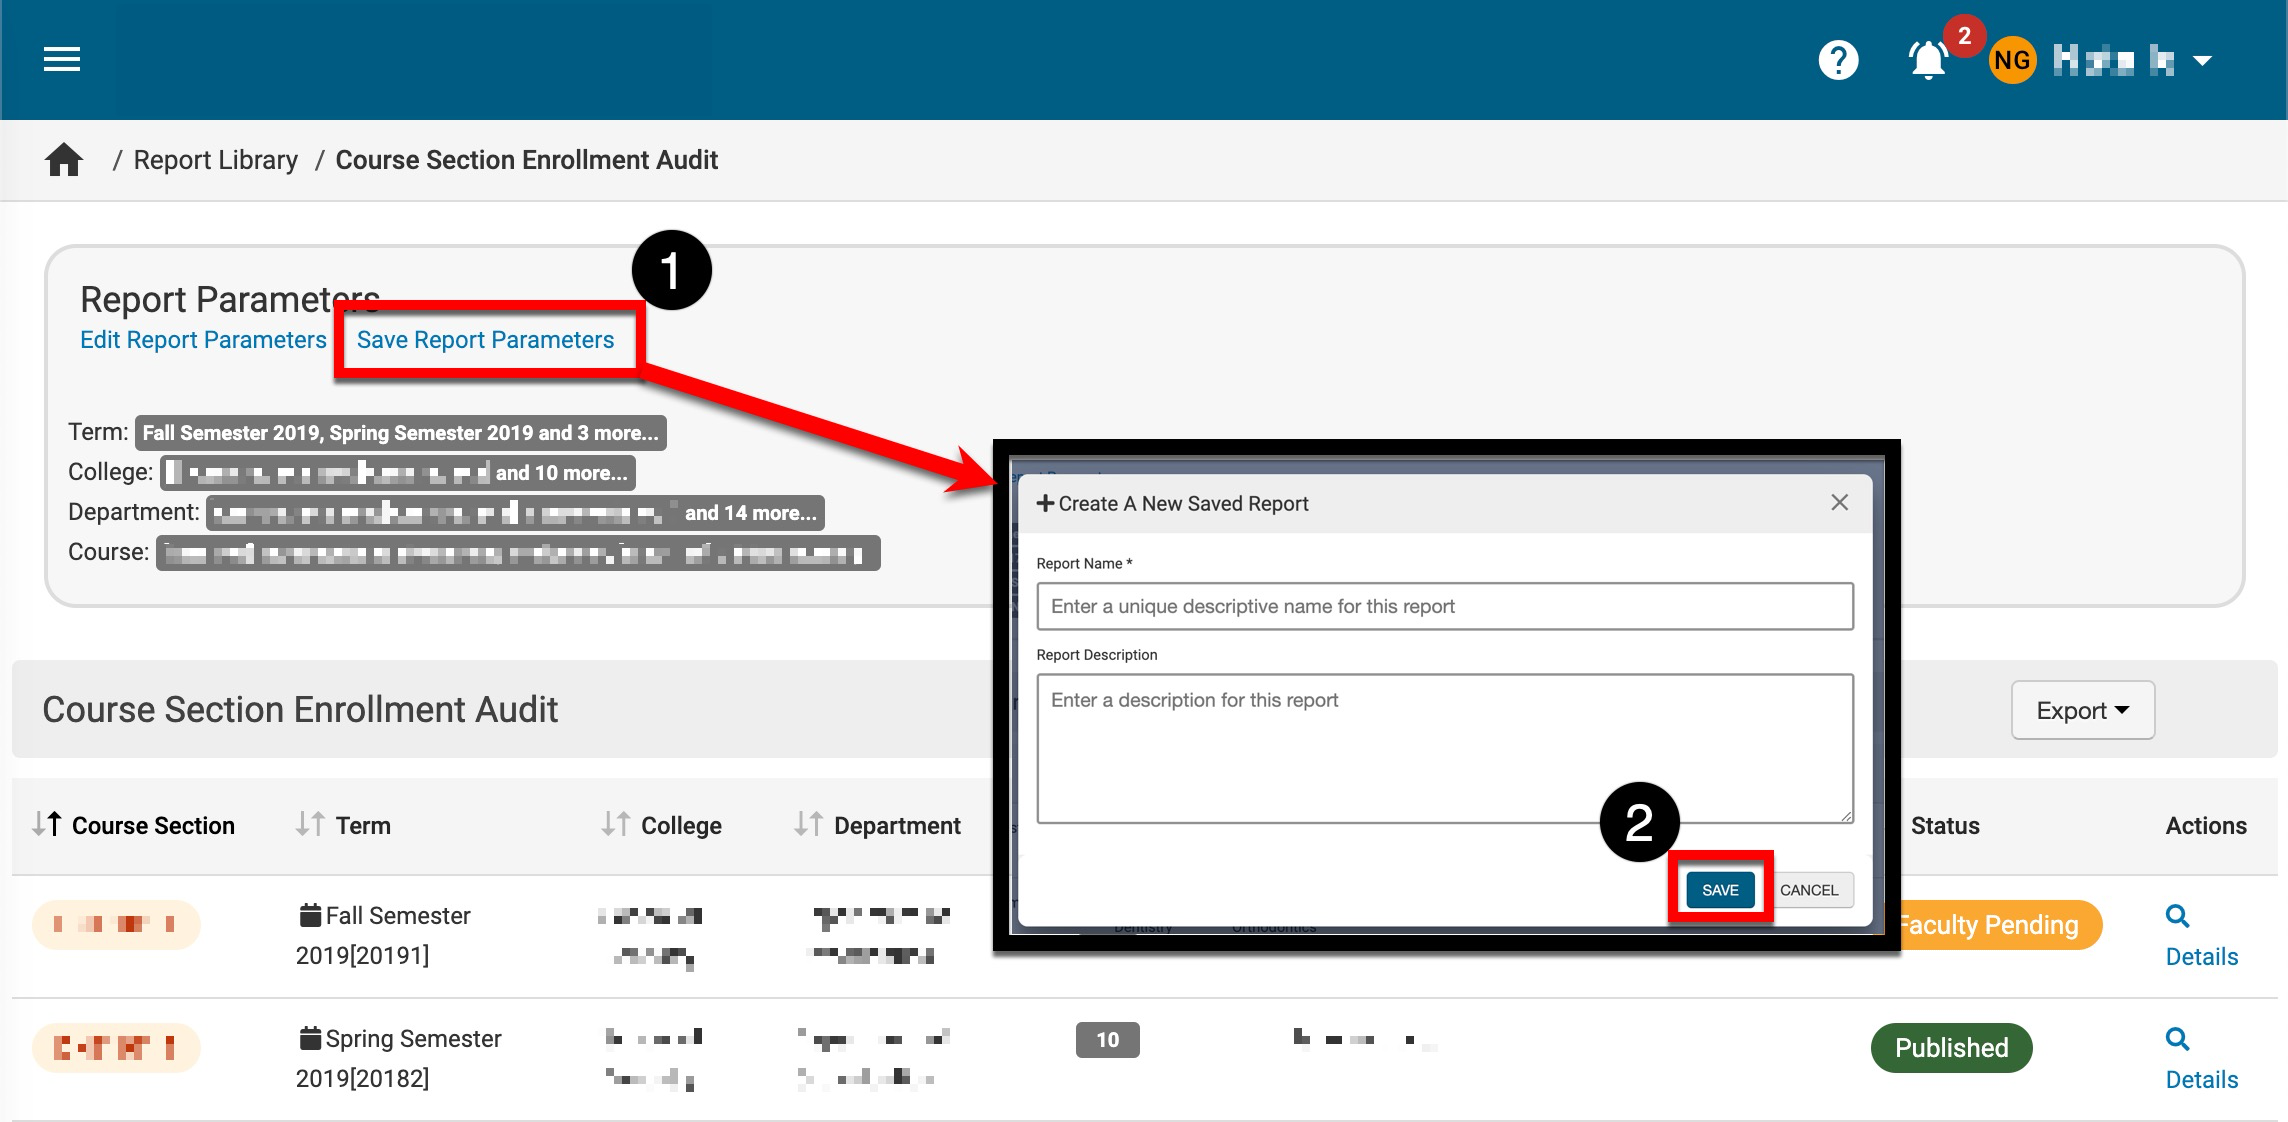
Once a report has been generated, the configured report can be saved for easier access by clicking Save Report Parameters (1). Via the +Create a New Saved Report popup, a custom name is required, and optionally, a description can be entered before clicking Save (2).
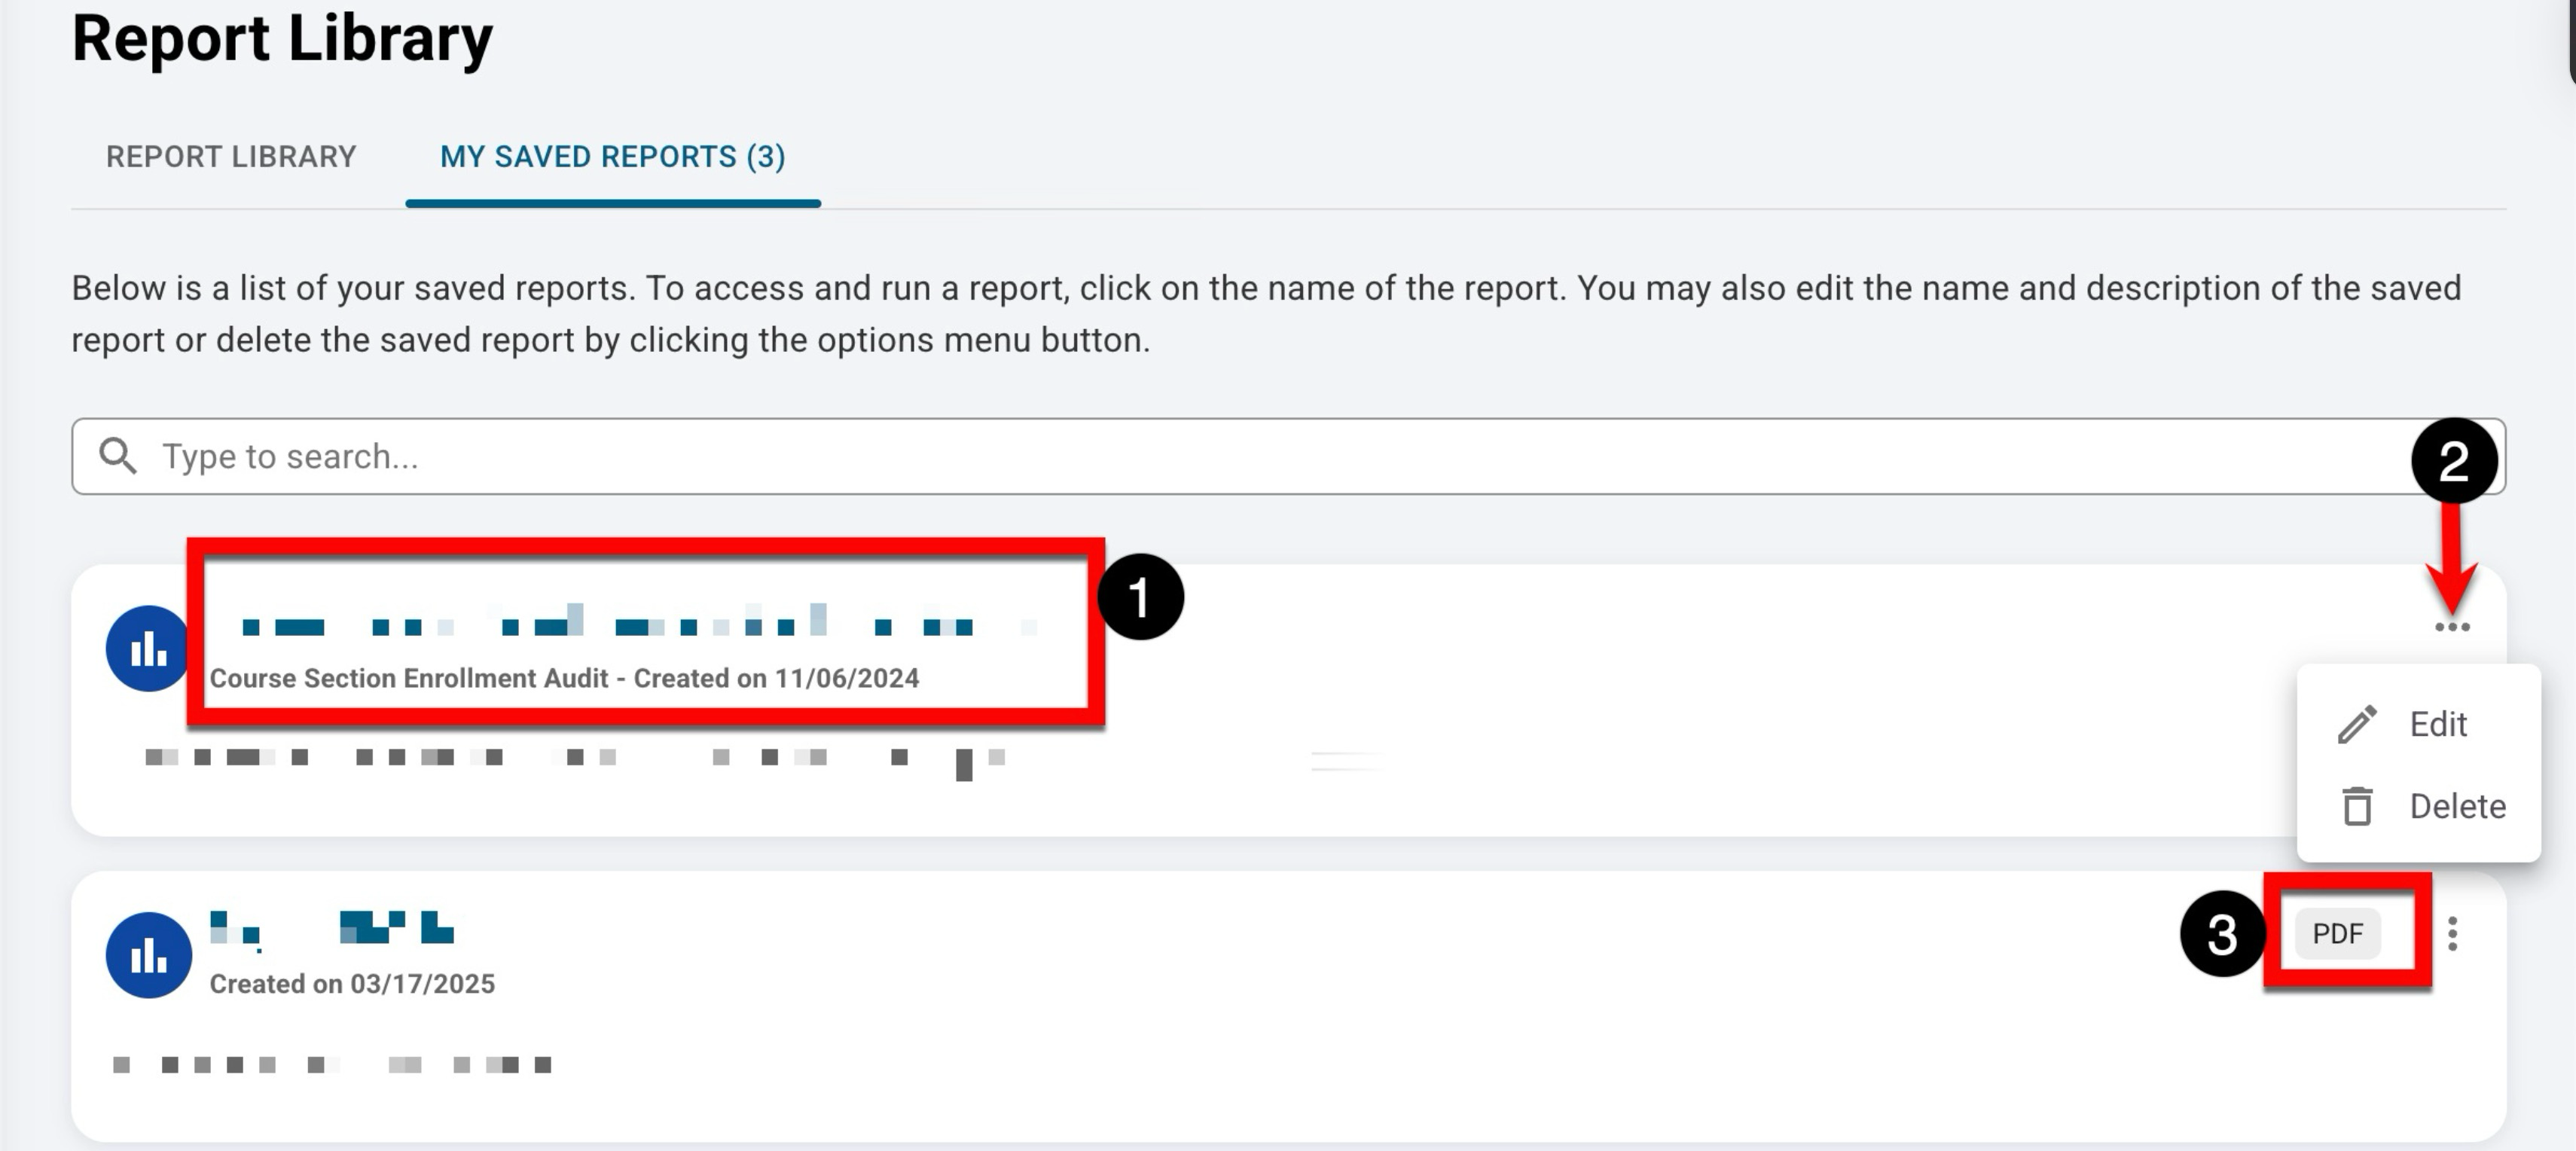
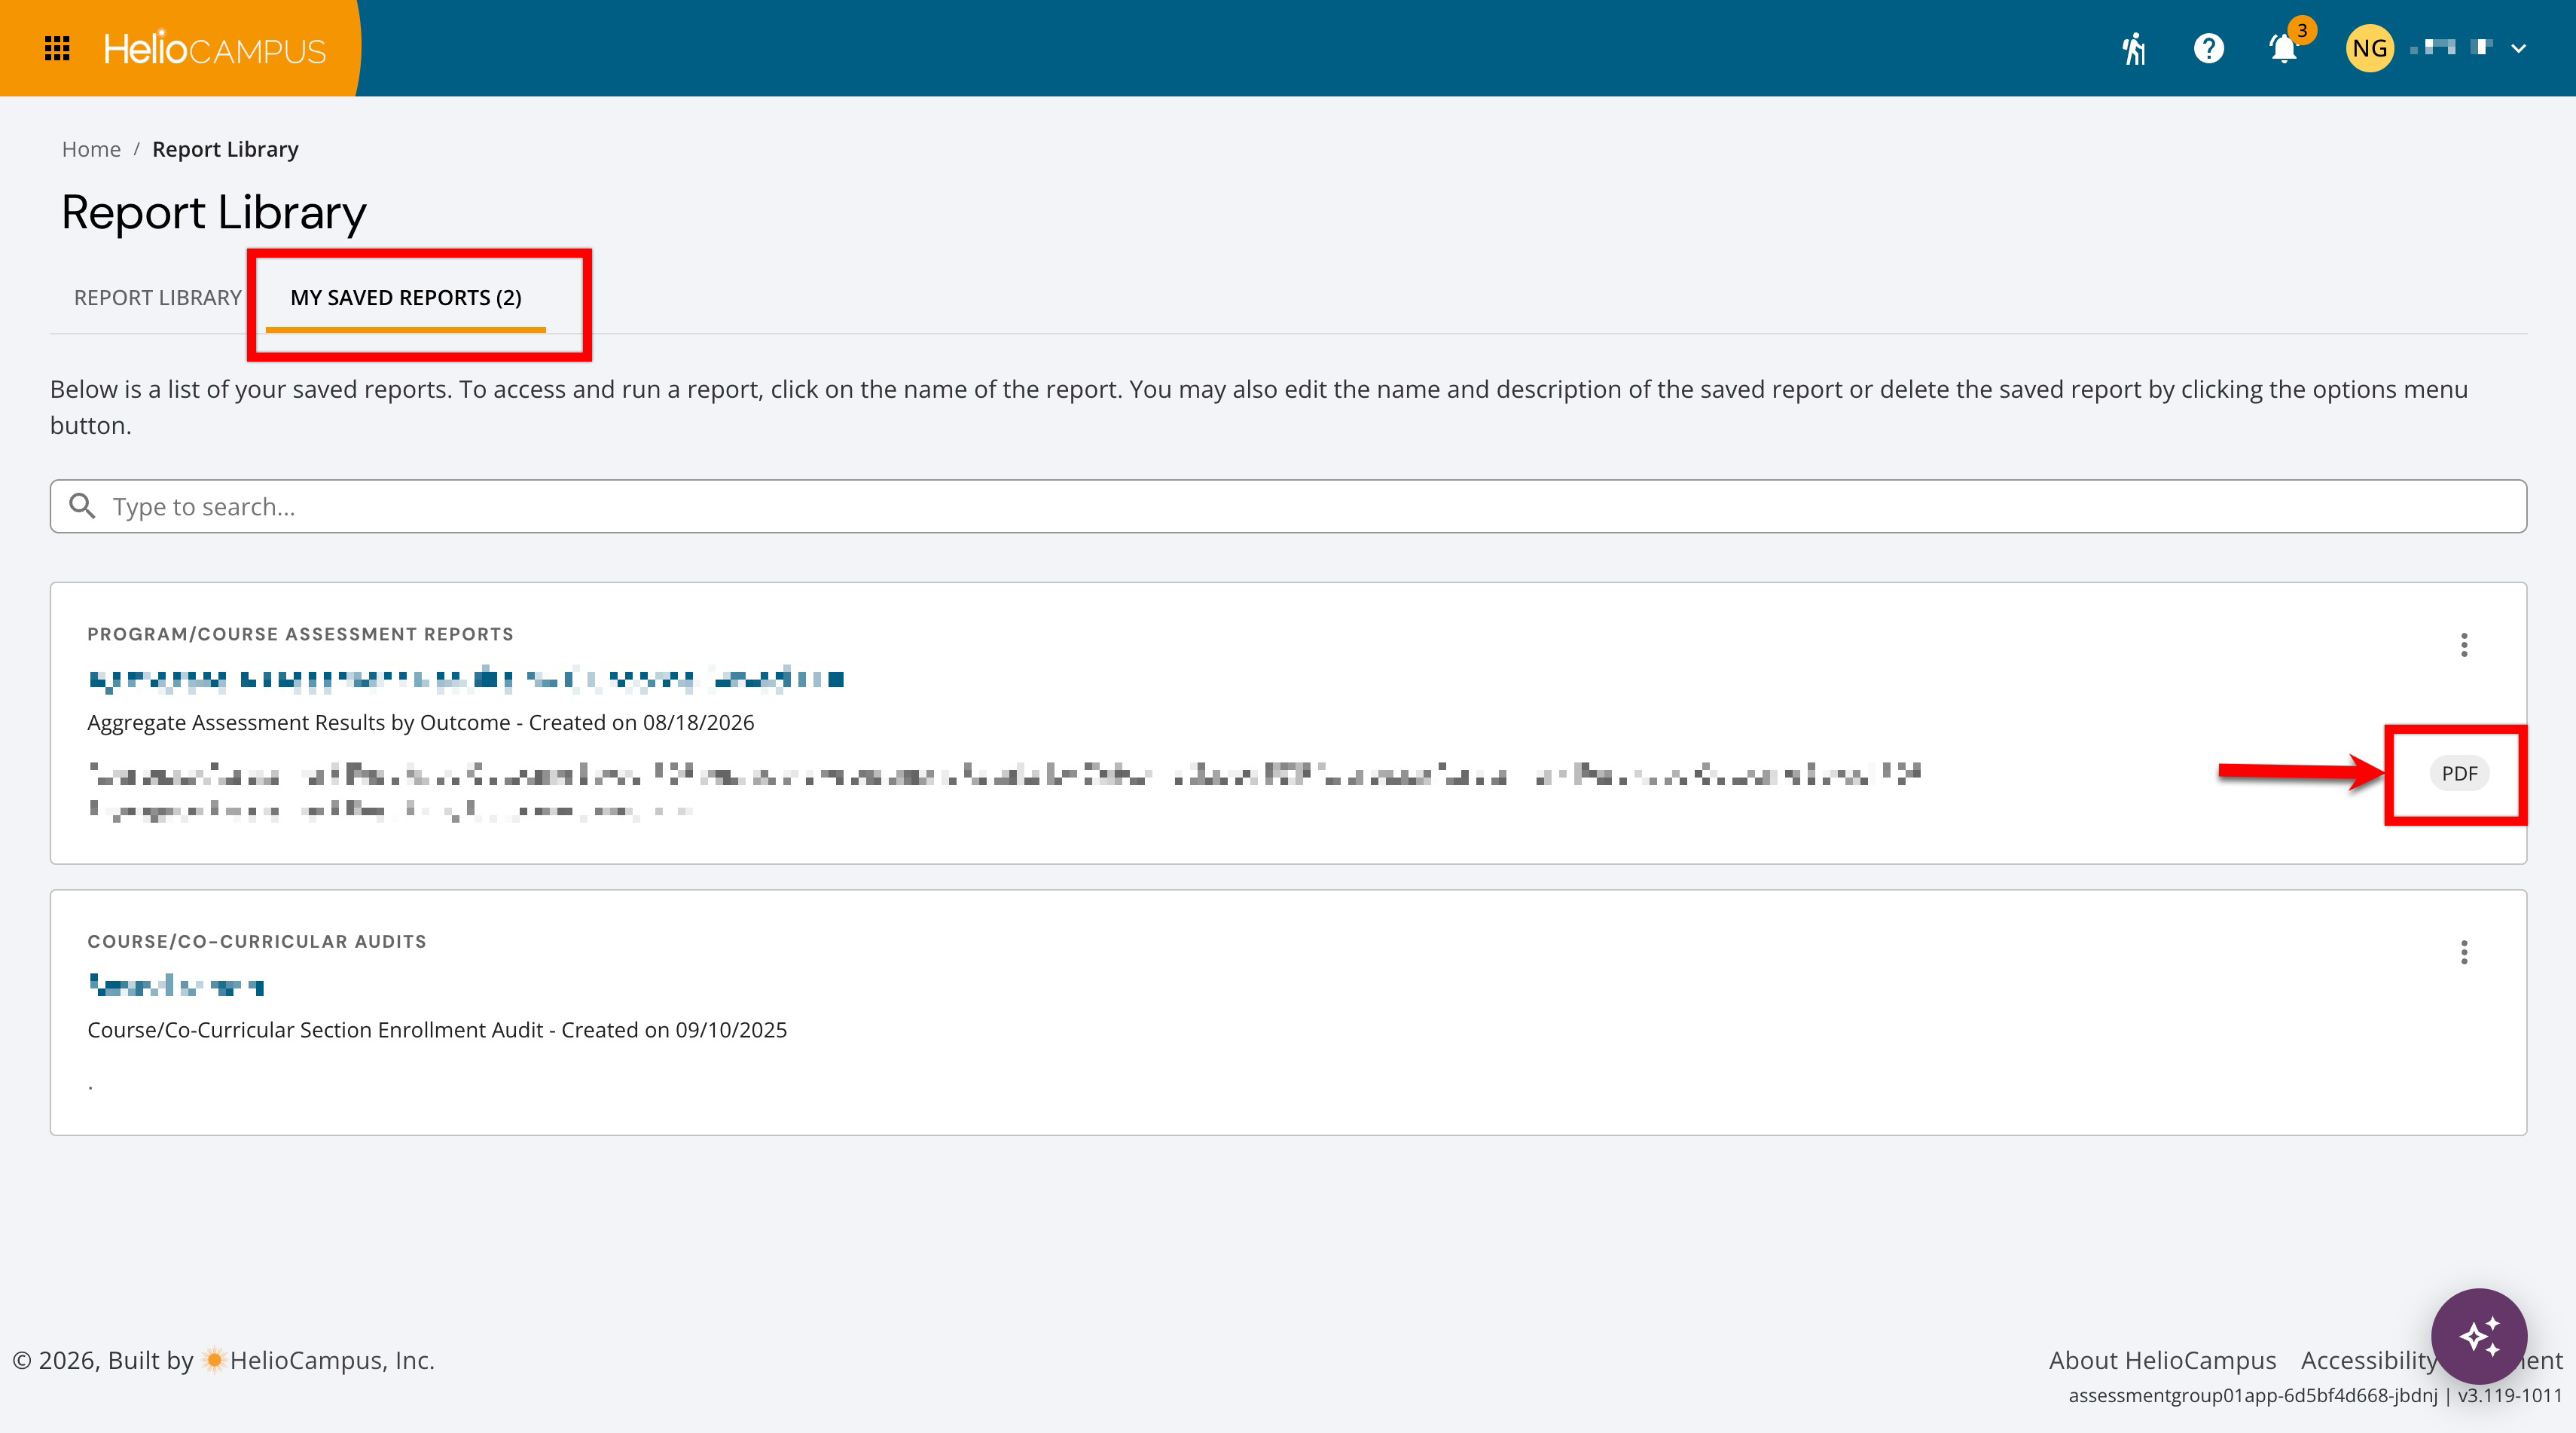
Once a report has been saved, it can be accessed by navigating to the Report Library and clicking the My Saved Reports tab. Clicking the name of a saved report (1) displays the parameters page; the original report name appears below the title configured when the report was saved. By expanding the kebab menu (2), the custom name and description can be edited, or a saved report can be deleted; deletion of a saved report is a permanent action that cannot be undone. When a report output has been saved as a PDF (3), the kebab menu will display an additional PDF download option.
Saving PDF Report Outputs
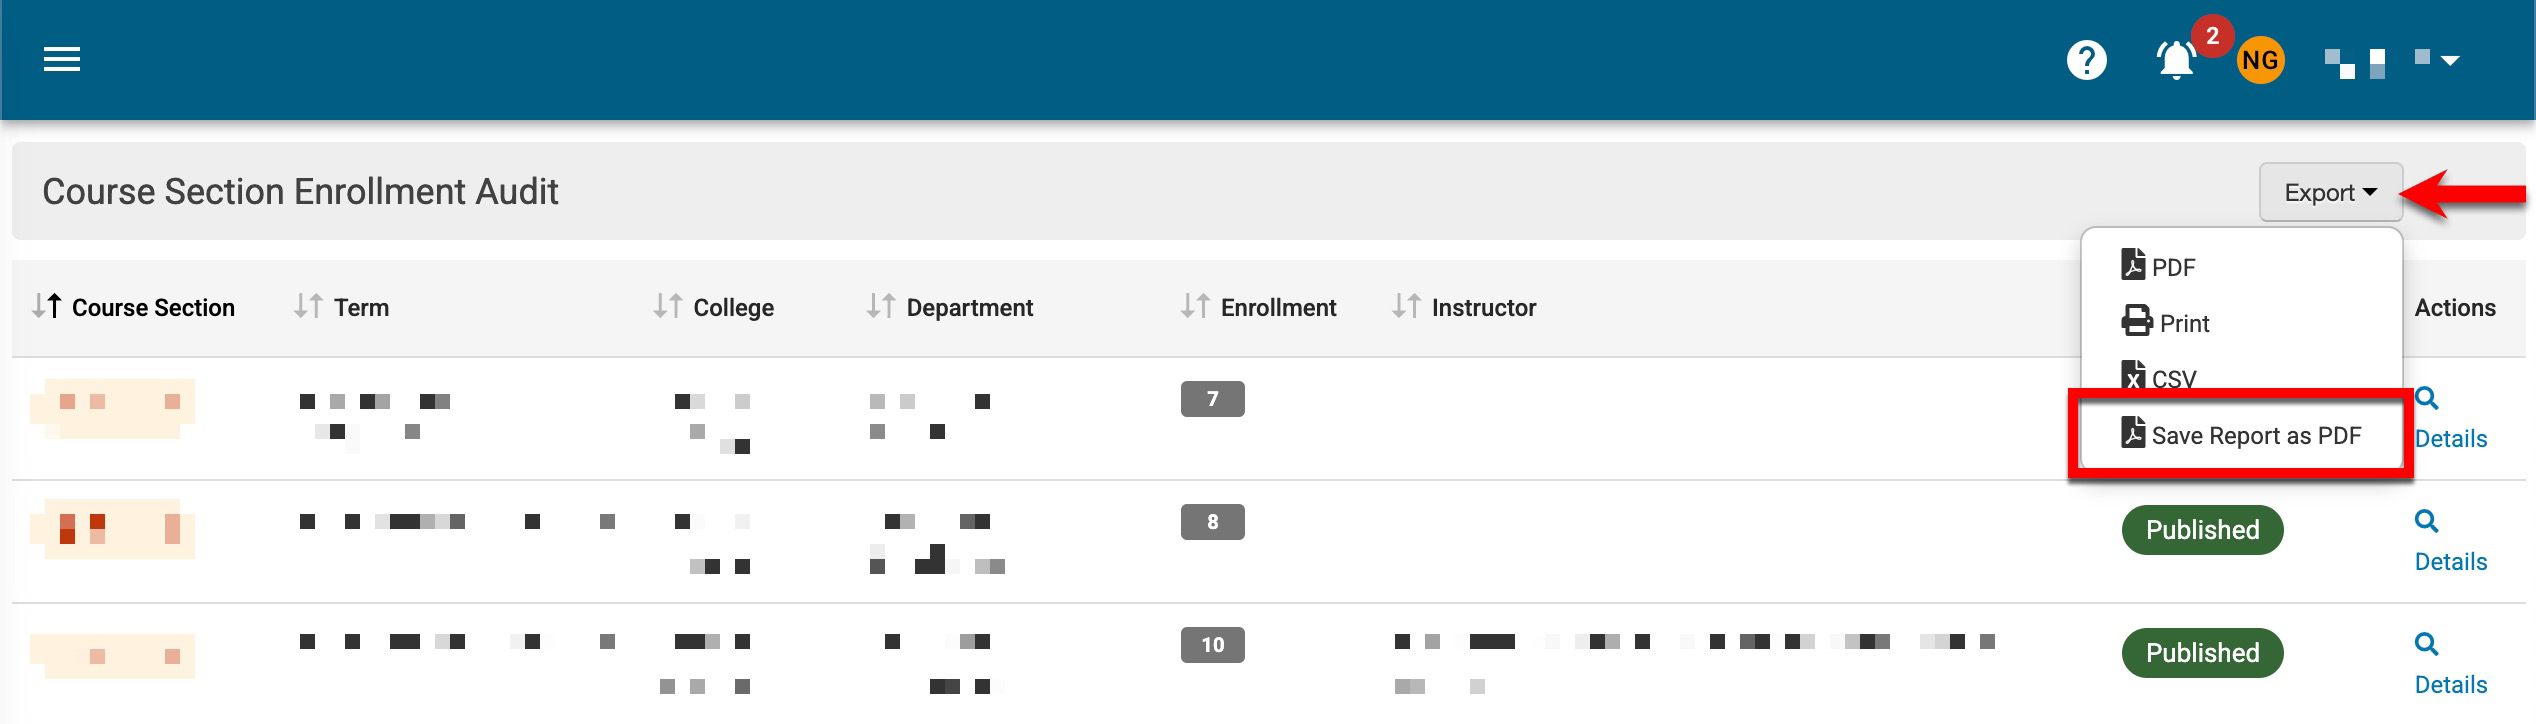
Once a report has been generated, the report output can be saved as a PDF by selecting Save Report as PDF from the expanded Export menu. Once saved, the platform will process the request, and once the PDF export is available, it will be displayed in the My Document Requests dashboard widget and the My Saved Reports tab of the Report Library.
Exporting Report Outputs
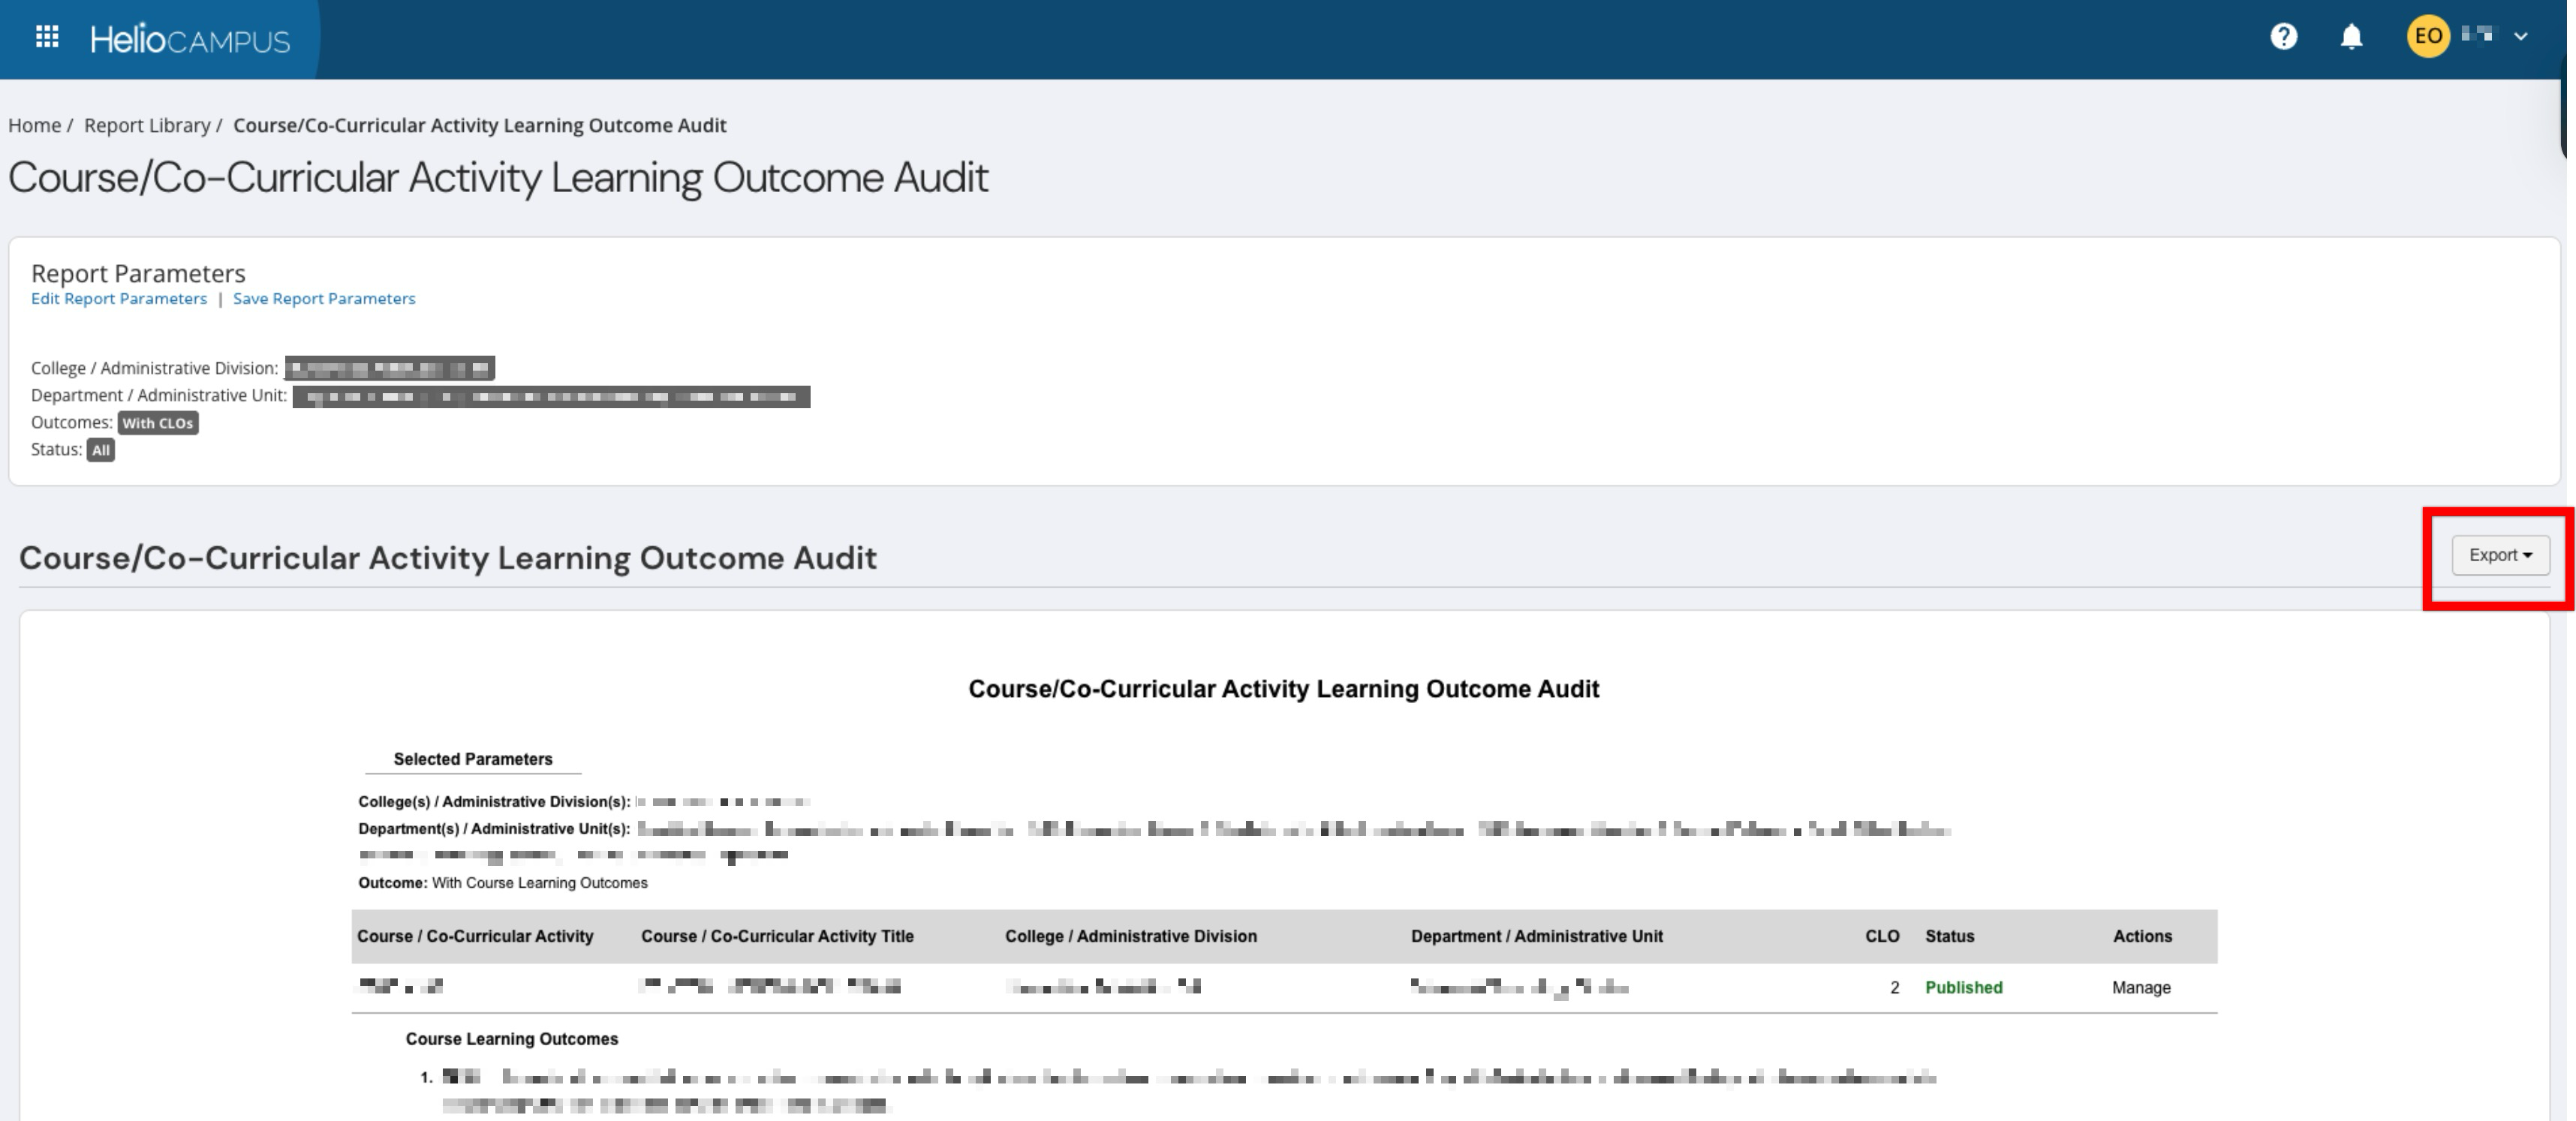
Report outputs can be exported by expanding the Export Menu and selecting one of the options. Export options will vary by report.
|
Export Option |
Best For |
|---|---|
|
HTML |
On-screen viewing; default display format. |
|
|
Printing and sharing as a formatted document. |
|
XLSX |
Data analysis in Excel; working with raw data. |
|
CSV |
Data integration or bulk processing. |
|
DOCX |
Including report data in Word documents. |
Saving a Report to the Evidence Bank
-
From the My Saved Reports tab of the Report Library, locate the saved report that should be added as evidence. Only reports saved as PDFs are eligible for addition to the Evidence Bank.
-
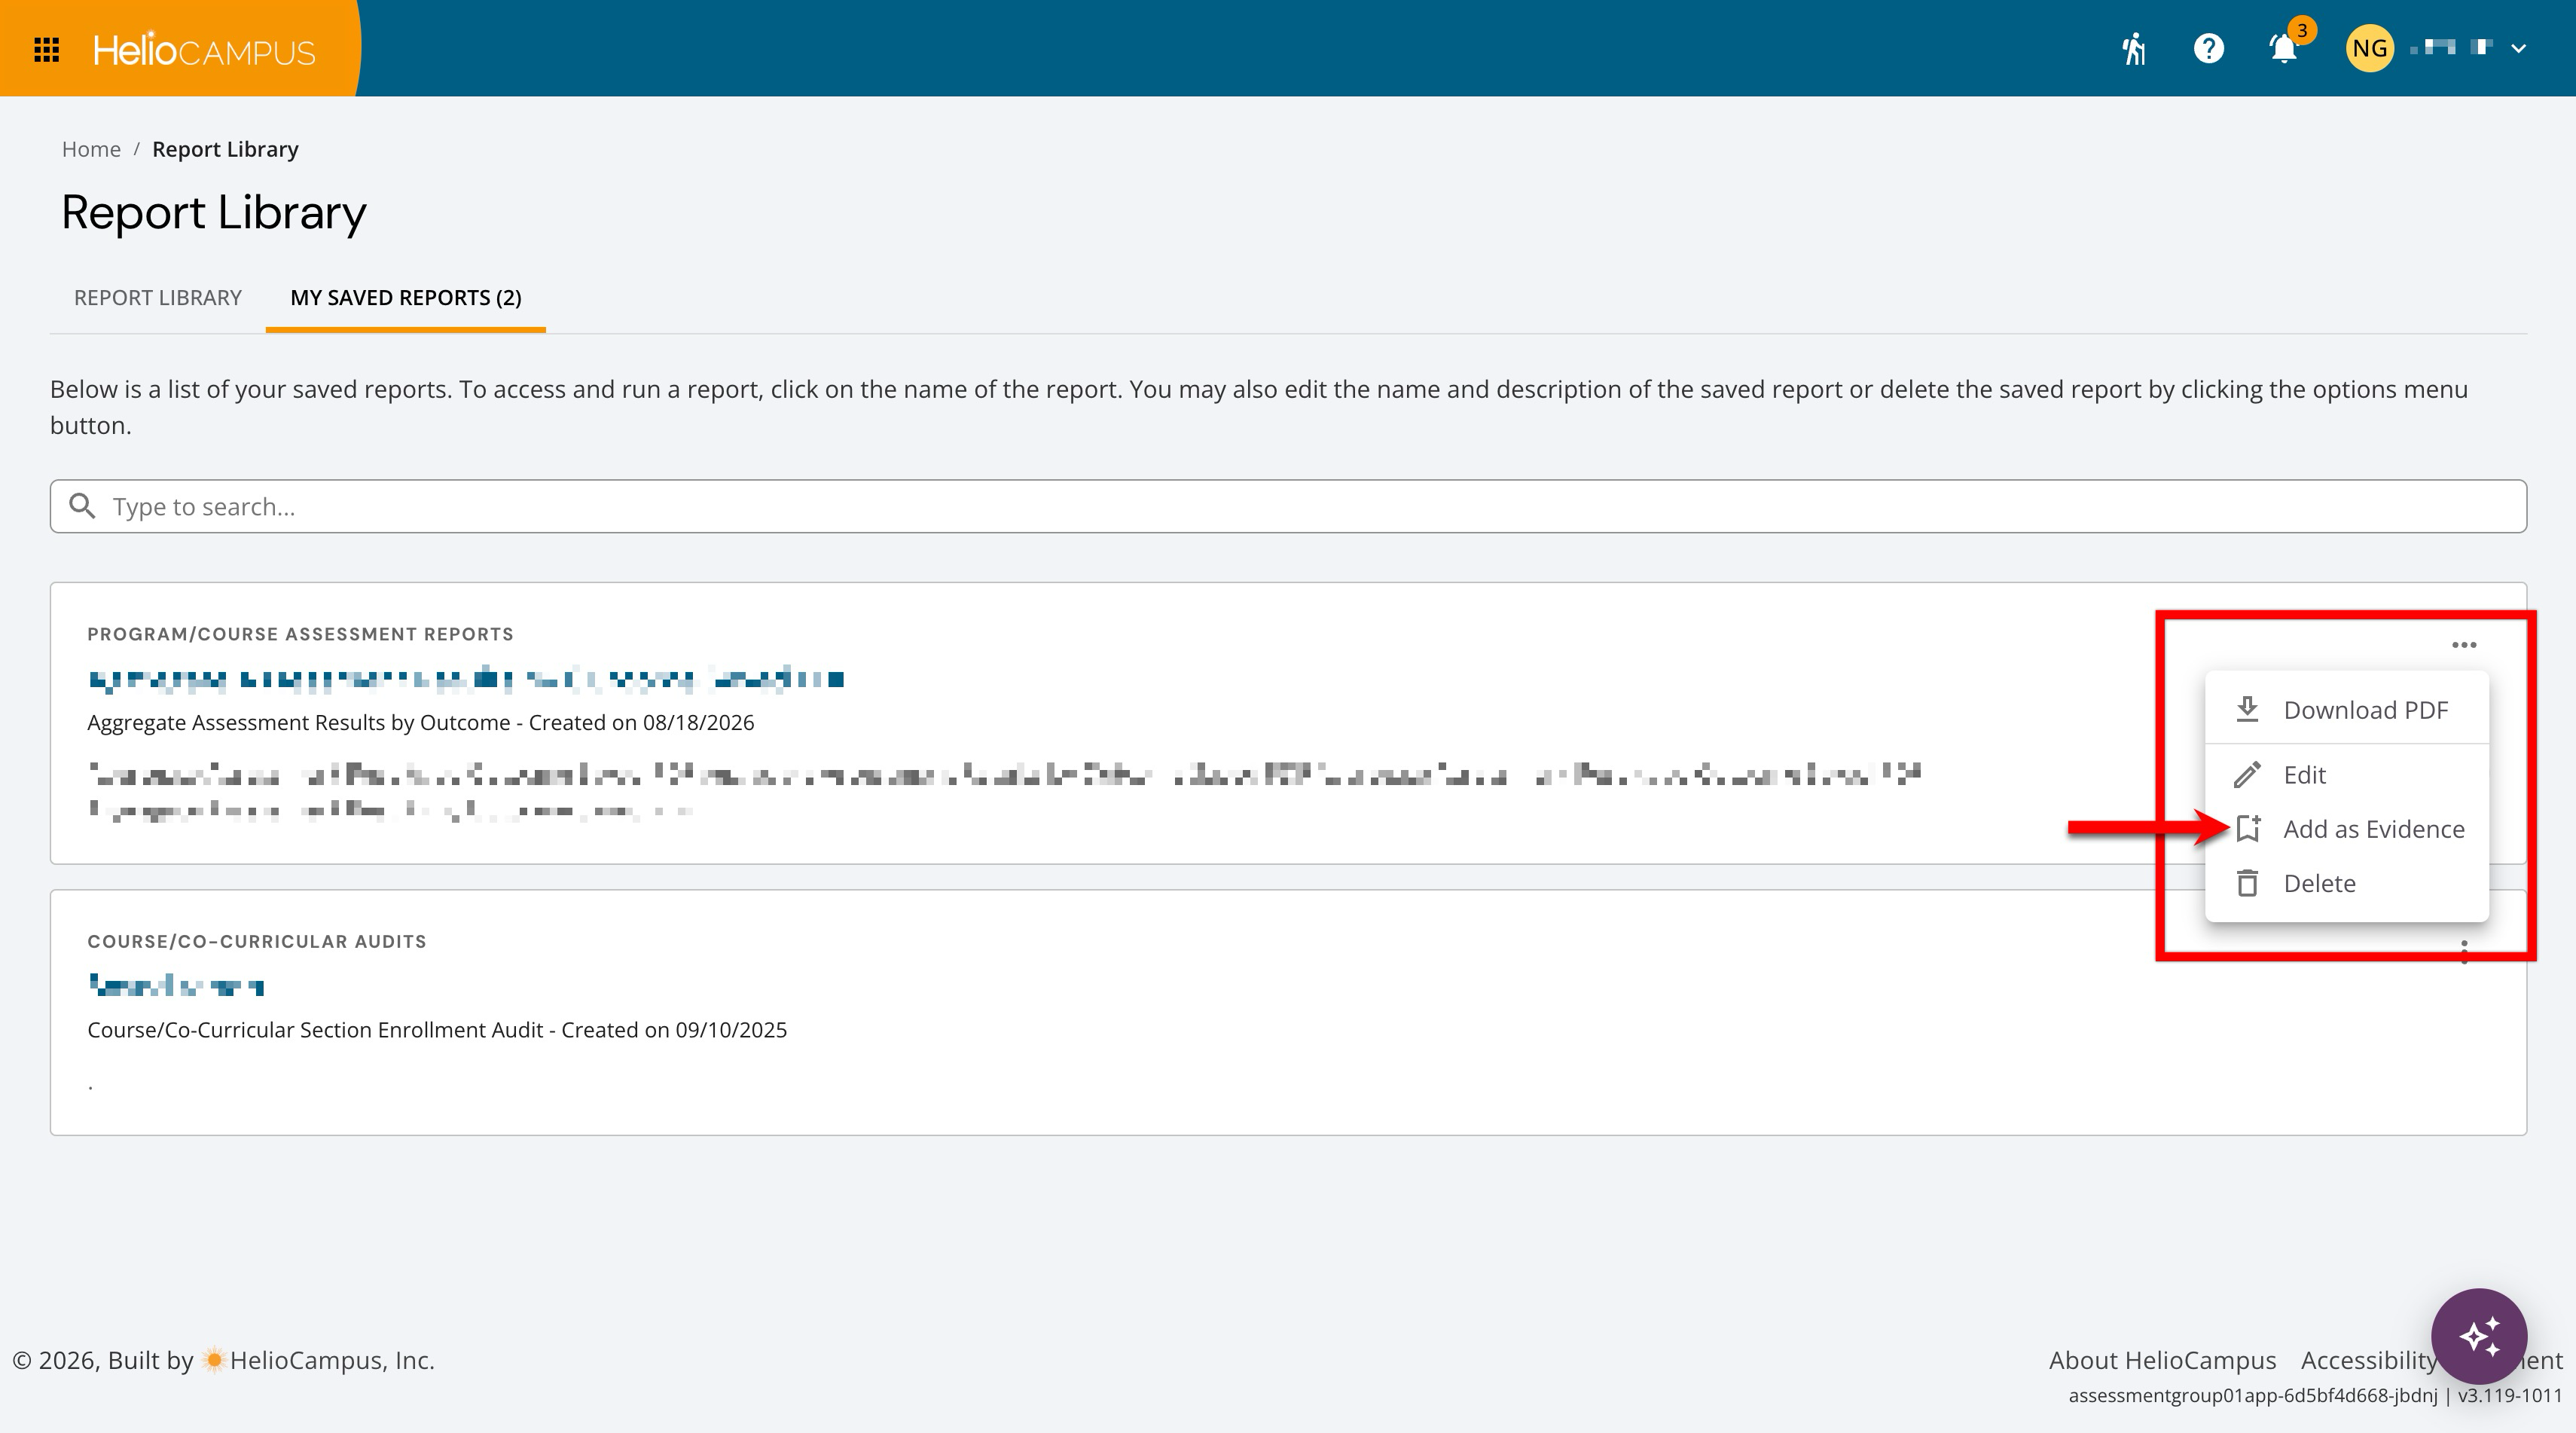
From the expanded options menu, select Add as Evidence.
-
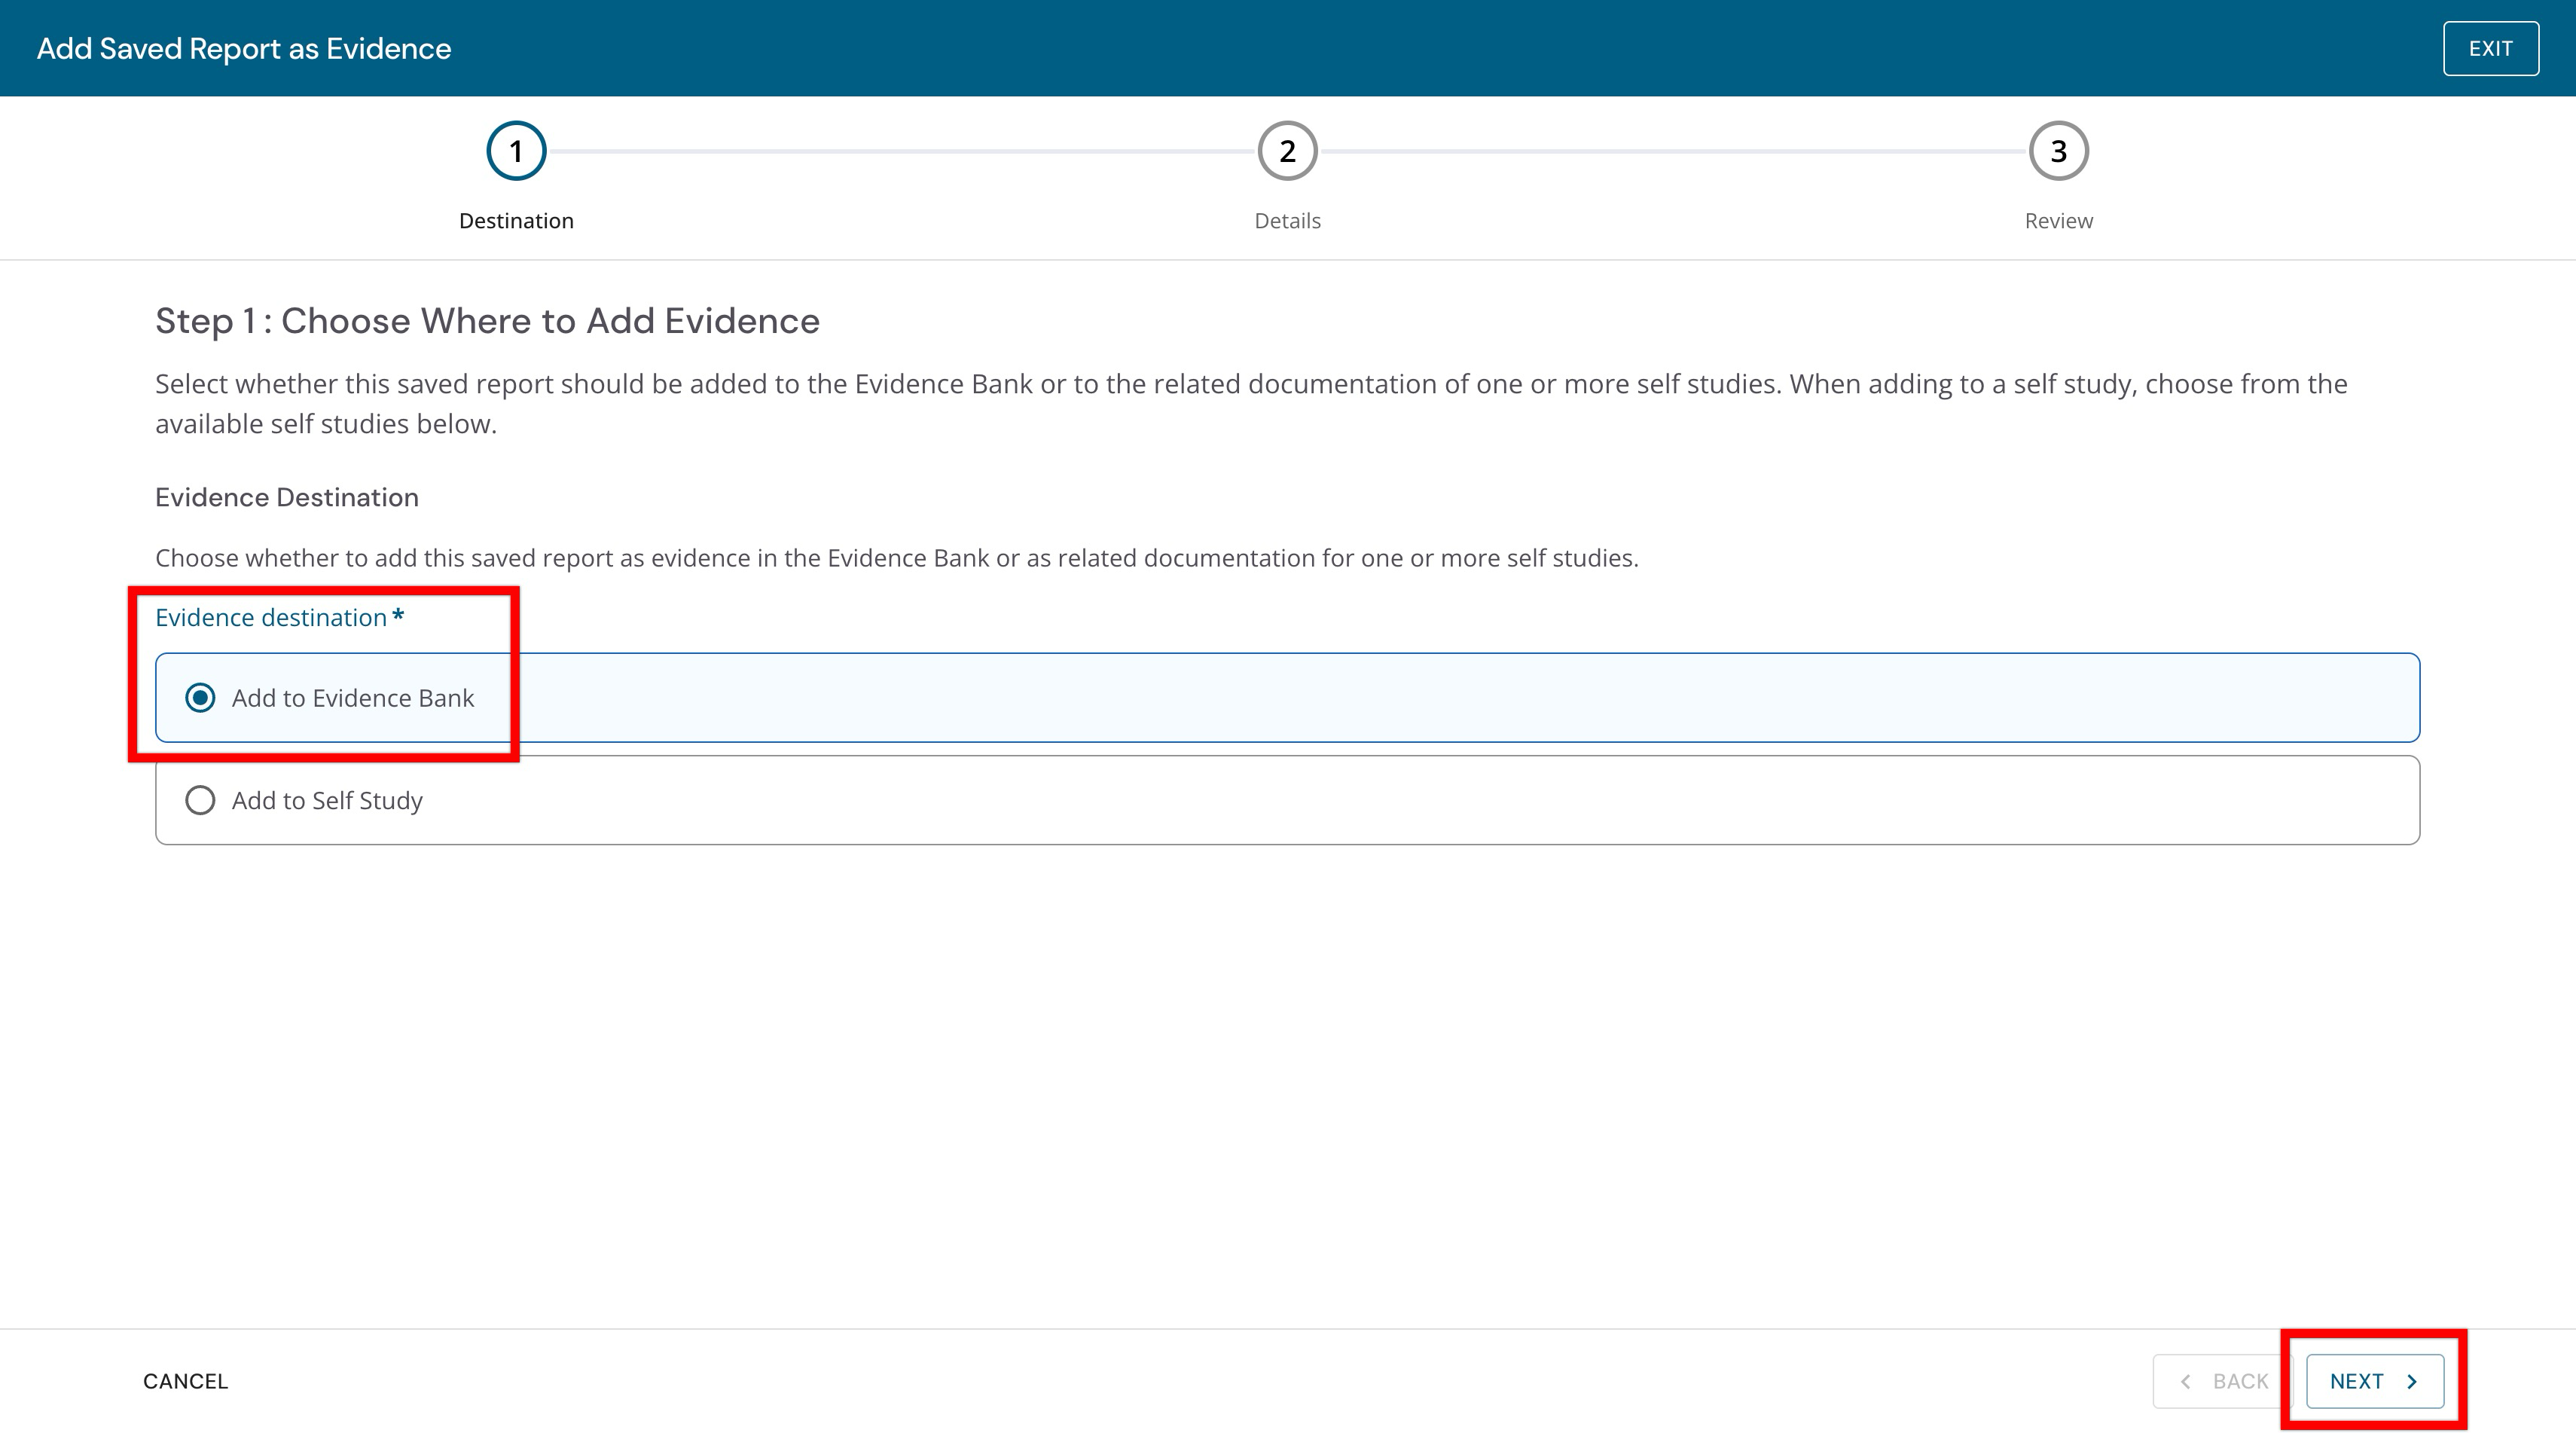
In step 1, choose Add to Evidence Bank when the saved report should be made available as an evidence record in the Evidence Bank. Click Next to proceed.
-
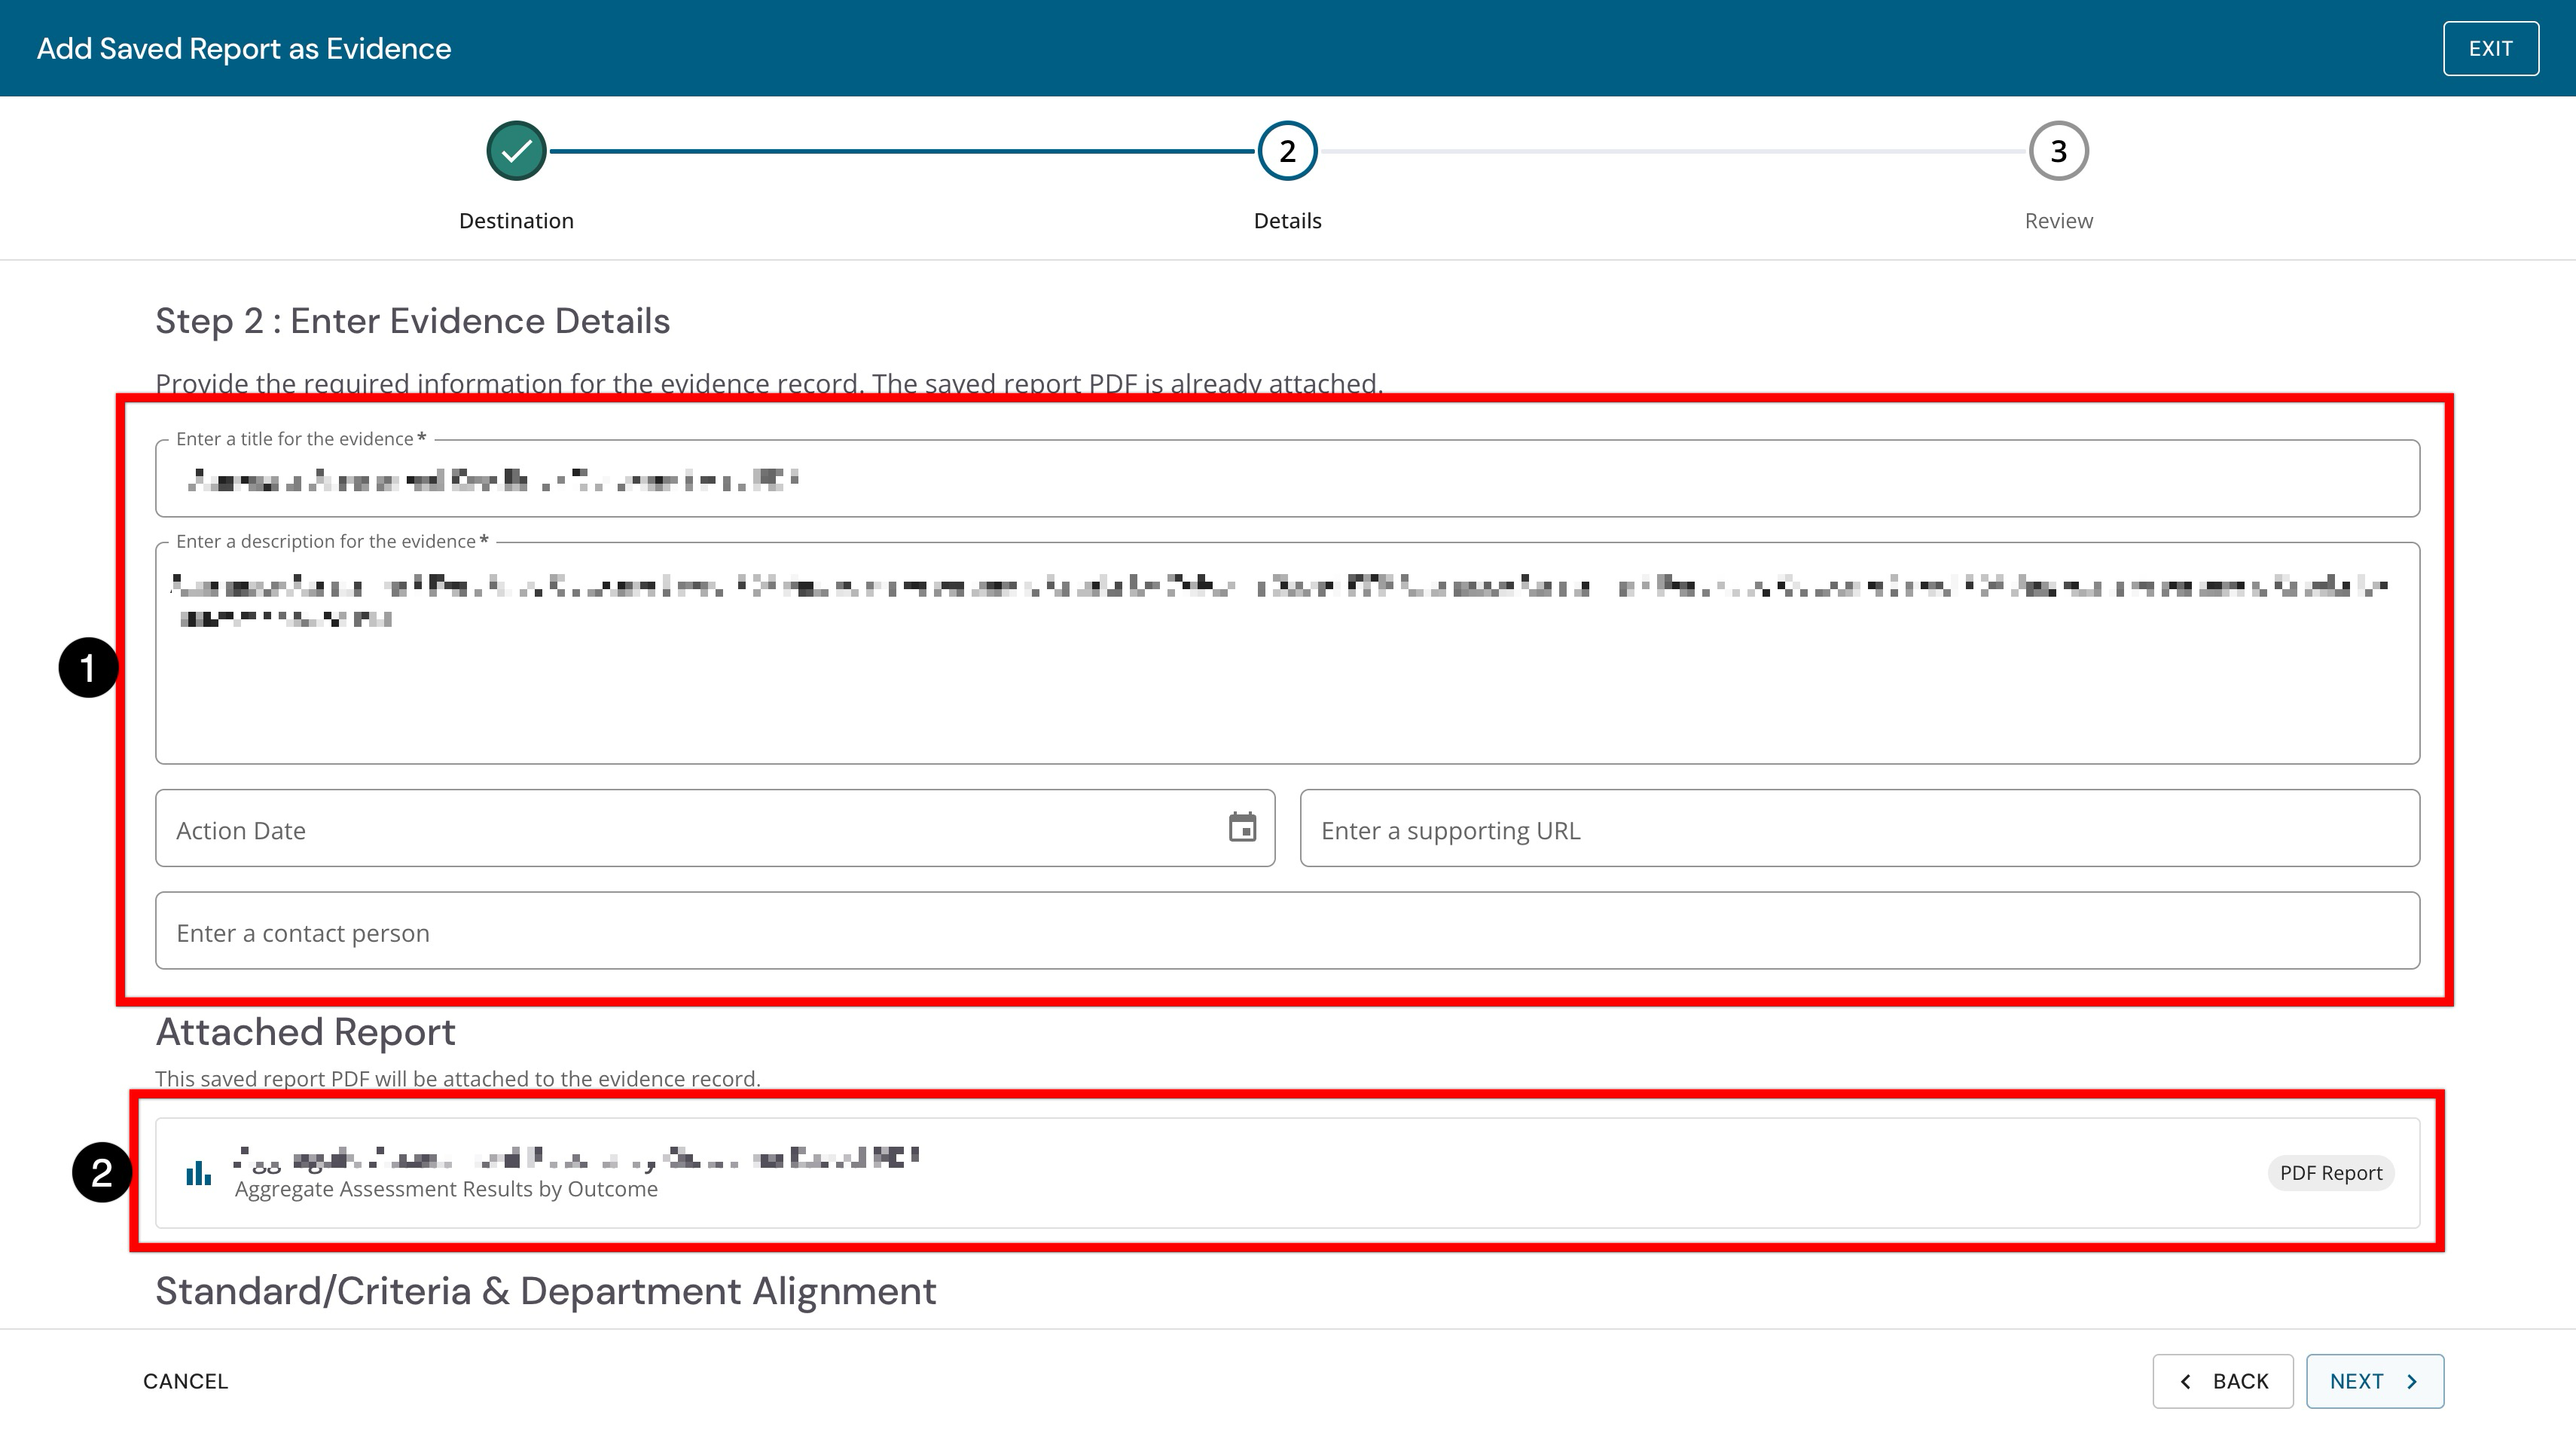
By default, the report's name and description are automatically entered (1); optionally, complete additional fields to provide supporting information for the evidence (1). By default, the selected PDF report will be attached (2).
-
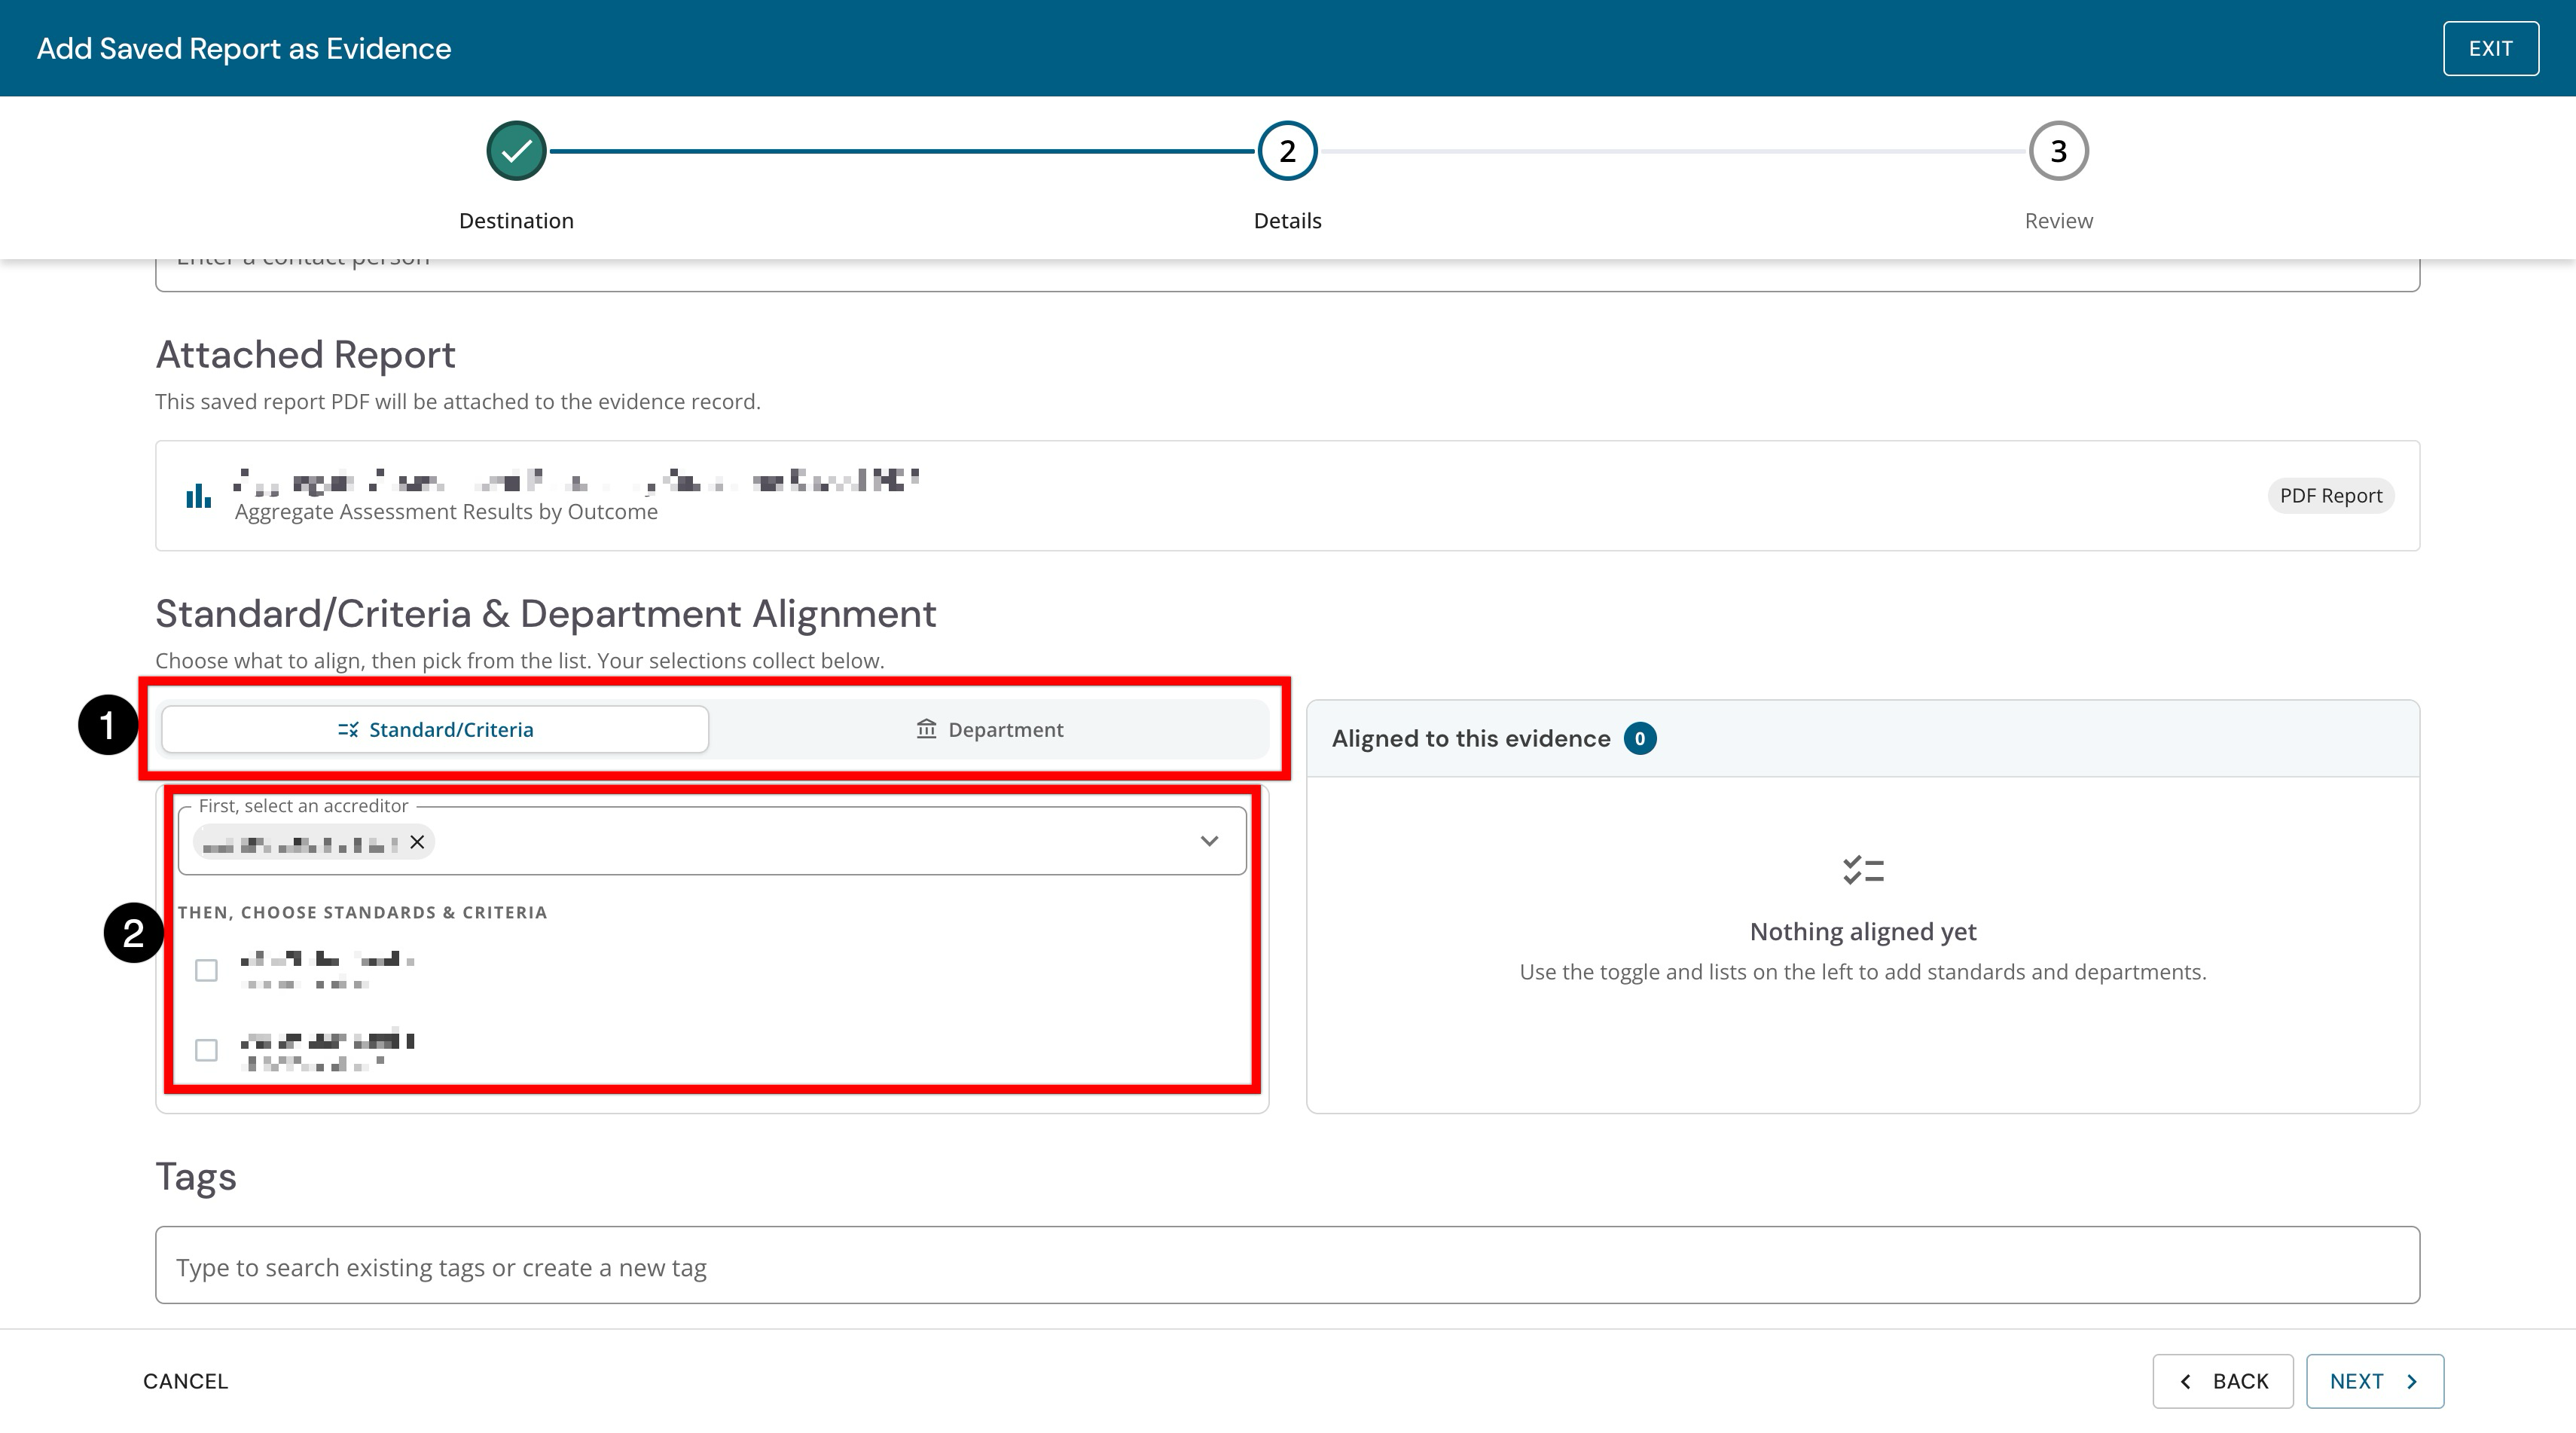
Select whether to align the evidence to Standard/Criteria or Department. Choose Standard/Criteria when the evidence supports an accreditor standard or criterion. Choose Department when the evidence should be associated with a department. After making a selection, search for and select one or more accreditors or departments (2).
-
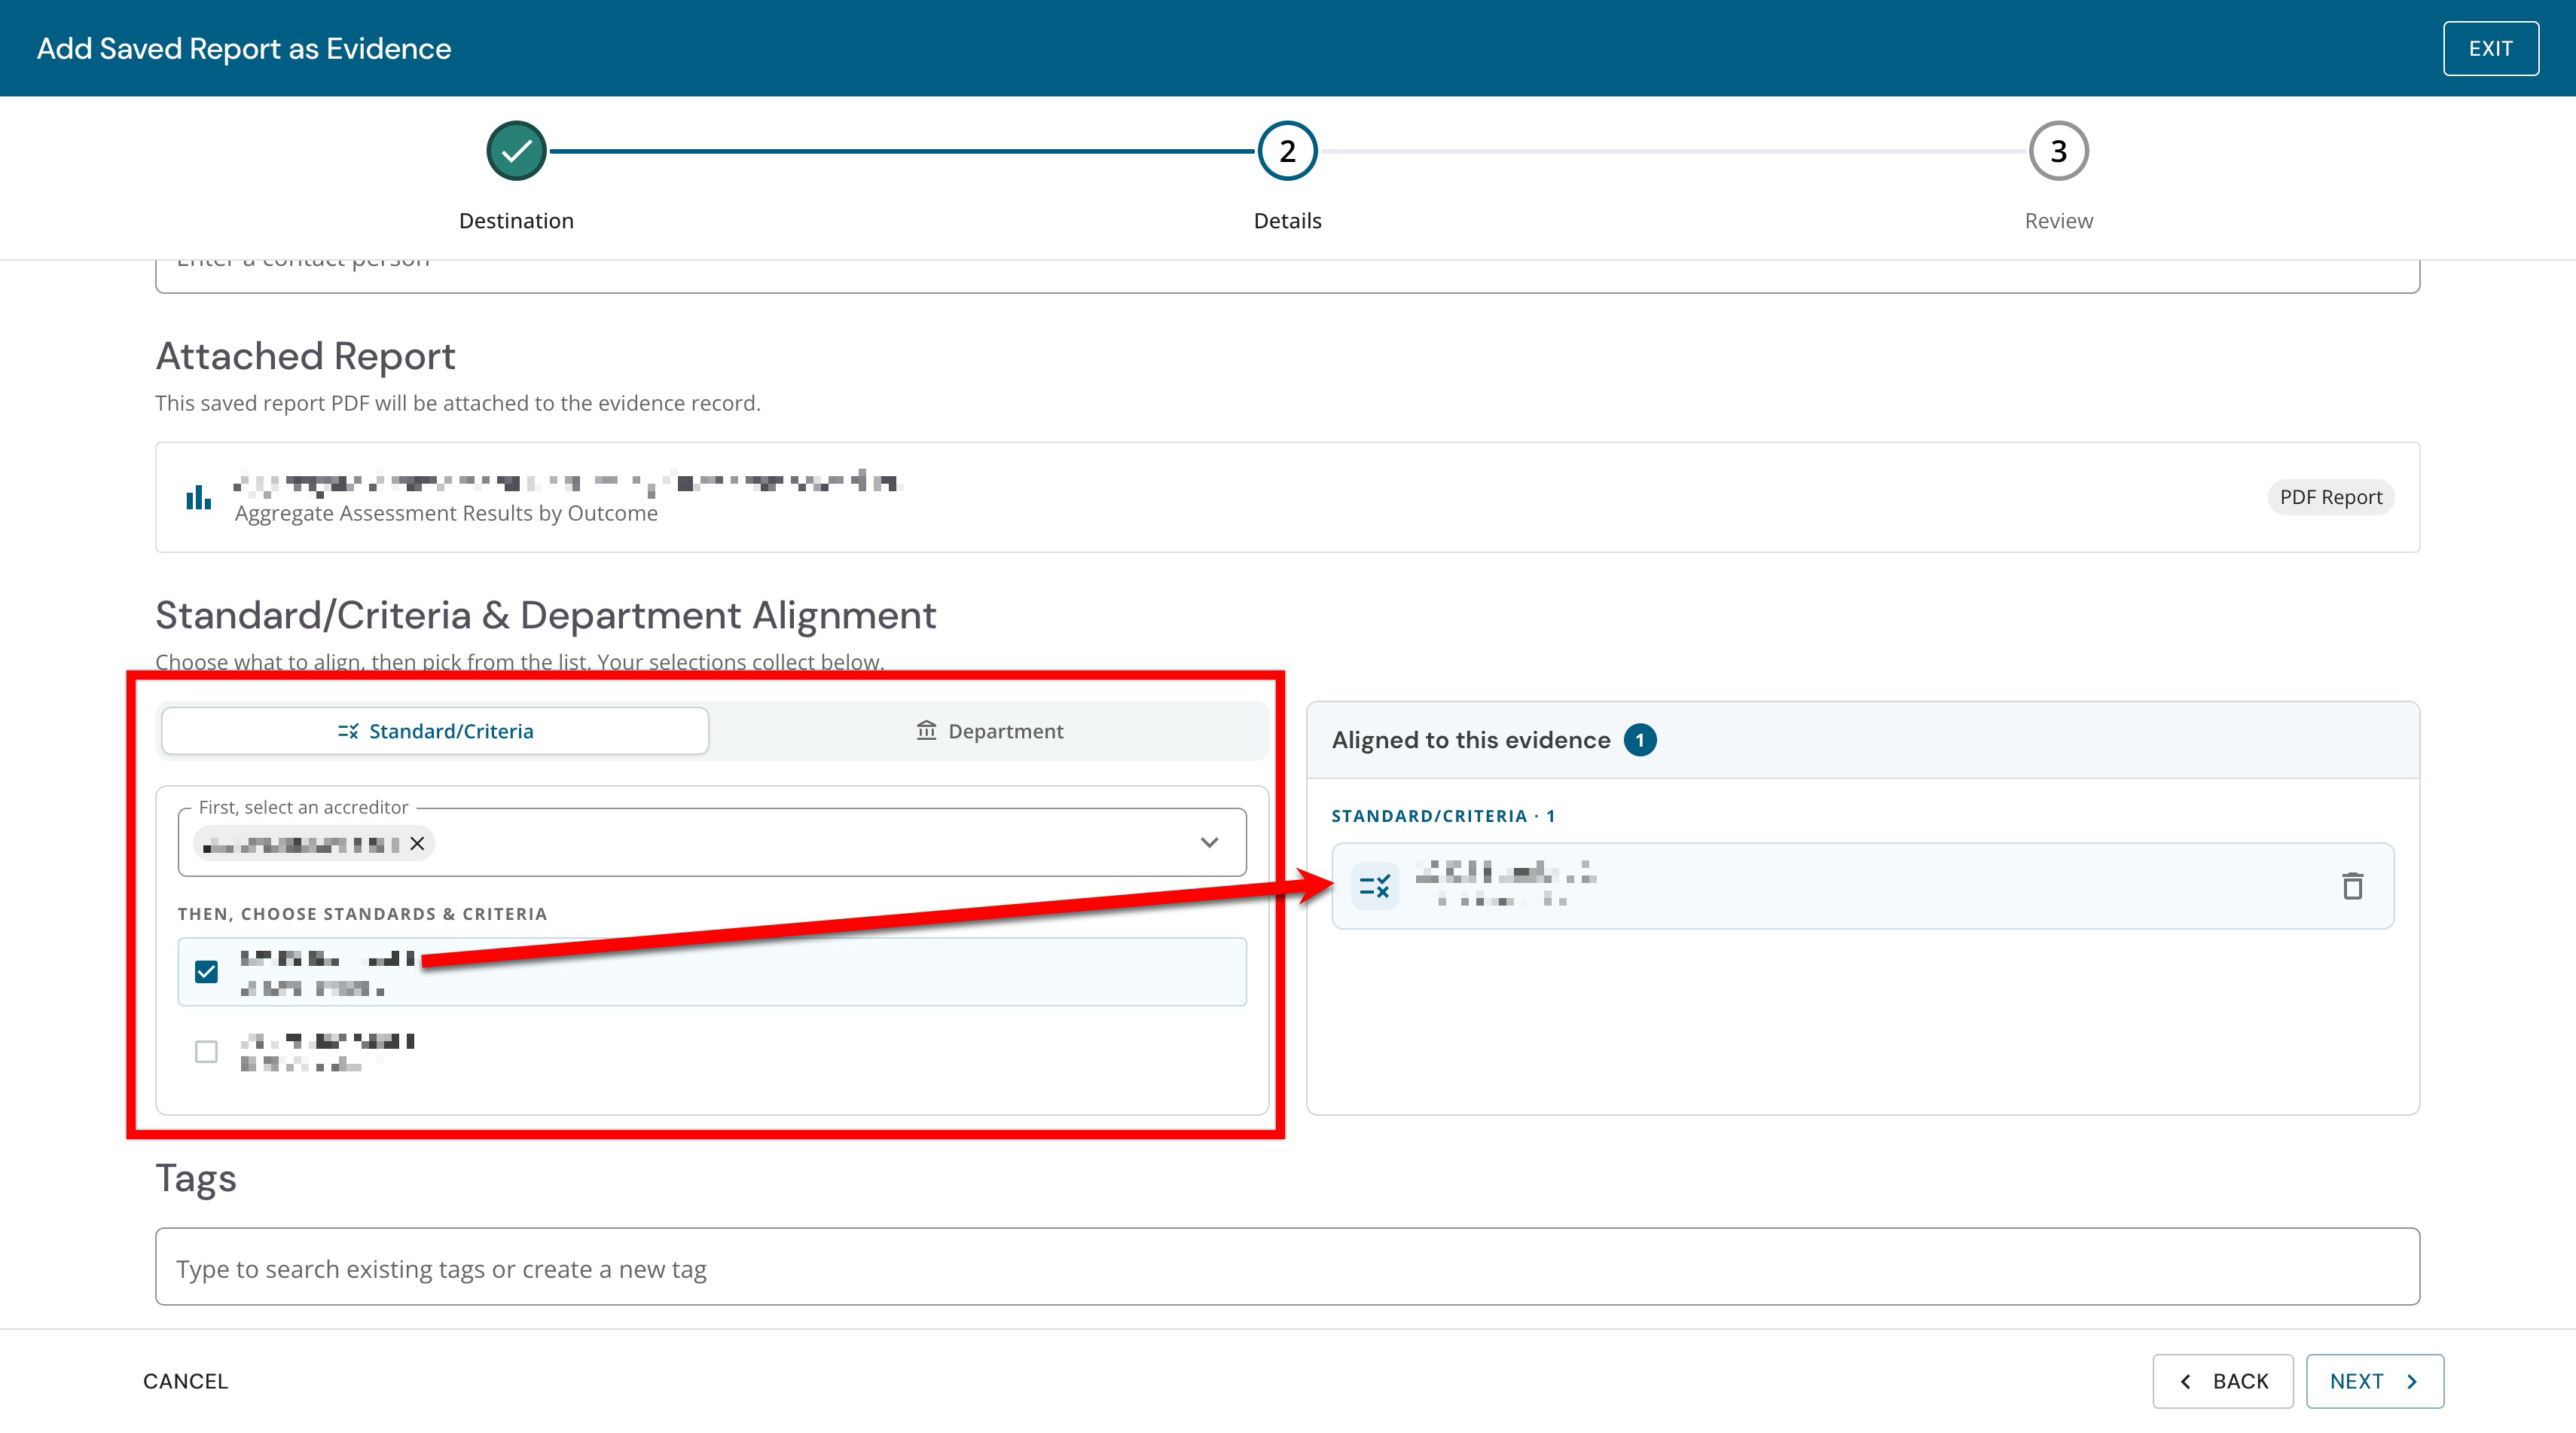
After selecting one or more accreditor or department, choose which associated standards and criteria to align to the report evidence.
-
Optionally, tags can be added. Tags make evidence easier to find, group, and reuse later by connecting the saved report to common themes, initiatives, departments, or reporting needs.
-
-
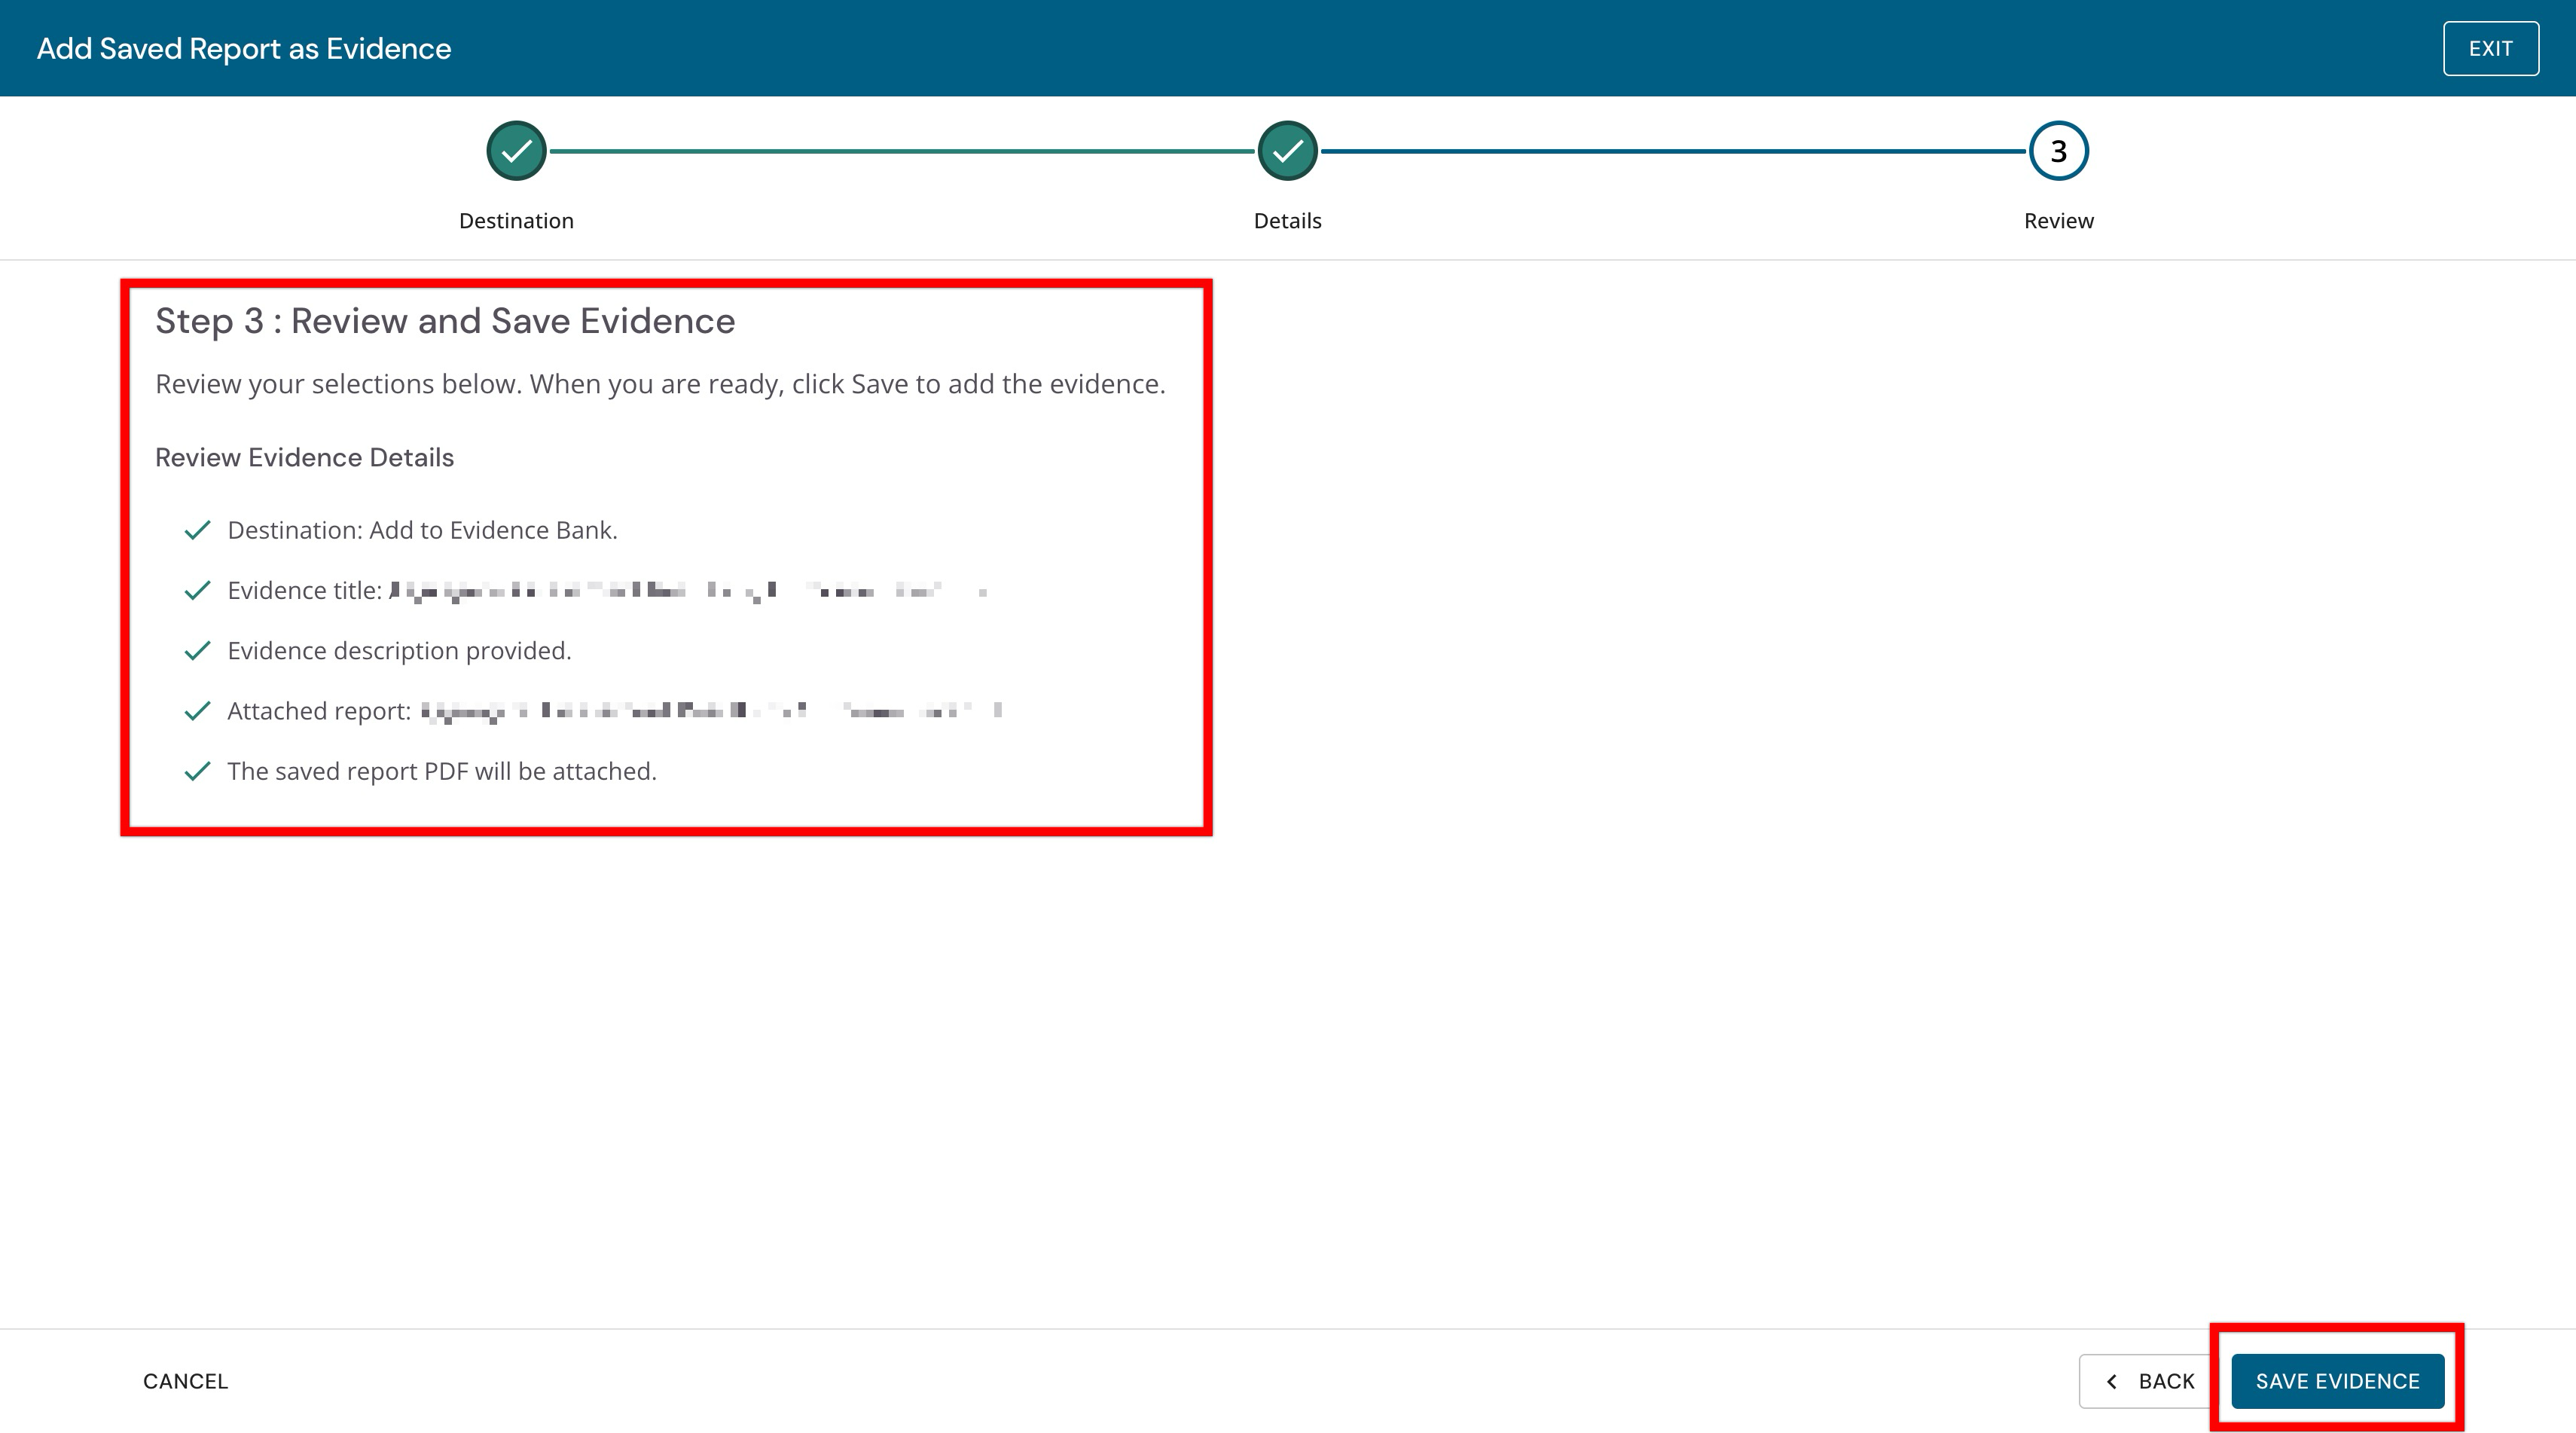
Select Next to review the selections and click Save Evidence to save the report to the Evidence Bank.
Saving a Report to a Self Study
-
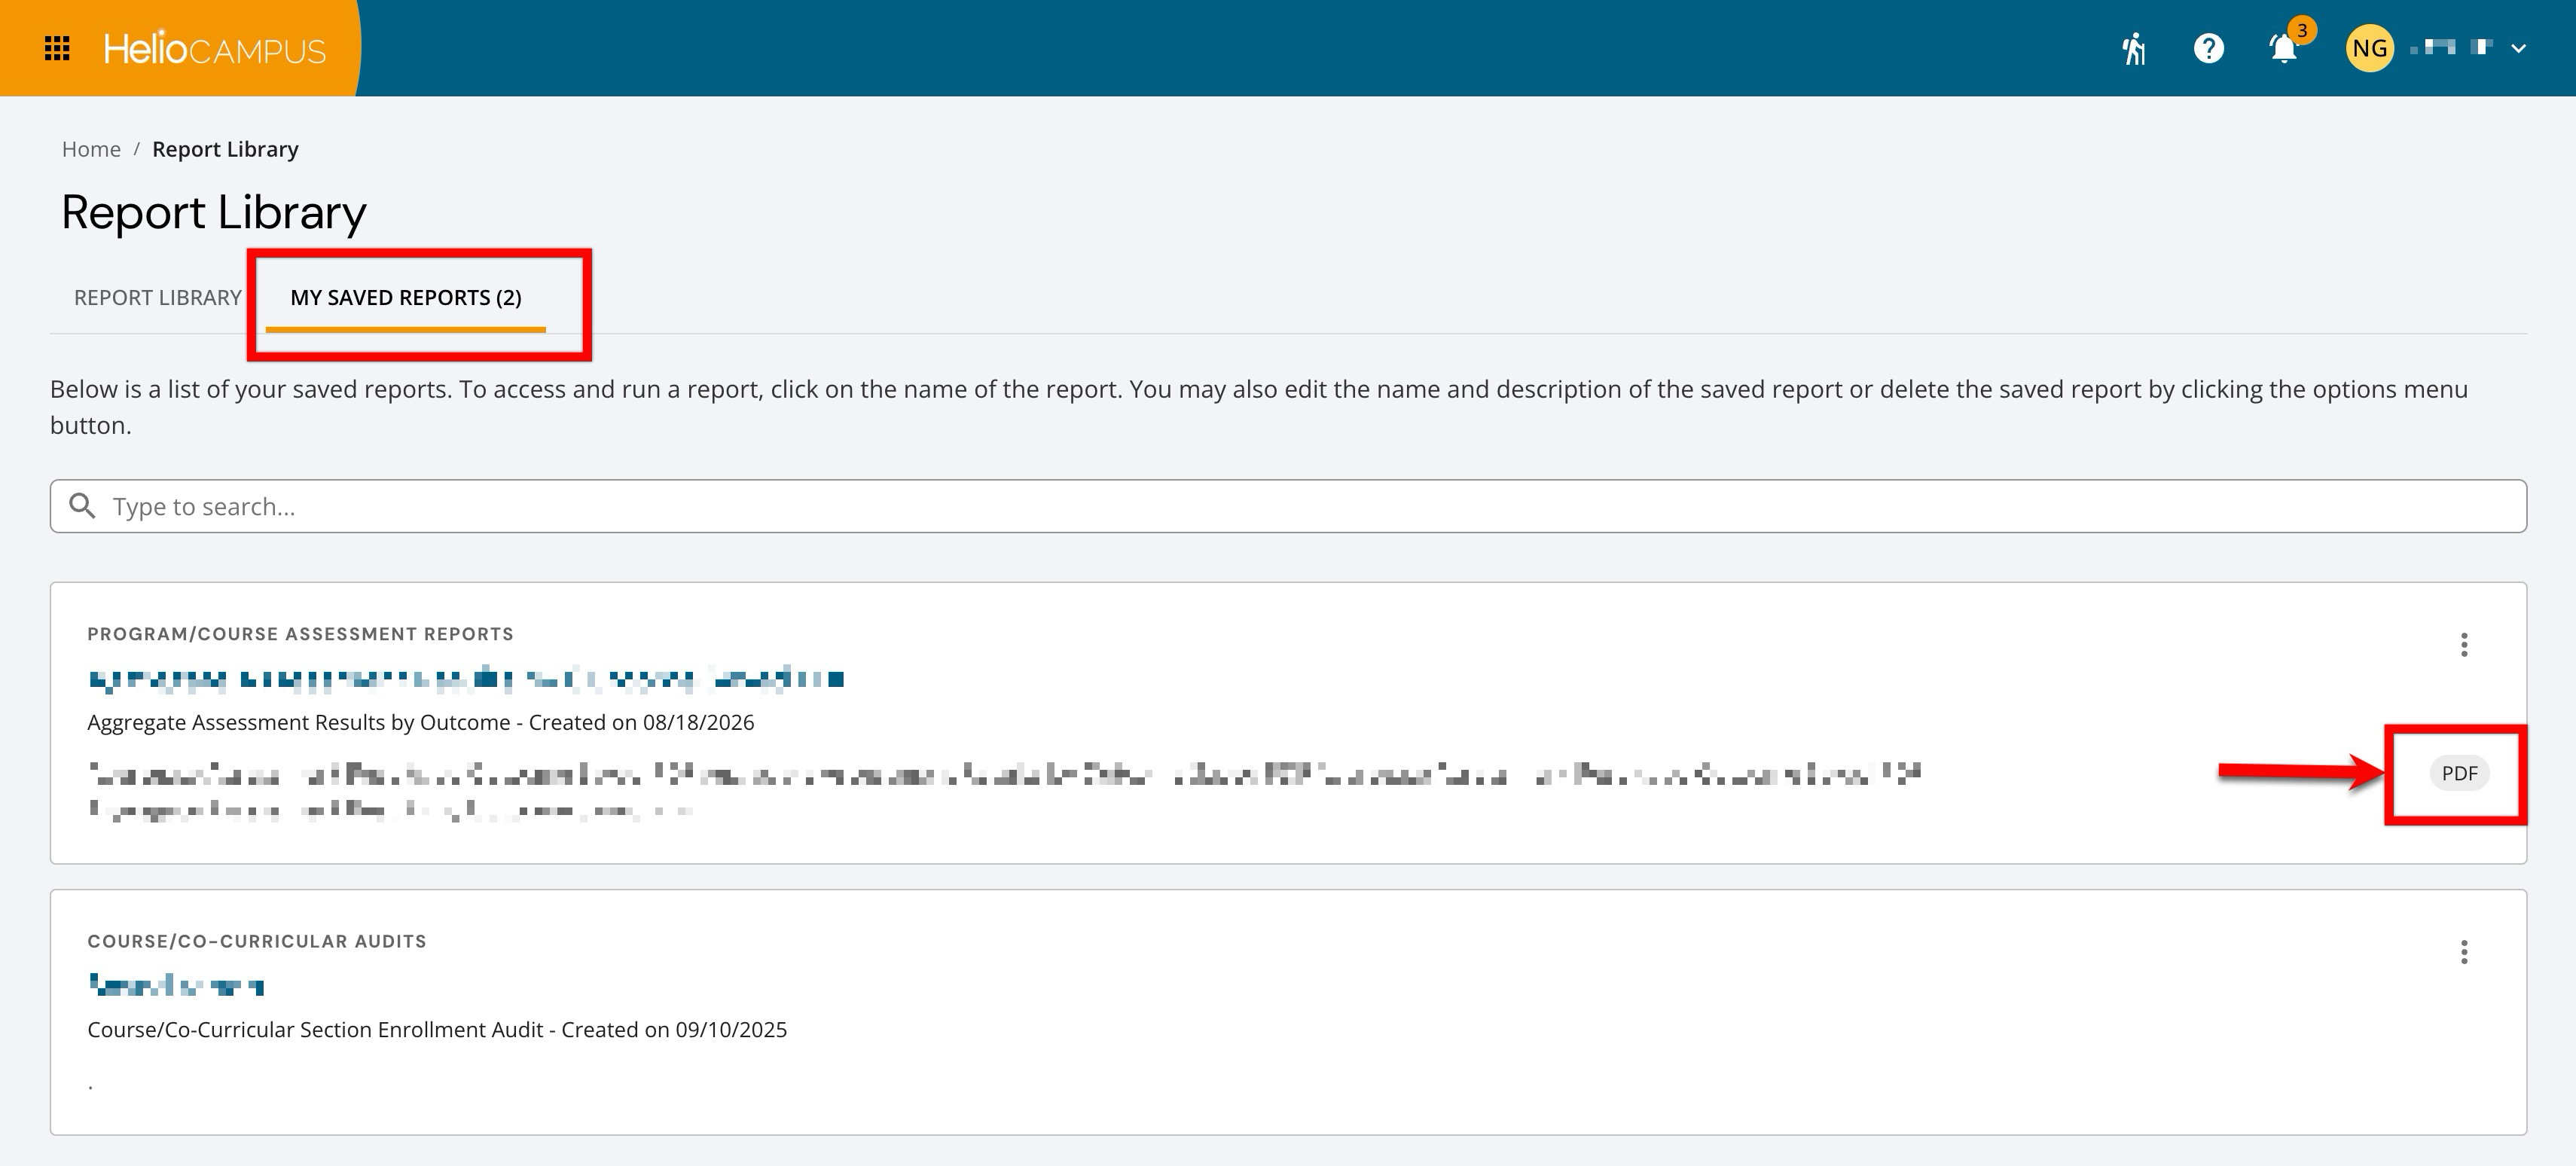
From the My Saved Reports tab of the Report Library, locate the saved report that should be added to a self study as evidence. Only reports saved as PDFs are eligible to be added as evidence.
-
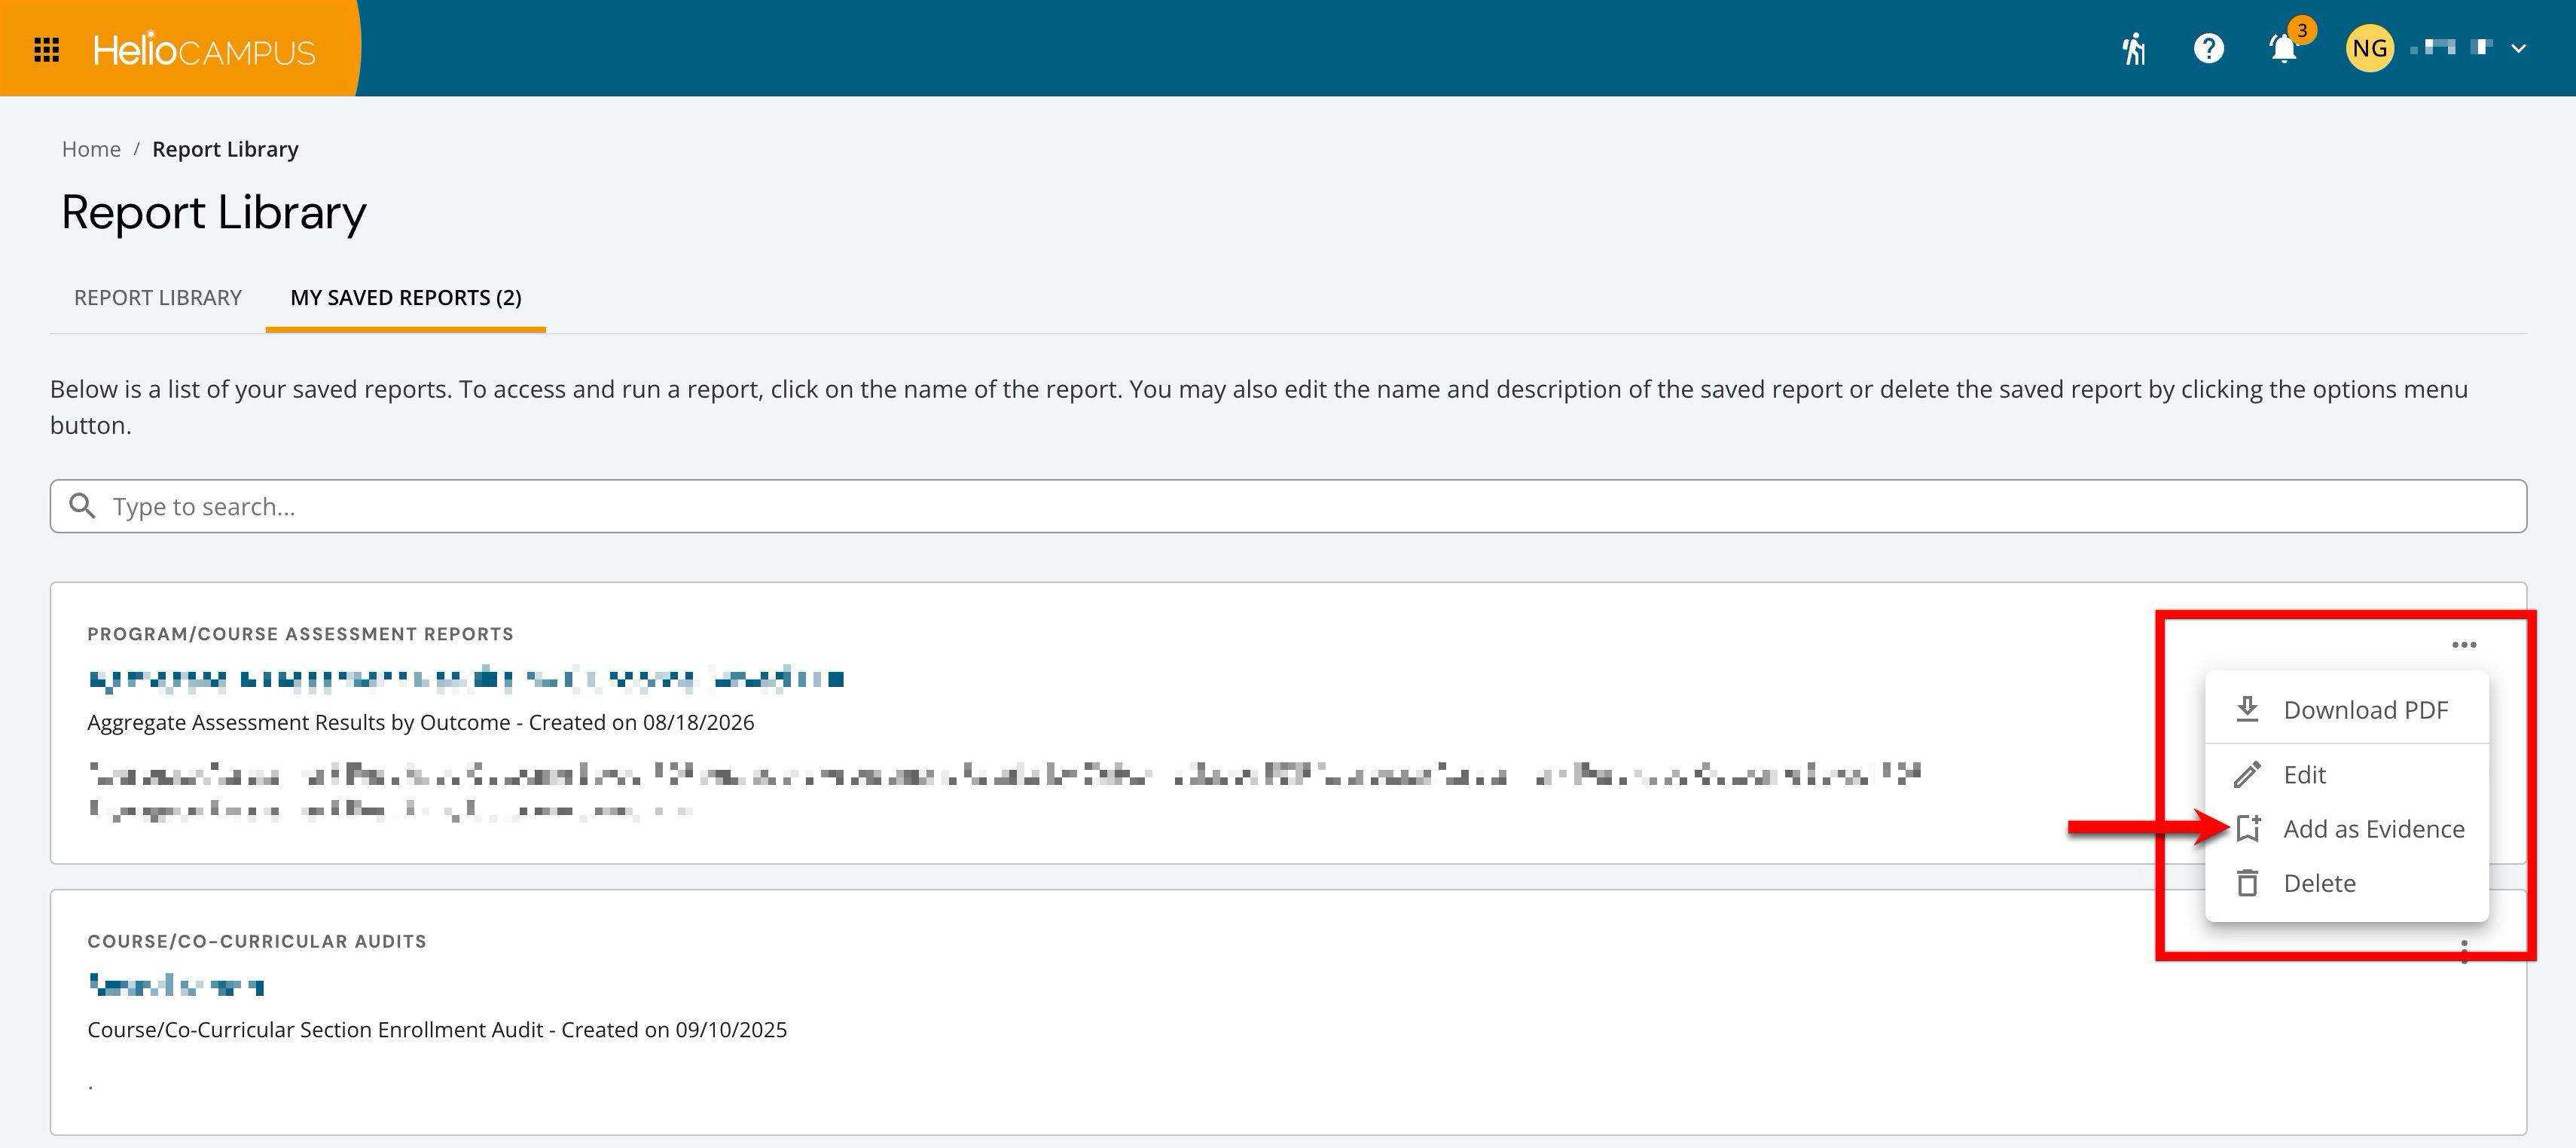
From the expanded options menu, select Add as Evidence.
-
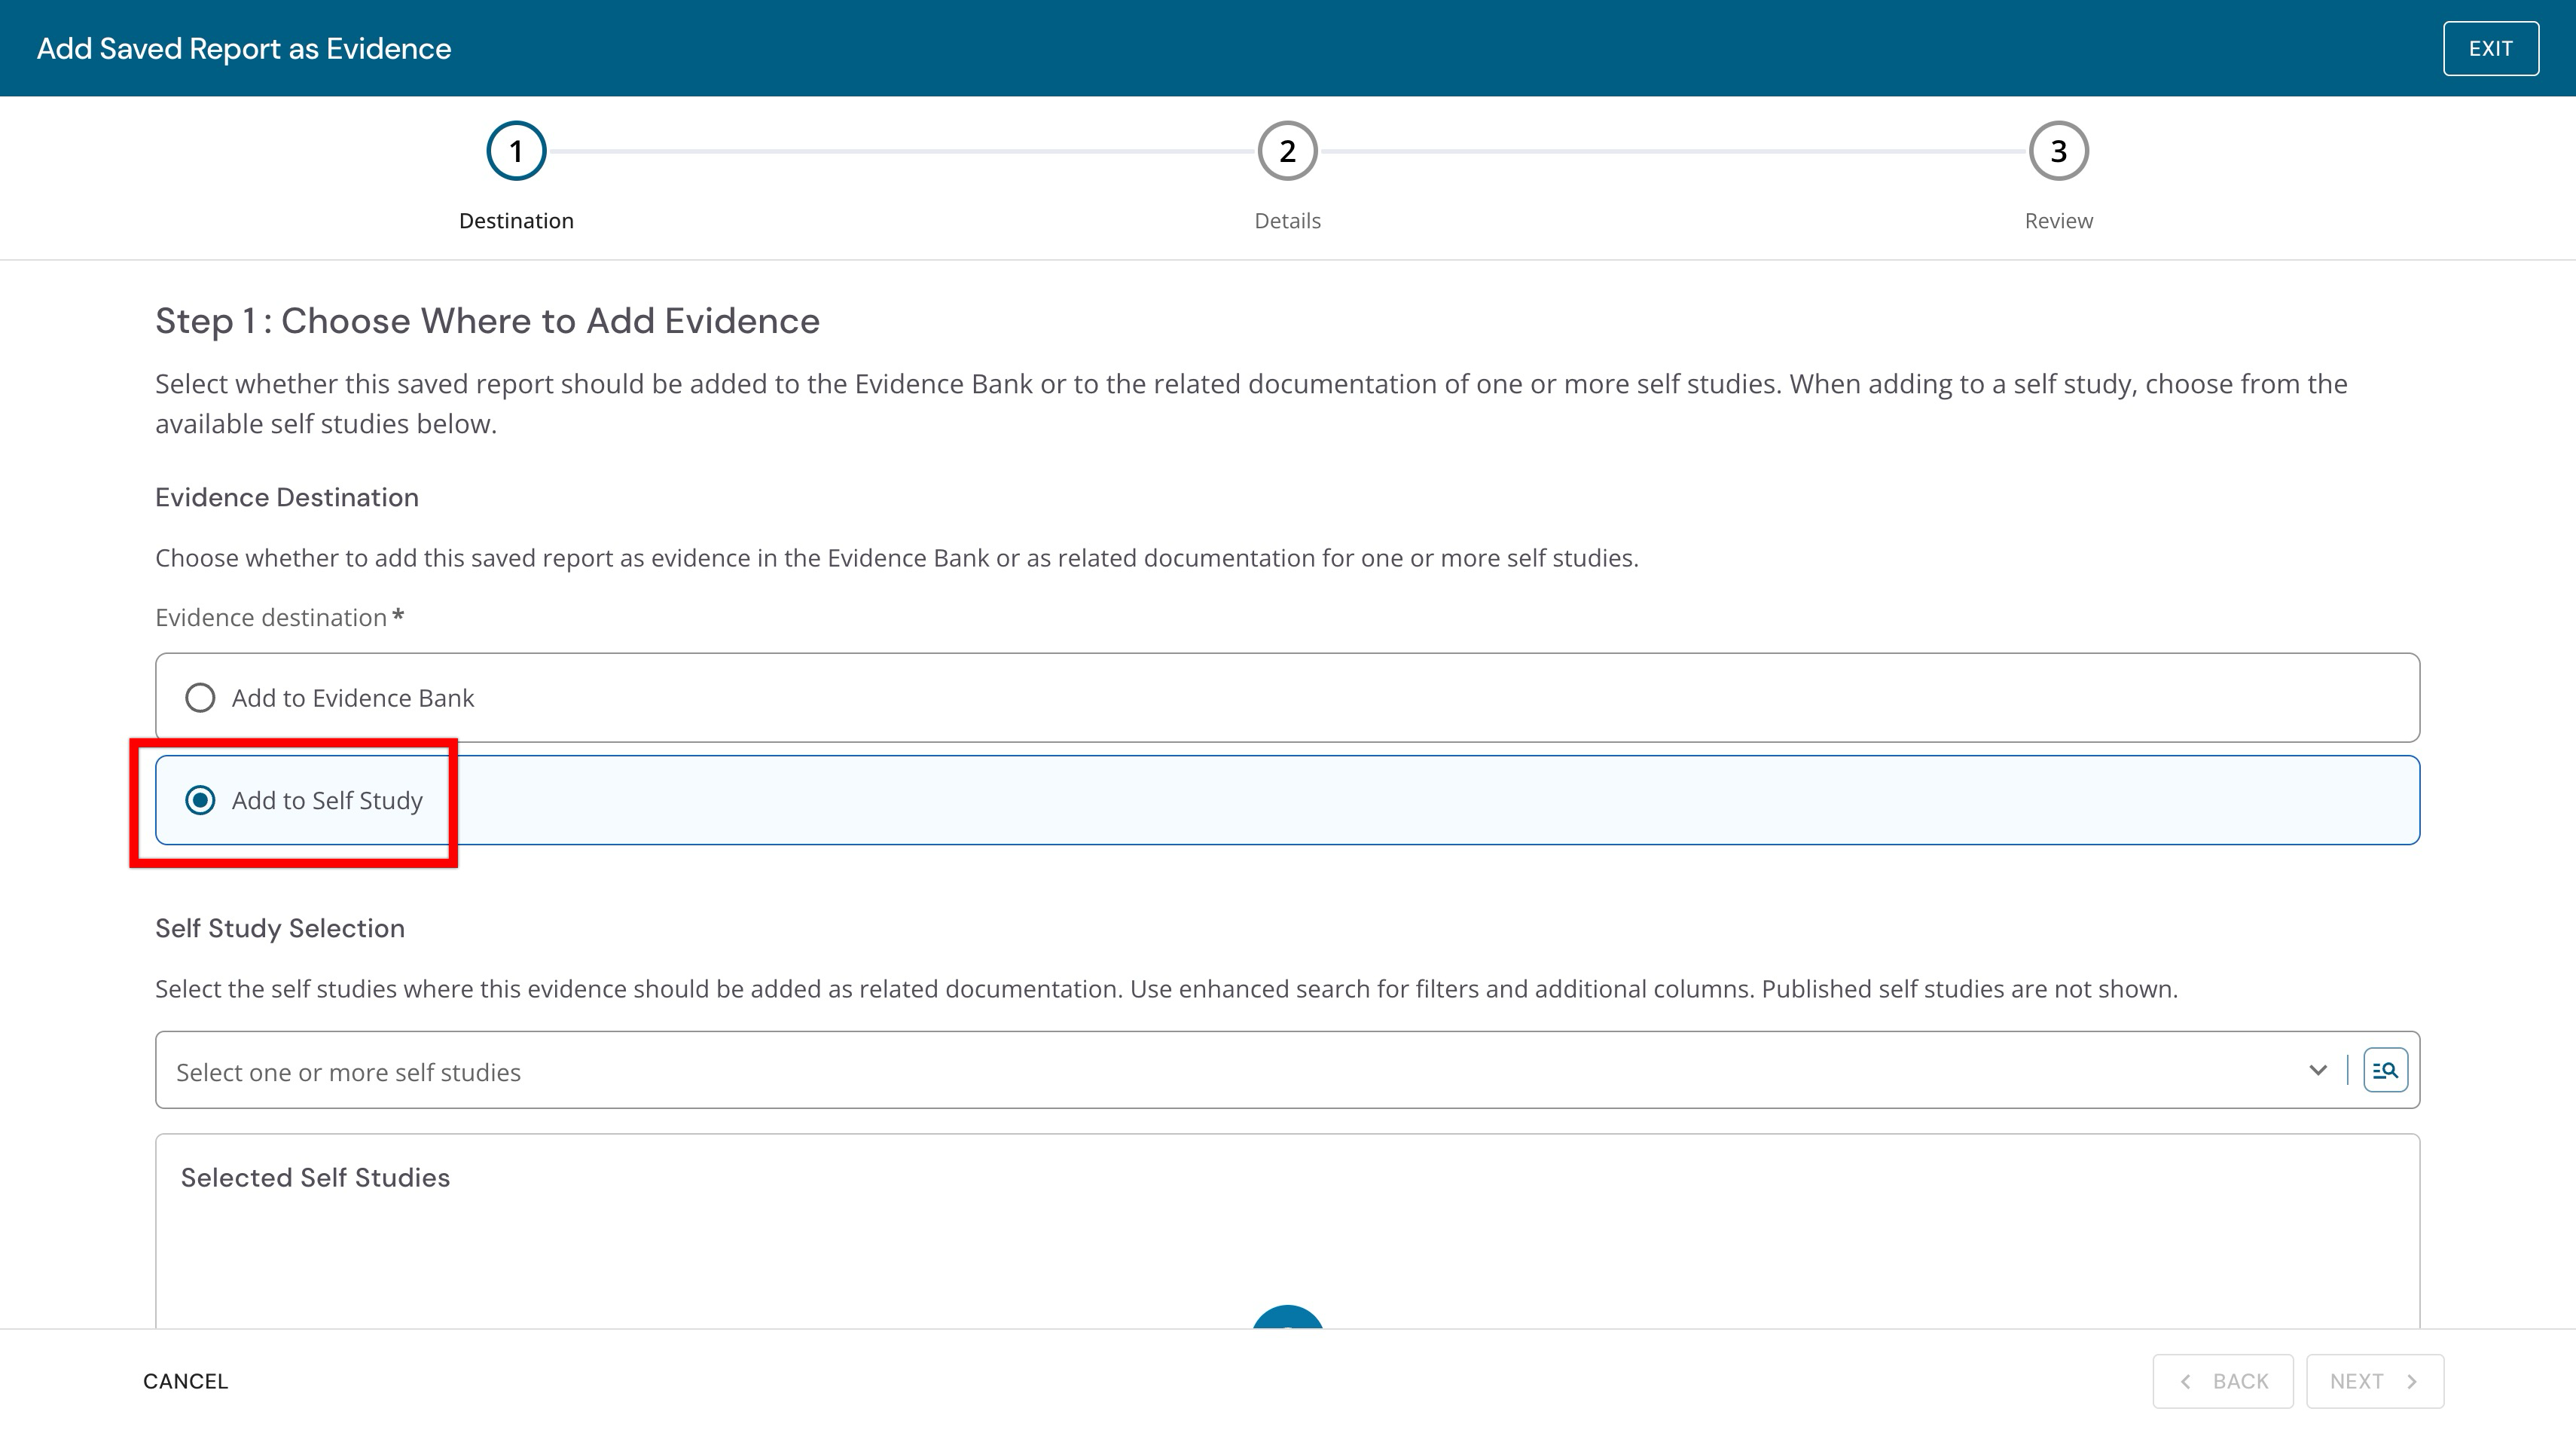
In step 1, choose Add to Self Study when the saved report should be made available as an evidence record in a self study.
-
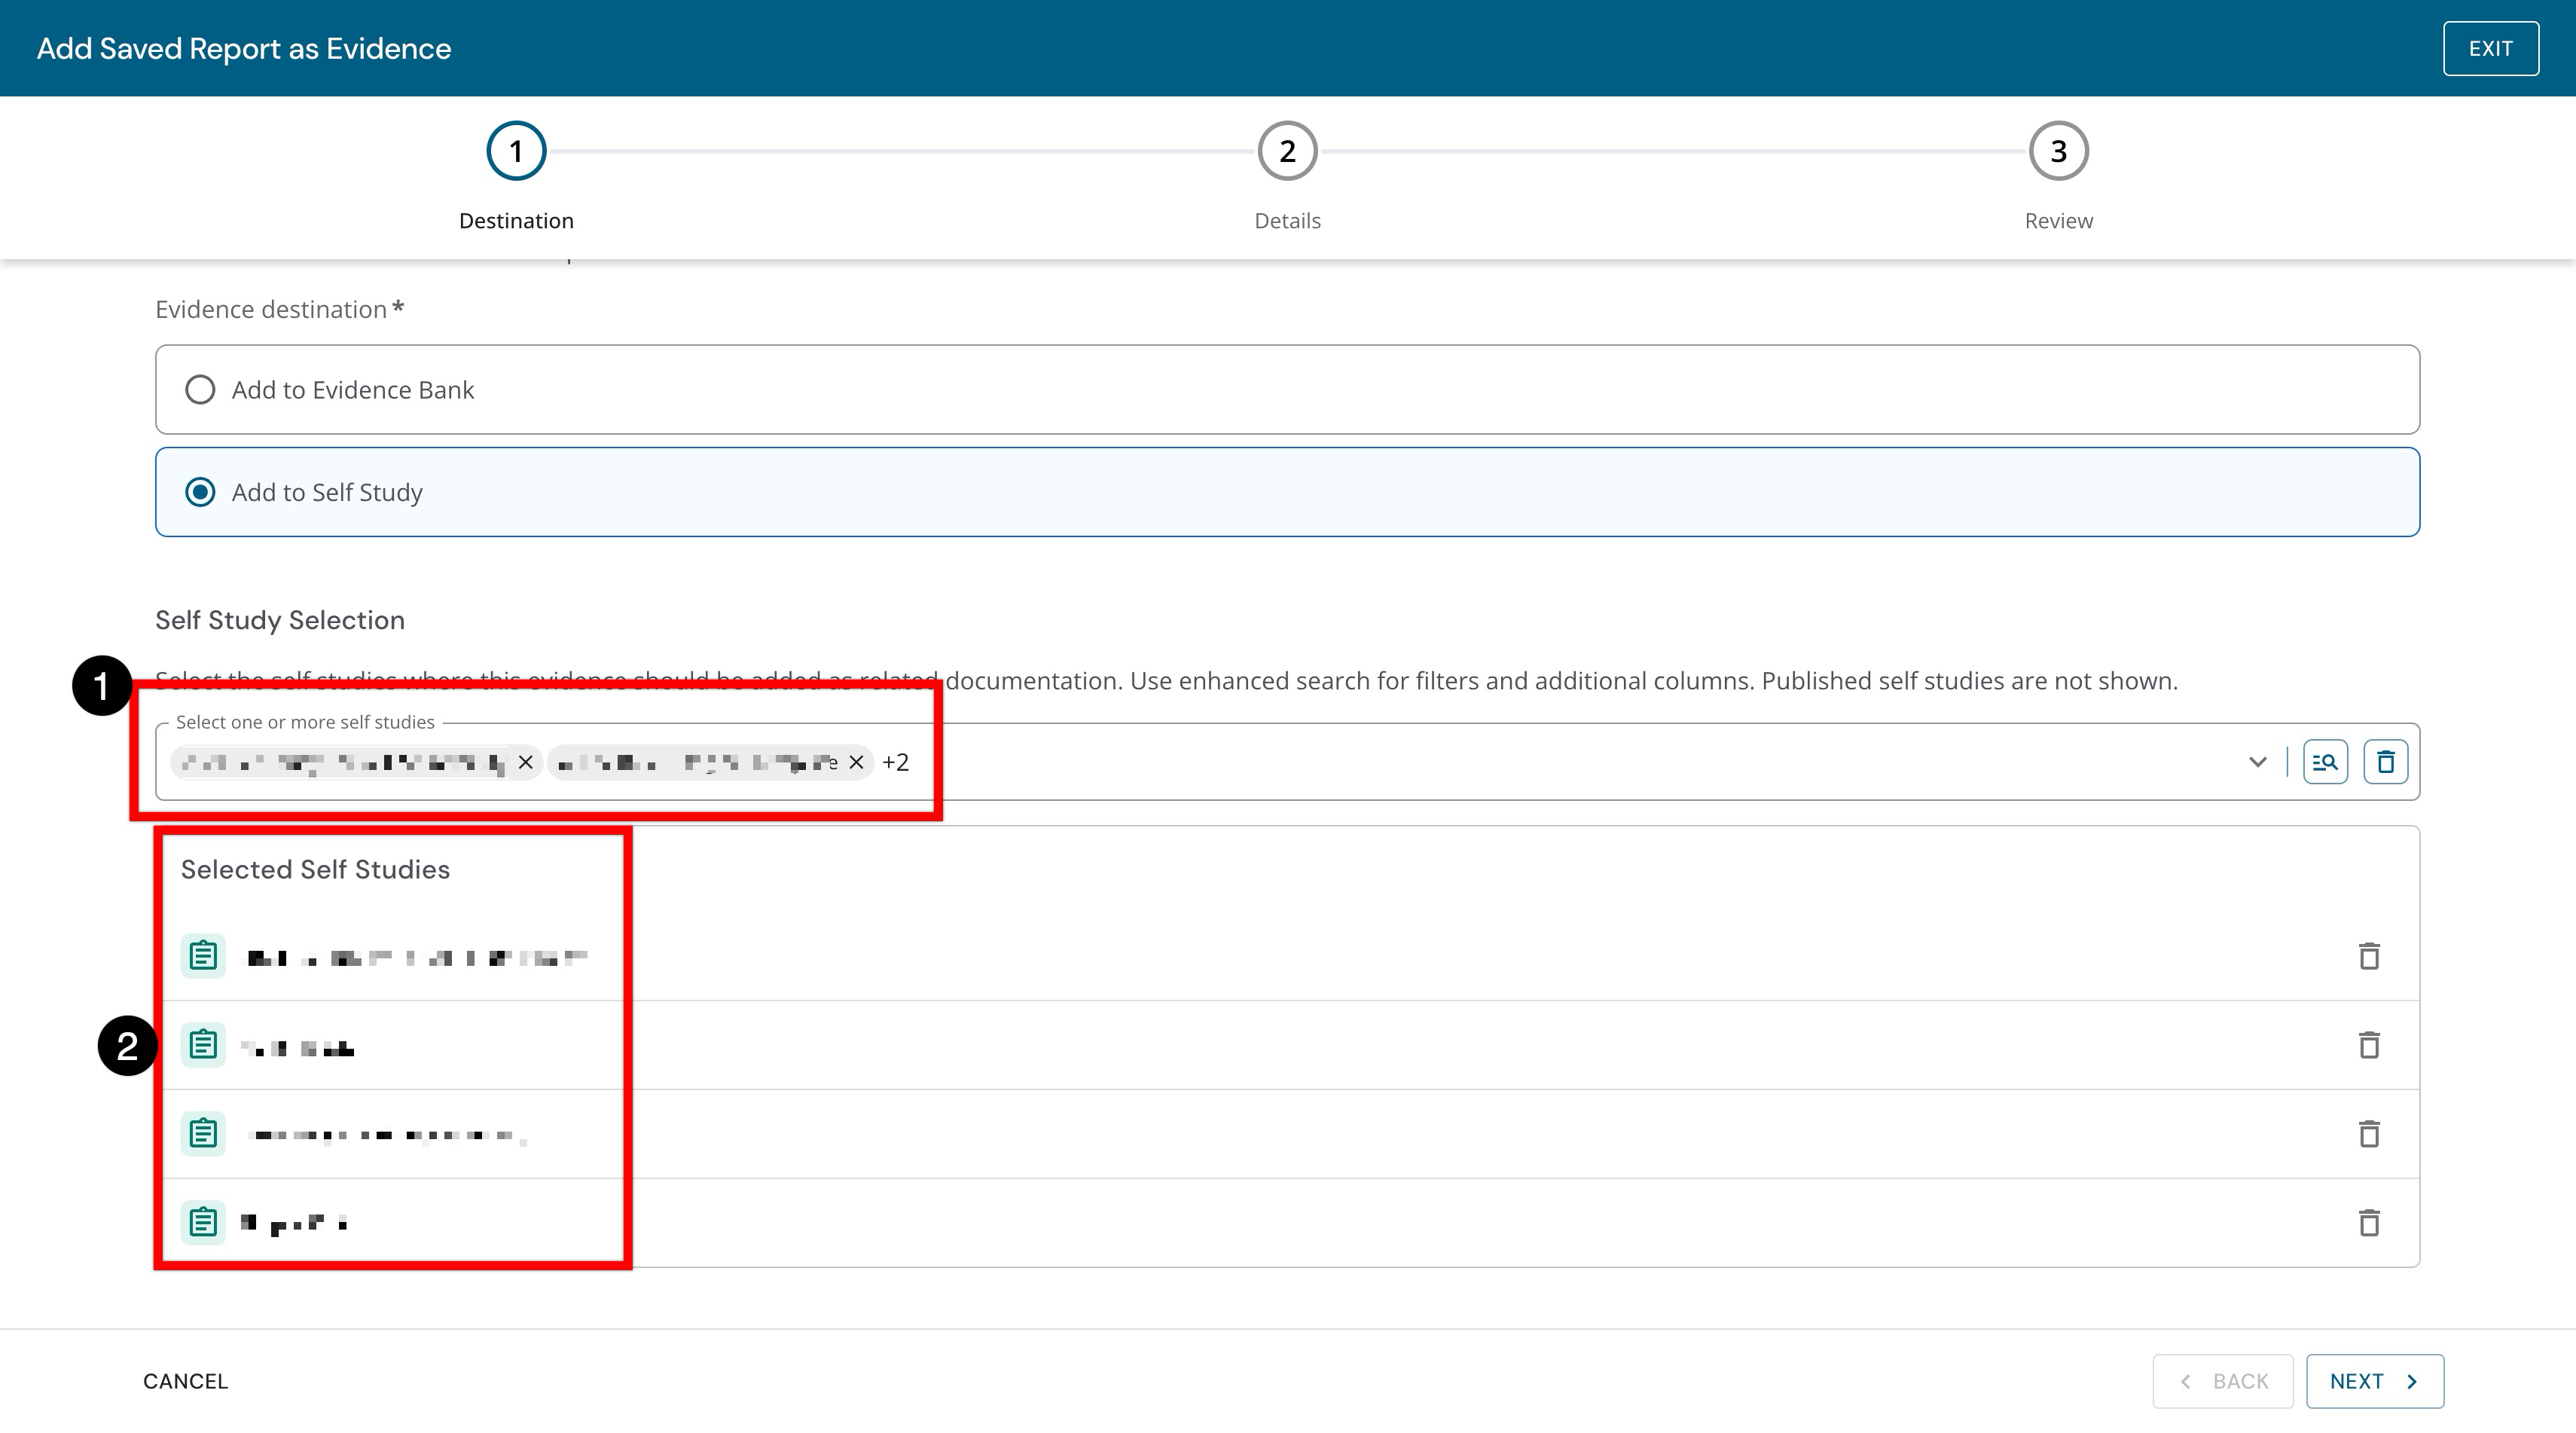
Search for (1) and select one or more self studies to associate the report with as evidence (2).
-
By default, the report's name and description are automatically entered (1); optionally, complete additional fields to provide supporting information for the evidence (1). By default, the selected PDF report will be attached (2).
-
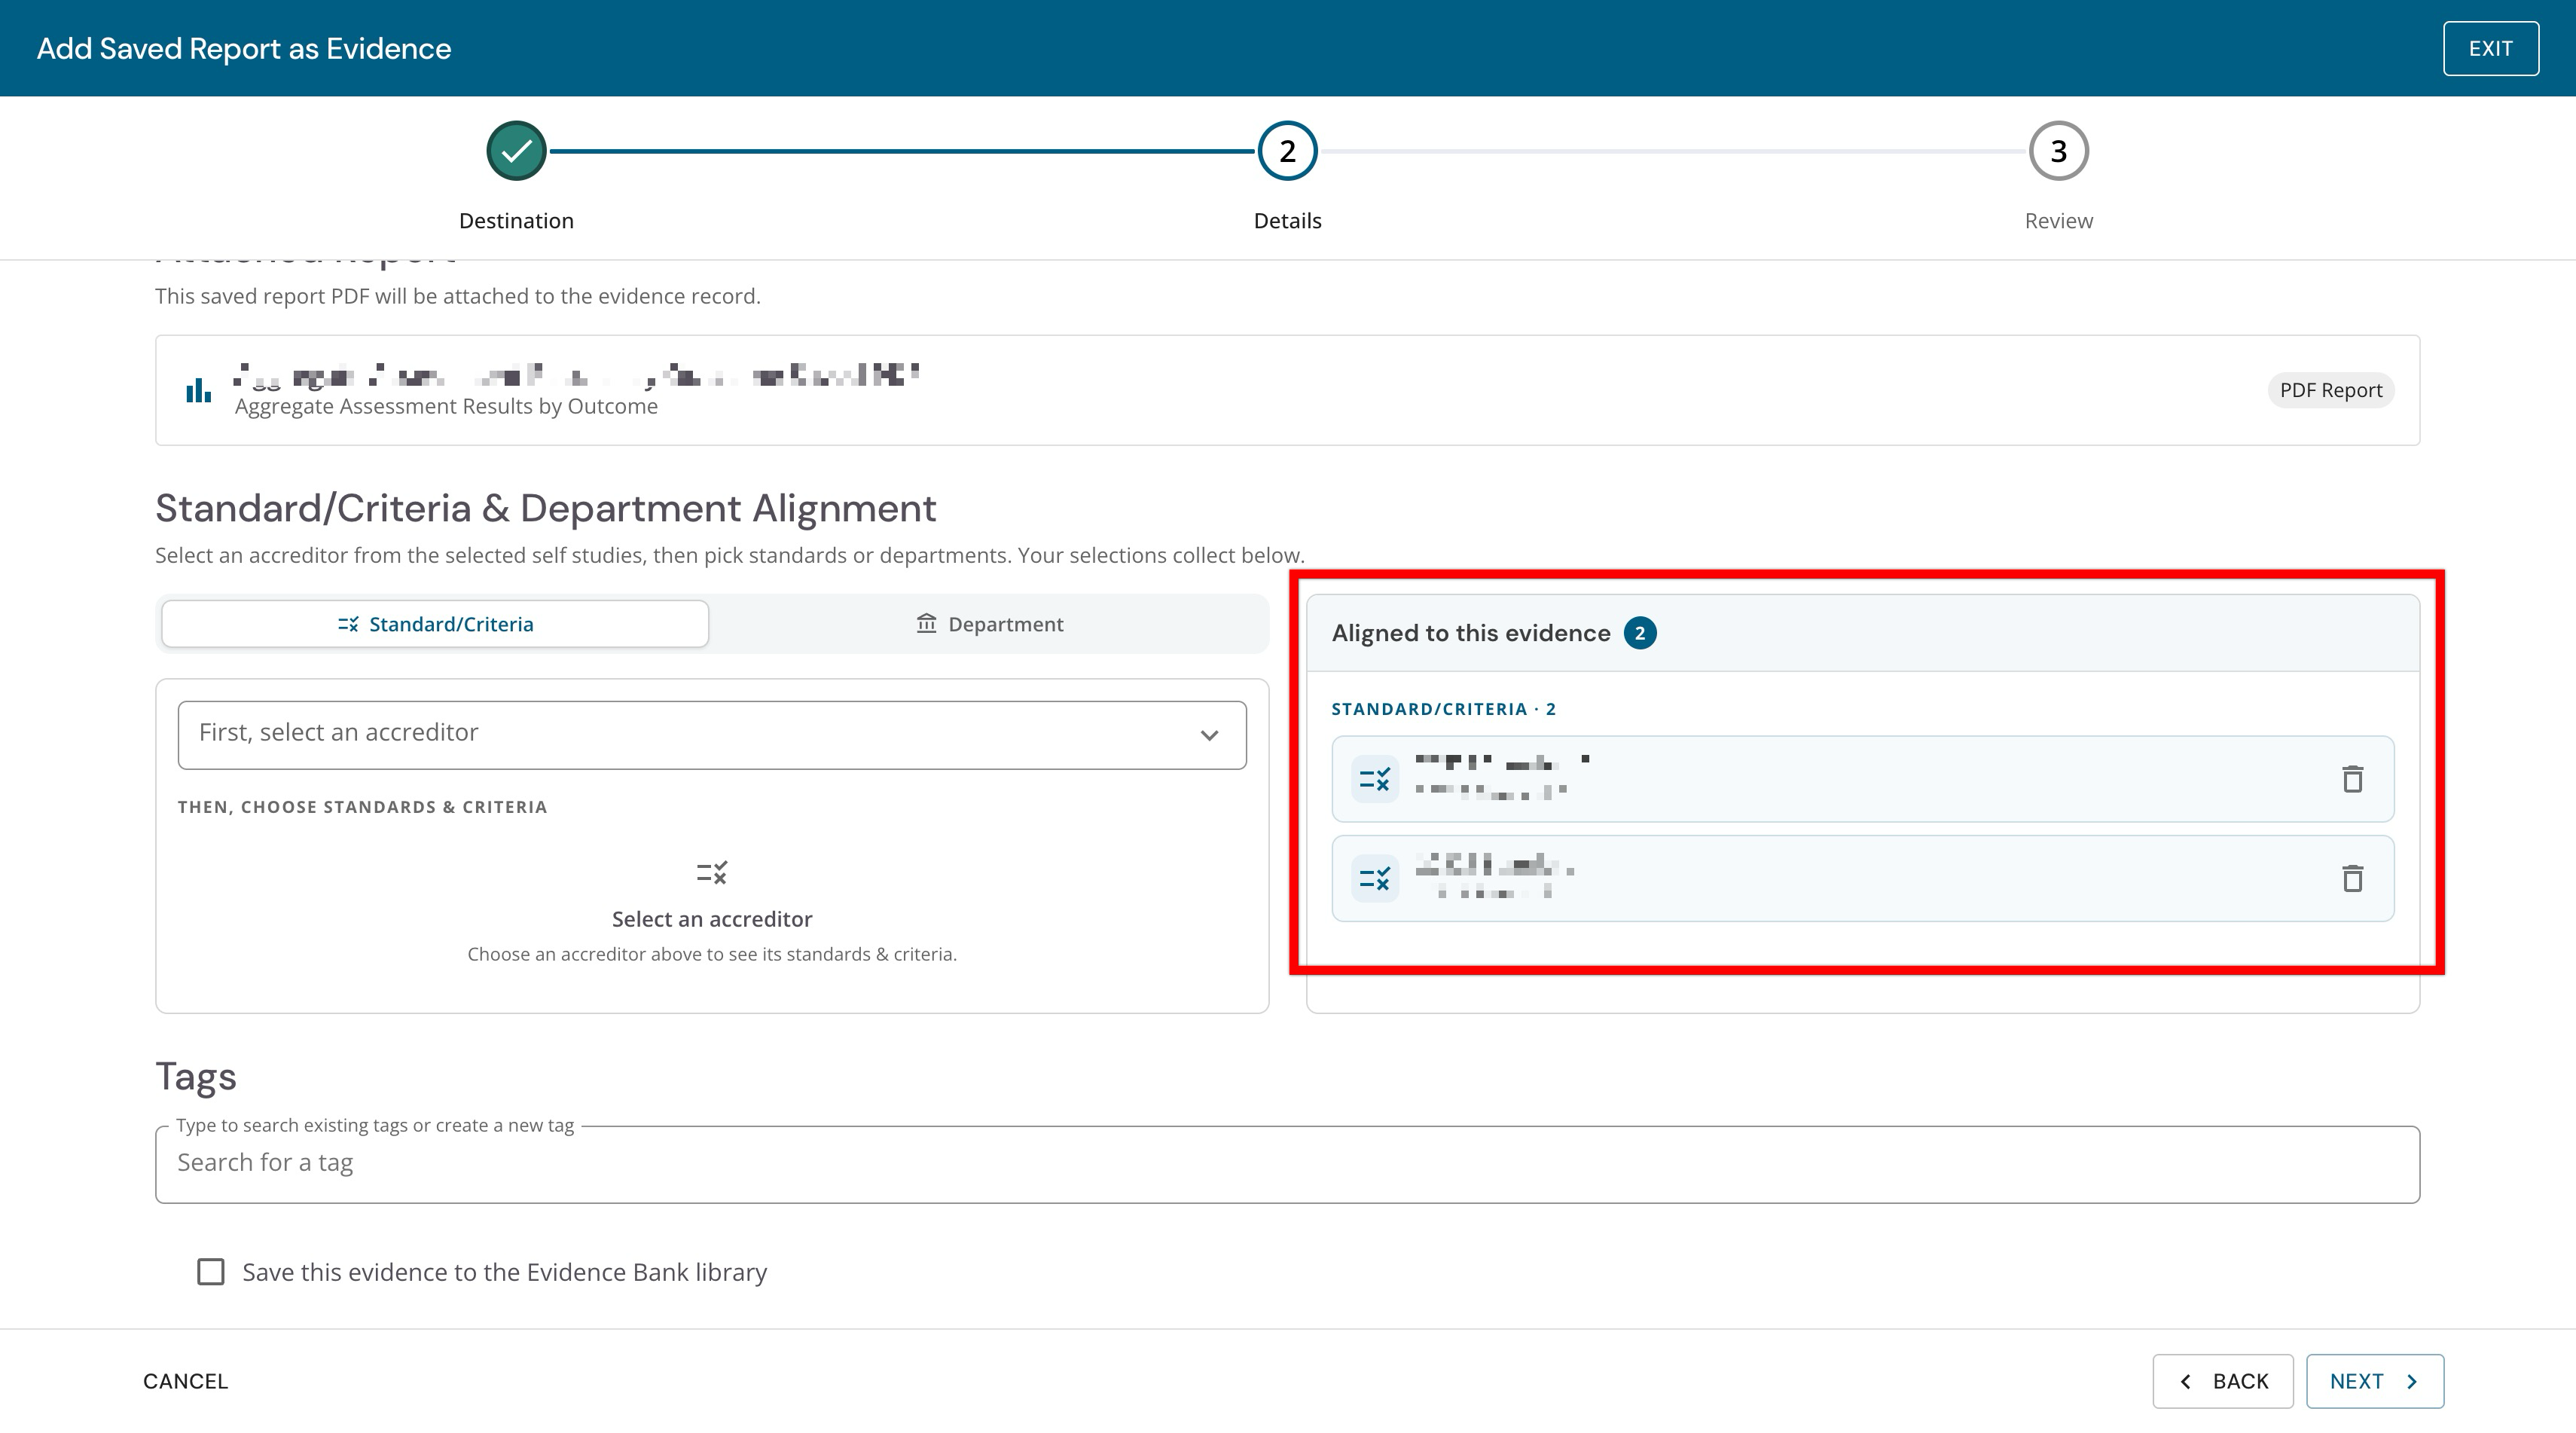
By default, standards/criteria associated with the self studies selected in the previous step will be automatically aligned to the report evidence.
-
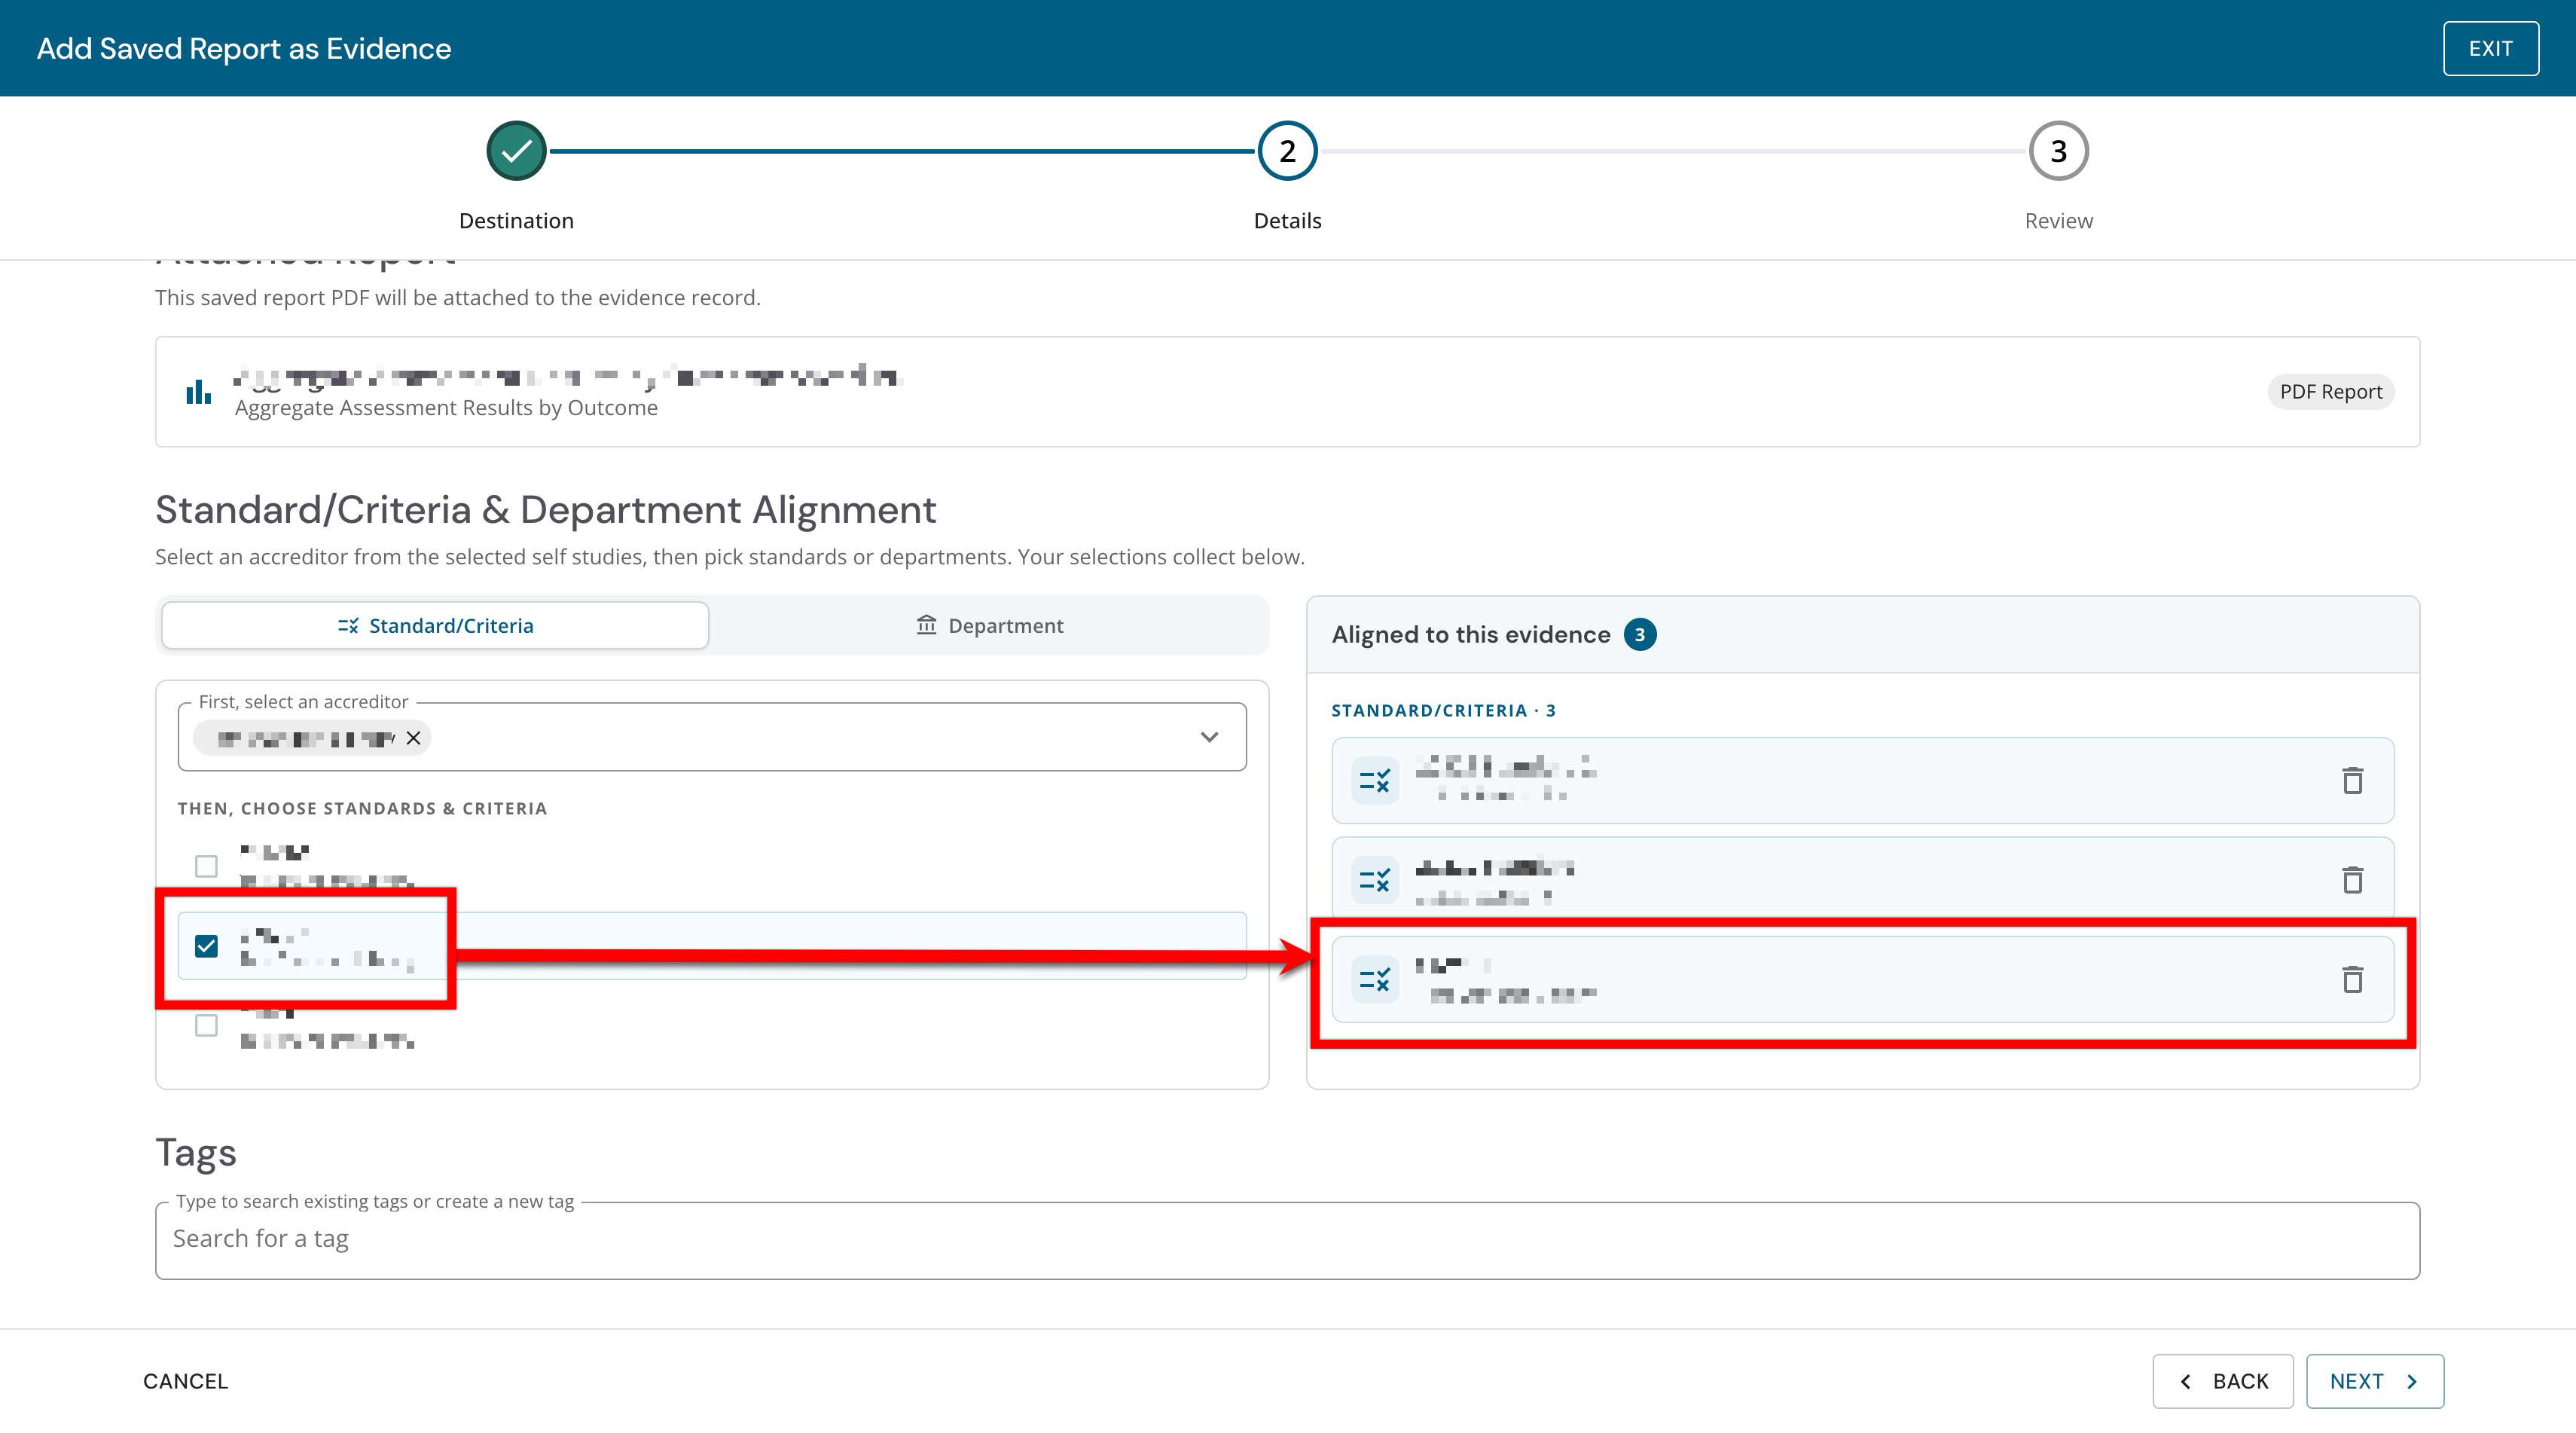
Additional standards/critieria can be aligned by choosing Standard/Criteria when the evidence supports an accreditor standard or criterion, or Department when the evidence should be associated with a department. After making a selection, search for and select one or more accreditor or department.
-
-
Optionally, tags can be added. Tags make evidence easier to find, group, and reuse later by connecting the saved report to common themes, initiatives, departments, or reporting needs.
-
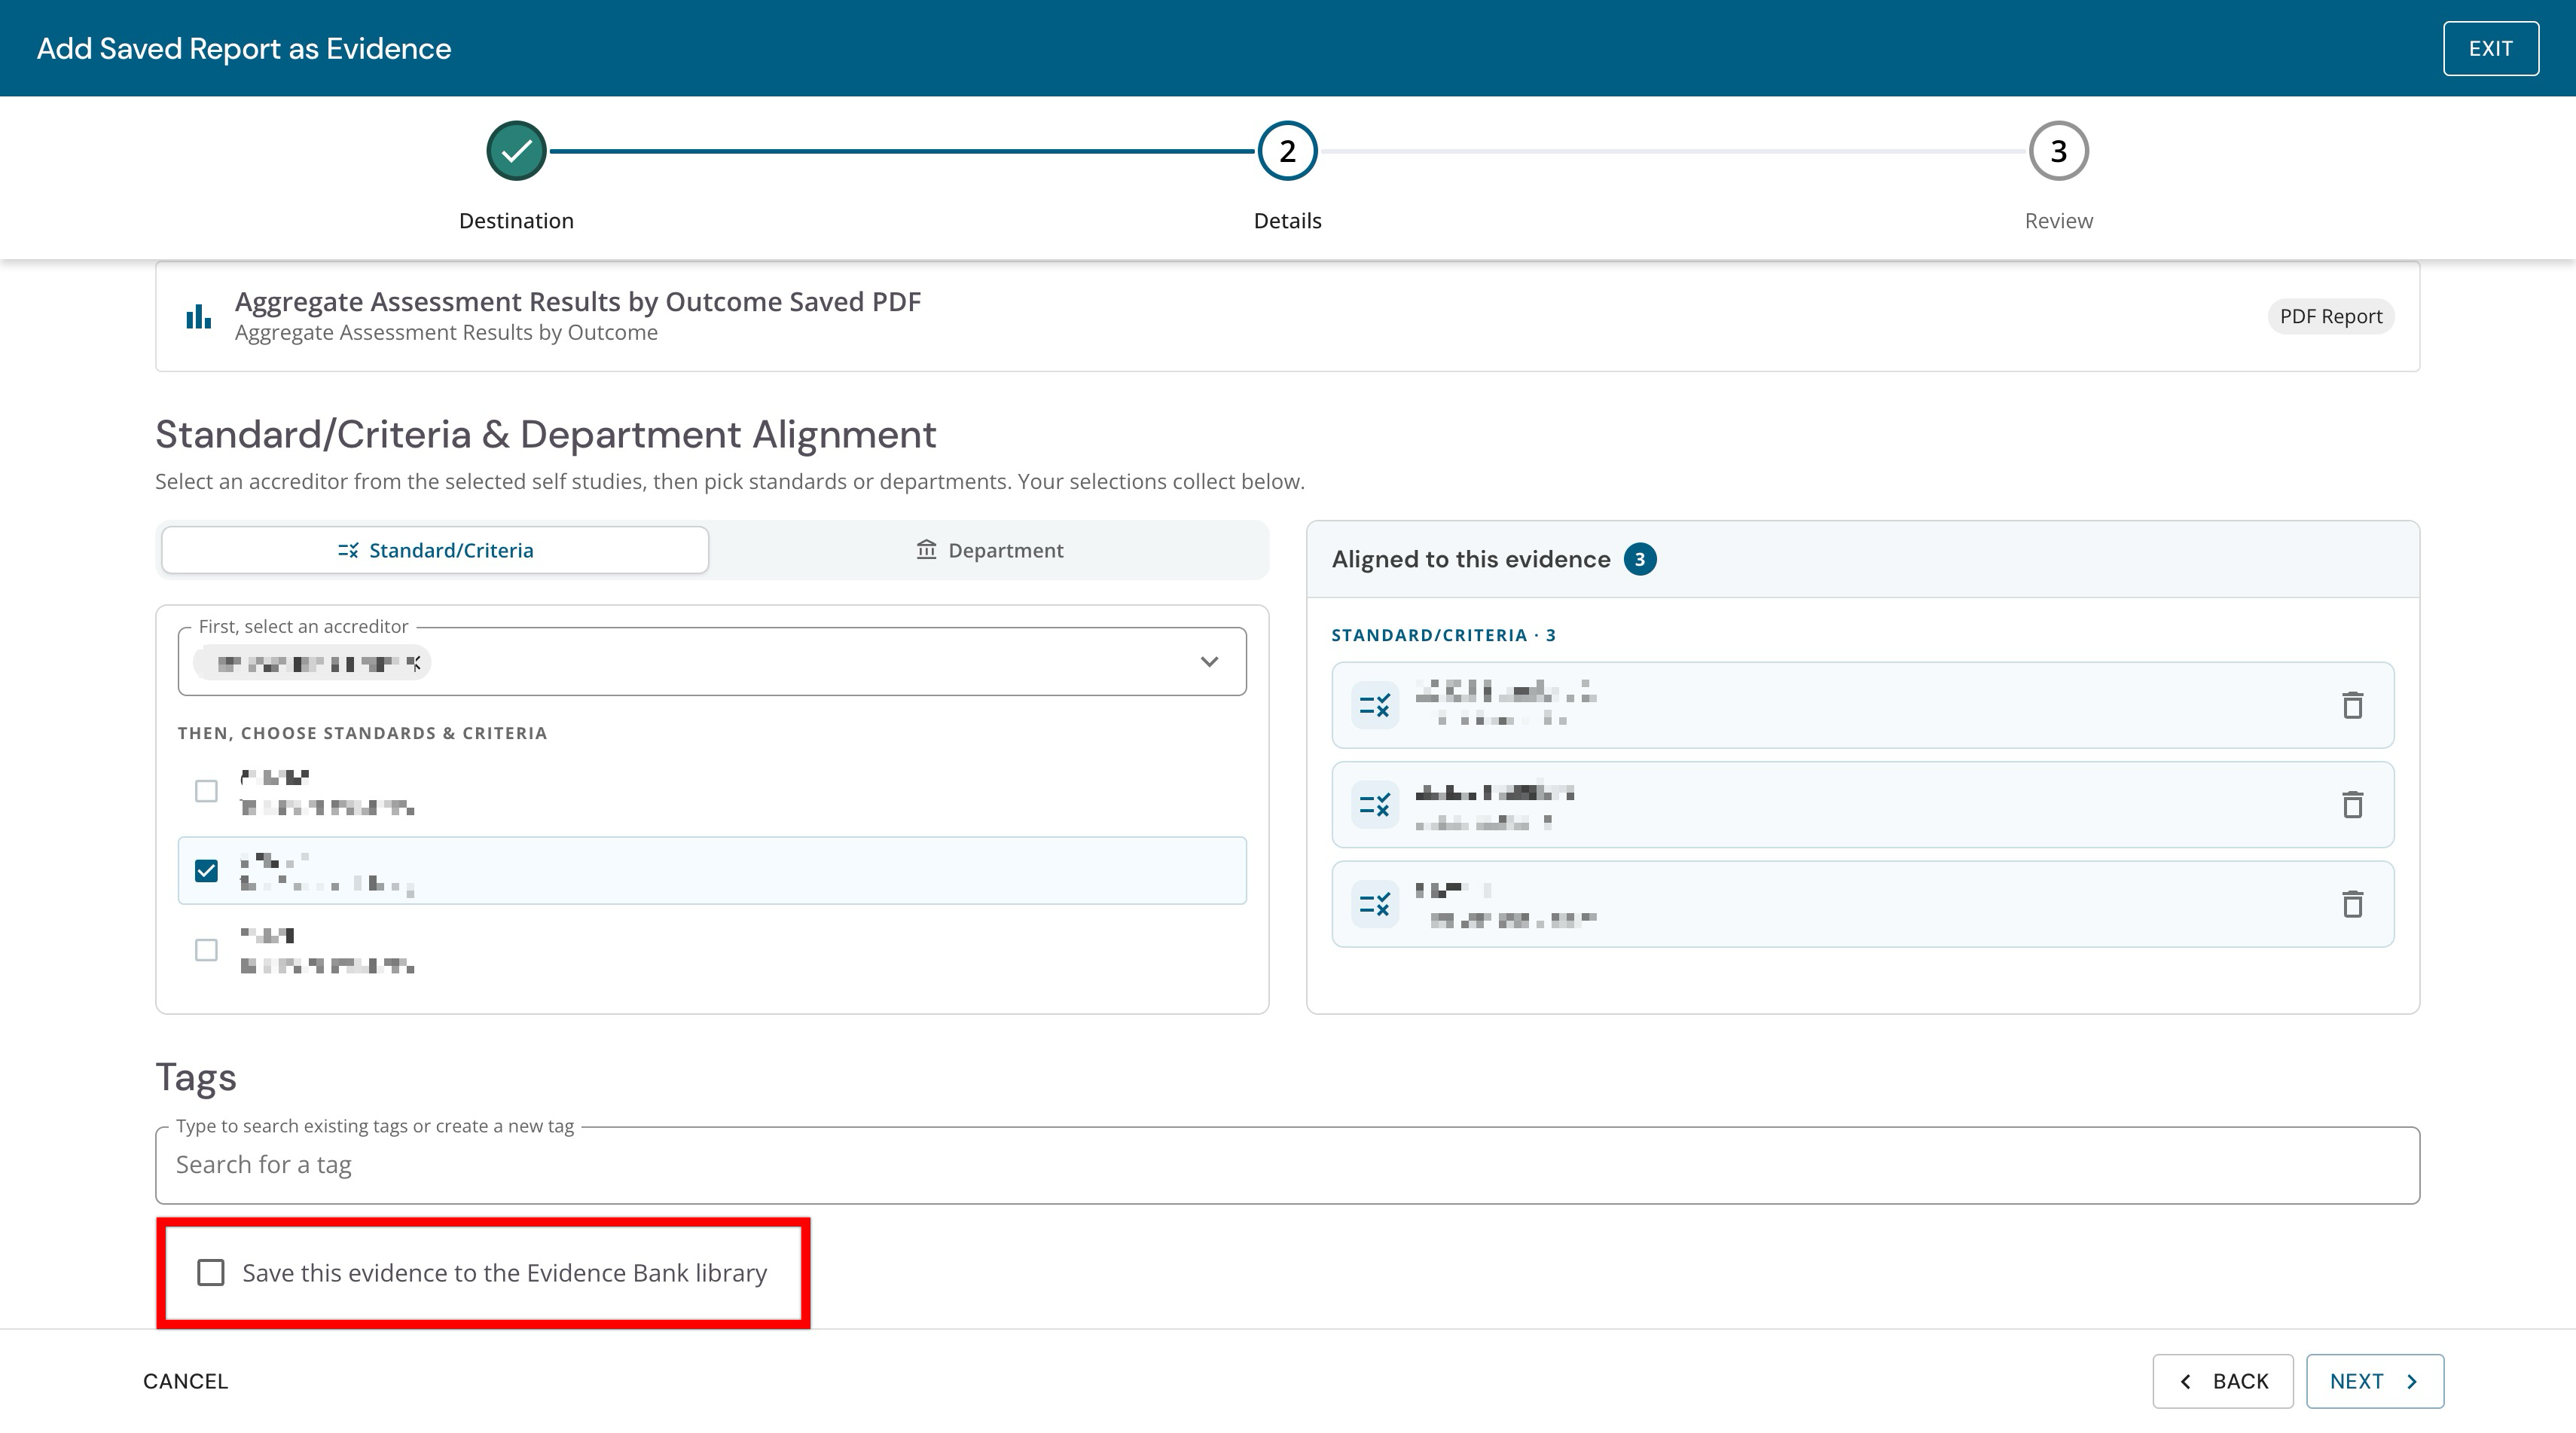
Optionally, the report can be added to the Evidence Bank.
-
-
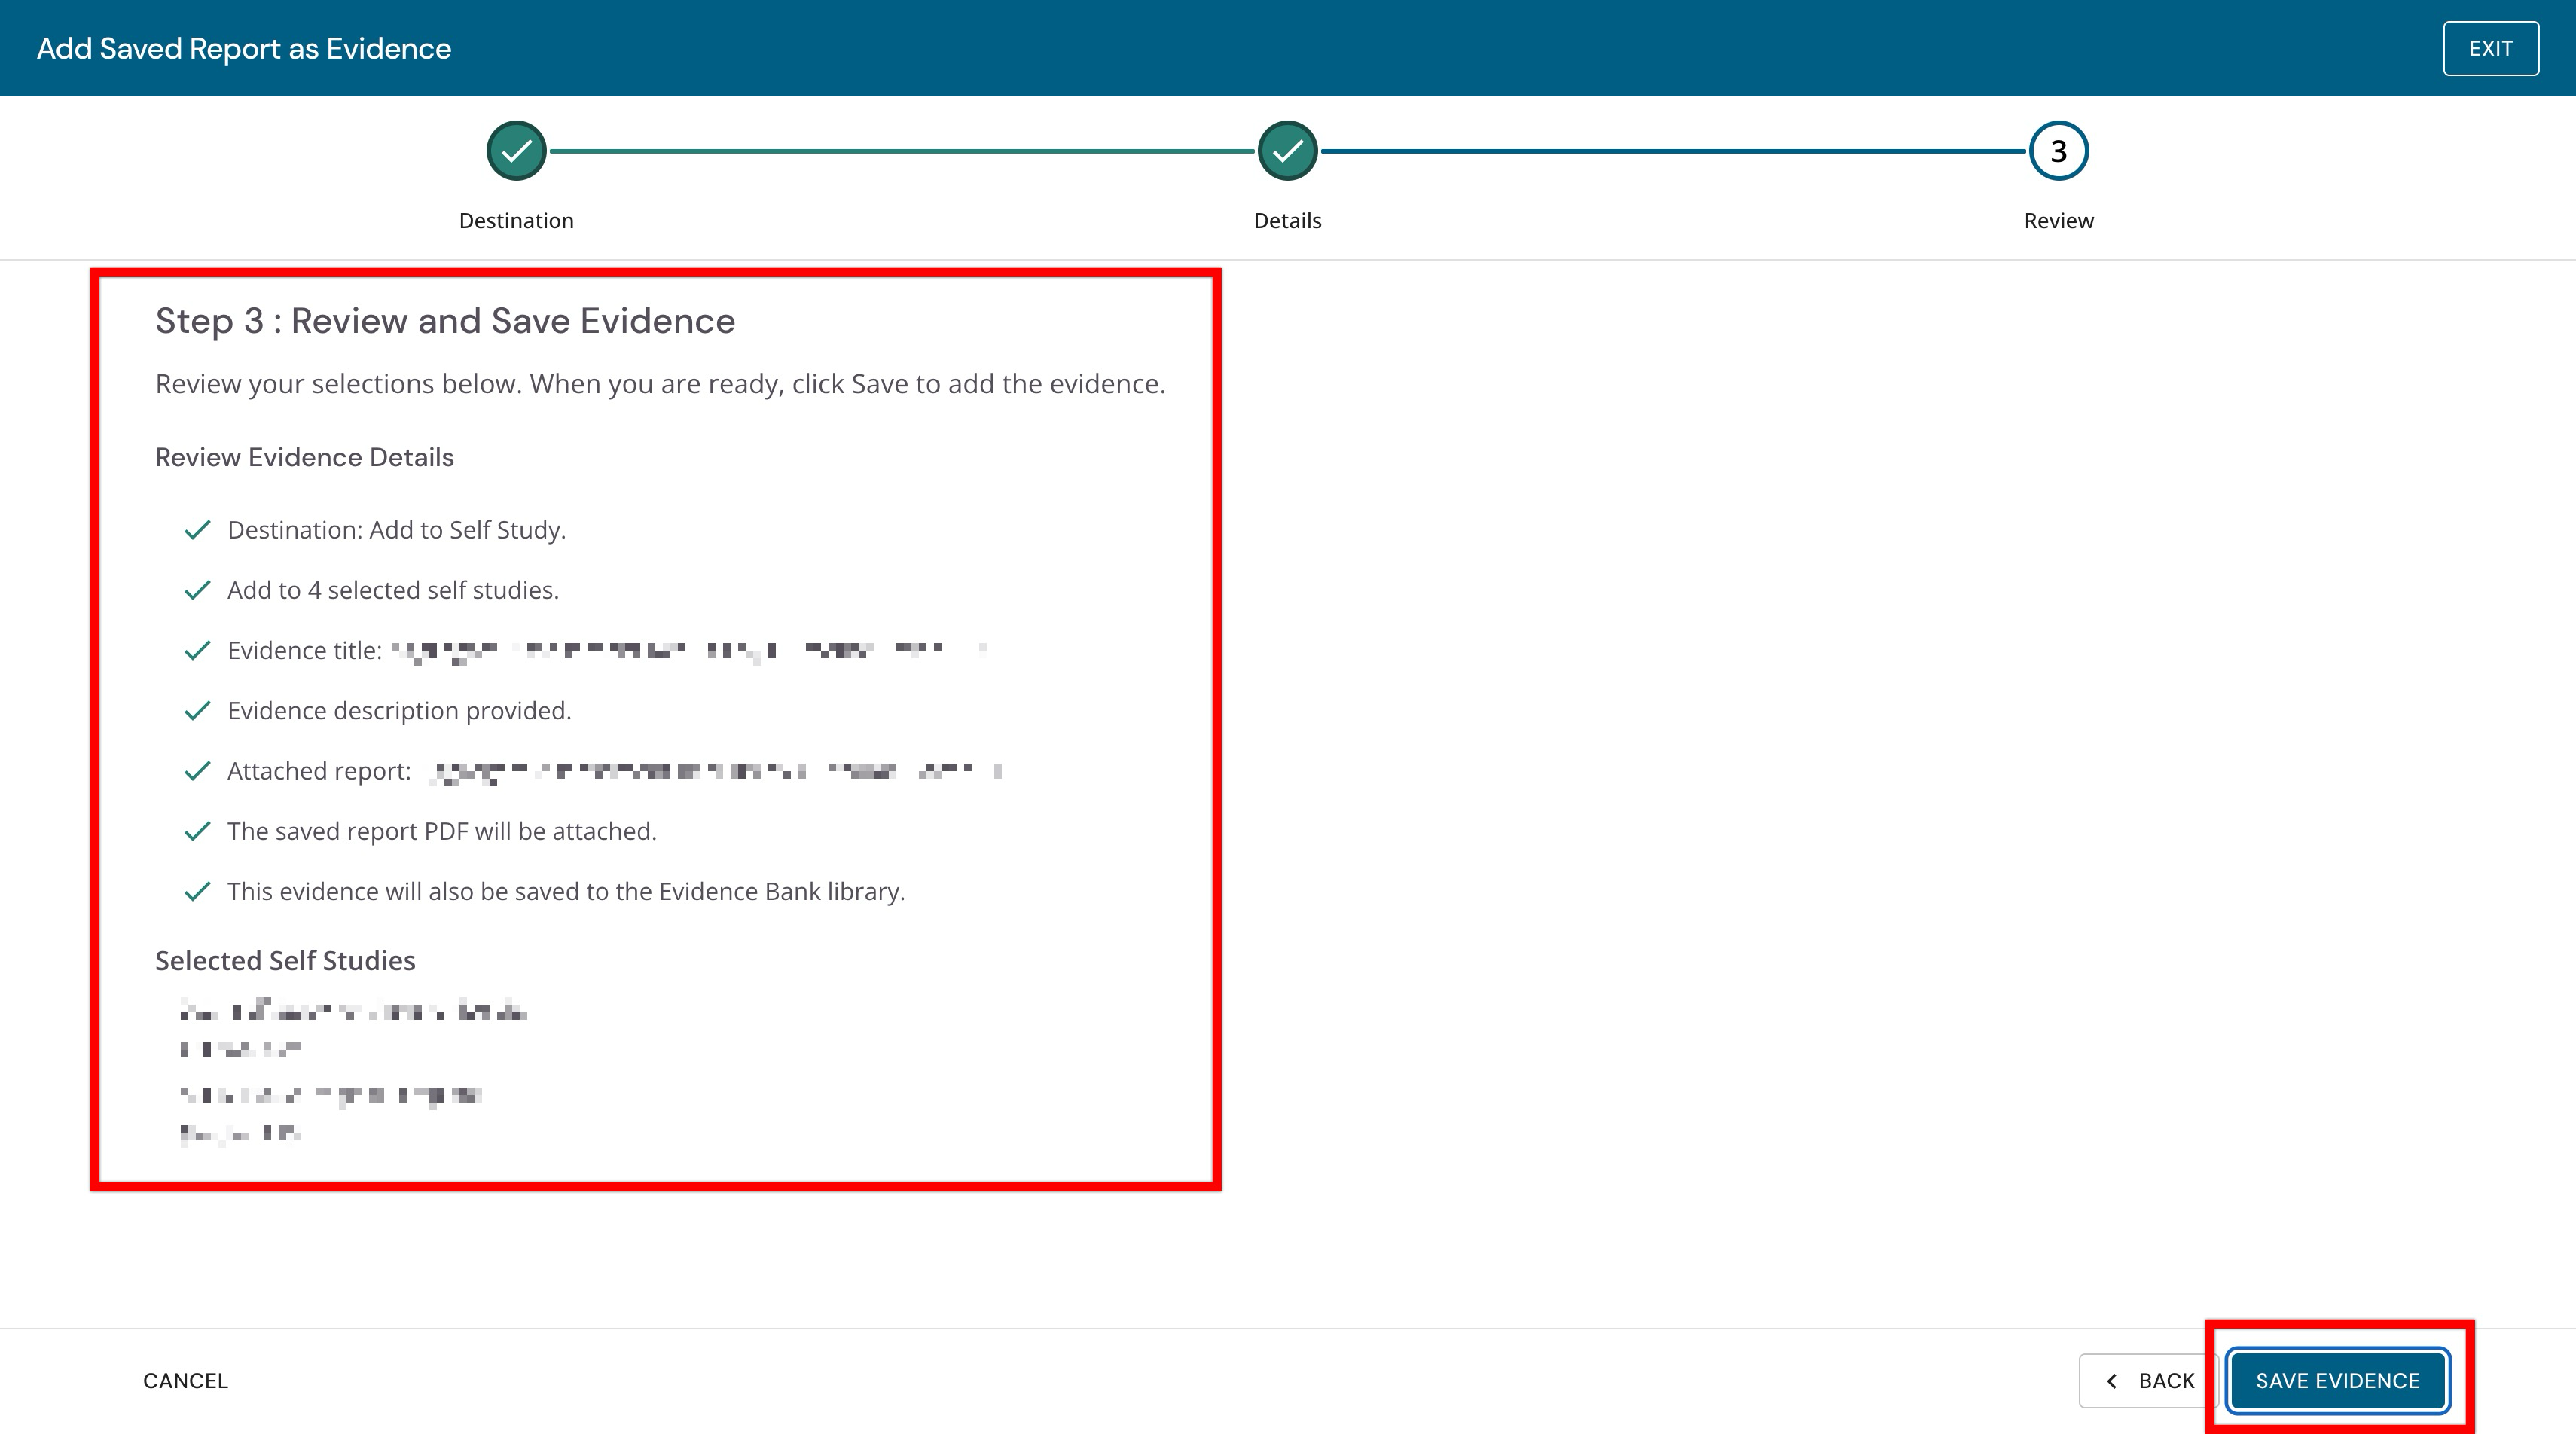
Select Next to review the selections and click Save Evidence to save the report to the self study.
FAQ
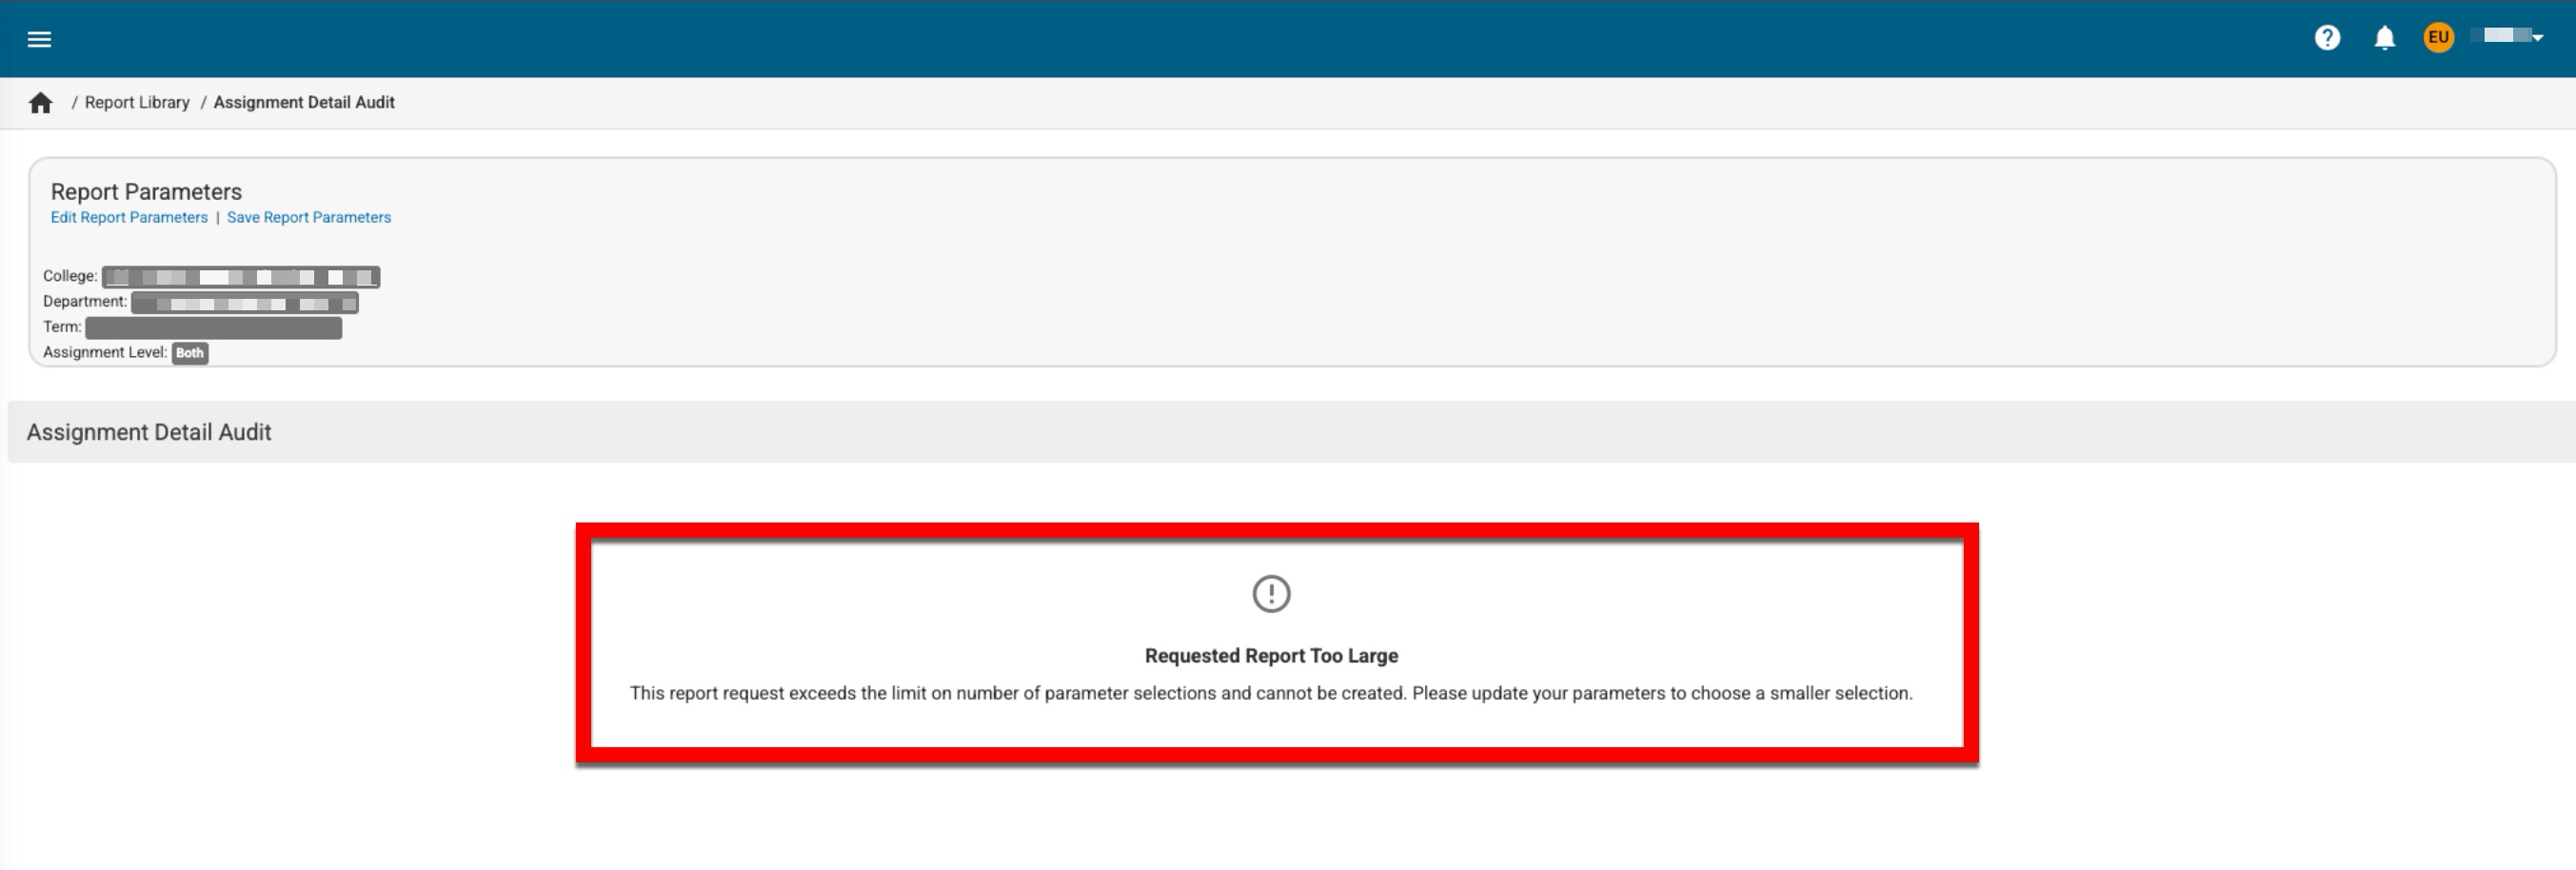
What are some options for narrowing the scope of my parameters when what I’ve requested is too large?
When parameter selections exceed the limit of 15,000, the report cannot be generated. Considering narrowing the Term parameter first, then the Organizational Hierarchy parameters, followed by the Course parameter. Splitting these parameters into separate report generations will often provide <15,000 selections.