
📙 Knowledge Base Tip: It is recommended that users review the Getting Assessment Support article prior to submitting a ticket via the Assessment Support Portal.
To create a support portal ticket, users will select a request type that most closely matches their issue. For this example, a support ticket is being submitted for an issue with a course, therefore, Educational Experiences is chosen as the request type.
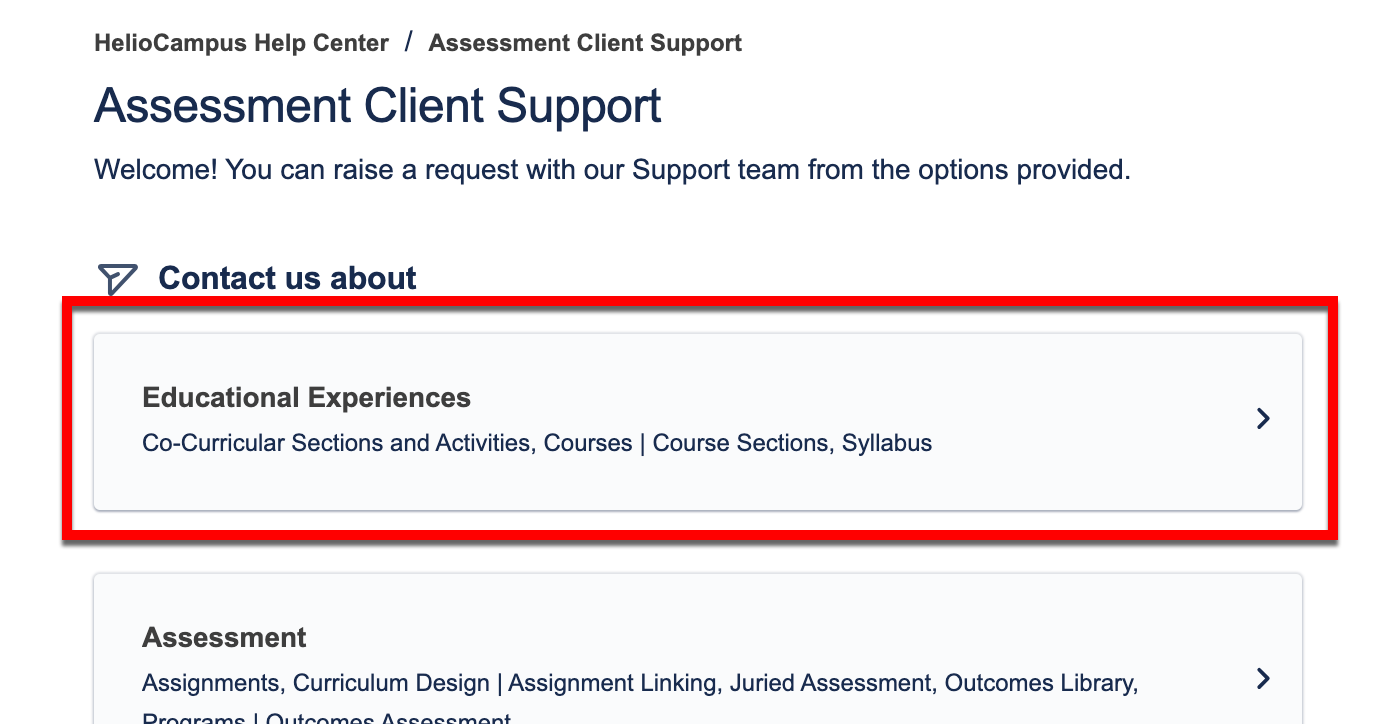
If it’s unclear which request type matches the issue being submitted, choose the most applicable request type based on the platform feature that most closely aligns with the issue.
Once the request type has been selected, it can be changed via the Contact Us About drop-down (1).
Options related to the request type will be displayed for selection (2). Select an option to narrow down further the support needed to solve the issue being submitted.
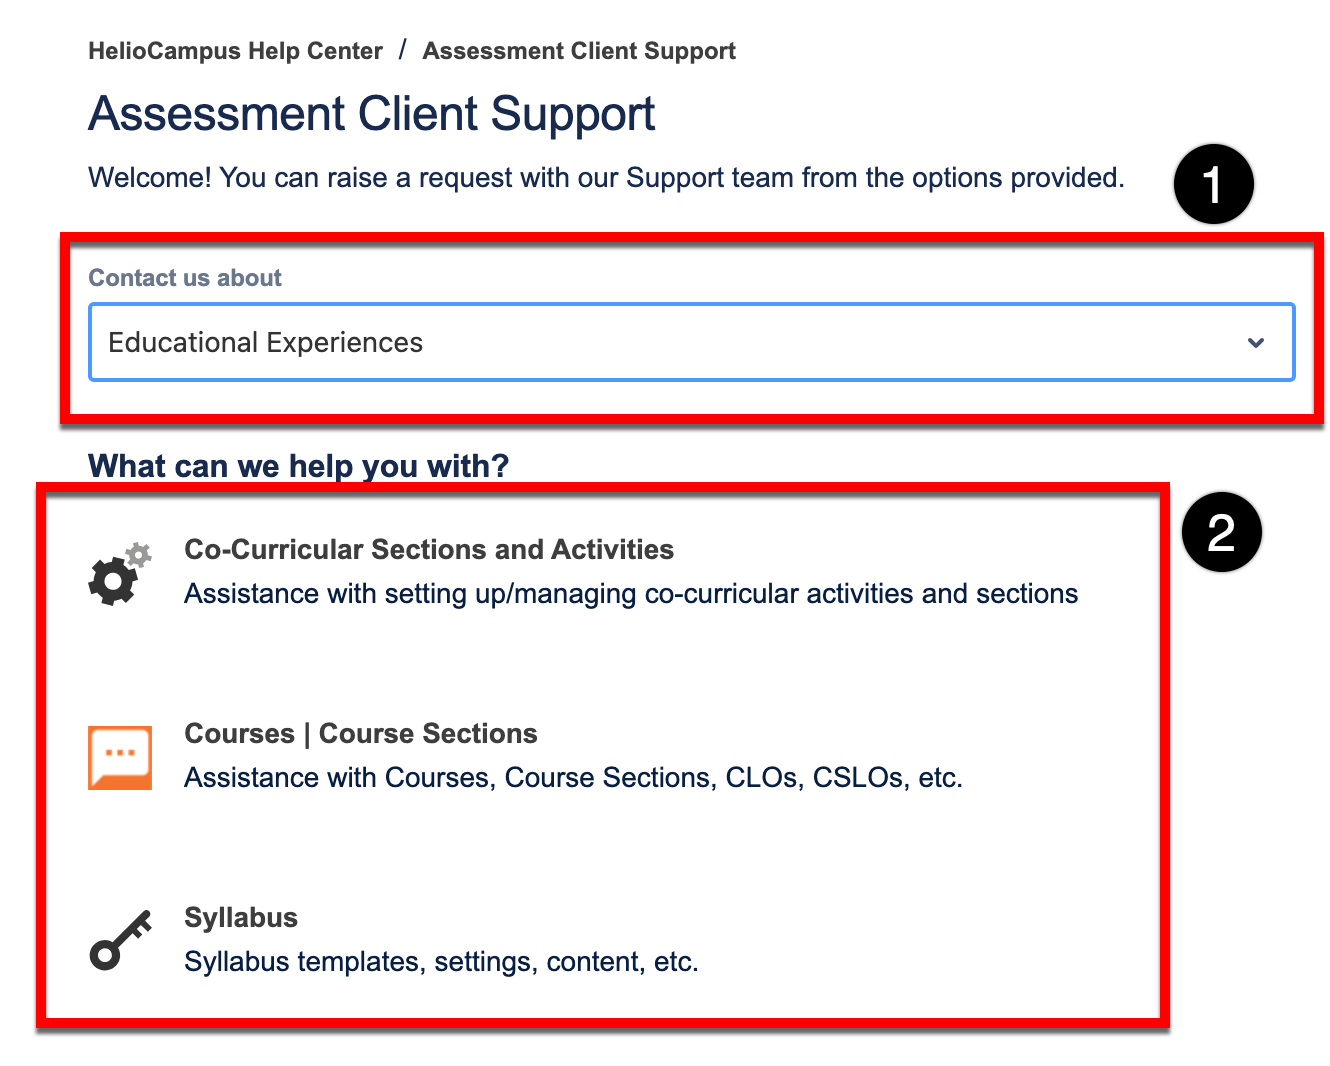
If it’s unclear which option to select, choose the most applicable option based on the descriptive text for each option.
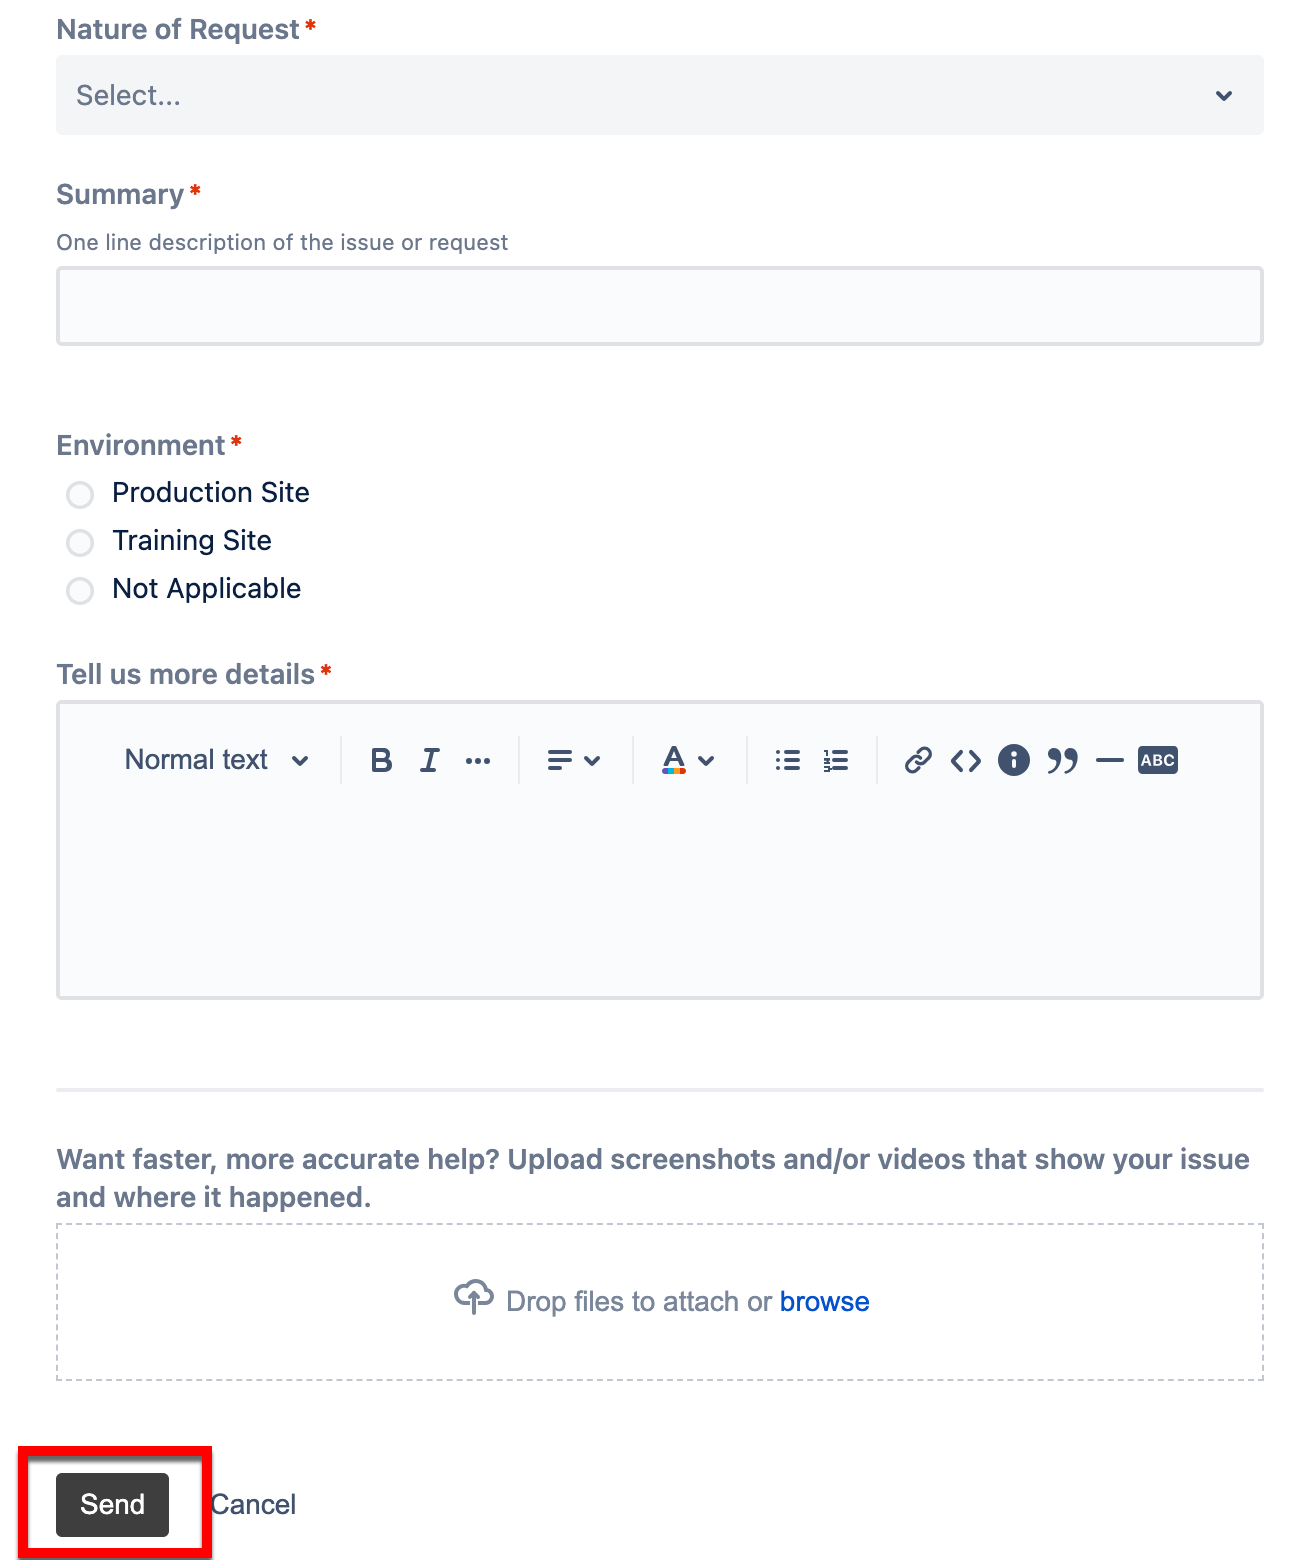
Depending on the selected request type, a form will be generated to provide the details of the issue. Once all details have been entered, click Send to submit the ticket to the HelioCampus Client Support Team. When applicable, it is highly recommended to include screenshots and attachments that will help the HelioCampus Client Support Team better solve the issue being submitted.
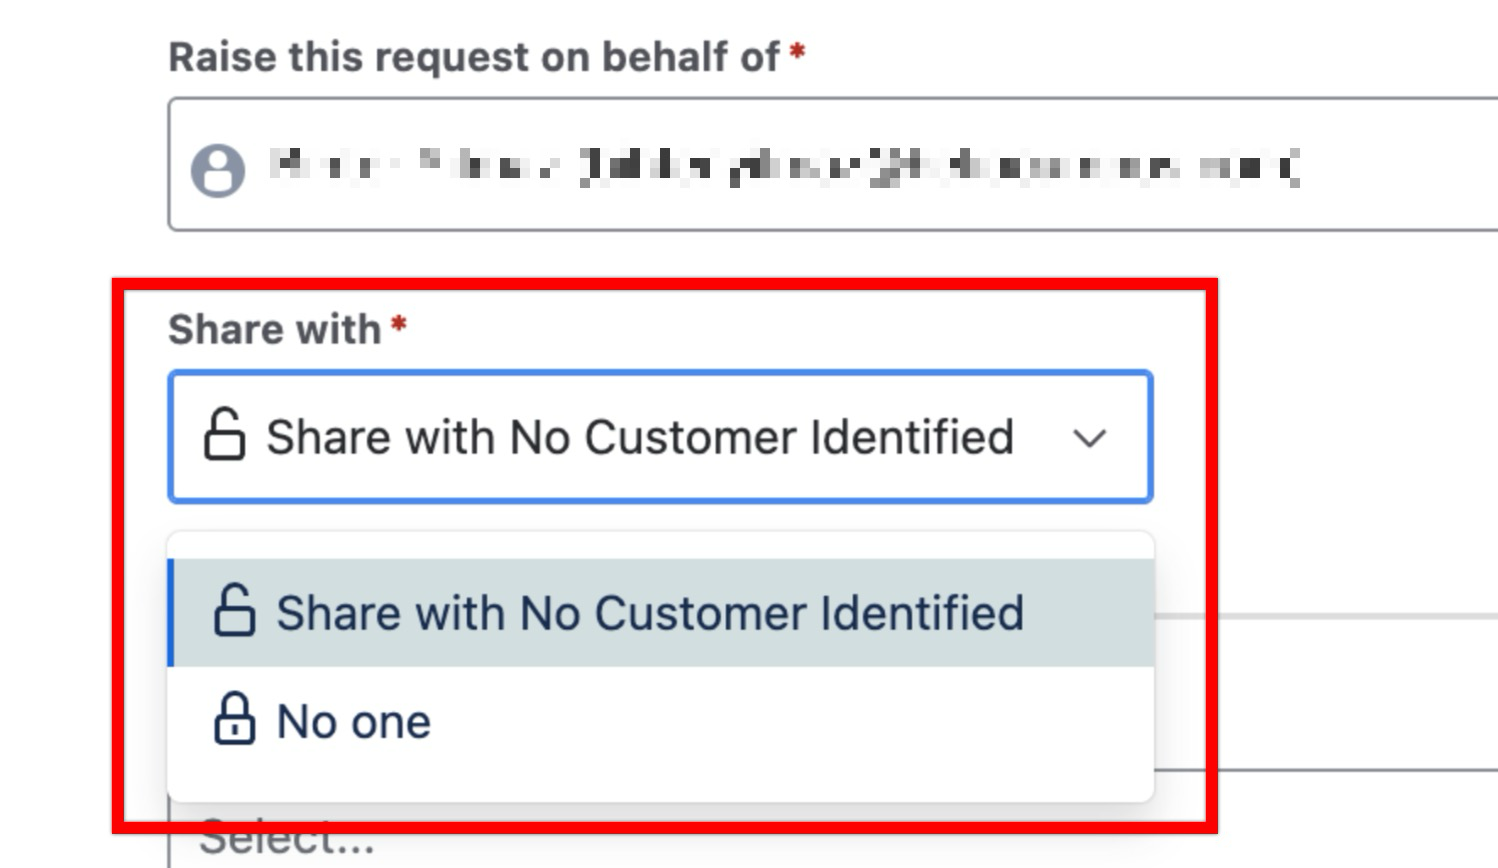
The Share With drop-down can be configured to define who the issue is automatically shared with.
-
Share with: This option will populate with the Institution's name, and selecting it allows other users within the Institution to view the submitted issue.
-
No One: Selecting this option allows only the submitter to view the issue. No other users within the Institution will be able to see it.
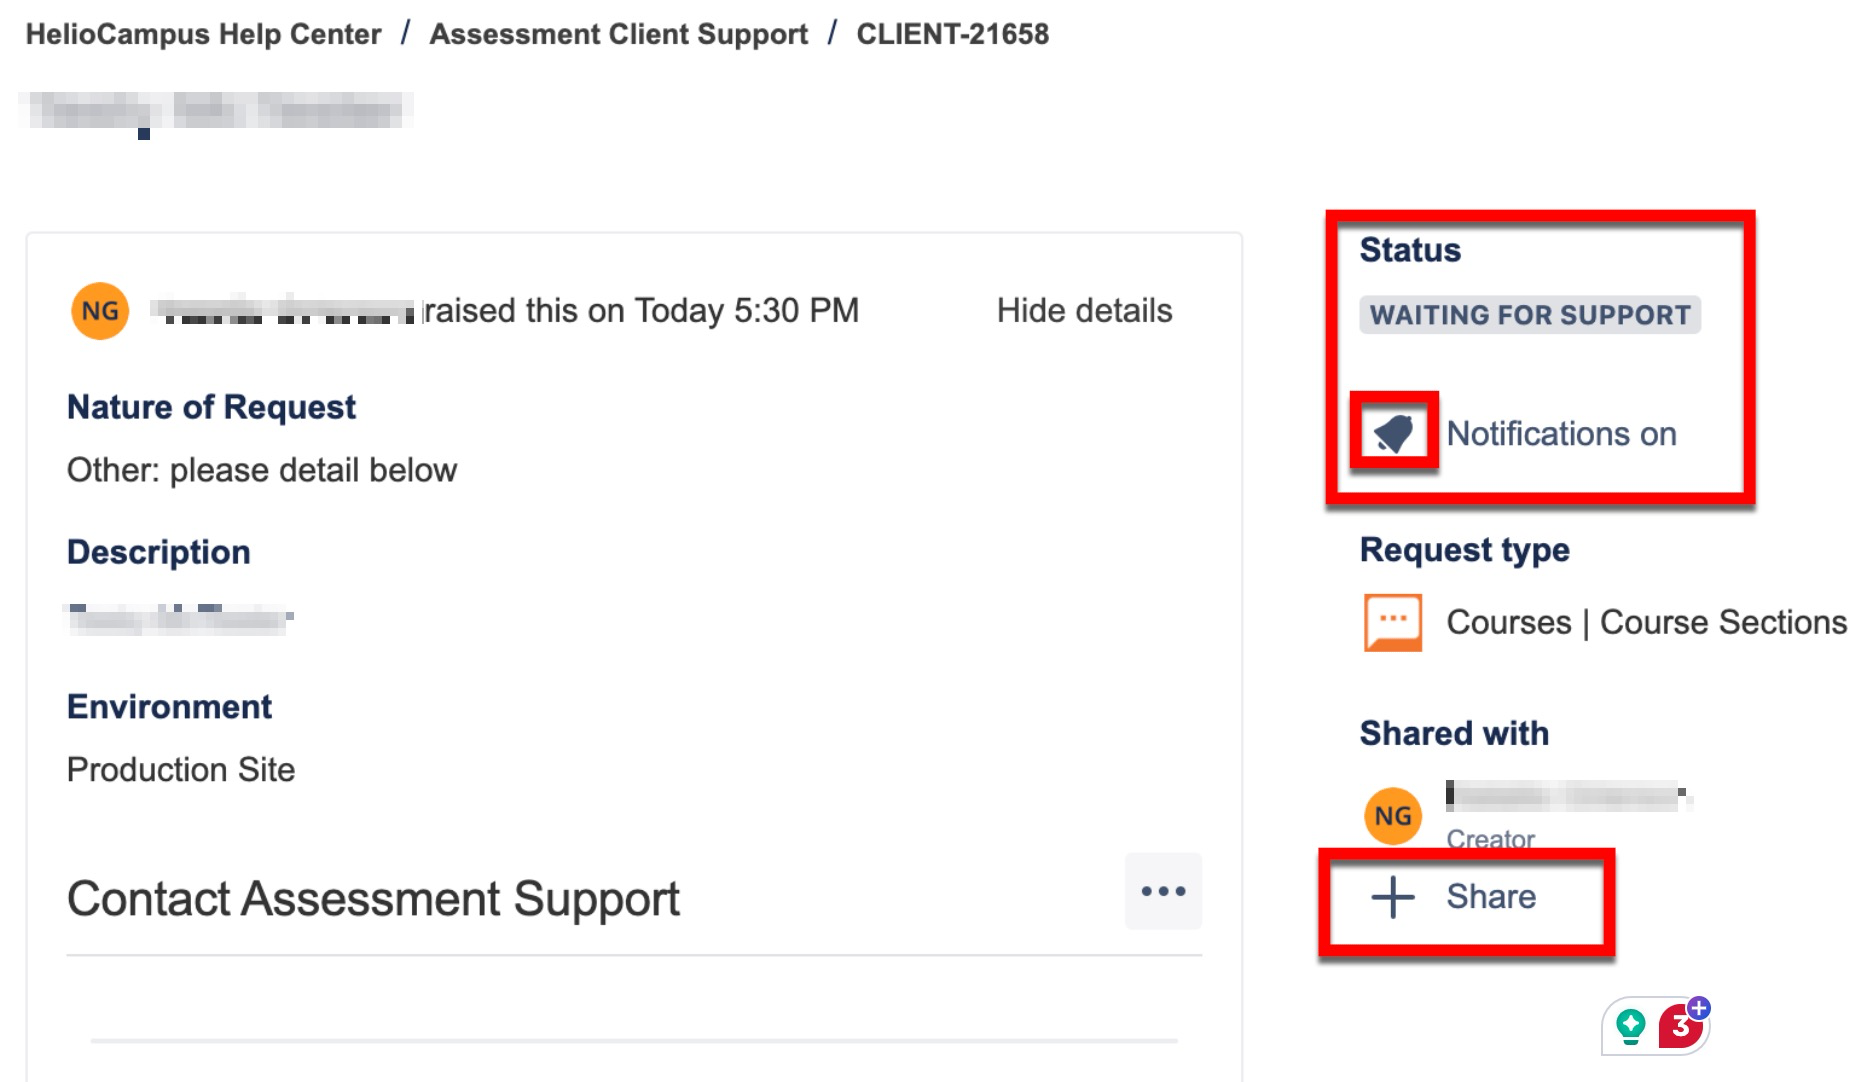
Once a support ticket has been submitted, details of the ticket will be displayed. The ticket status is displayed, and notifications related to the ticket can be turned on or off by clicking the notification bell. Additionally, the ticket can be shared with other users by clicking the ➕ Share option. To learn more about reviewing submitted support portal tickets, the Review a Support Portal Ticket article can be reviewed.
📔 Additional Resources