
The same user cannot be added as both an editor and an approver. If a user is added as both roles, the approver role supersedes the editor role; for example, the user will display only as a Self Study Section Approver.
Individual Section Assignment
-
Navigate to Main Menu > Self Study Manager > Self Study Homepage > Sections.
-
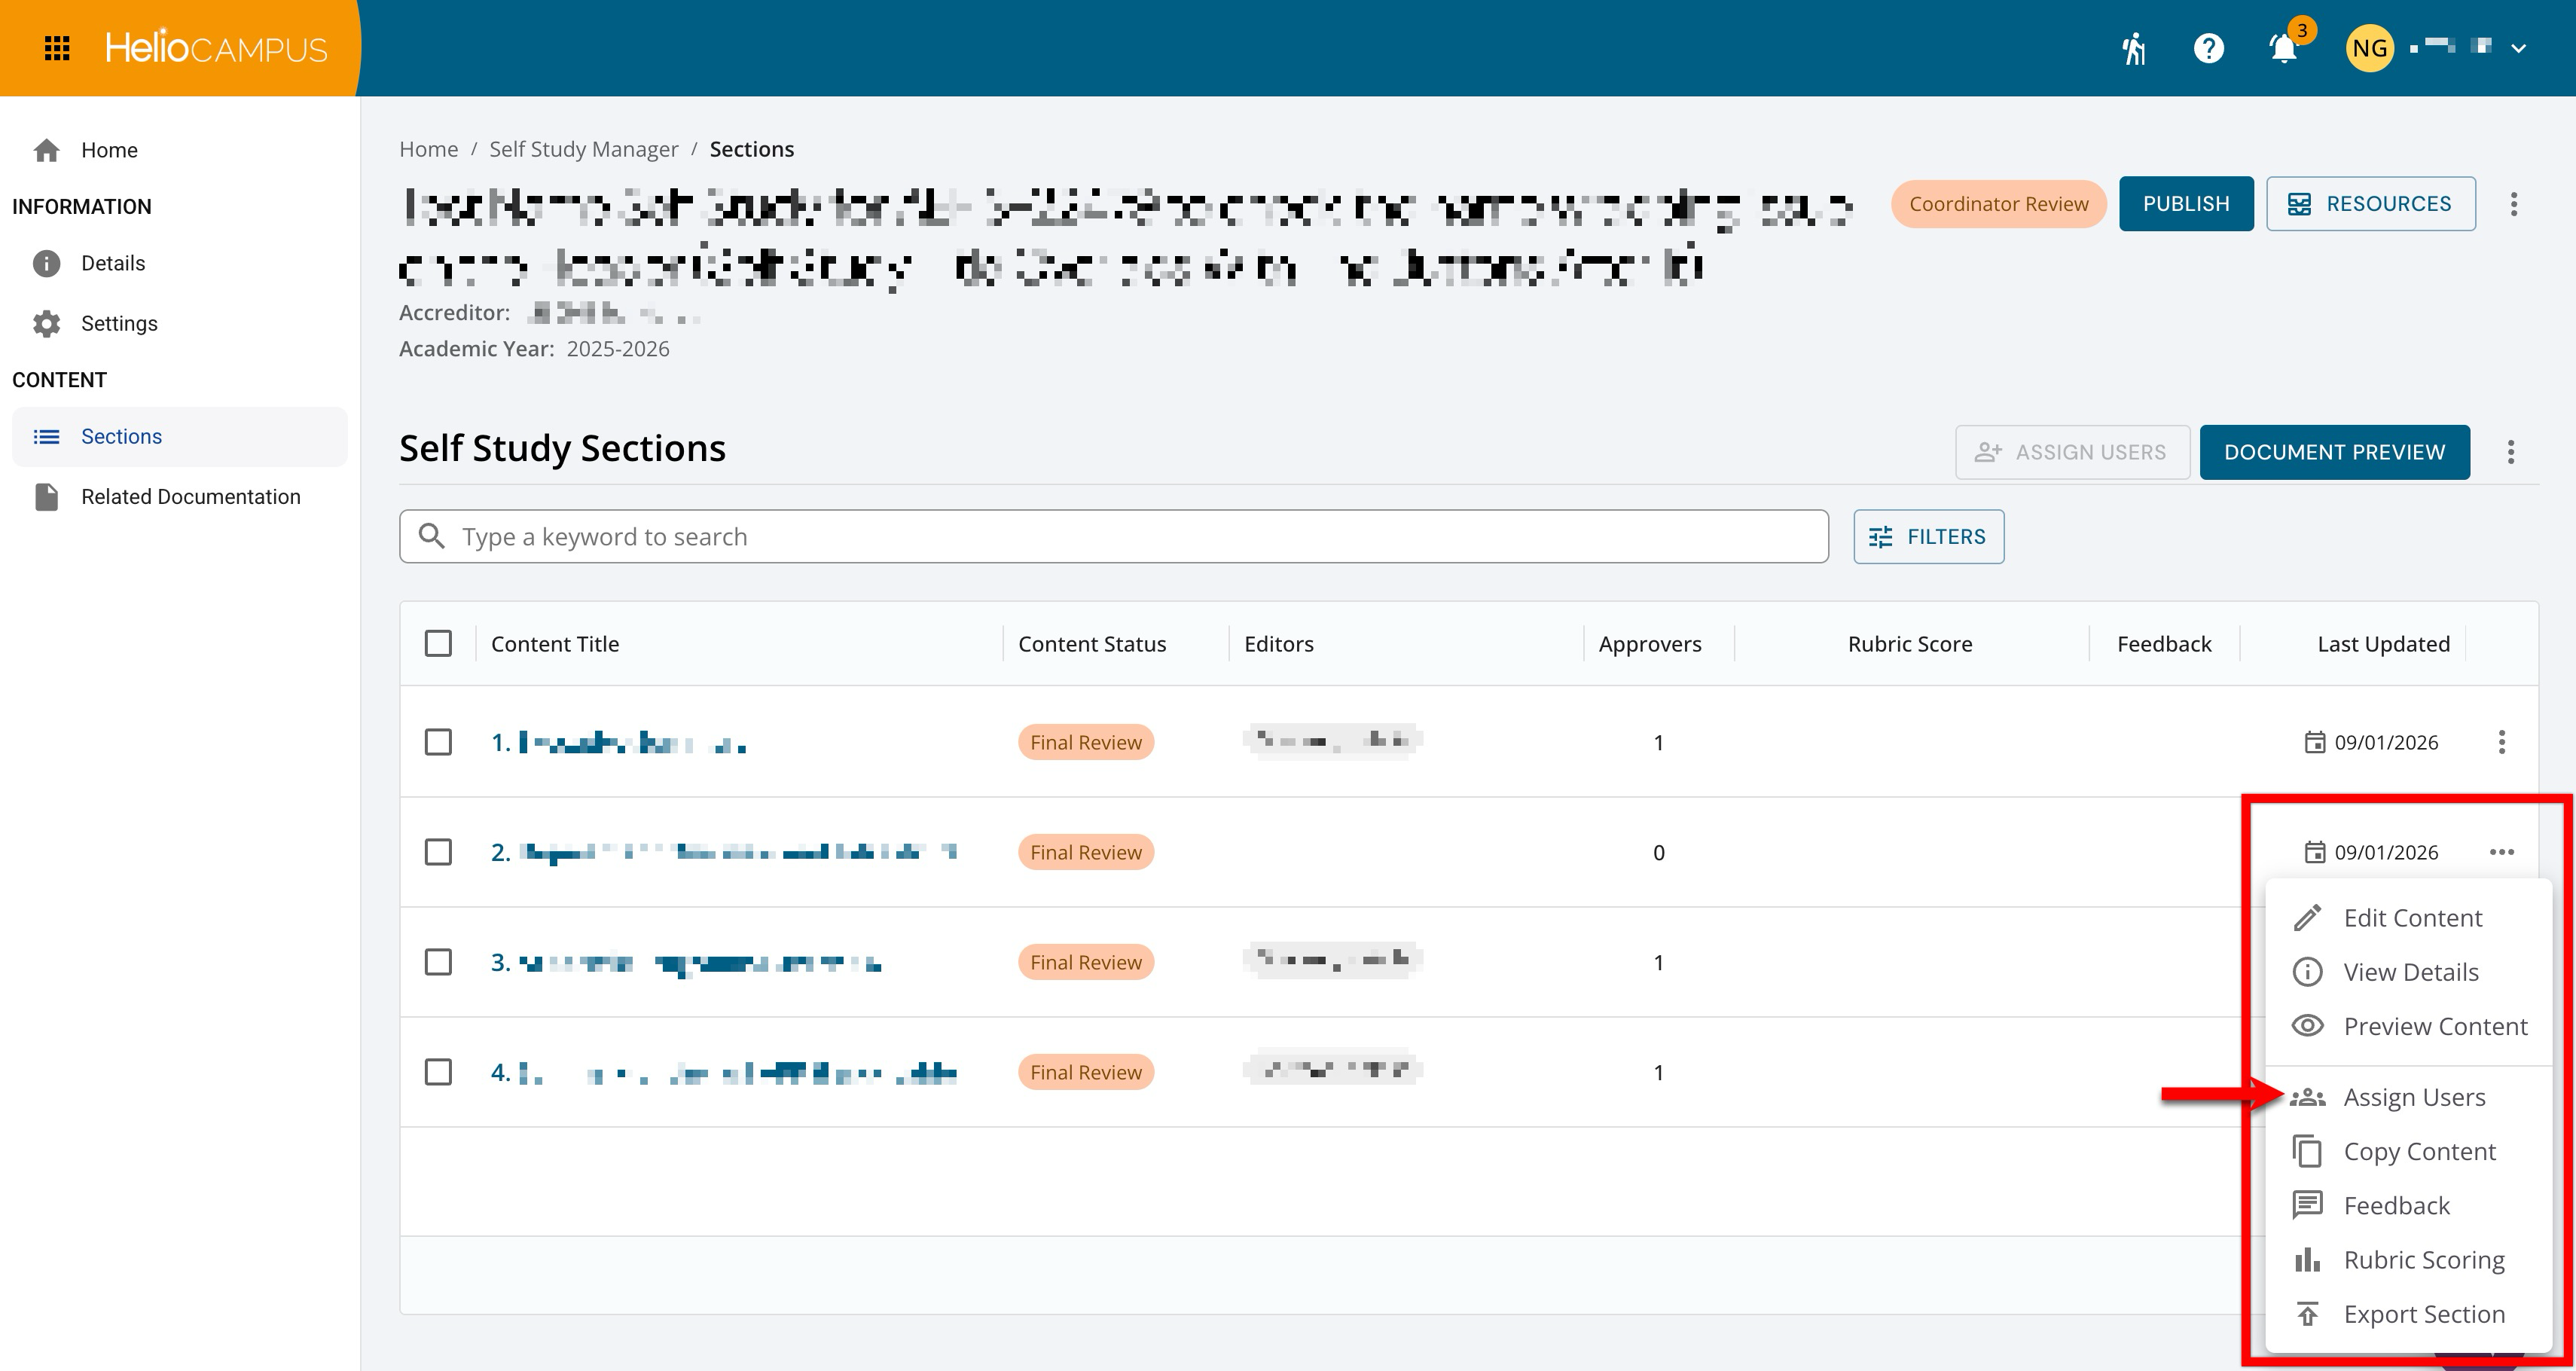
Locate the section that needs an individual user assignment, then open the section’s kebab menu and select Assign Users.
-
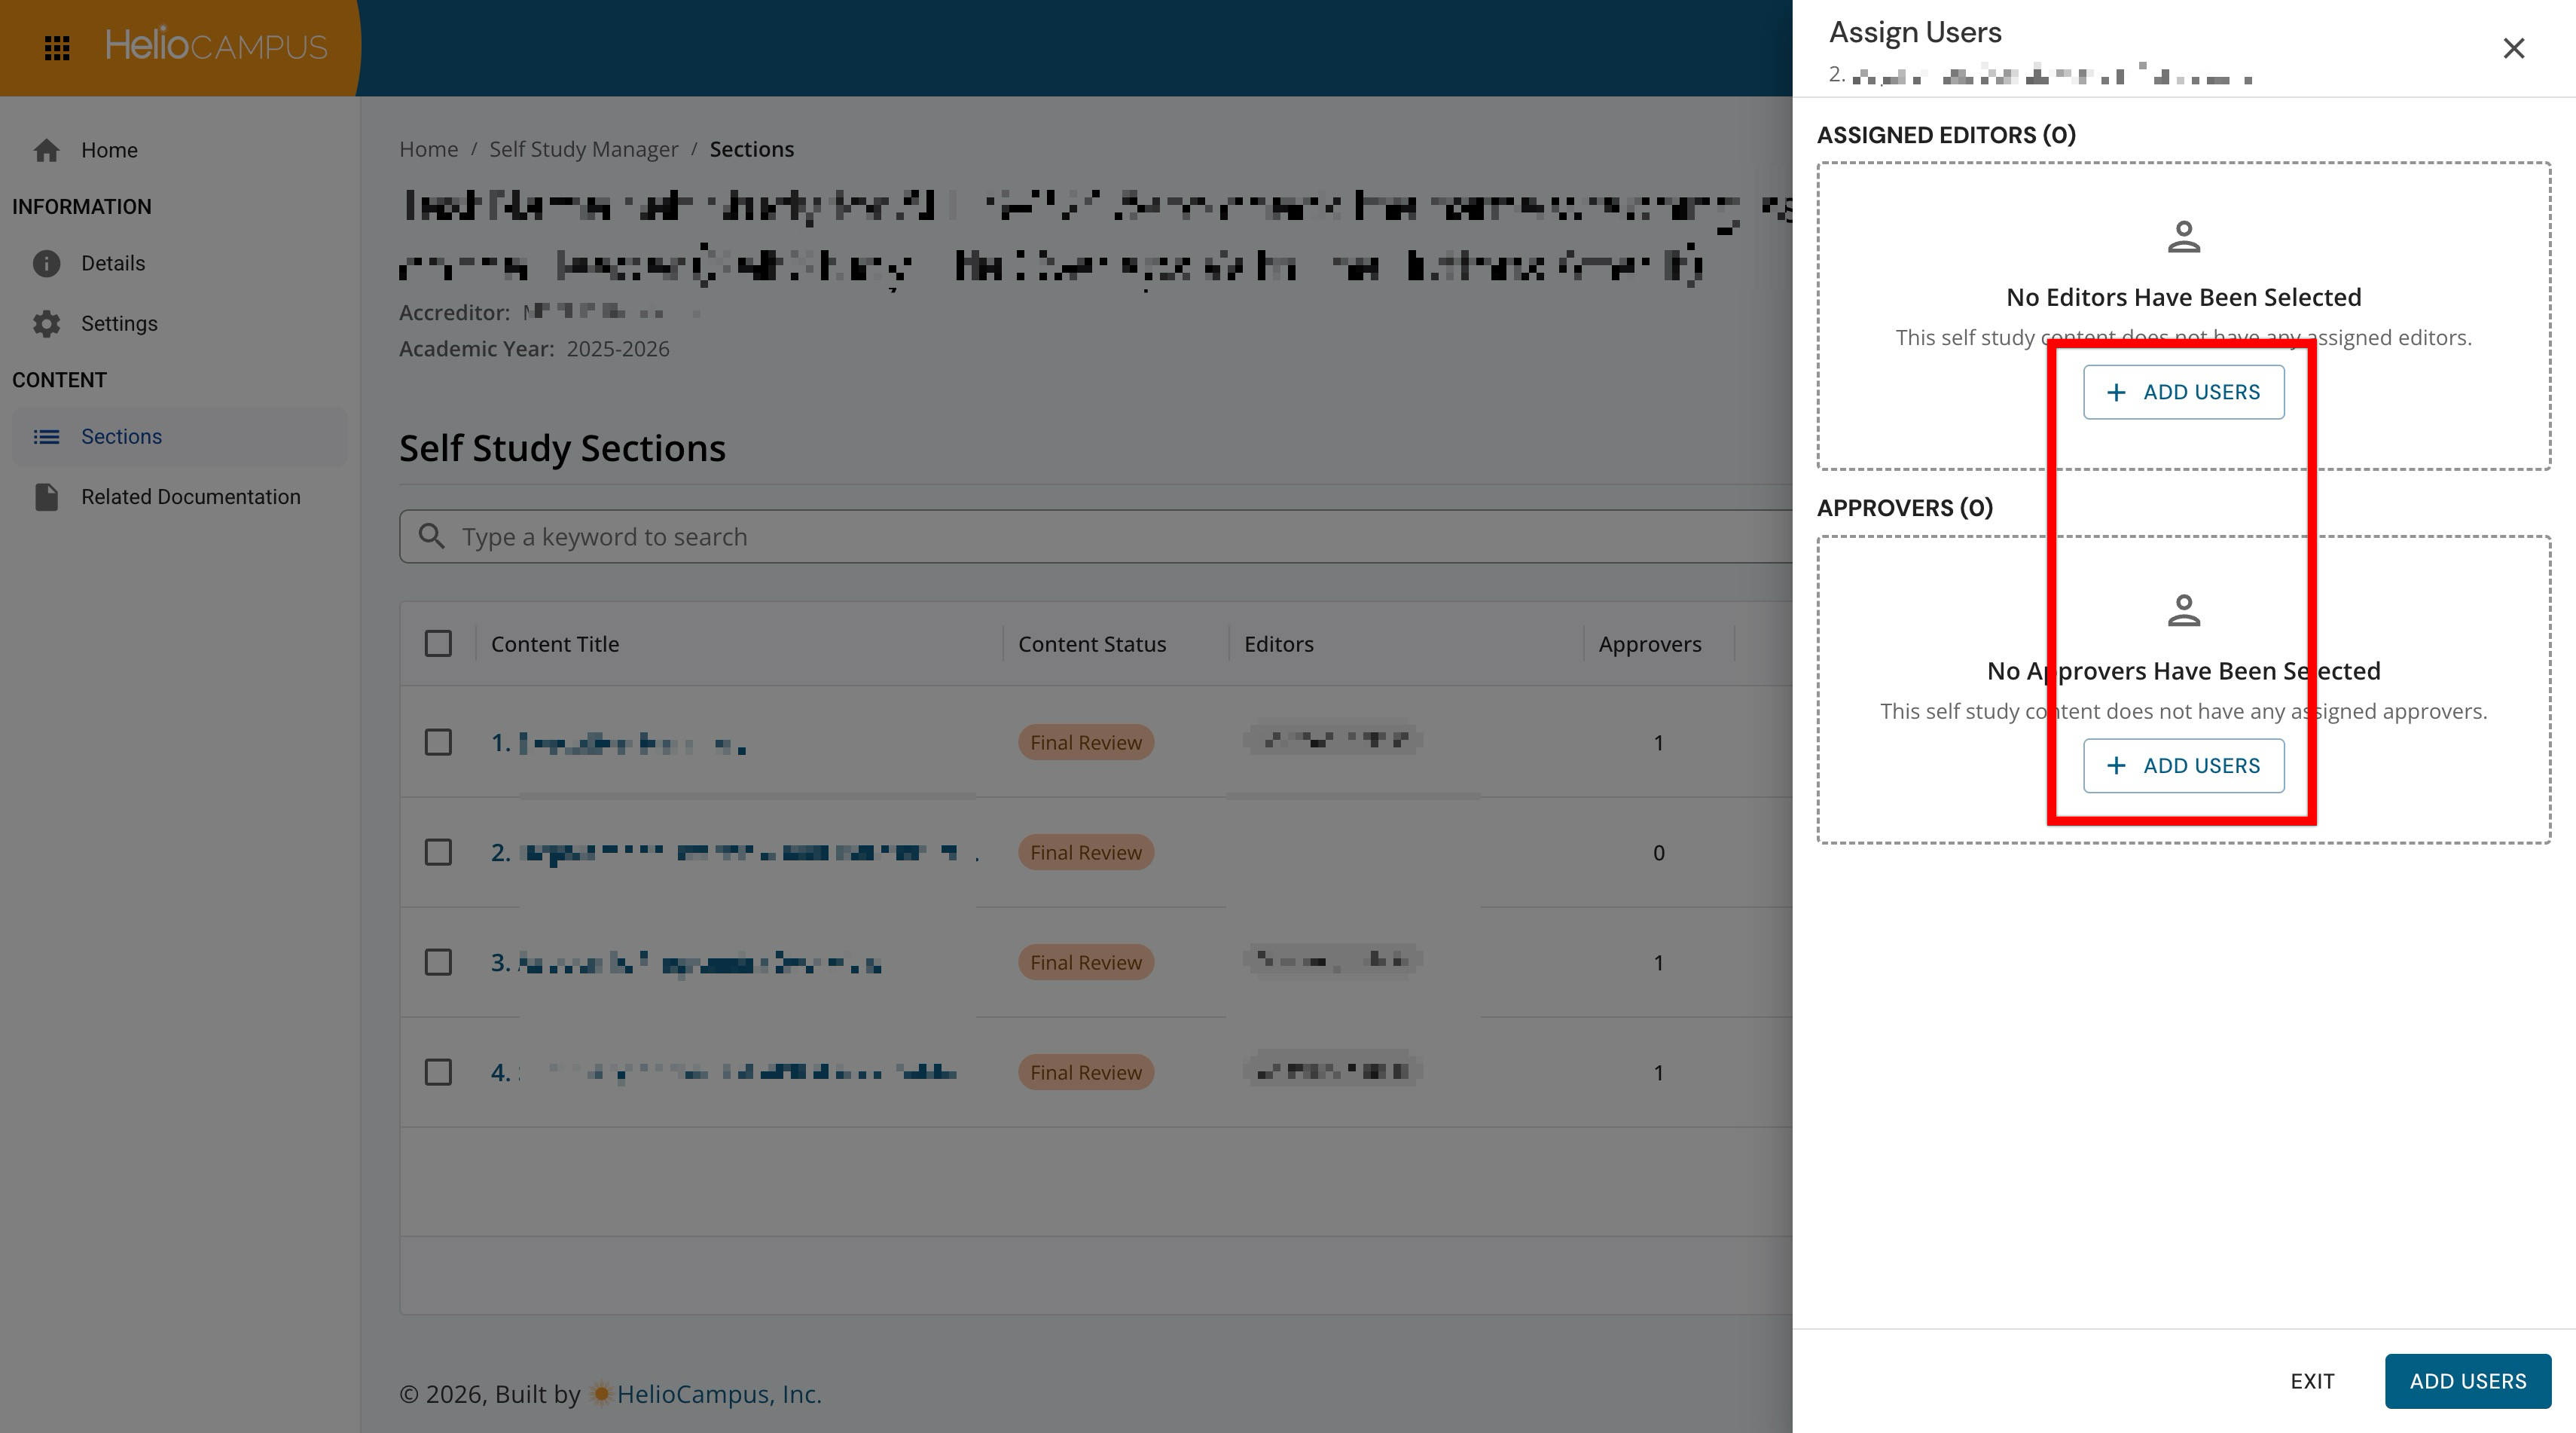
In the Assign Users drawer, click Add User.
-
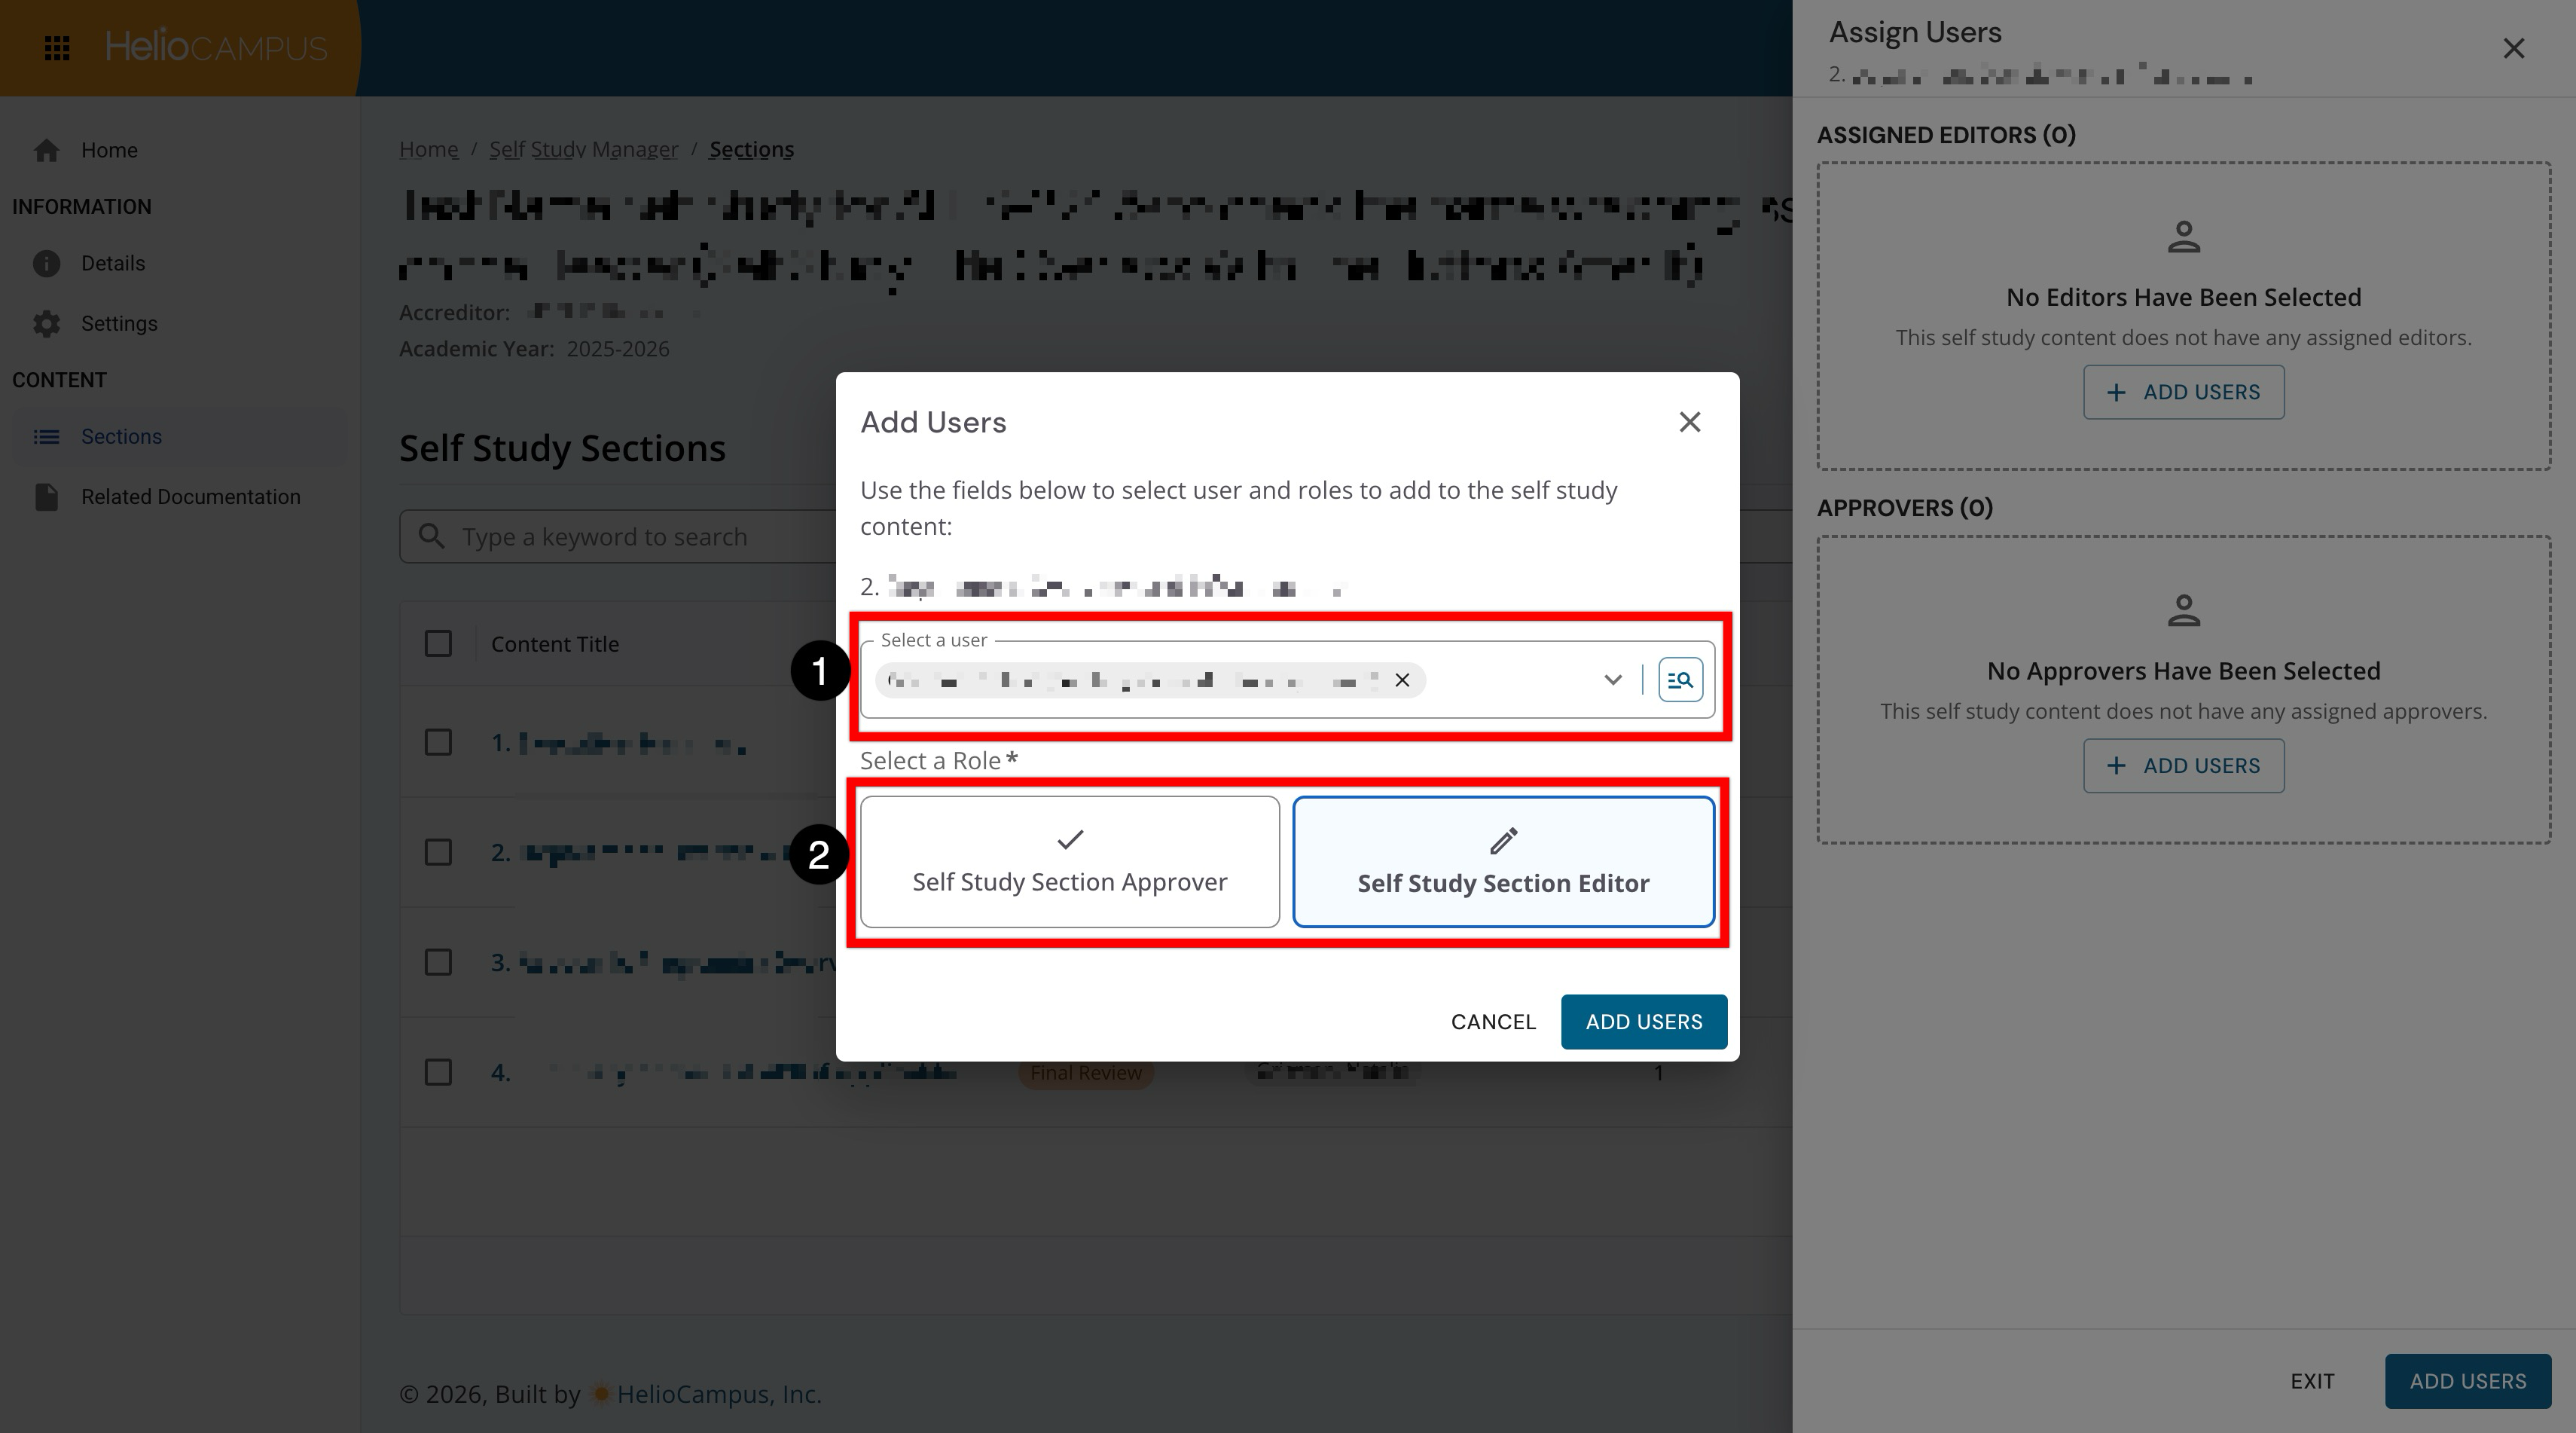
In the Add User pop-up, search for and select the user, choose the applicable section role, and click Save User.
-
-
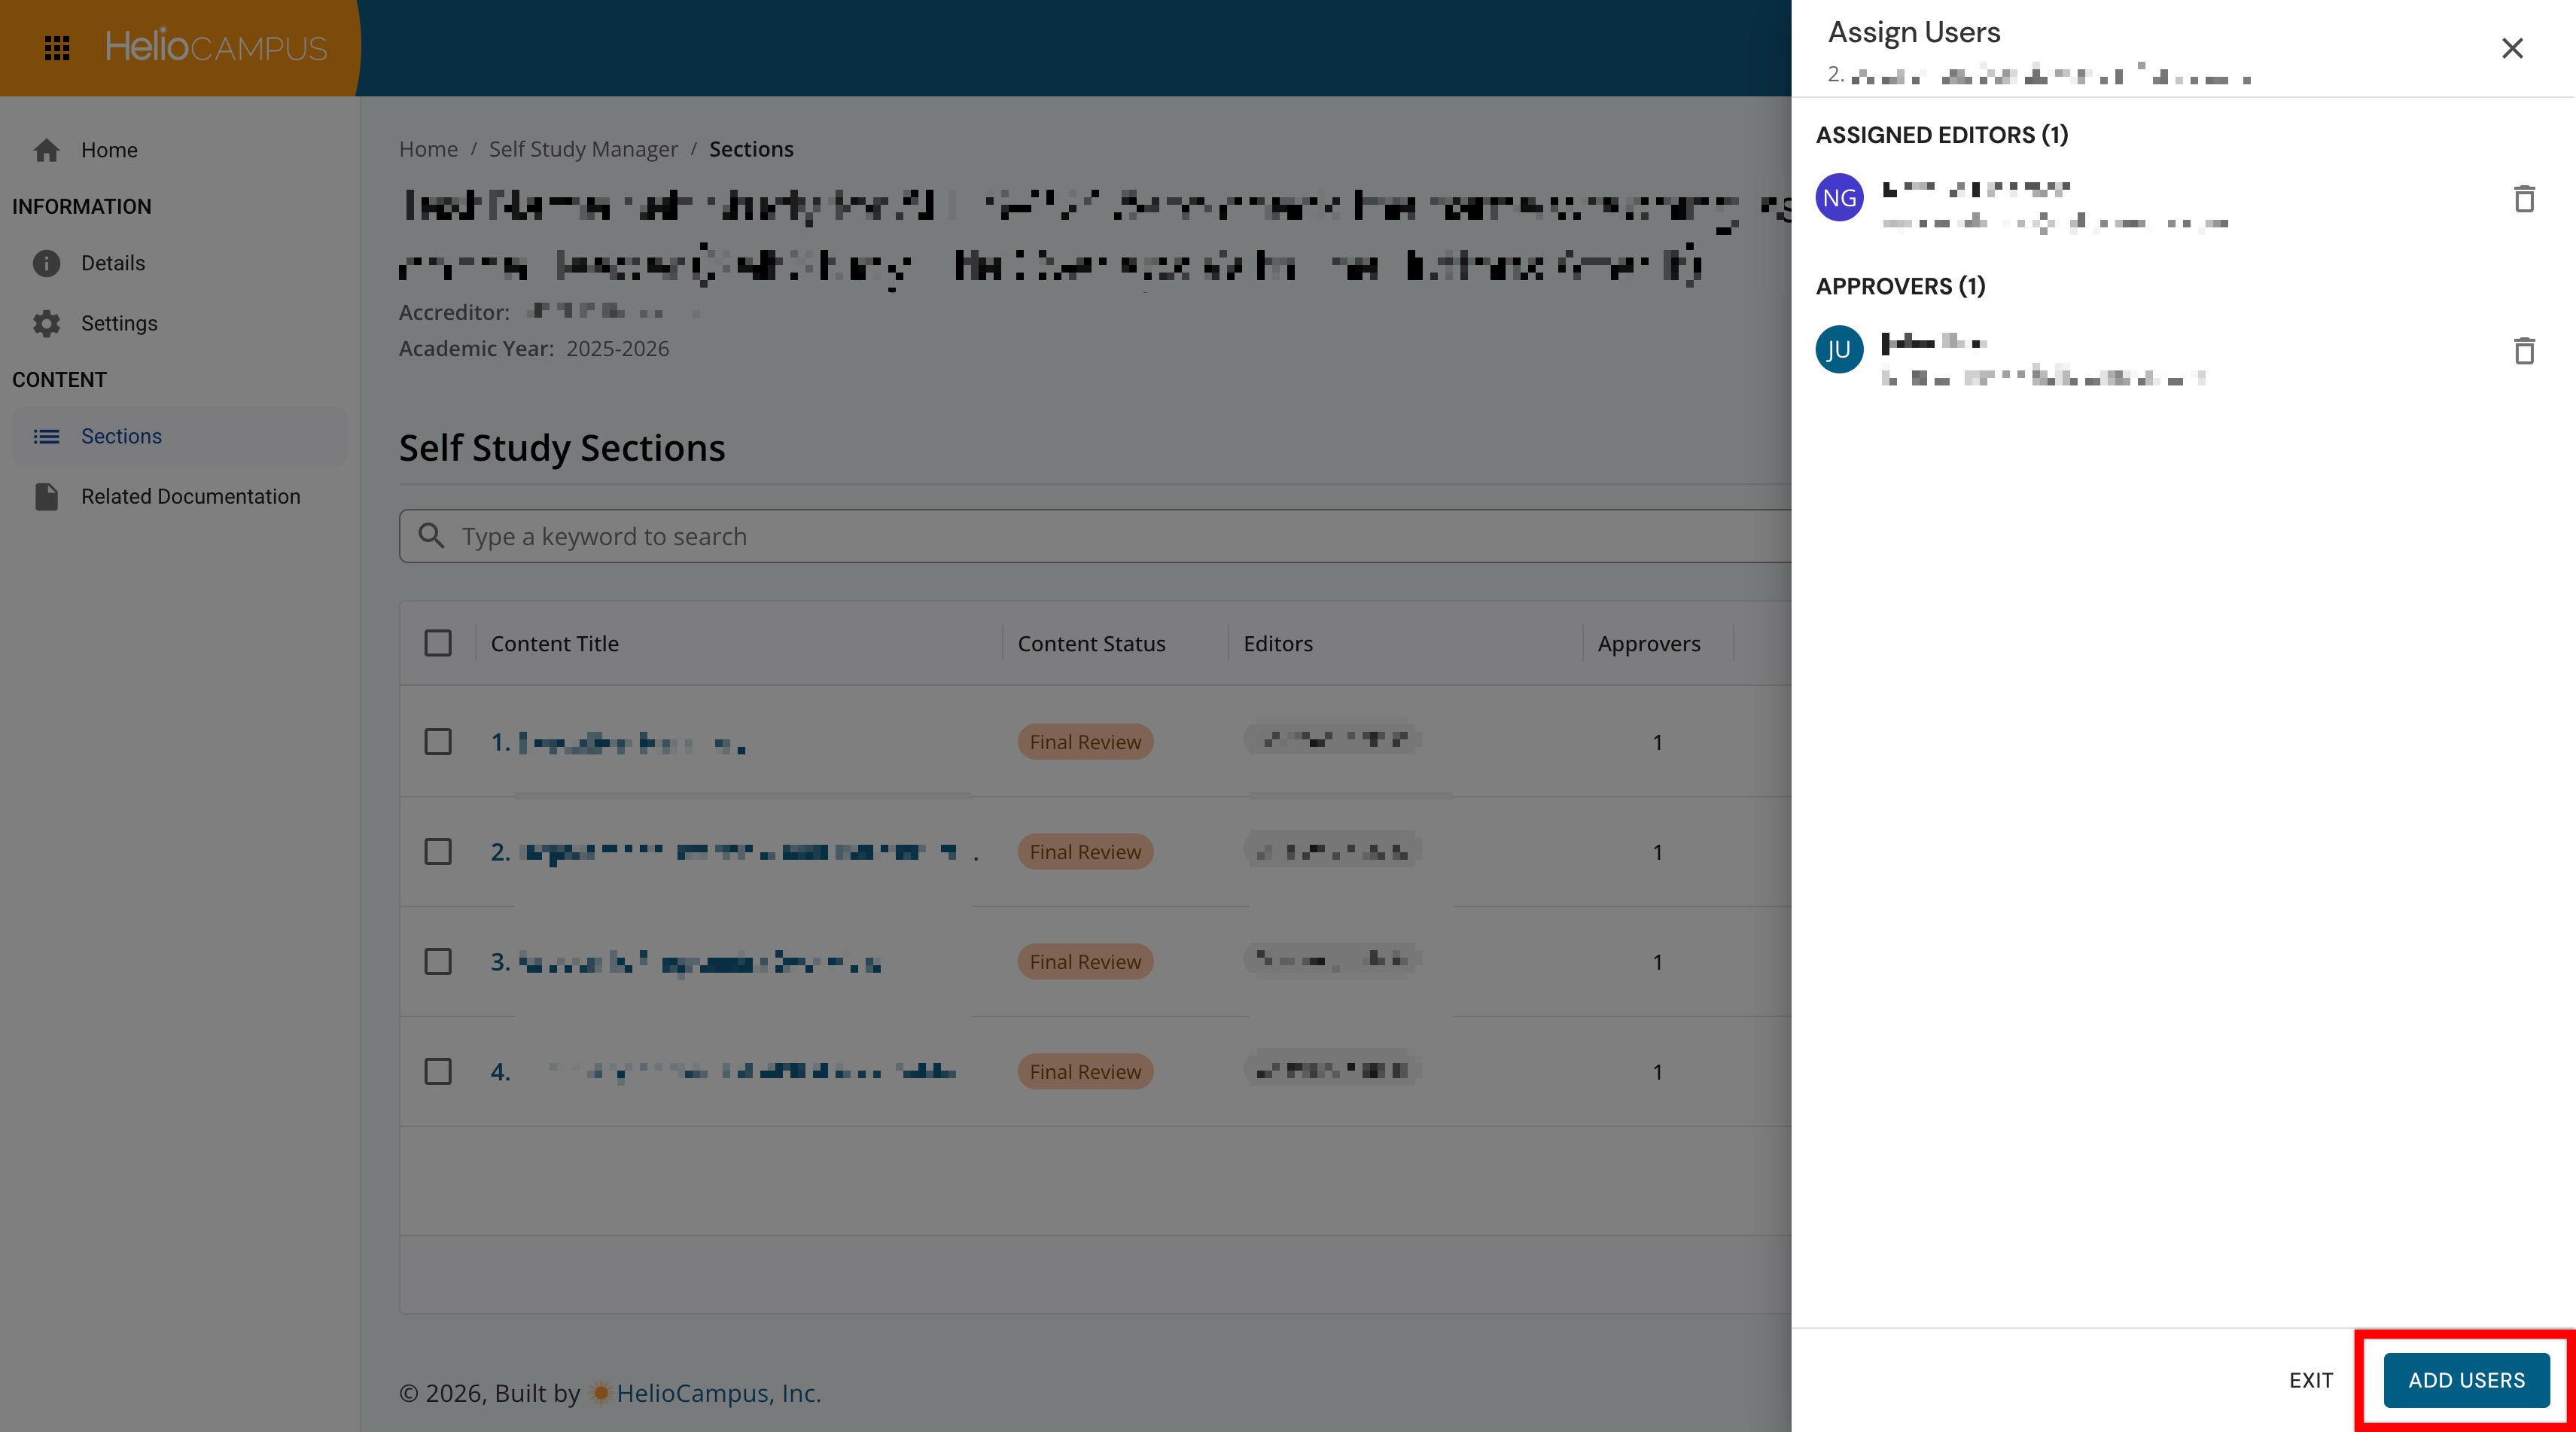
Review the updated Assign Users drawer to confirm the user appears under the correct role.
-
Multiple Section Assignment
-
Navigate to Main Menu > Self Study Manager > Self Study Homepage > Sections.
-
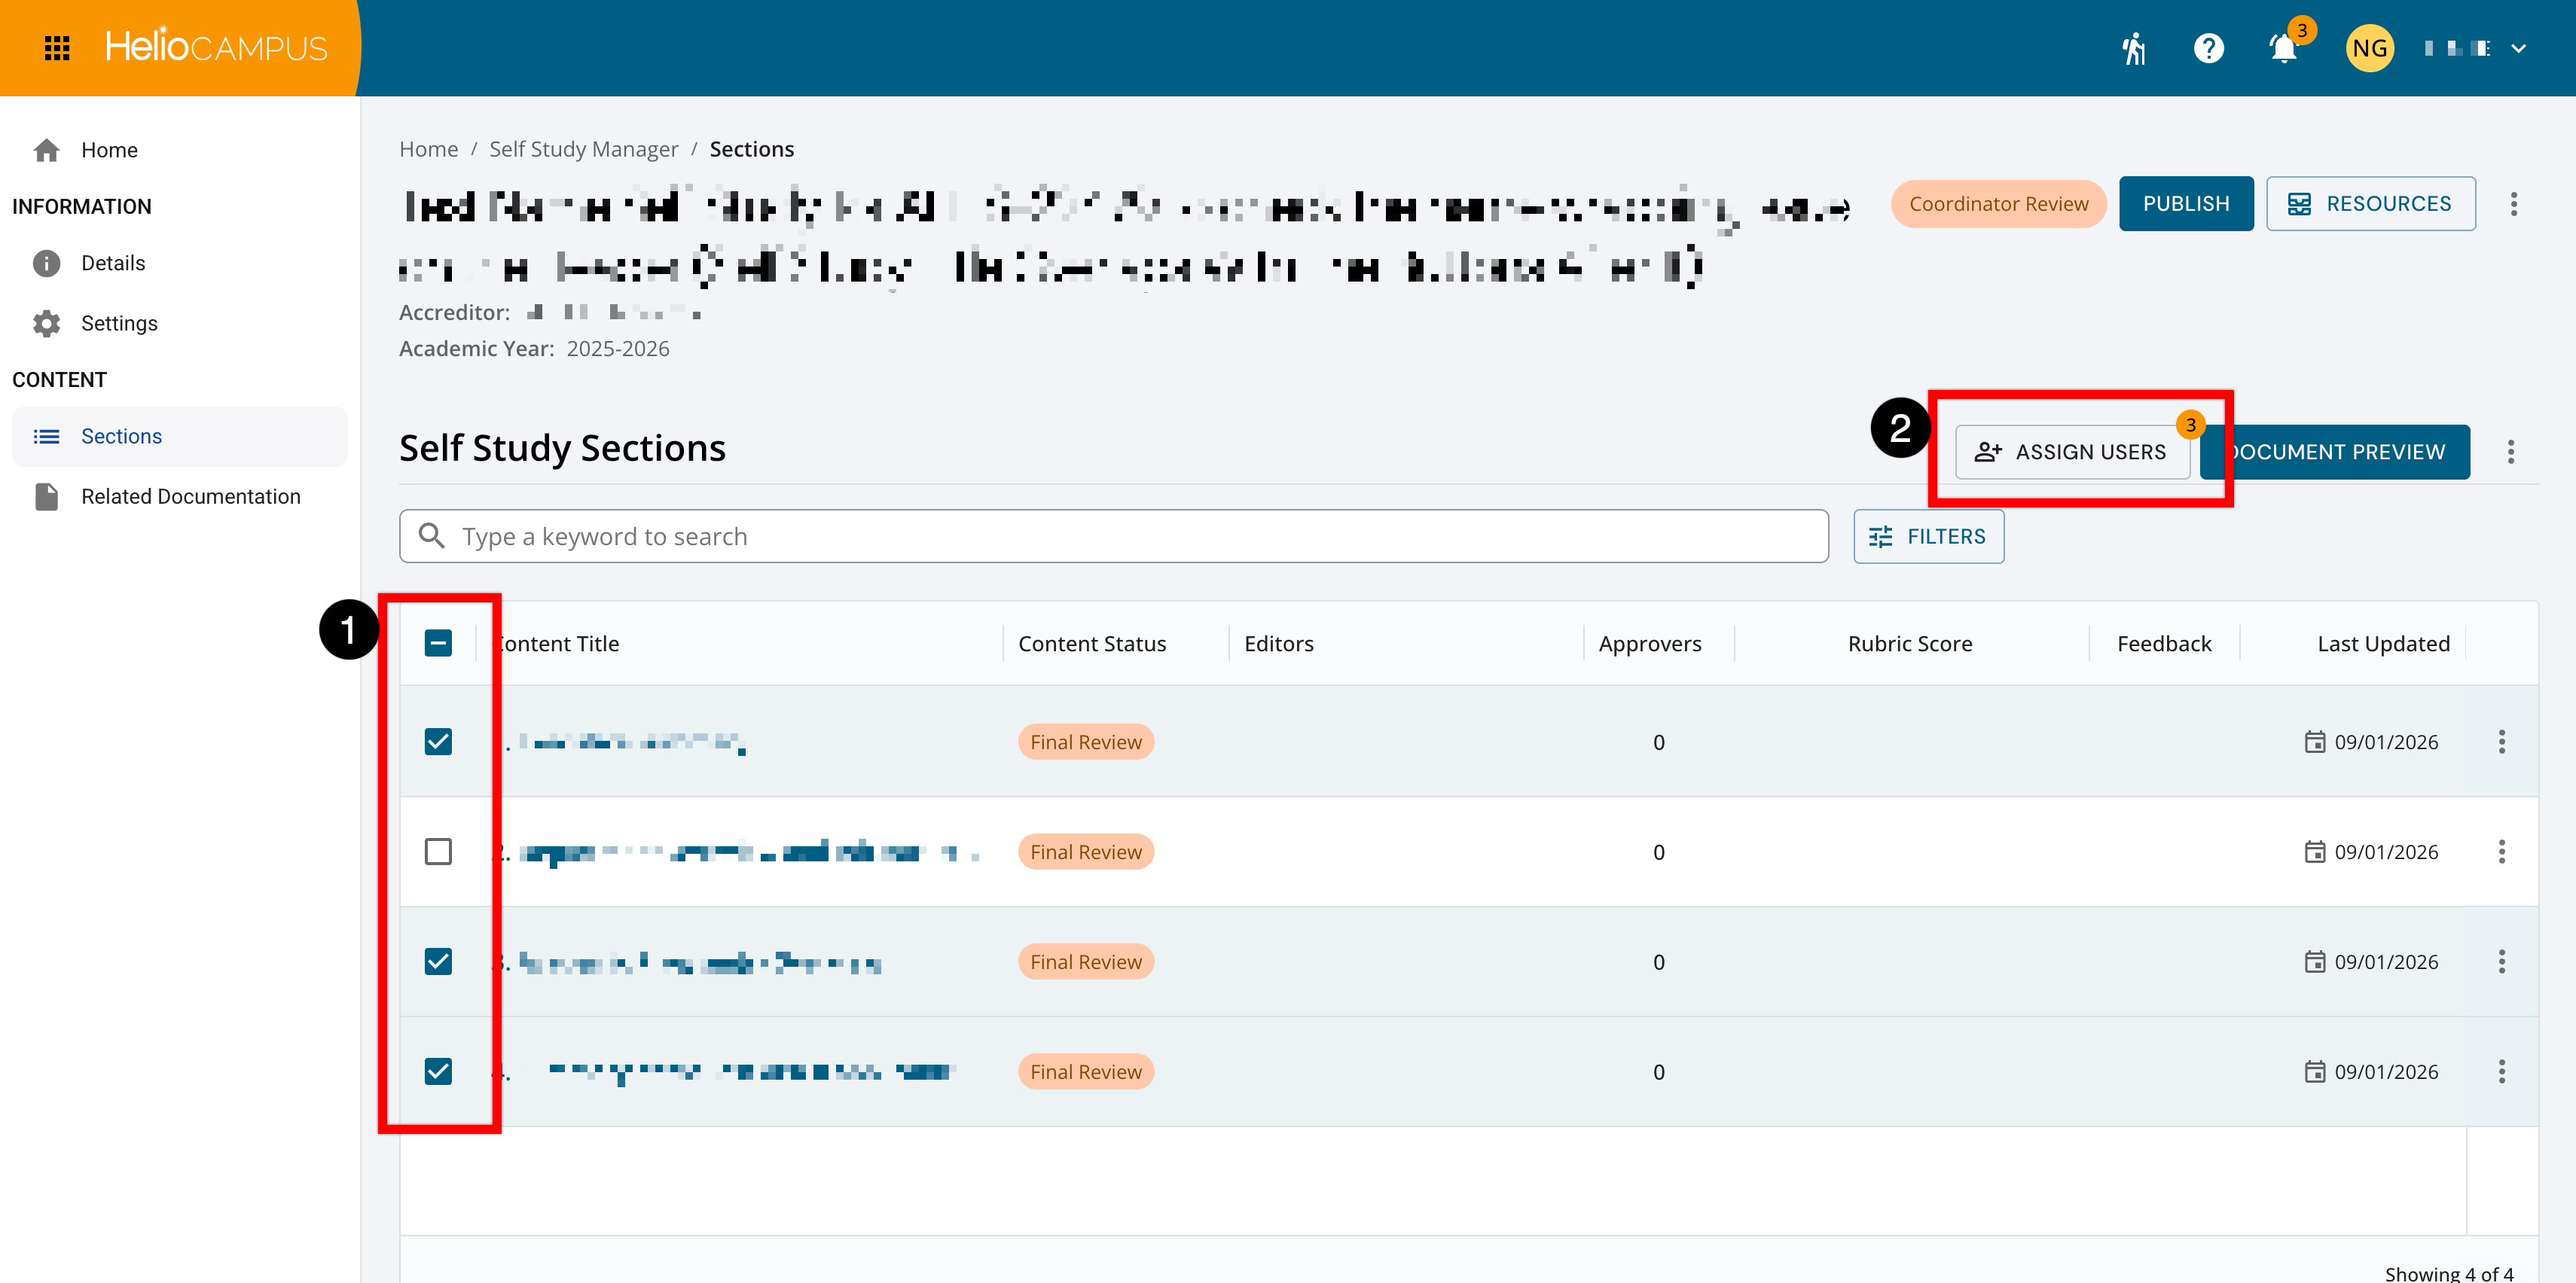
Select the checkbox for each section that should receive the same user assignment (1). After selecting multiple sections, click Assign Users from the bulk action toolbar (2).
-
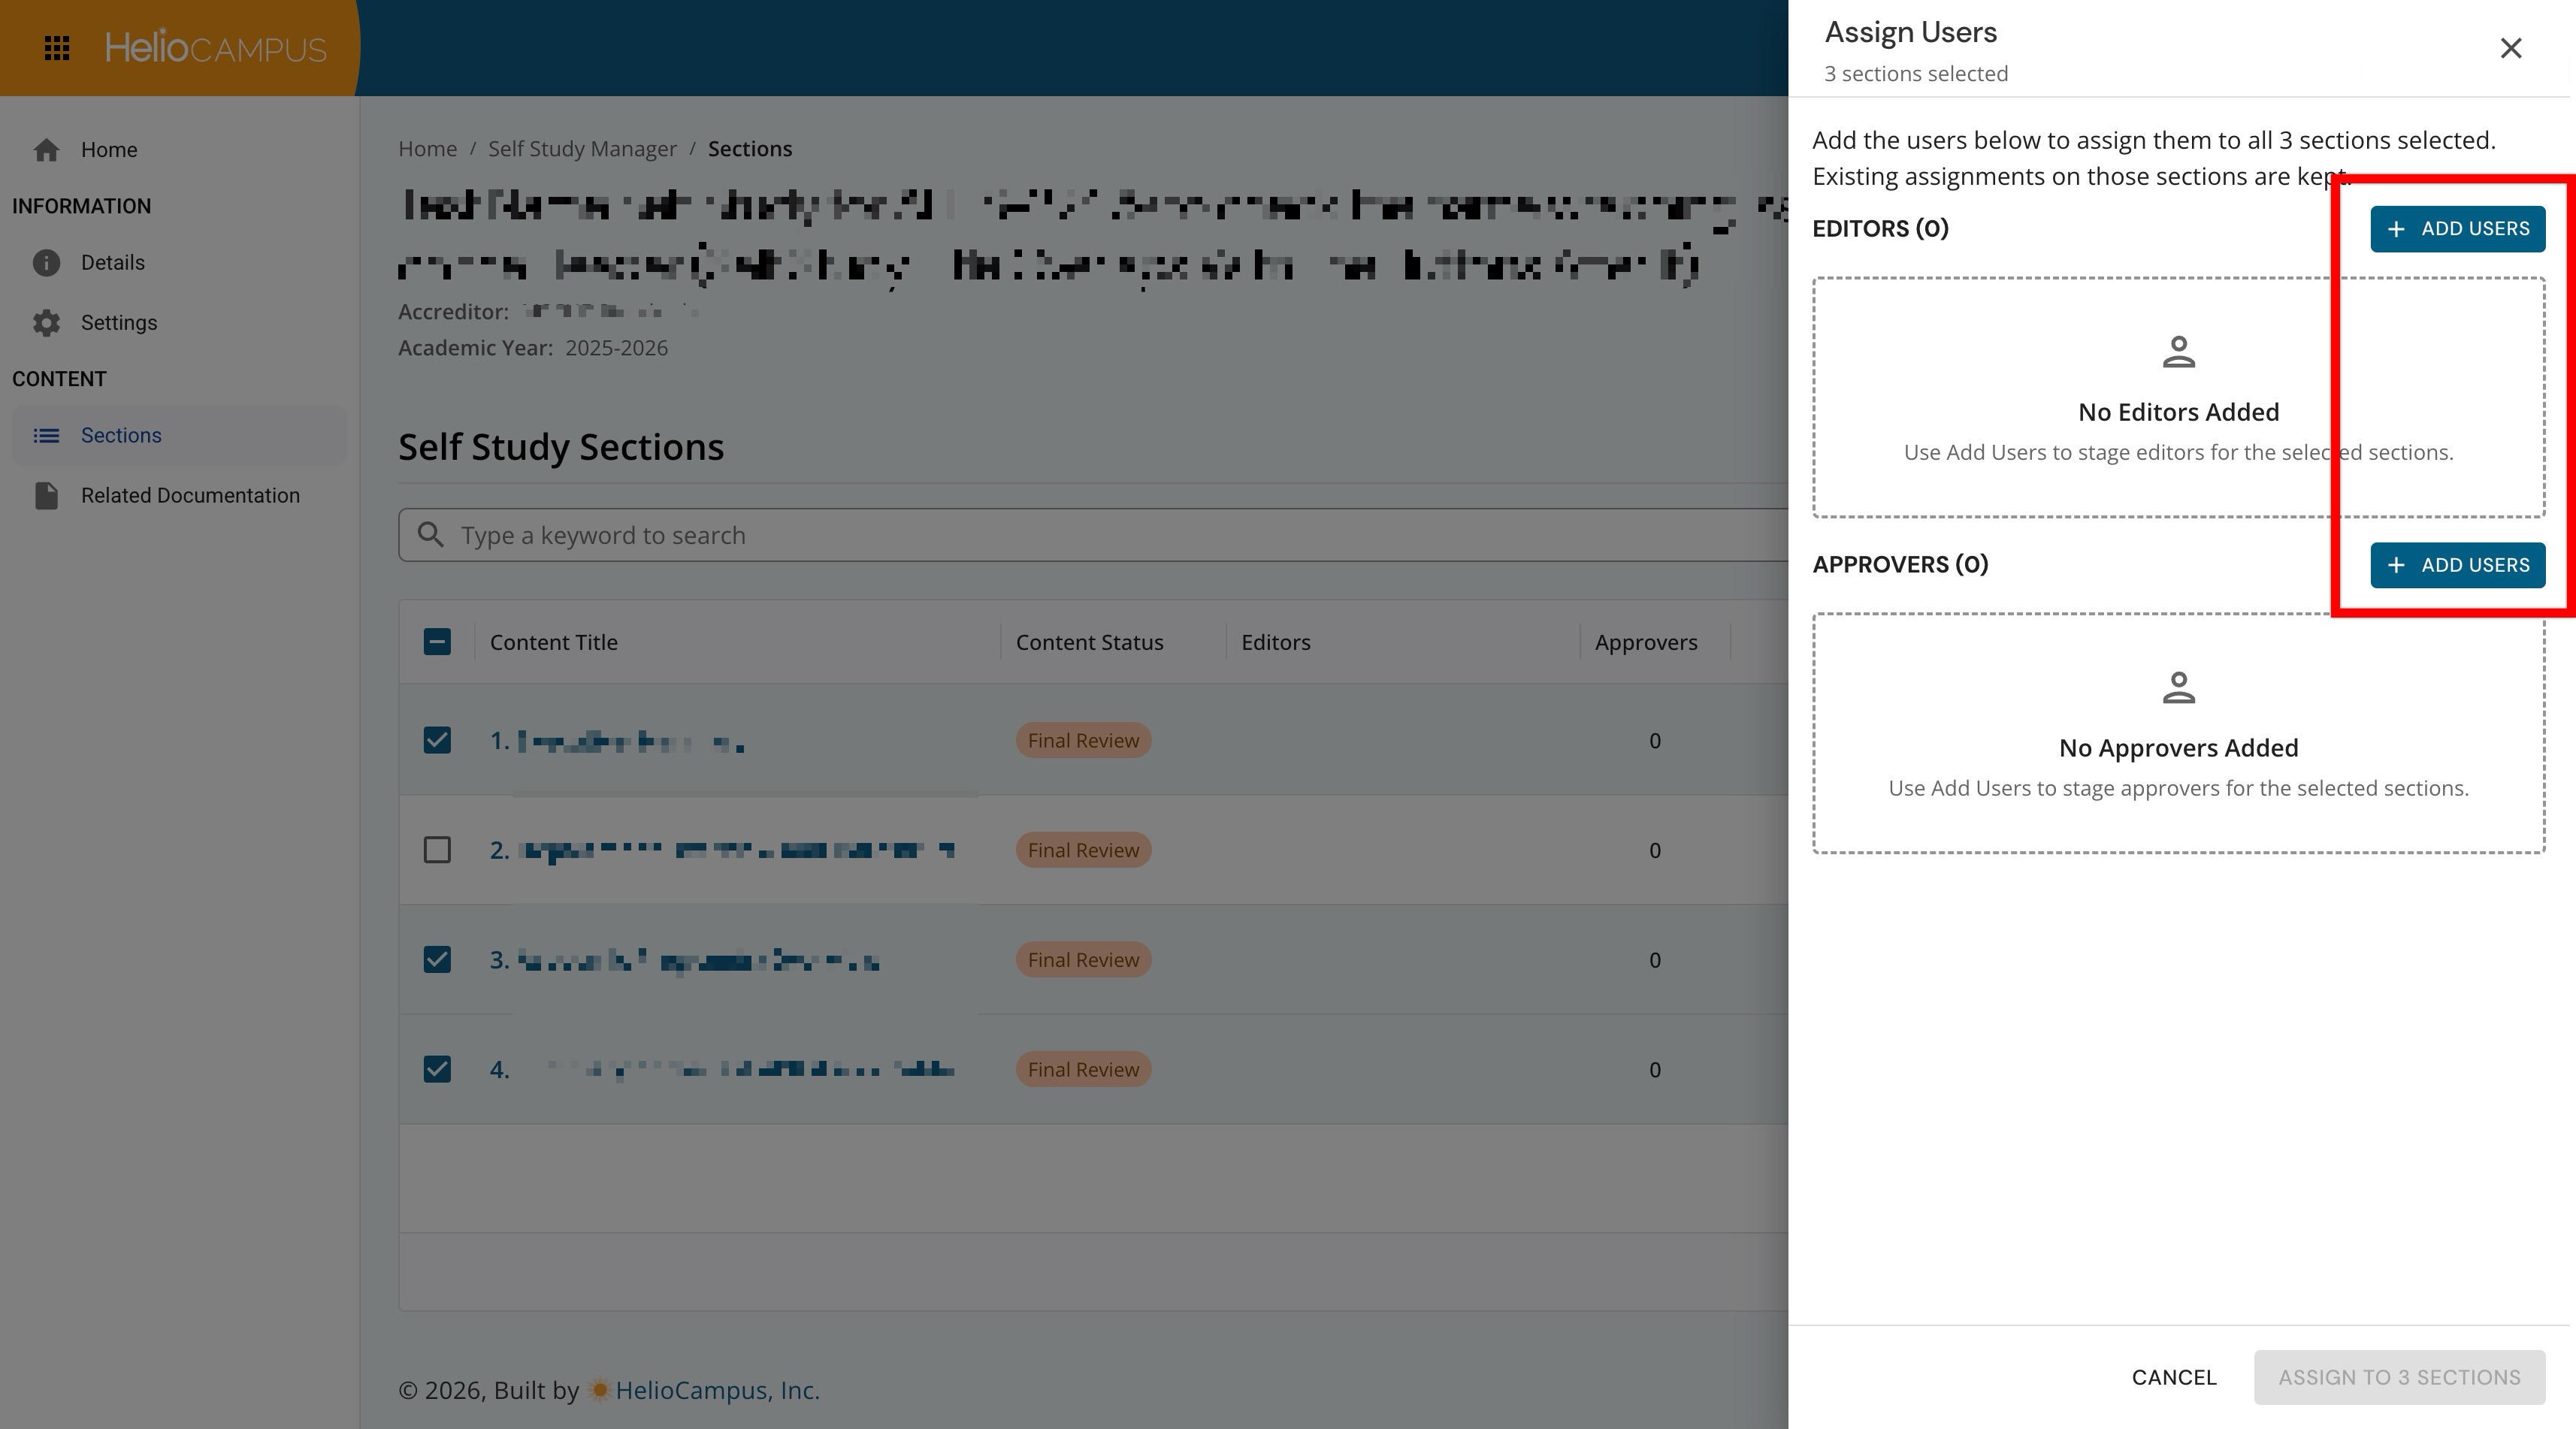
In the Assign Users drawer, click Add User.
-
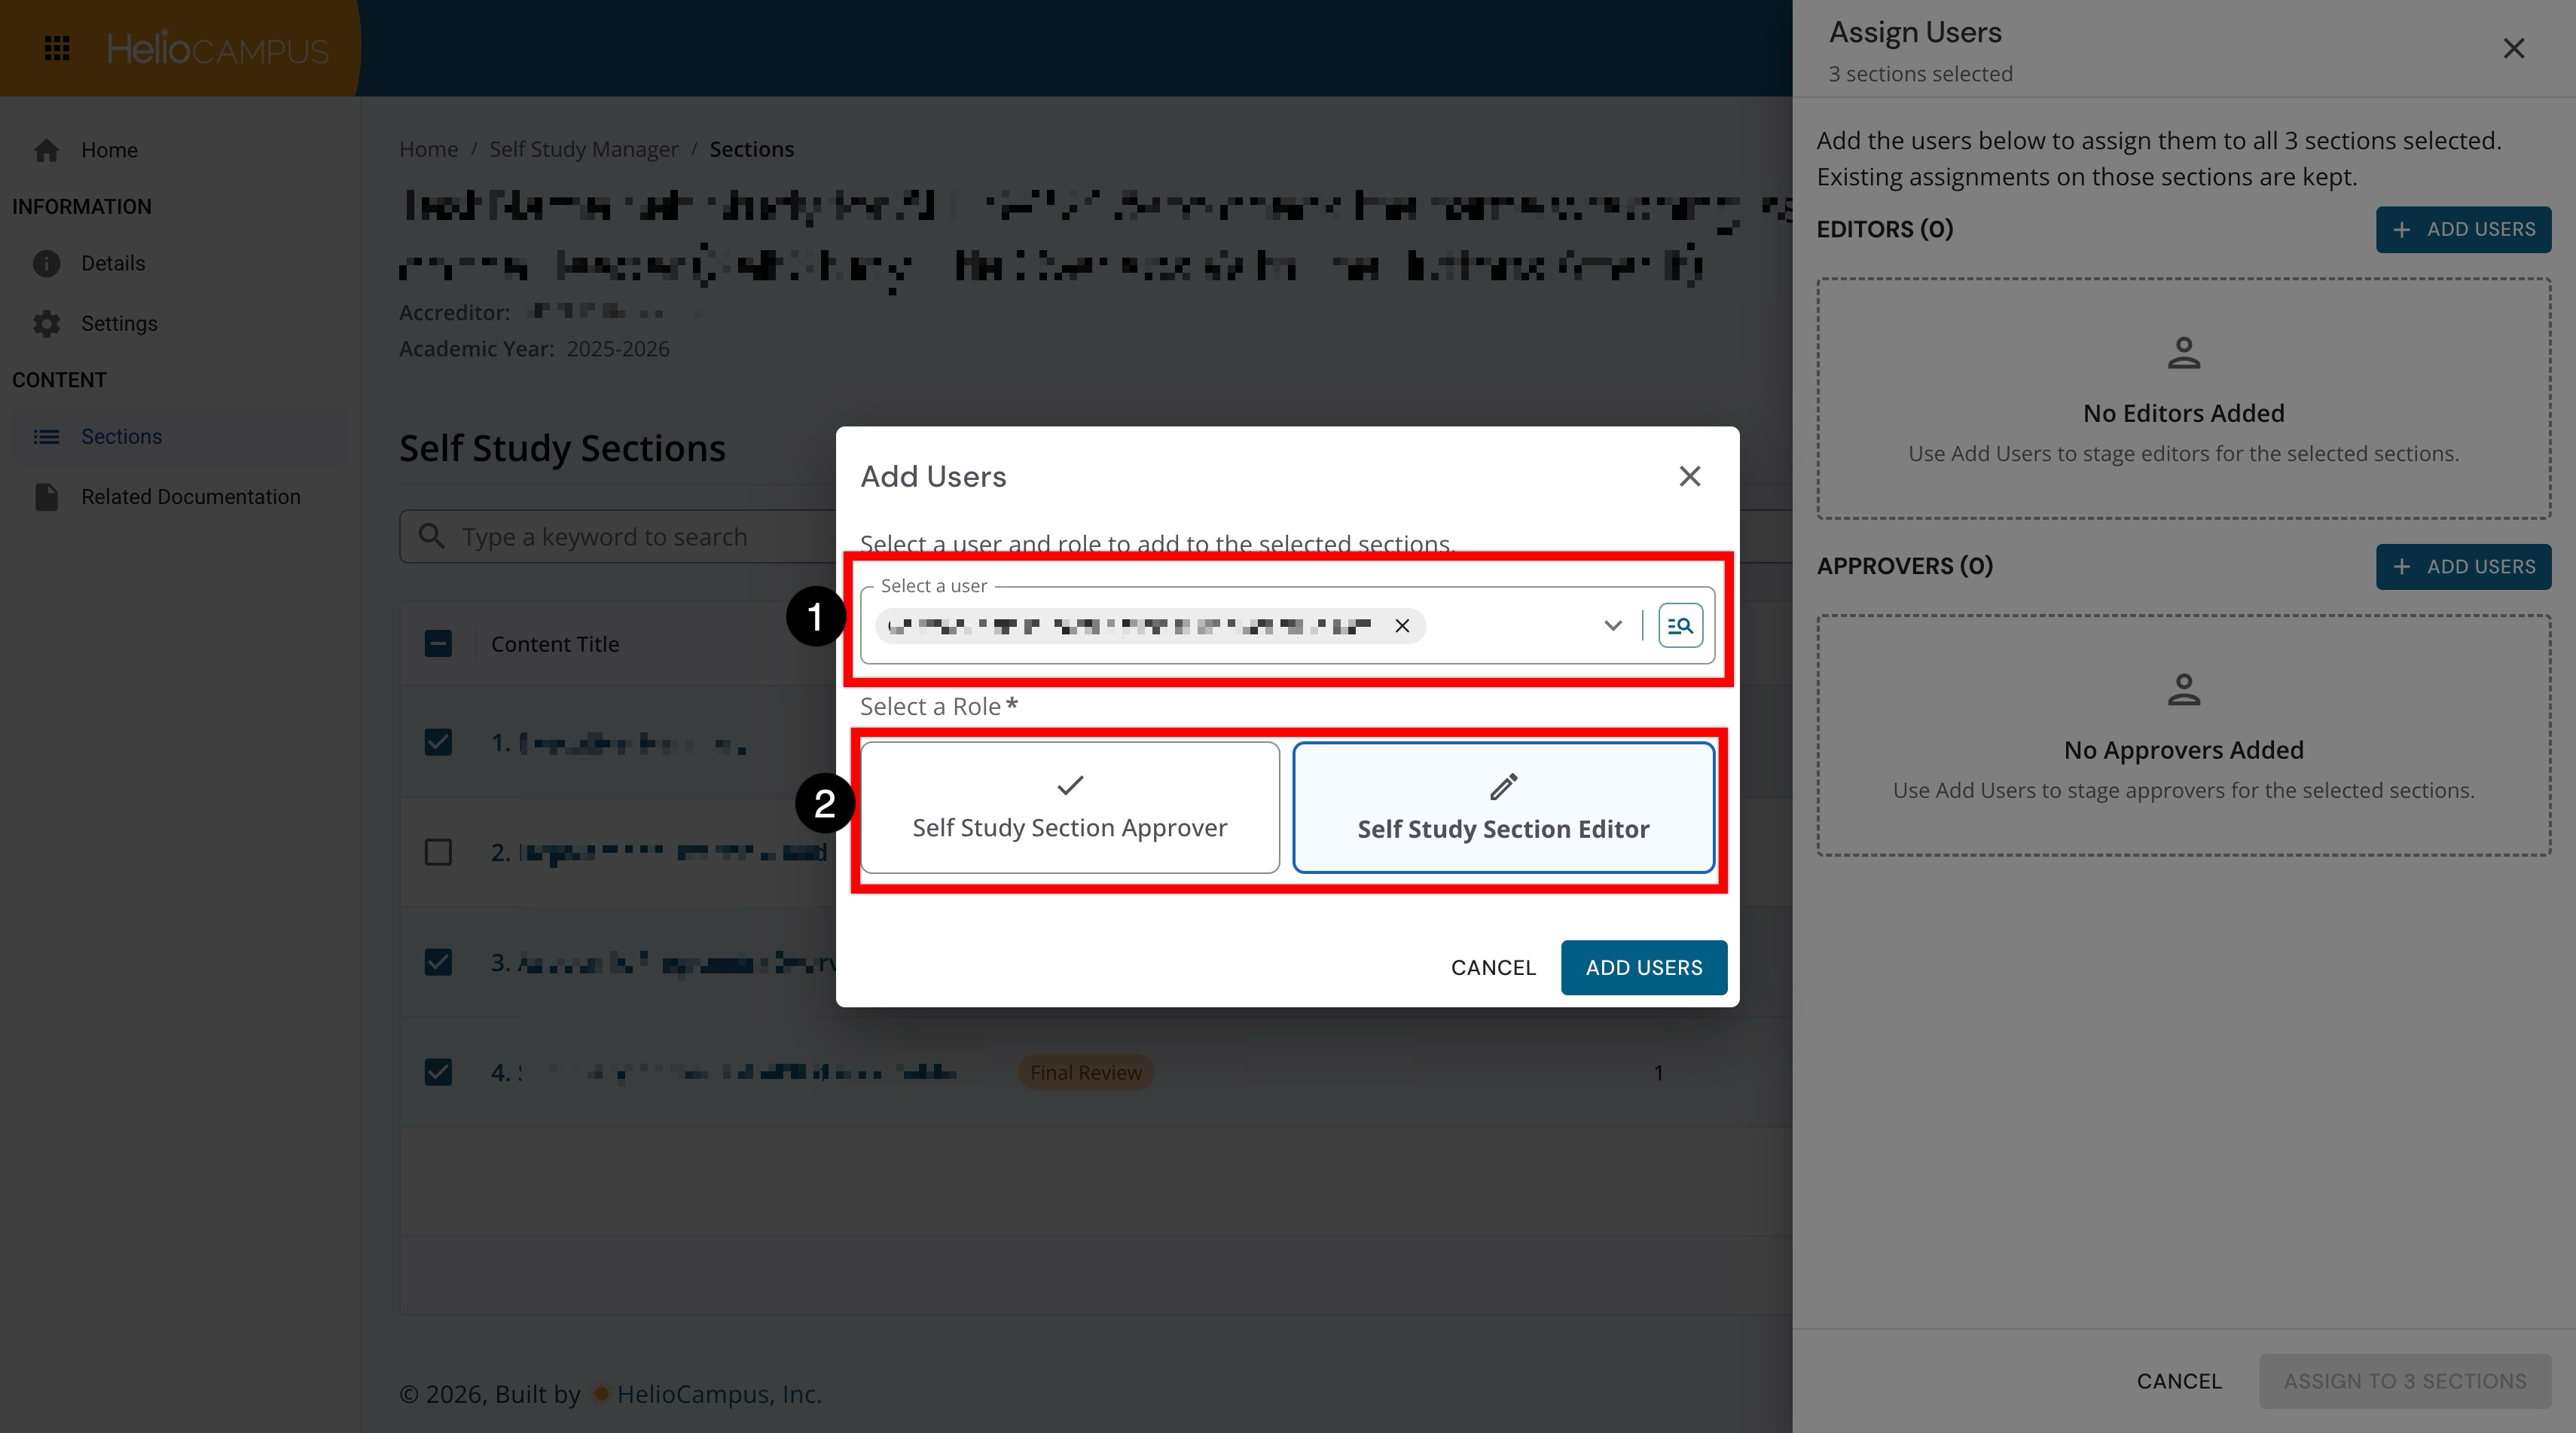
In the Add User pop-up, search for and select a user (1), choose the applicable section role (2), and click Add Users.
-
-
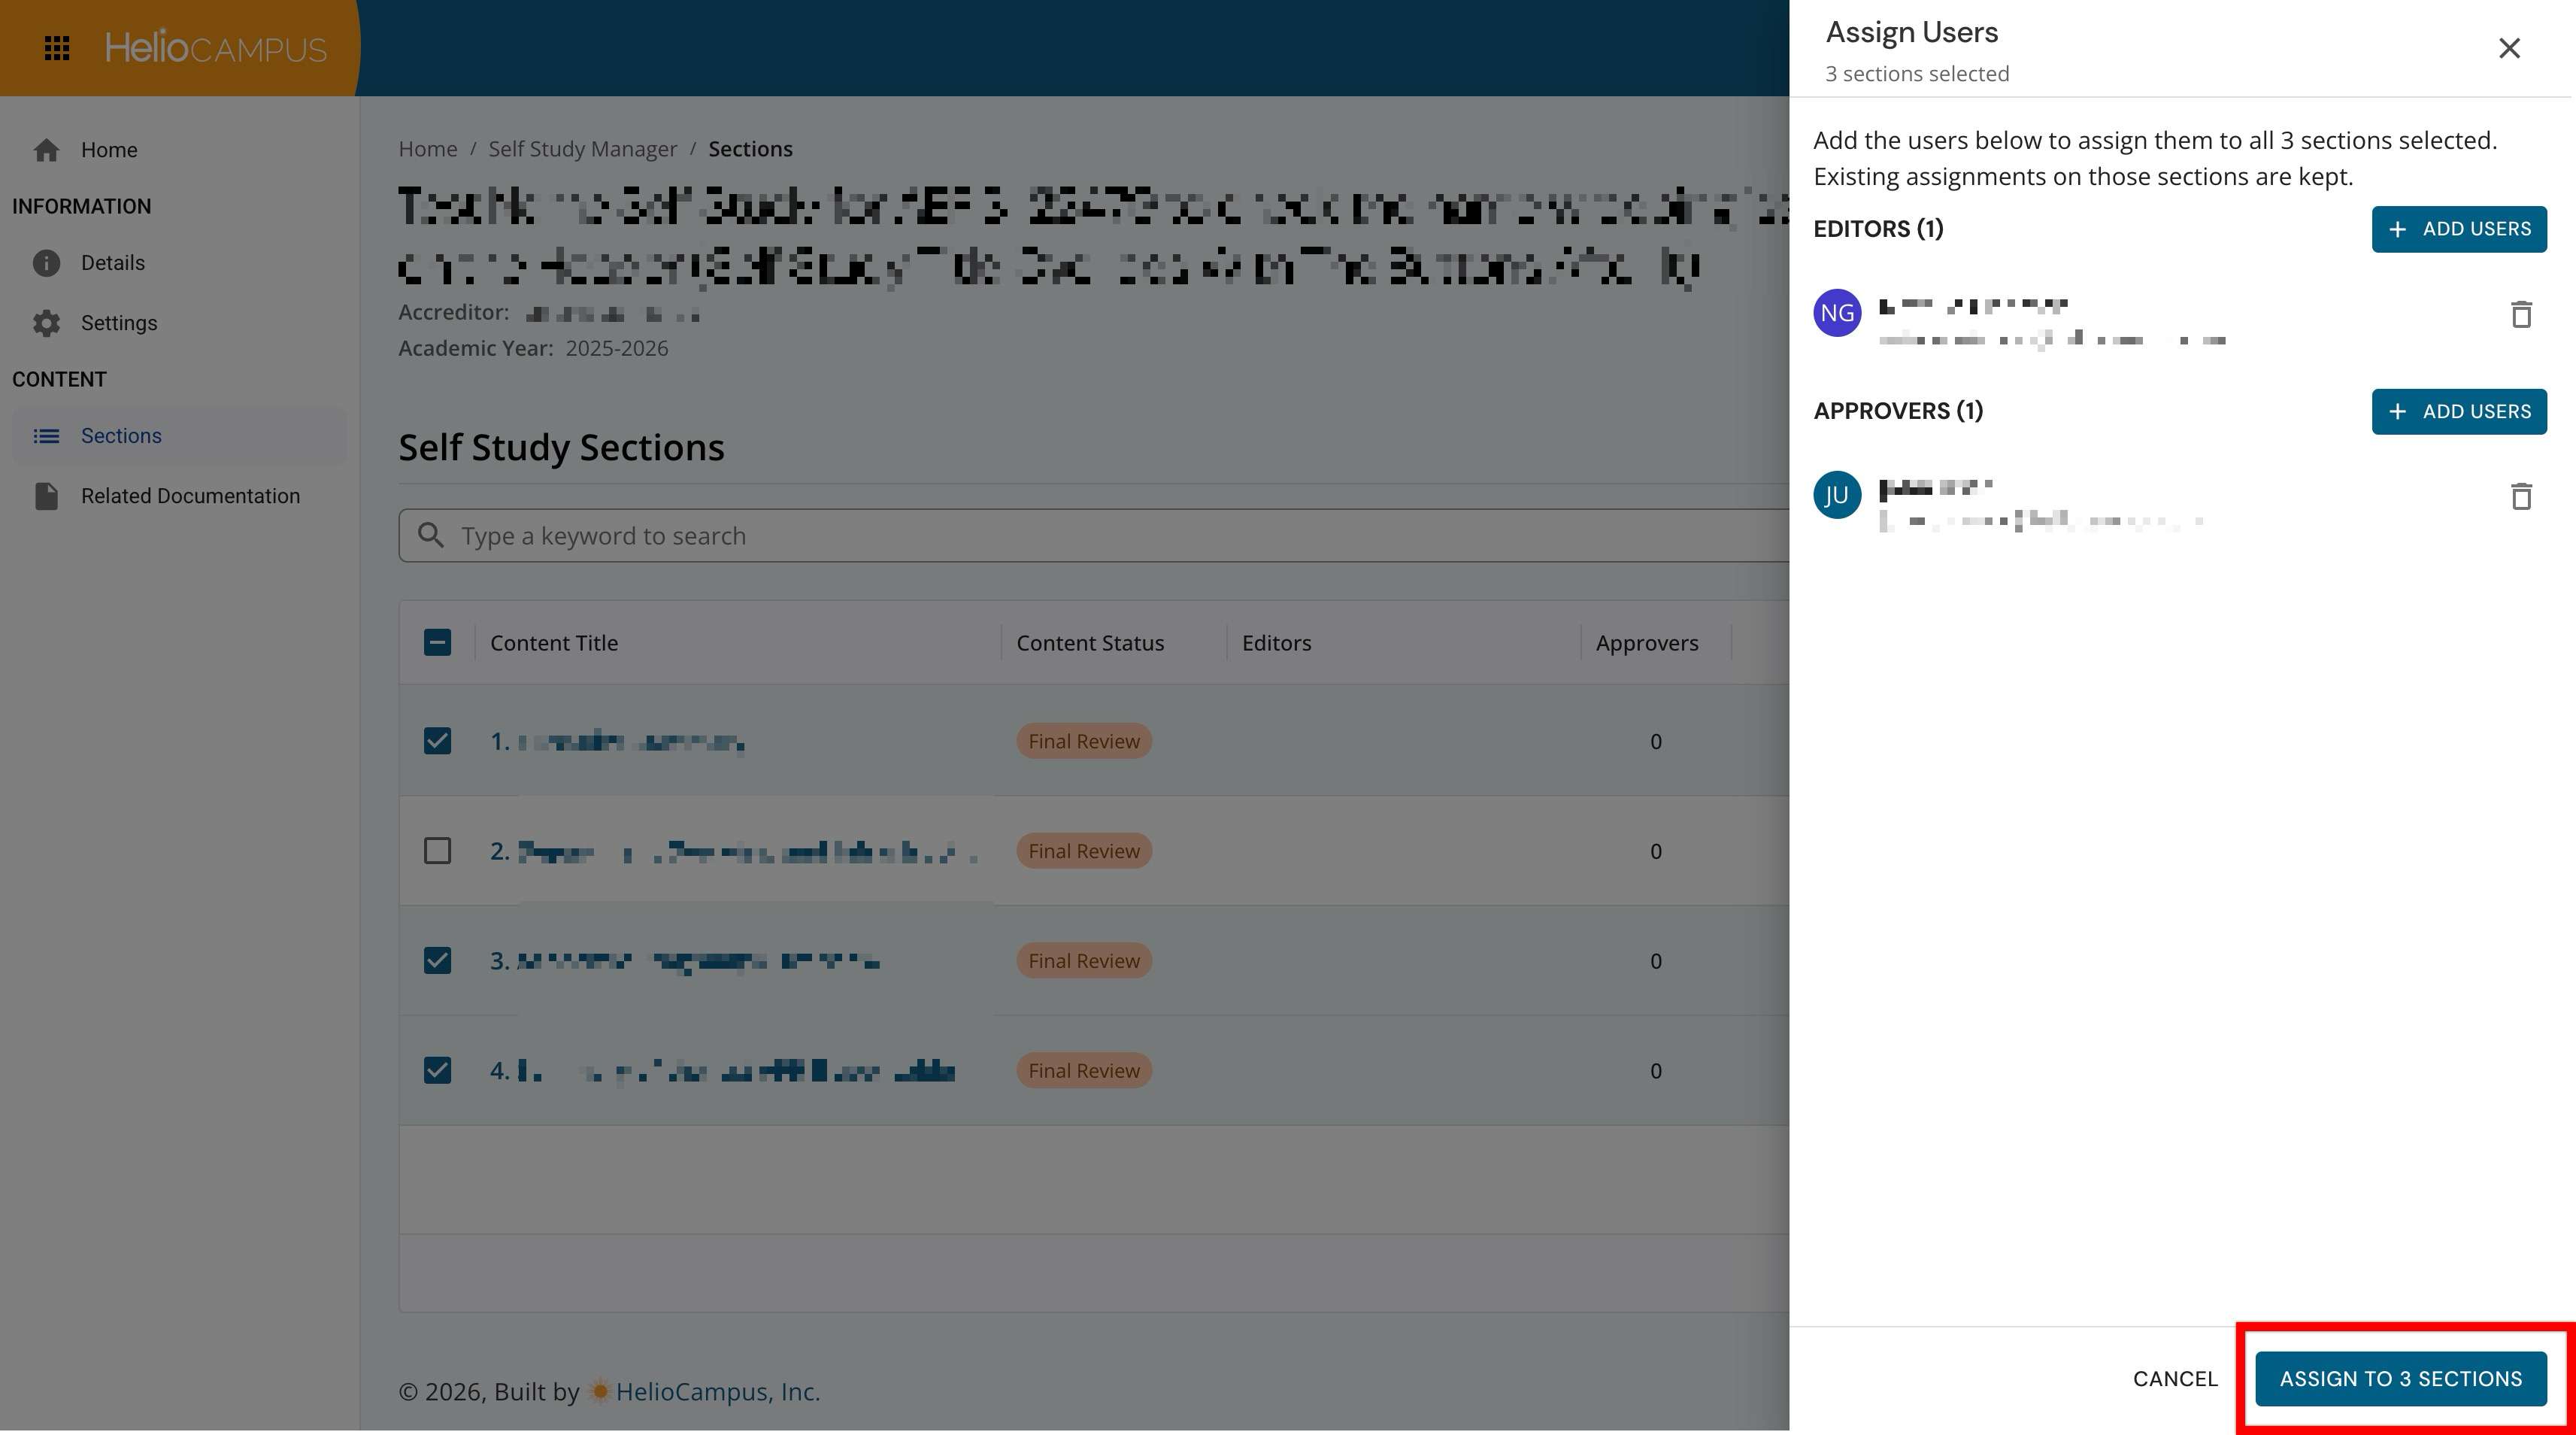
Review and confirm the user(s) appear under the correct role for the selected sections, and click the assign option to complete the assignment to multiple sections.
-
Remove a User Assignment
-
Navigate to Main Menu > Self Study Manager > Self Study Homepage > Sections.
-
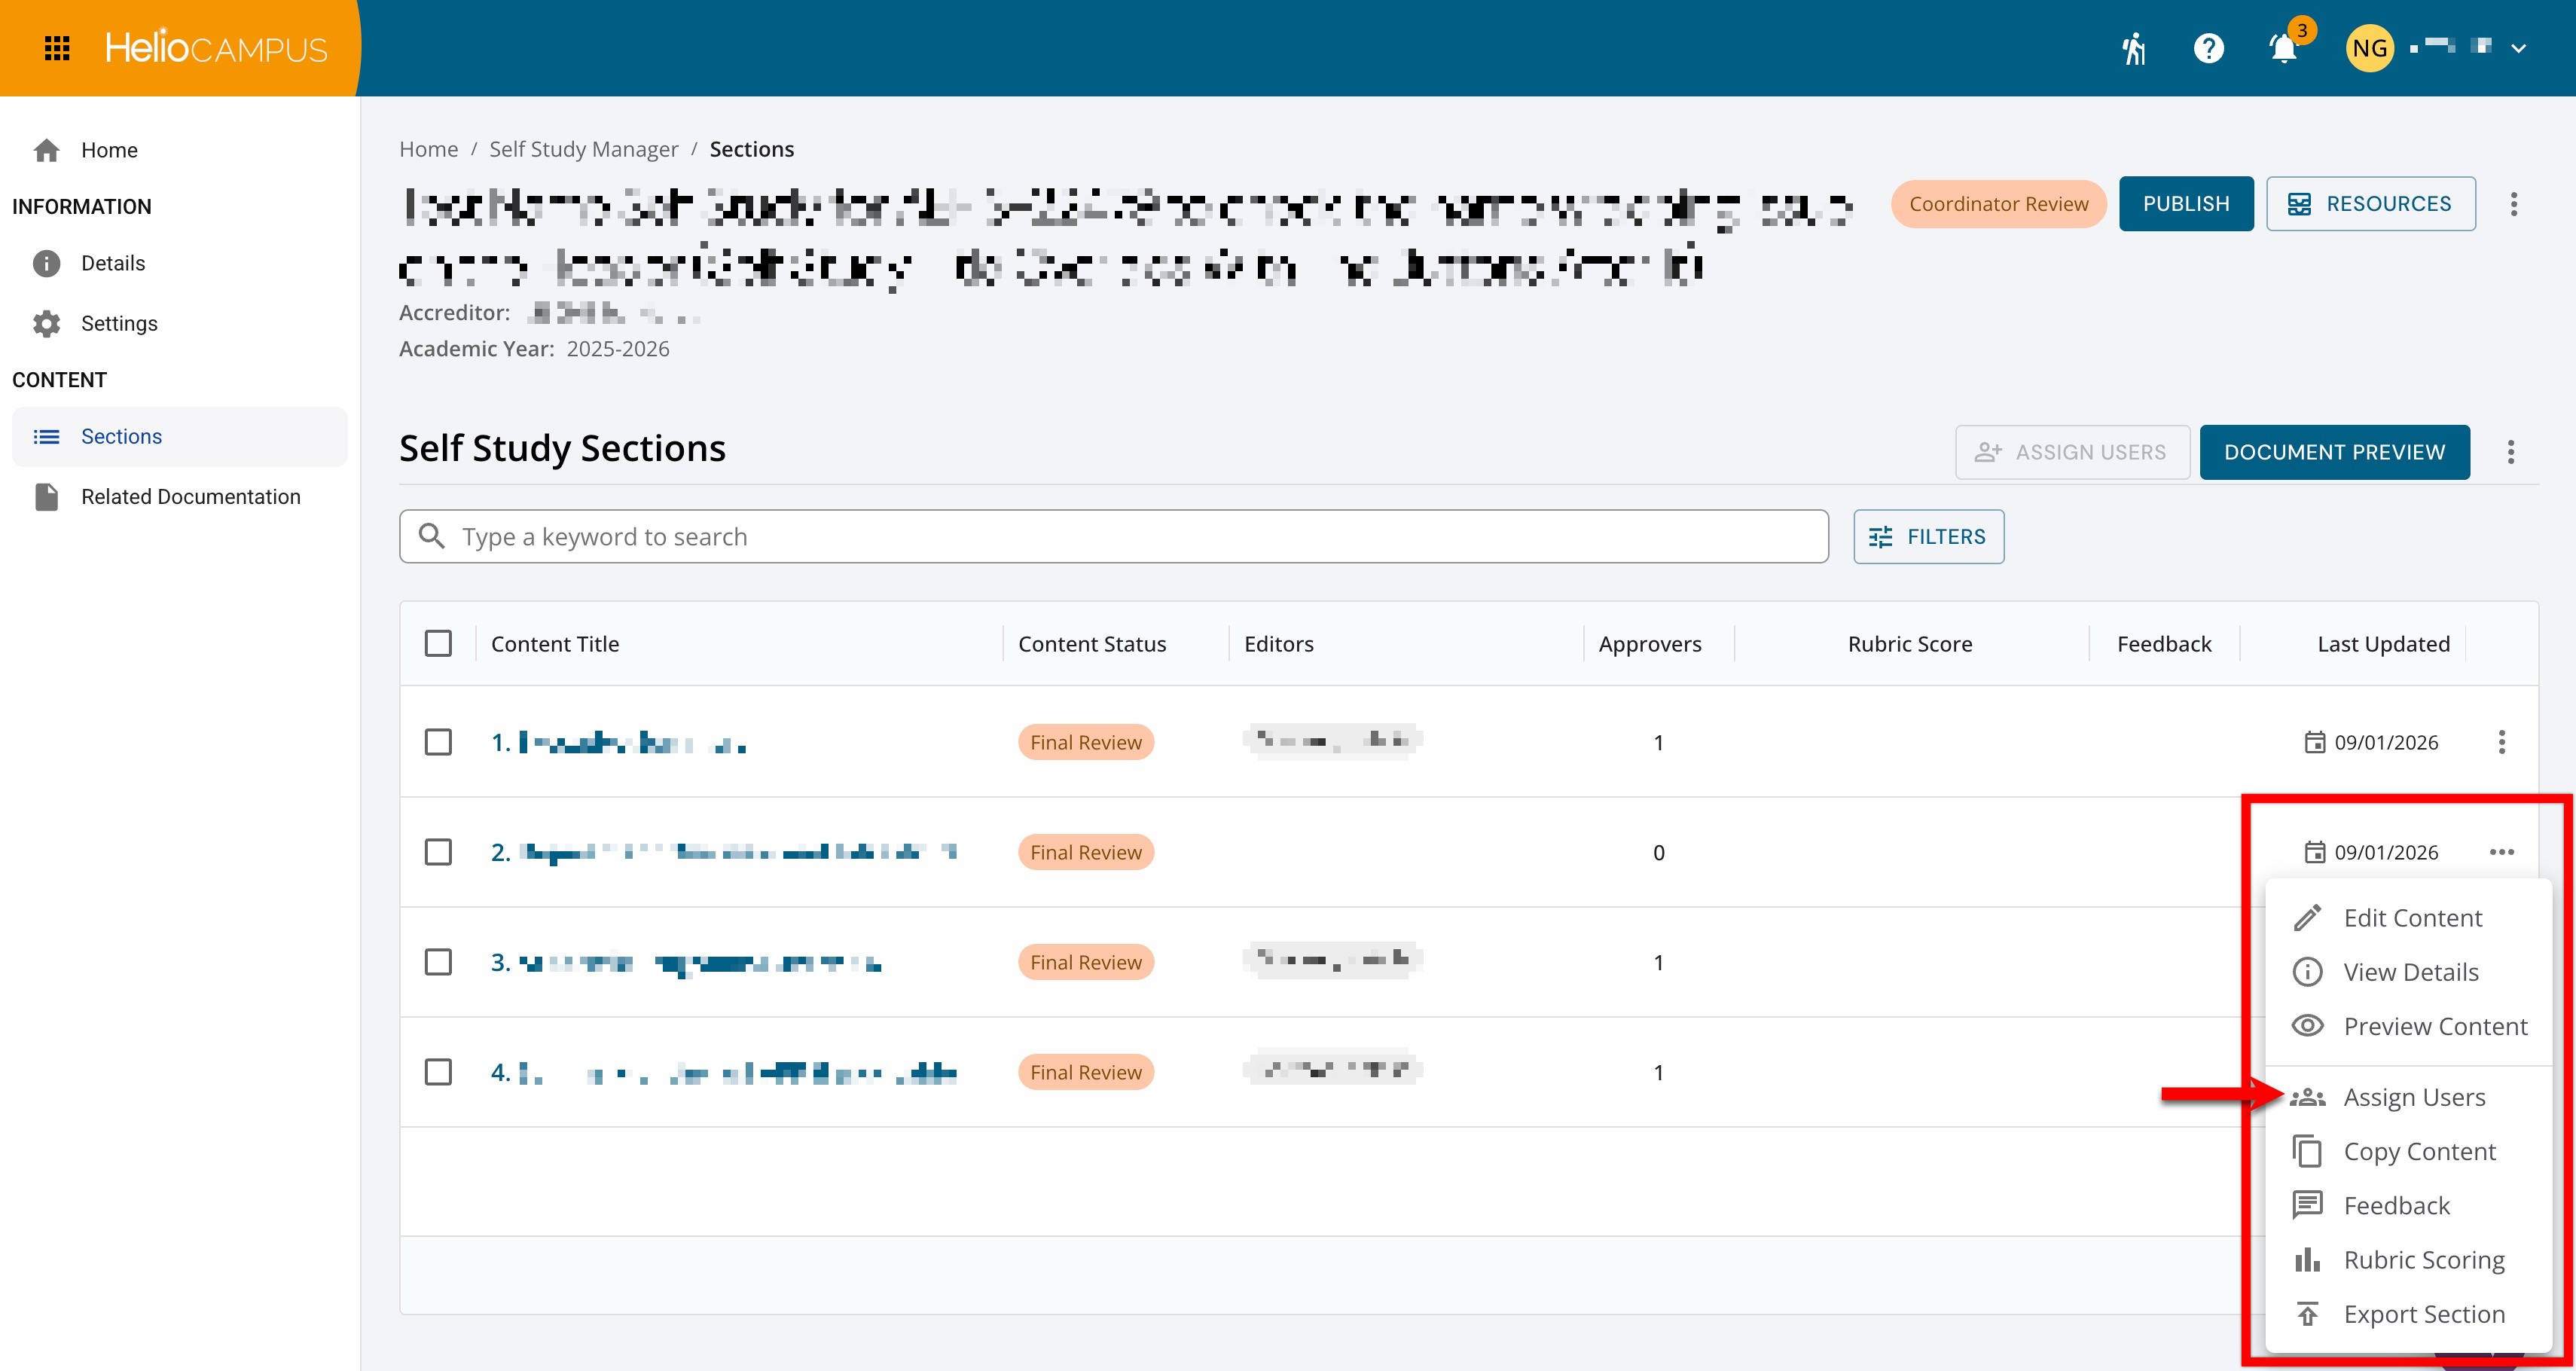
Locate the section that contains the user assignment to remove. Open the section’s kebab menu and select Assign Users.
-
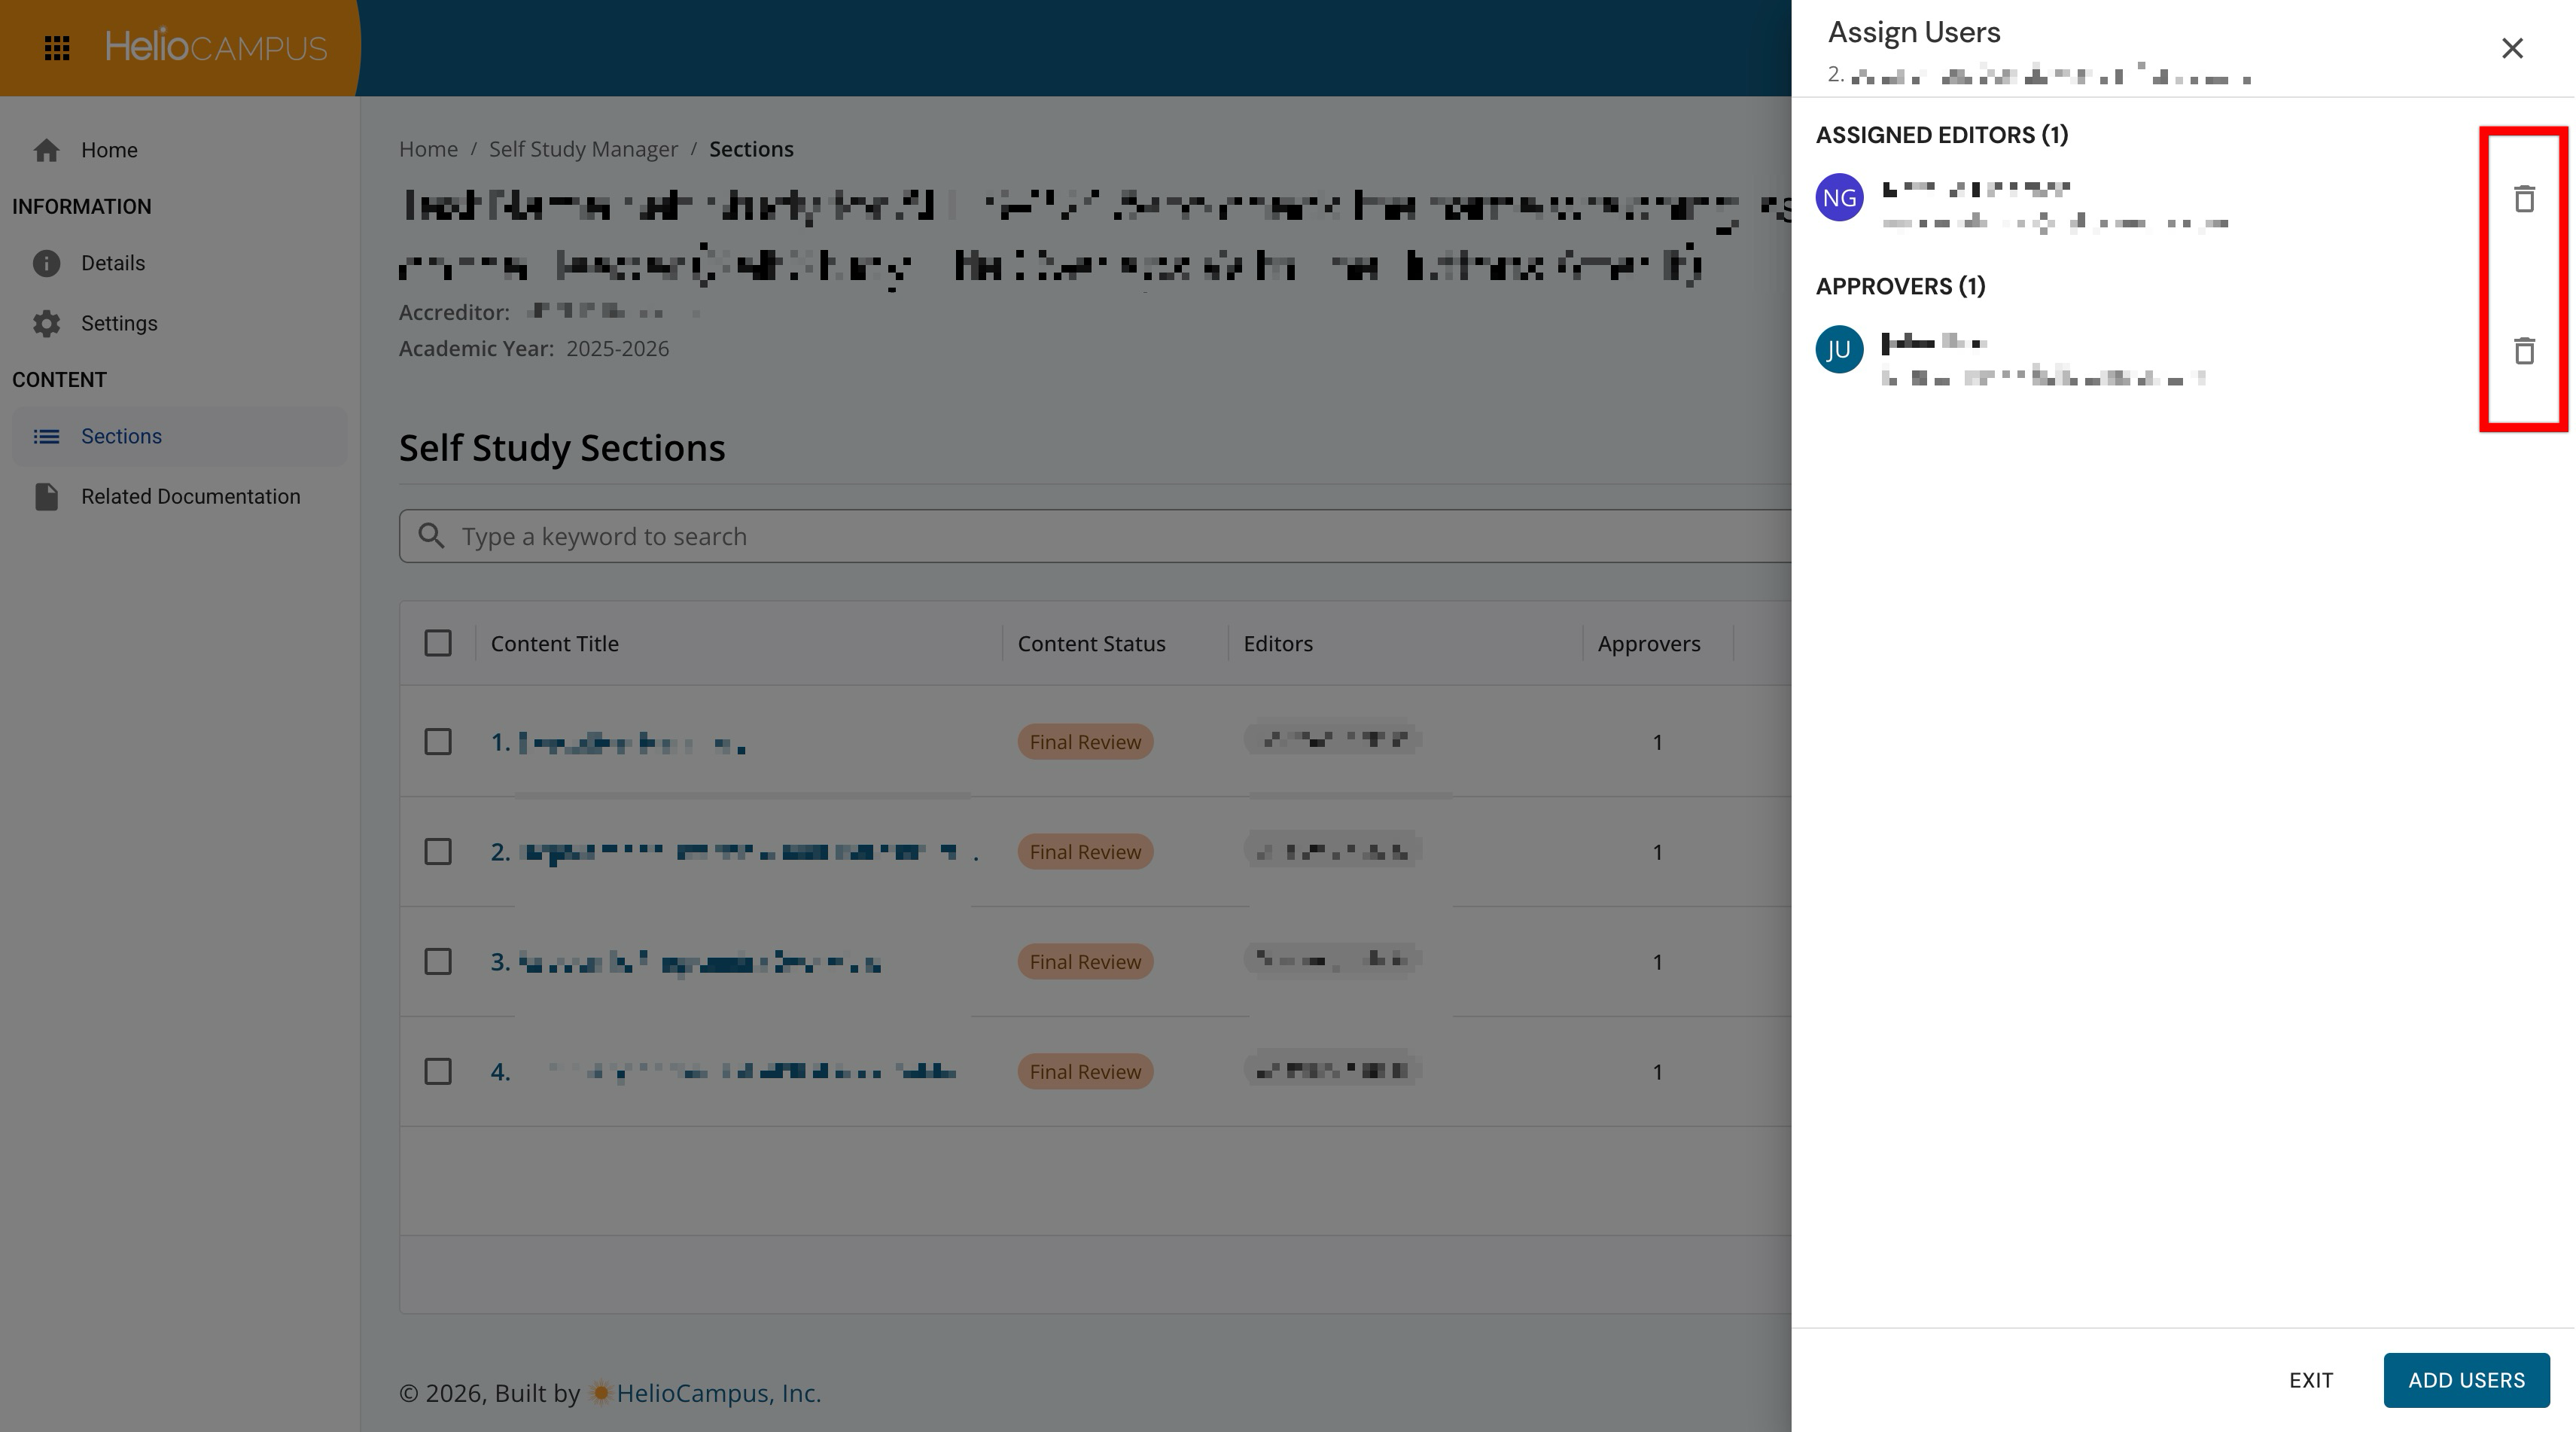
In the Assign Users drawer, find the user under the appropriate role and click the Remove option for that user.
-
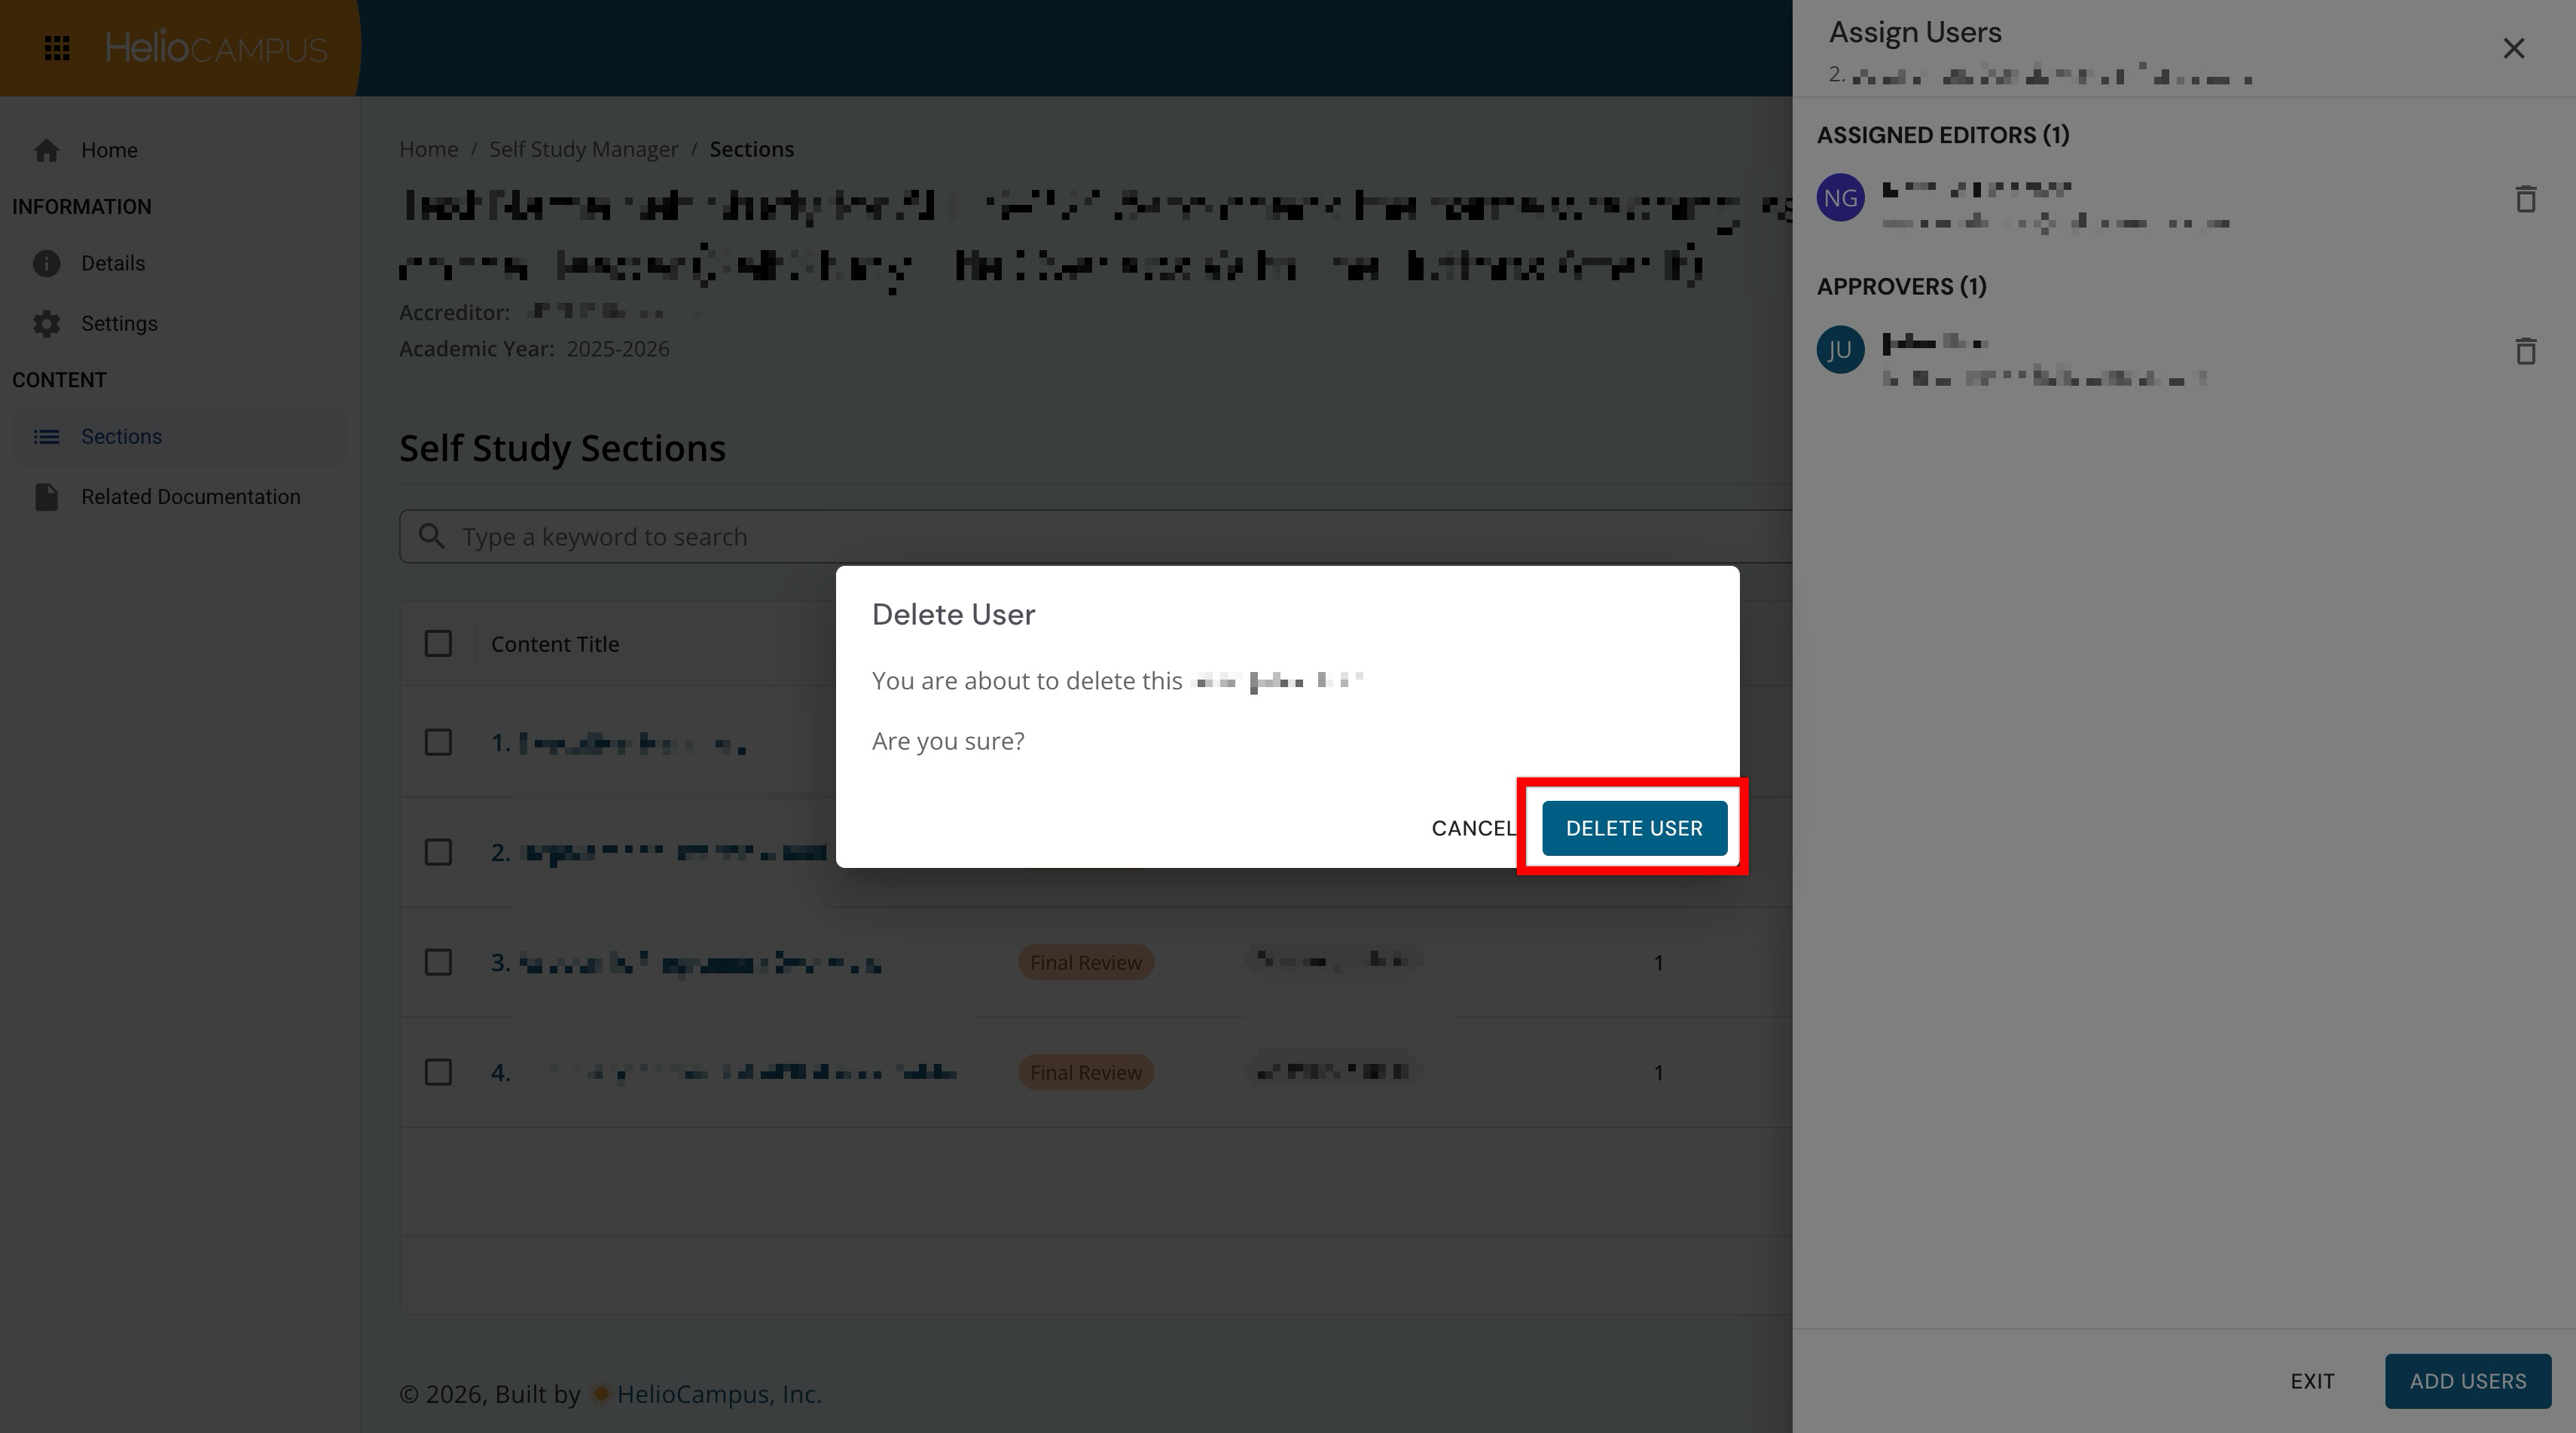
Review the confirmation message, then click Delete User to confirm the removal.
-
-