📙 Knowledge Base Tip: It is recommended to review the Terms, Term Types, and Term Manager articles before creating or editing Terms.
Product Tip
It is considered best practice to publish terms and ensure that the Course Section Data File has been imported before Instructors access their courses in the LMS. If instructors edit assignment names in the LMS before sections have been imported, existing assignment links copied from previous sections in the platform will break.
For Institutions using the Term Data File, terms can be automatically imported in published status, ensuring that existing assignment links copied from previous sections are not broken. Learn more about using the Term Data File.
Create a Term Manually
Learn about manually creating and publishing a term by watching a quick walkthrough video!
-
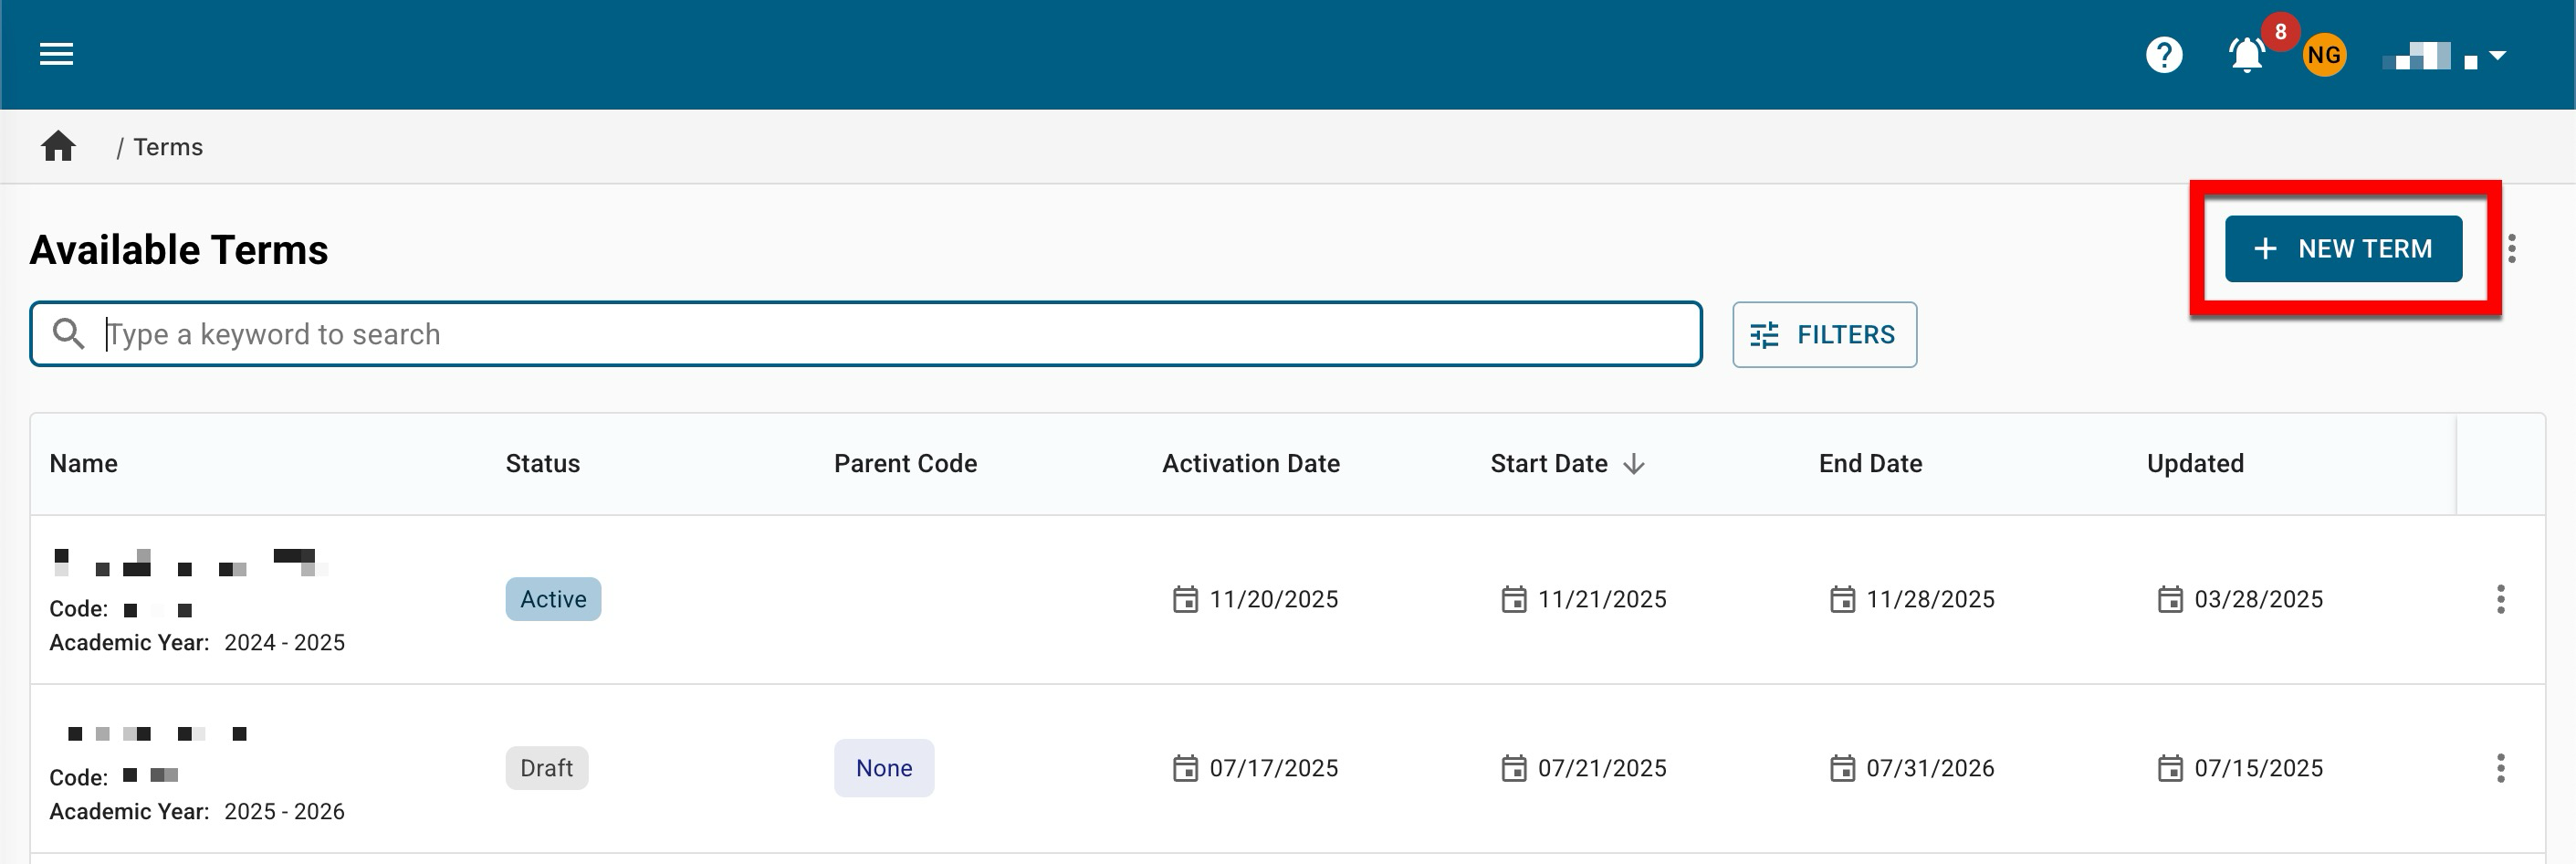
Navigate to Main Menu > Admin Tools > Terms and click + New Term.
-
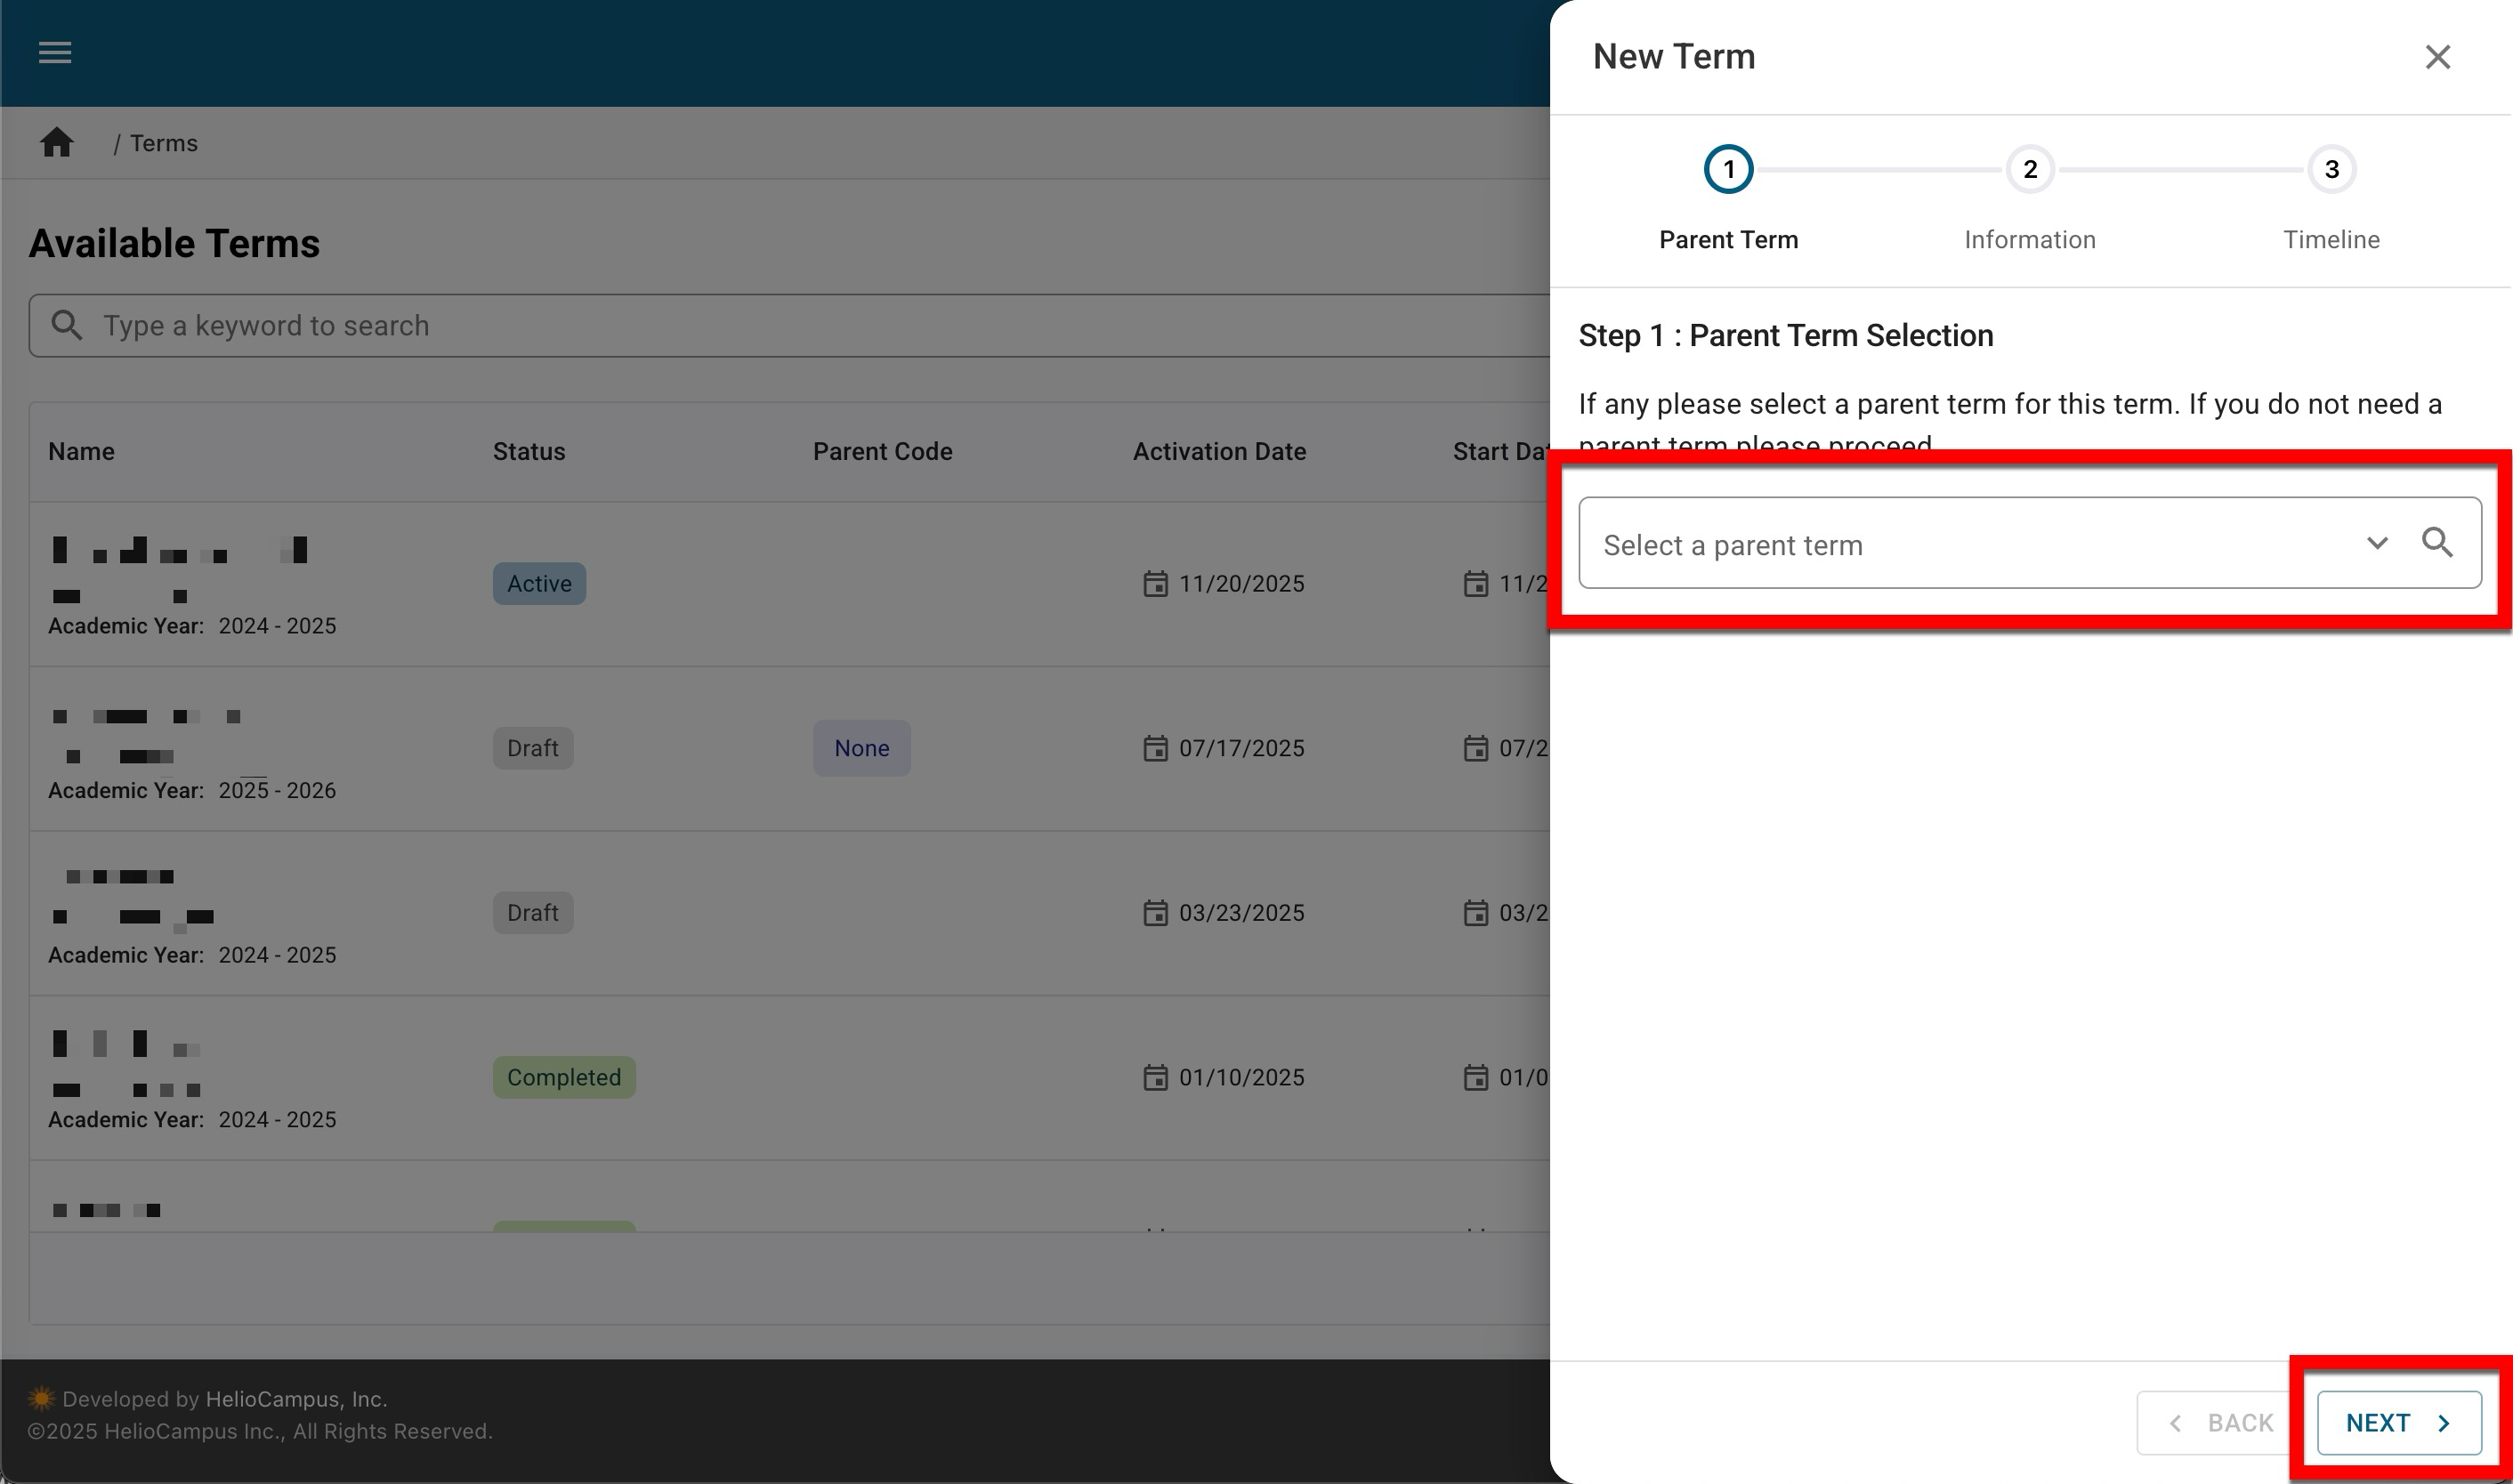
If a Partial Term is being created, select the Parent Term, then click Next. If a Partial Term is not being created, click Next to continue to the Information step. Learn more about Parent and Partial Terms.
By default, Partial Term functionality is disabled. To inquire about enabling this functionality, please contact Support.
-
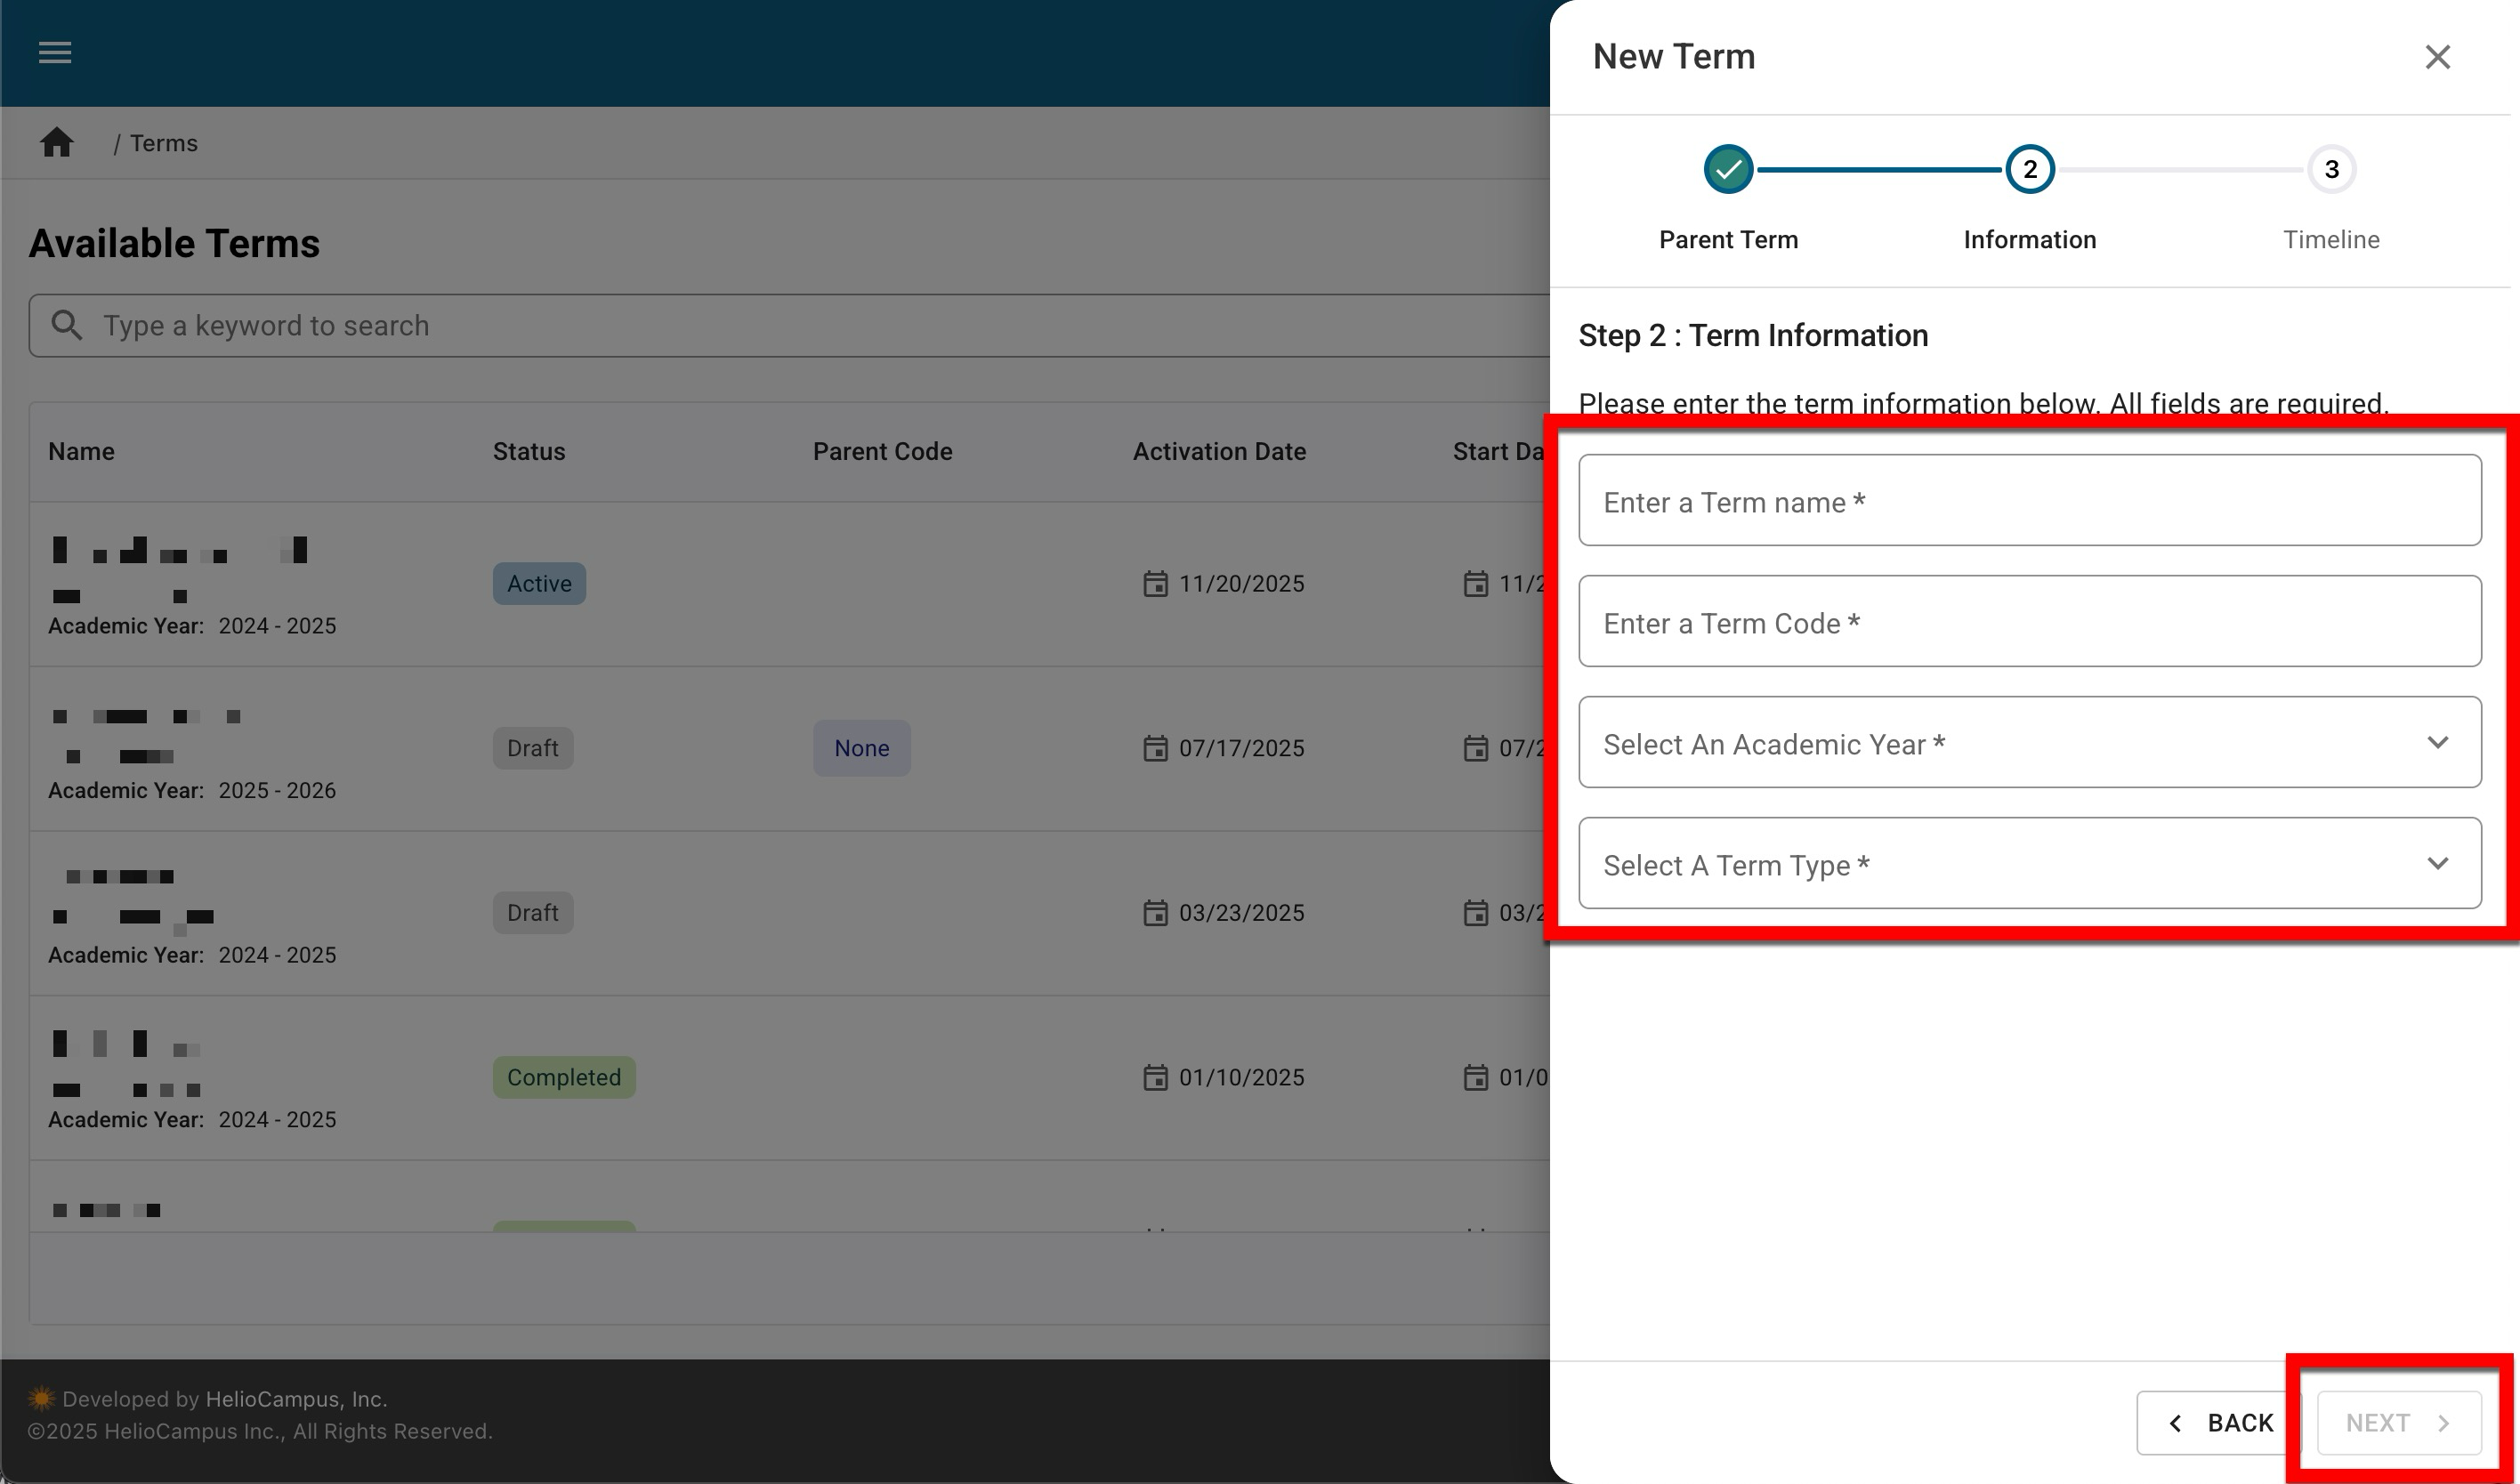
Via the Information step of the New Term drawer, enter term information and click Next when all fields are complete.
The Term Code must be unique, and to ensure the proper import of data files, the code must match what is included in the data files.
-
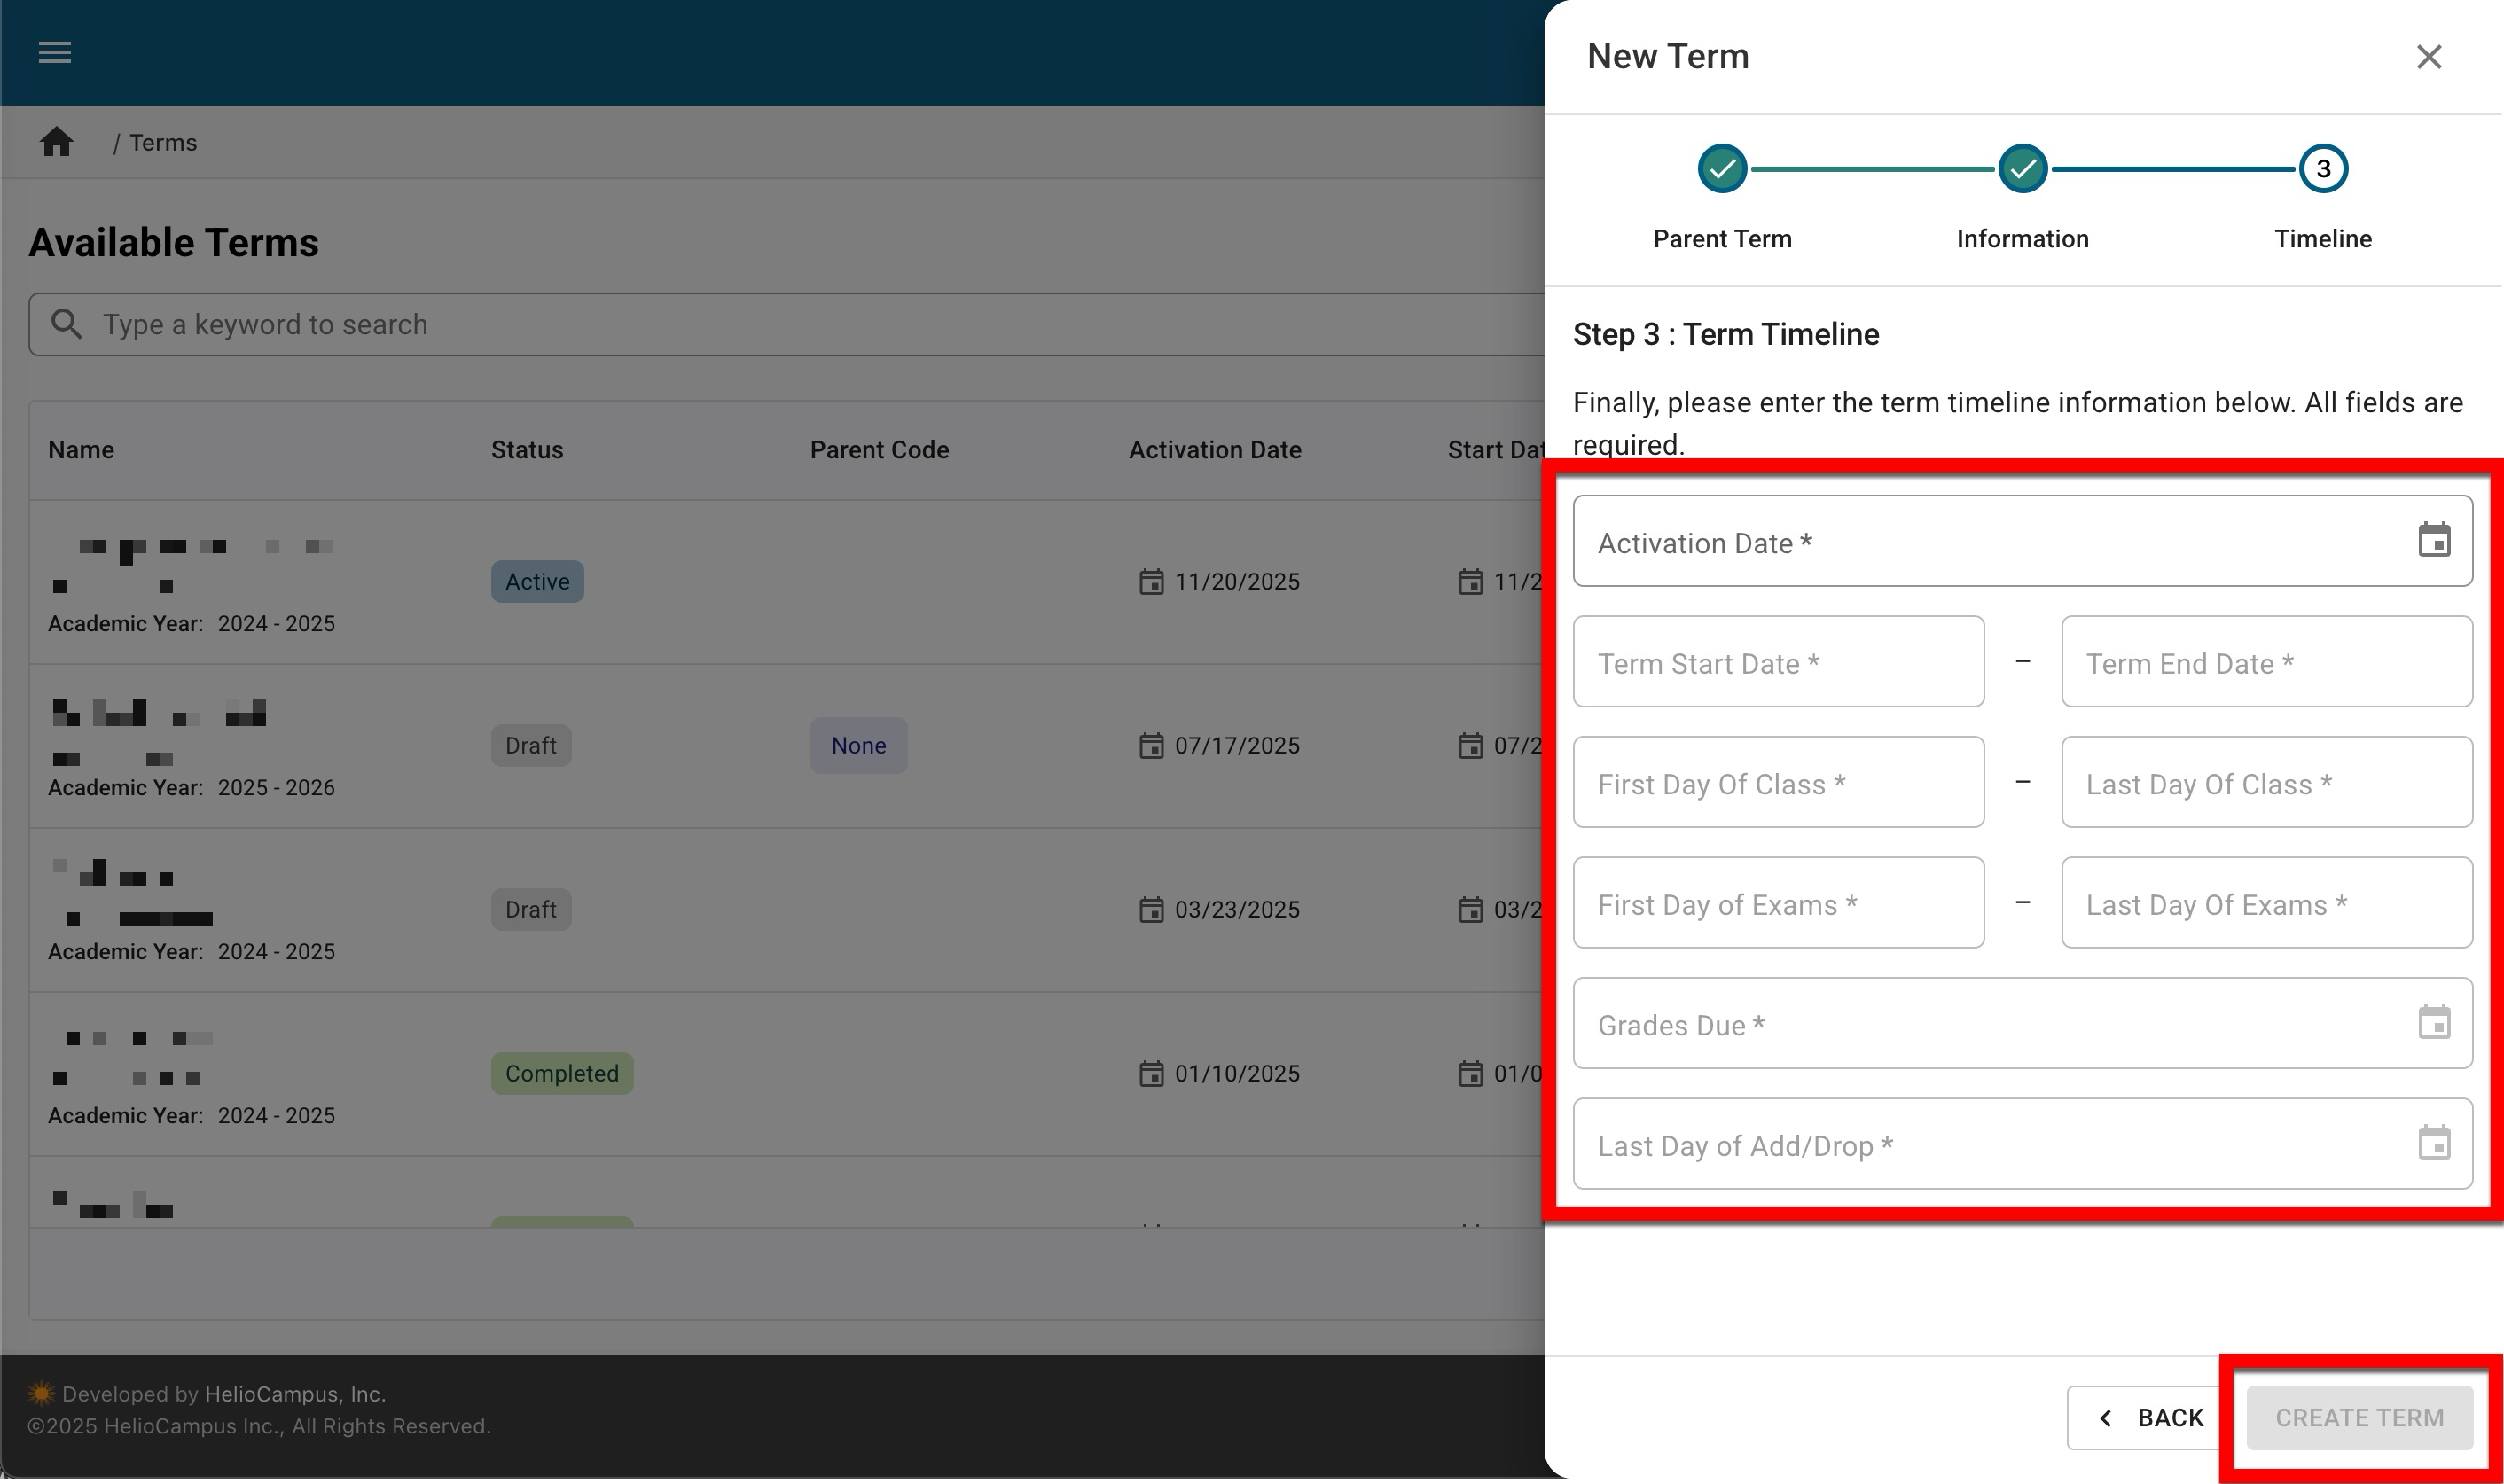
Via the Timeline step, configure key term dates used as milestone events for notification configuration. When all fields have been completed, click Create Term.
-
Activation Date: This date must be two or more days from the term creation date and cannot be set in the past.
-
Term Start/End Date: The start date must be one or more days after the Activation Date and cannot be set in the past.
-
-
-
When created, new terms will be in Draft status and should be published at least two days before the Term Activation Date.
Create Terms via Bulk Import
Learn about importing terms by watching a quick walkthrough video!
Adding terms via bulk import can be helpful for Institutions entering all terms for a full academic year at one time or if a partial term structure is being utilized. Learn more about parent and partial terms.
-
Navigate to Main Menu > Admin Tools > Terms and select Import/Export from the expanded kebab menu.

-
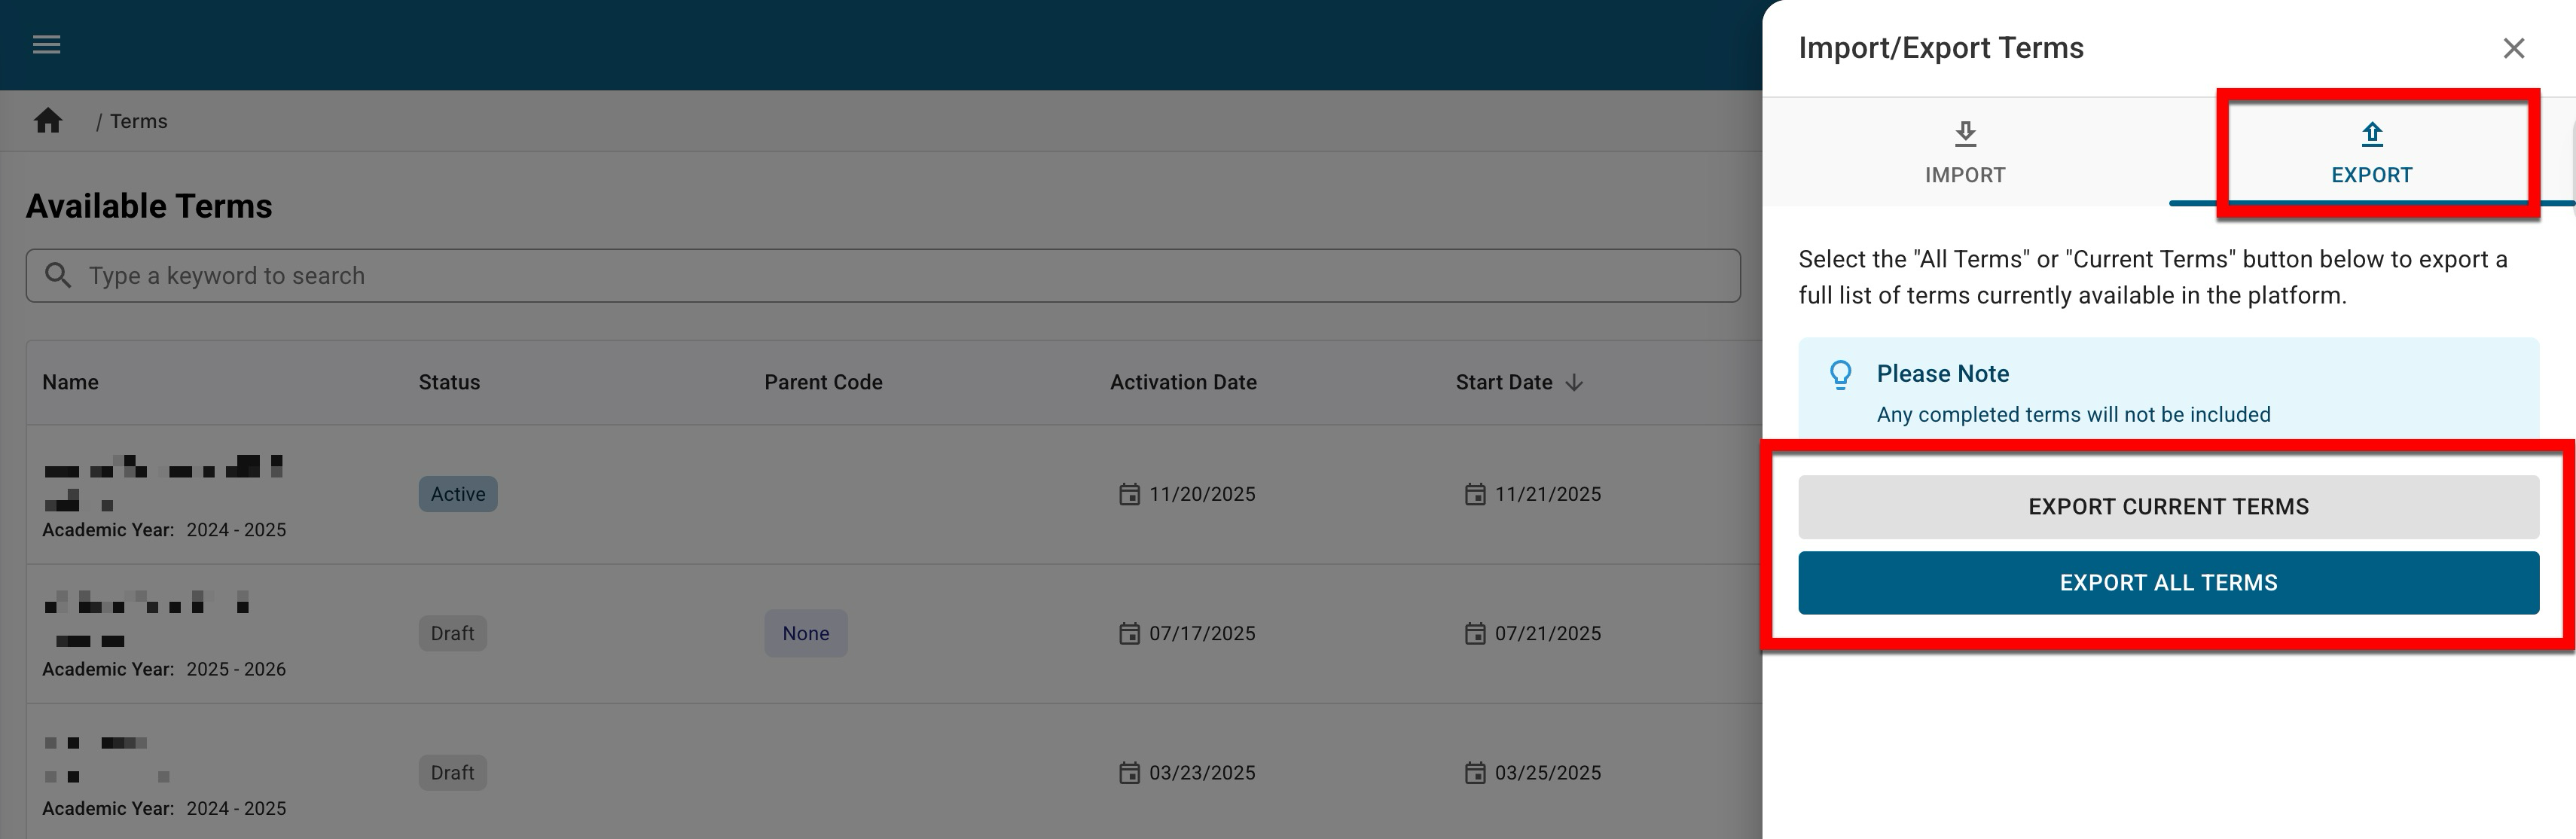
Via the Export tab of the Import/Export Terms drawer, select whether to export All Terms or Current Terms.
-
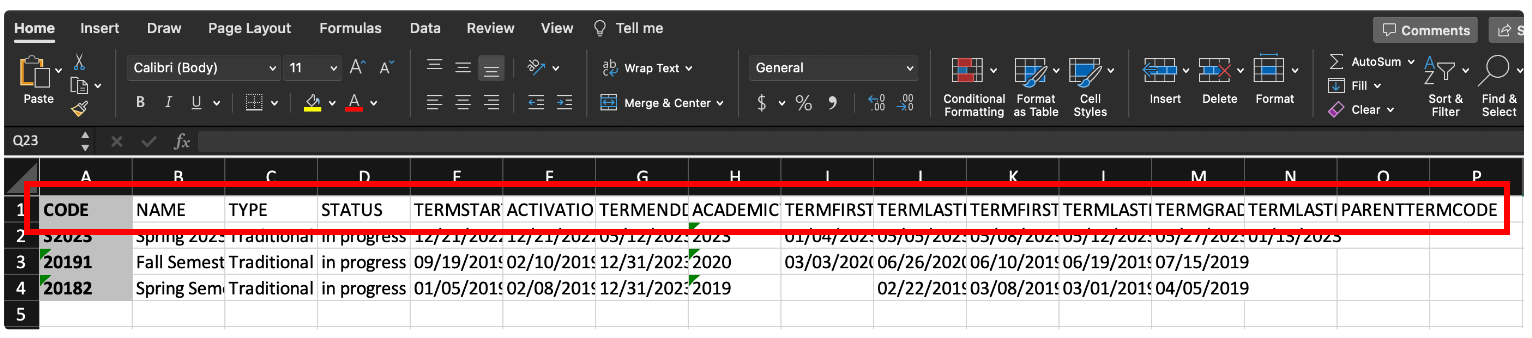
Once the term template has been downloaded, new terms can be added by adding term information to the template directly below existing terms. The columns in the term template directly correlate to the fields when manually creating a term, with the following exceptions:
-
Status: When adding new terms via bulk import, the status should be entered as Draft.
-
Parent Term Code: If adding a partial term, the code for the parent term should be added to this field to identify the relationship between the partial term being added and the parent term that it relates to. Before importing the term template, verify that the correct Term Codes (column A) and Parent Term Code (column O) have been entered correctly. If a Parent Term Code is empty, the term will be created as a parent term and not a partial term.
-
-
-
To import, navigate to Main Menu > Admin Tools > Terms, and select Import/Export from the expanded kebab menu.

-
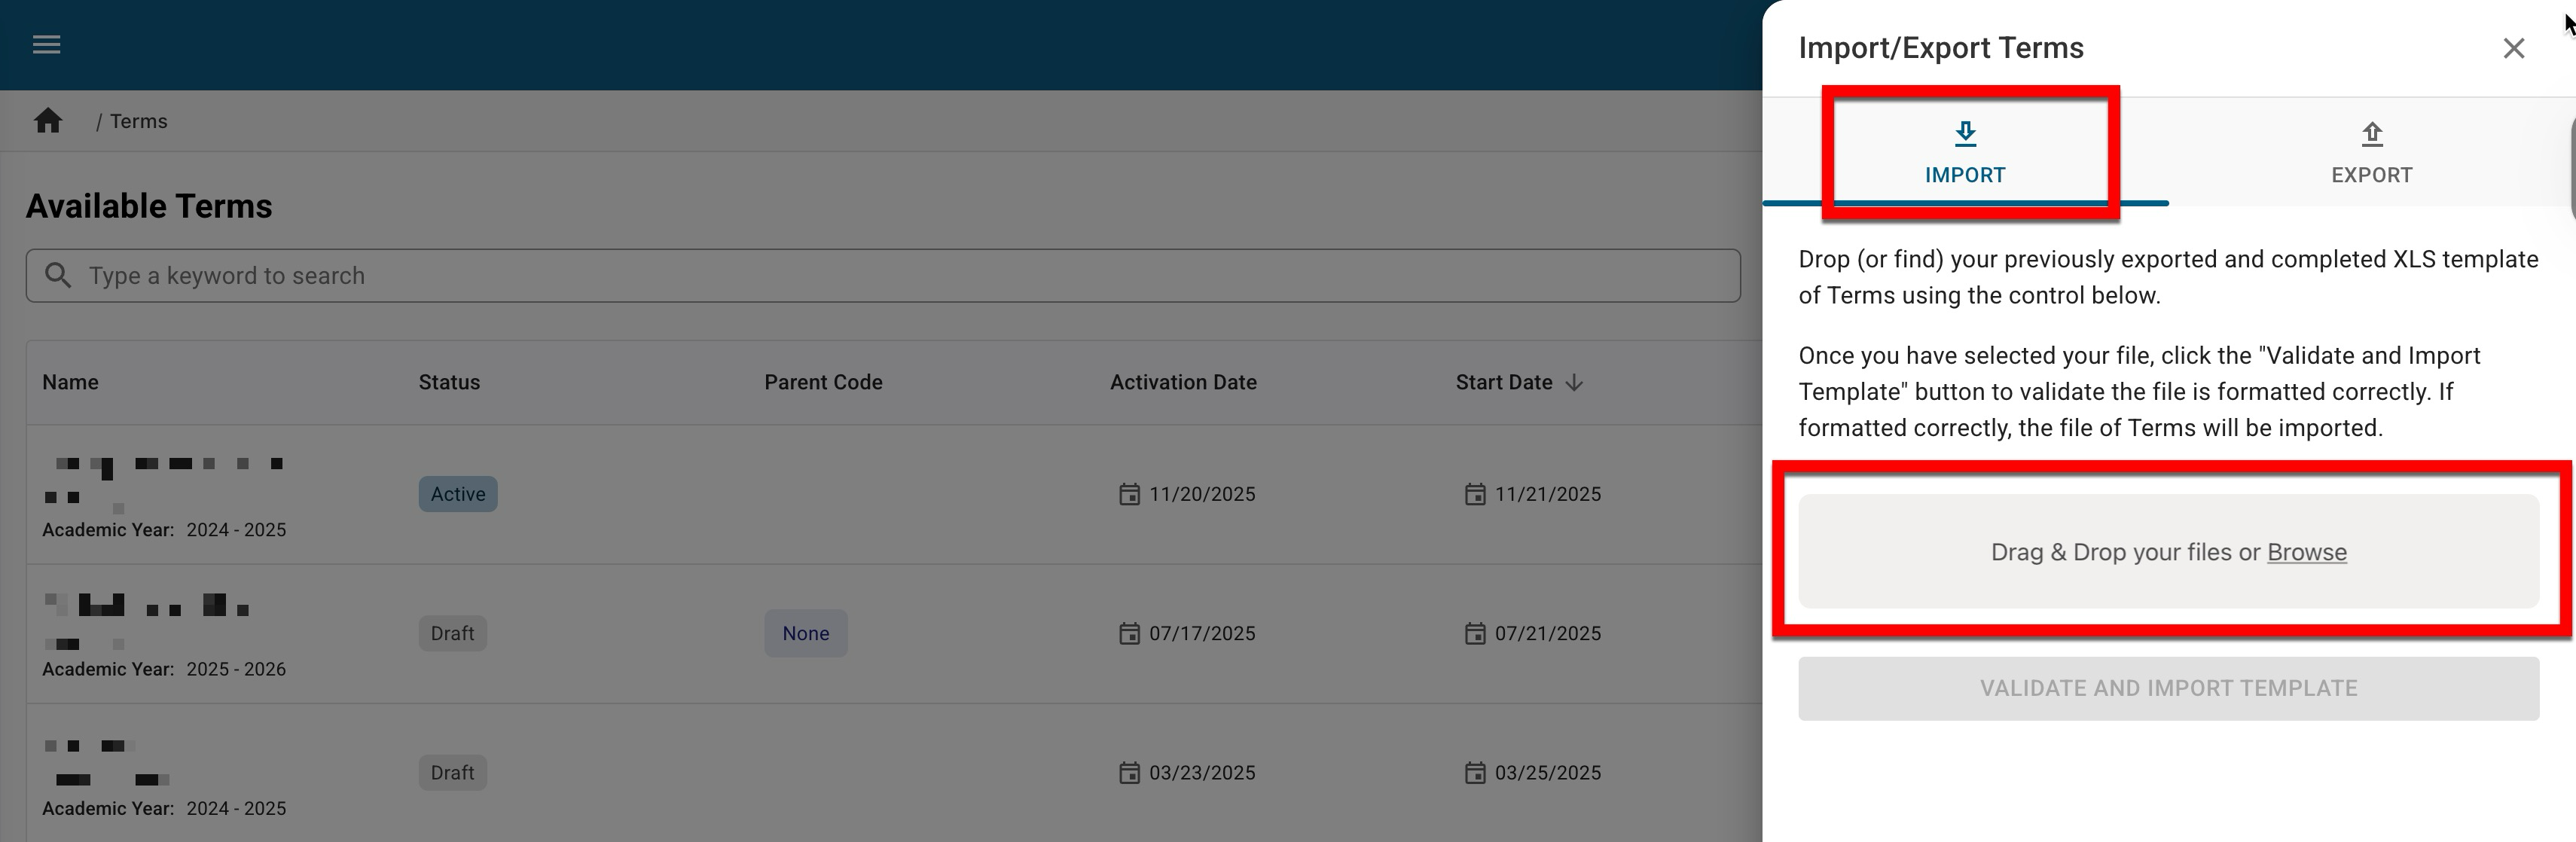
Via the Import tab of the Import/Export Terms drawer, import the completed template. Drag and drop the completed template to the indicated area, or click Browse to search for and select the completed template via the computer's File Explorer.
-
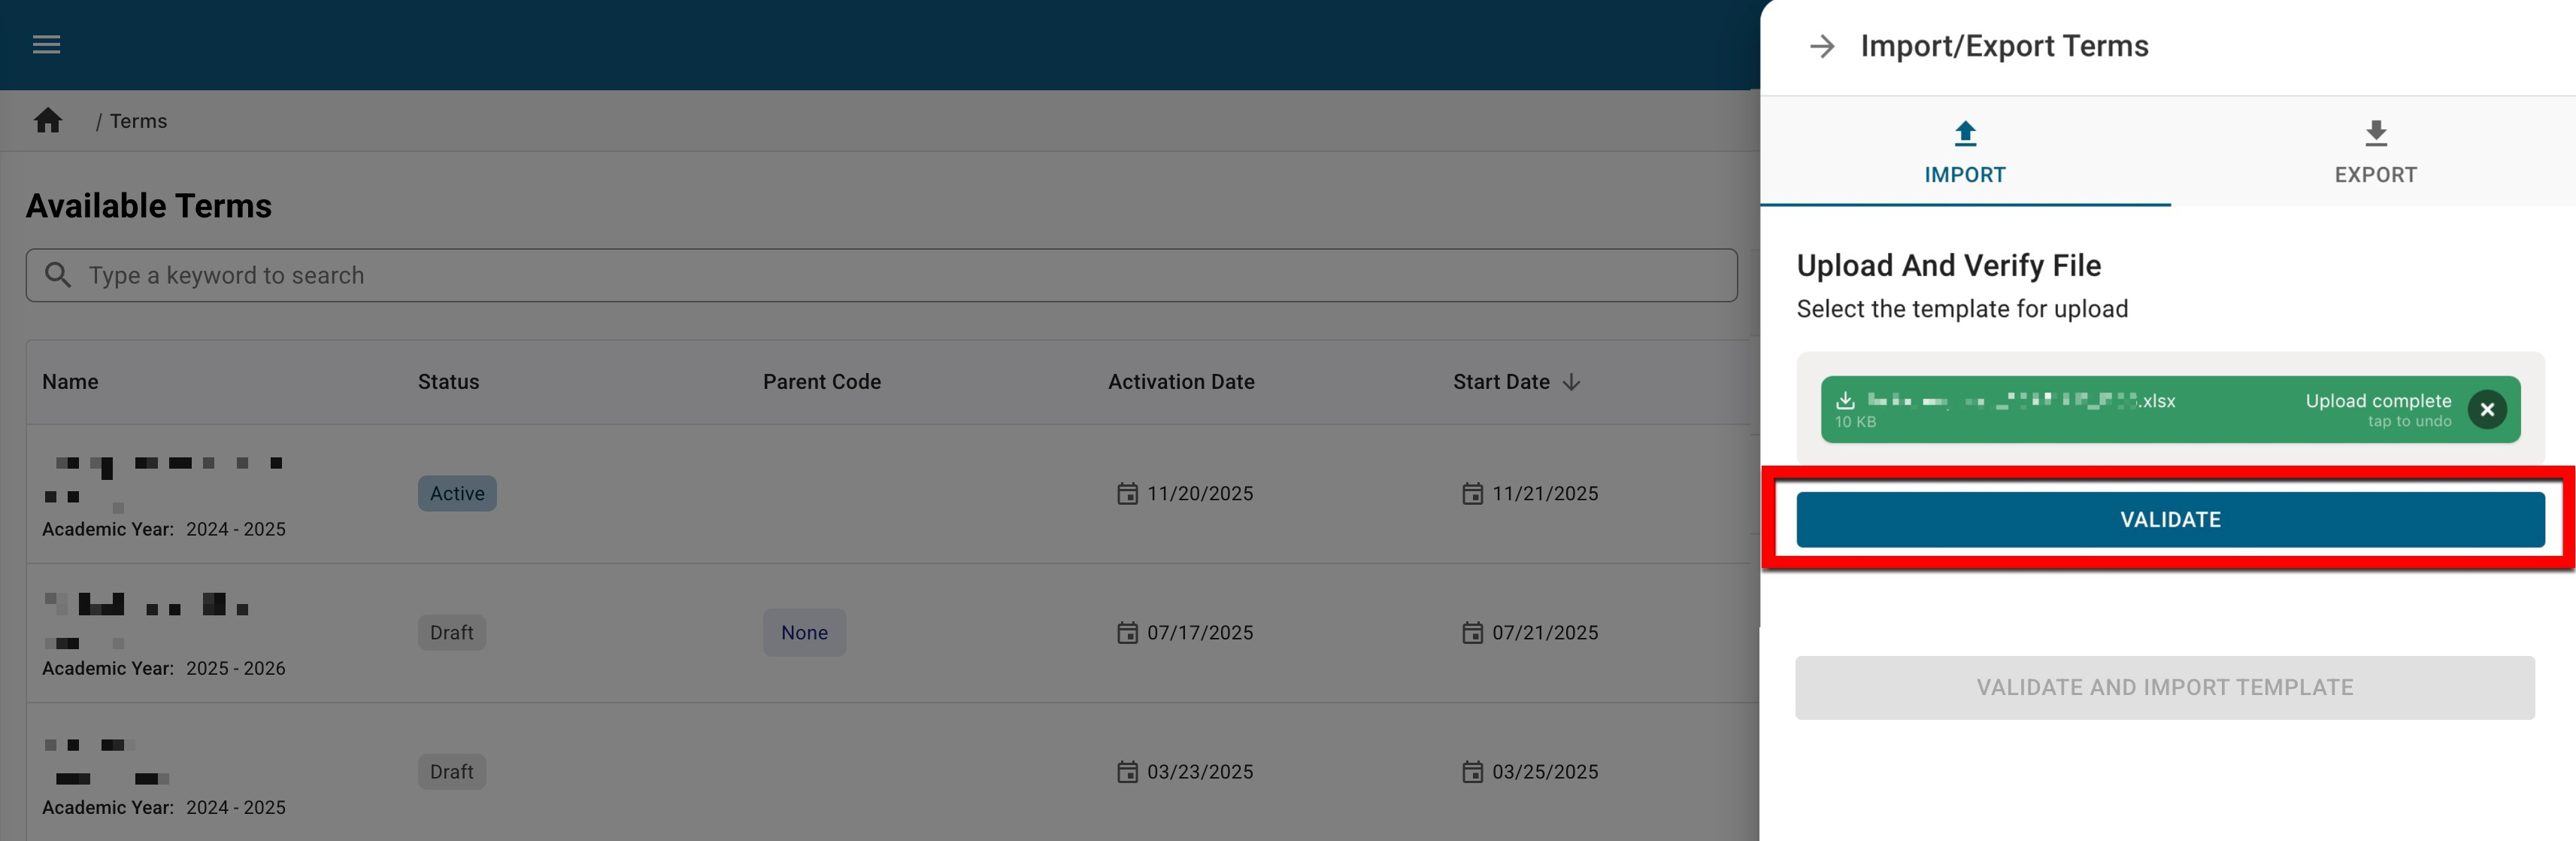
Once uploaded, click Validate.
-
If issues are found during the validation process, they will be displayed for correction, separated by term codes (1). Once errors have been corrected, remove the template with errors (2) and upload the corrected template.
🔎 Example: Shown below, two issues were found for term code 12345: an error related to the TermStartDate column and a warning about the TermEndDate column.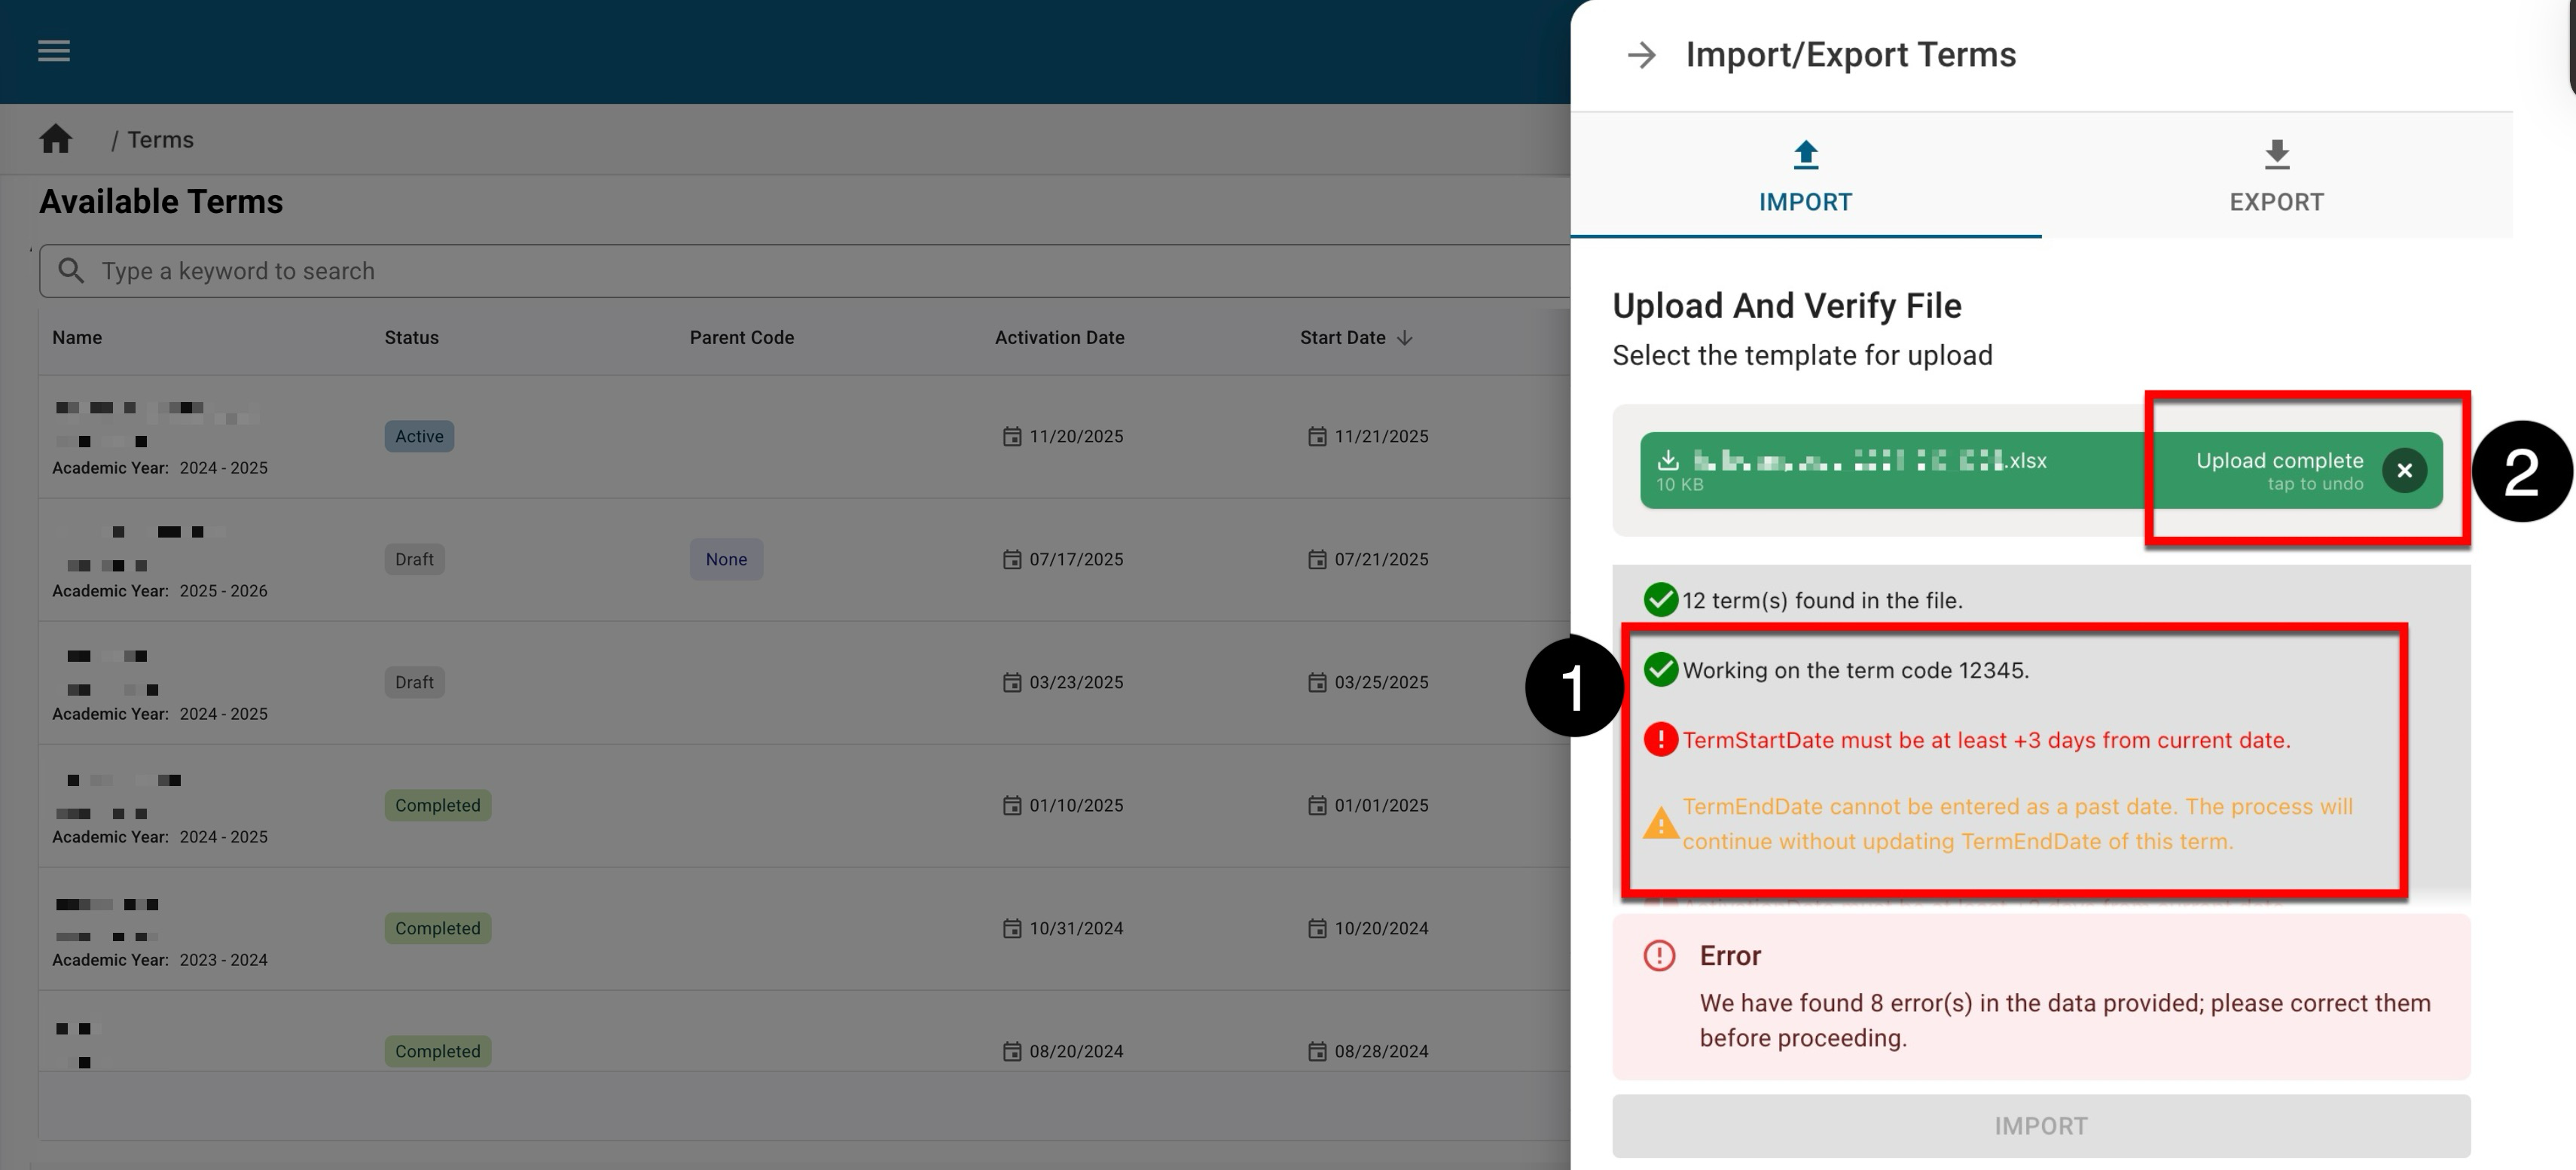
-
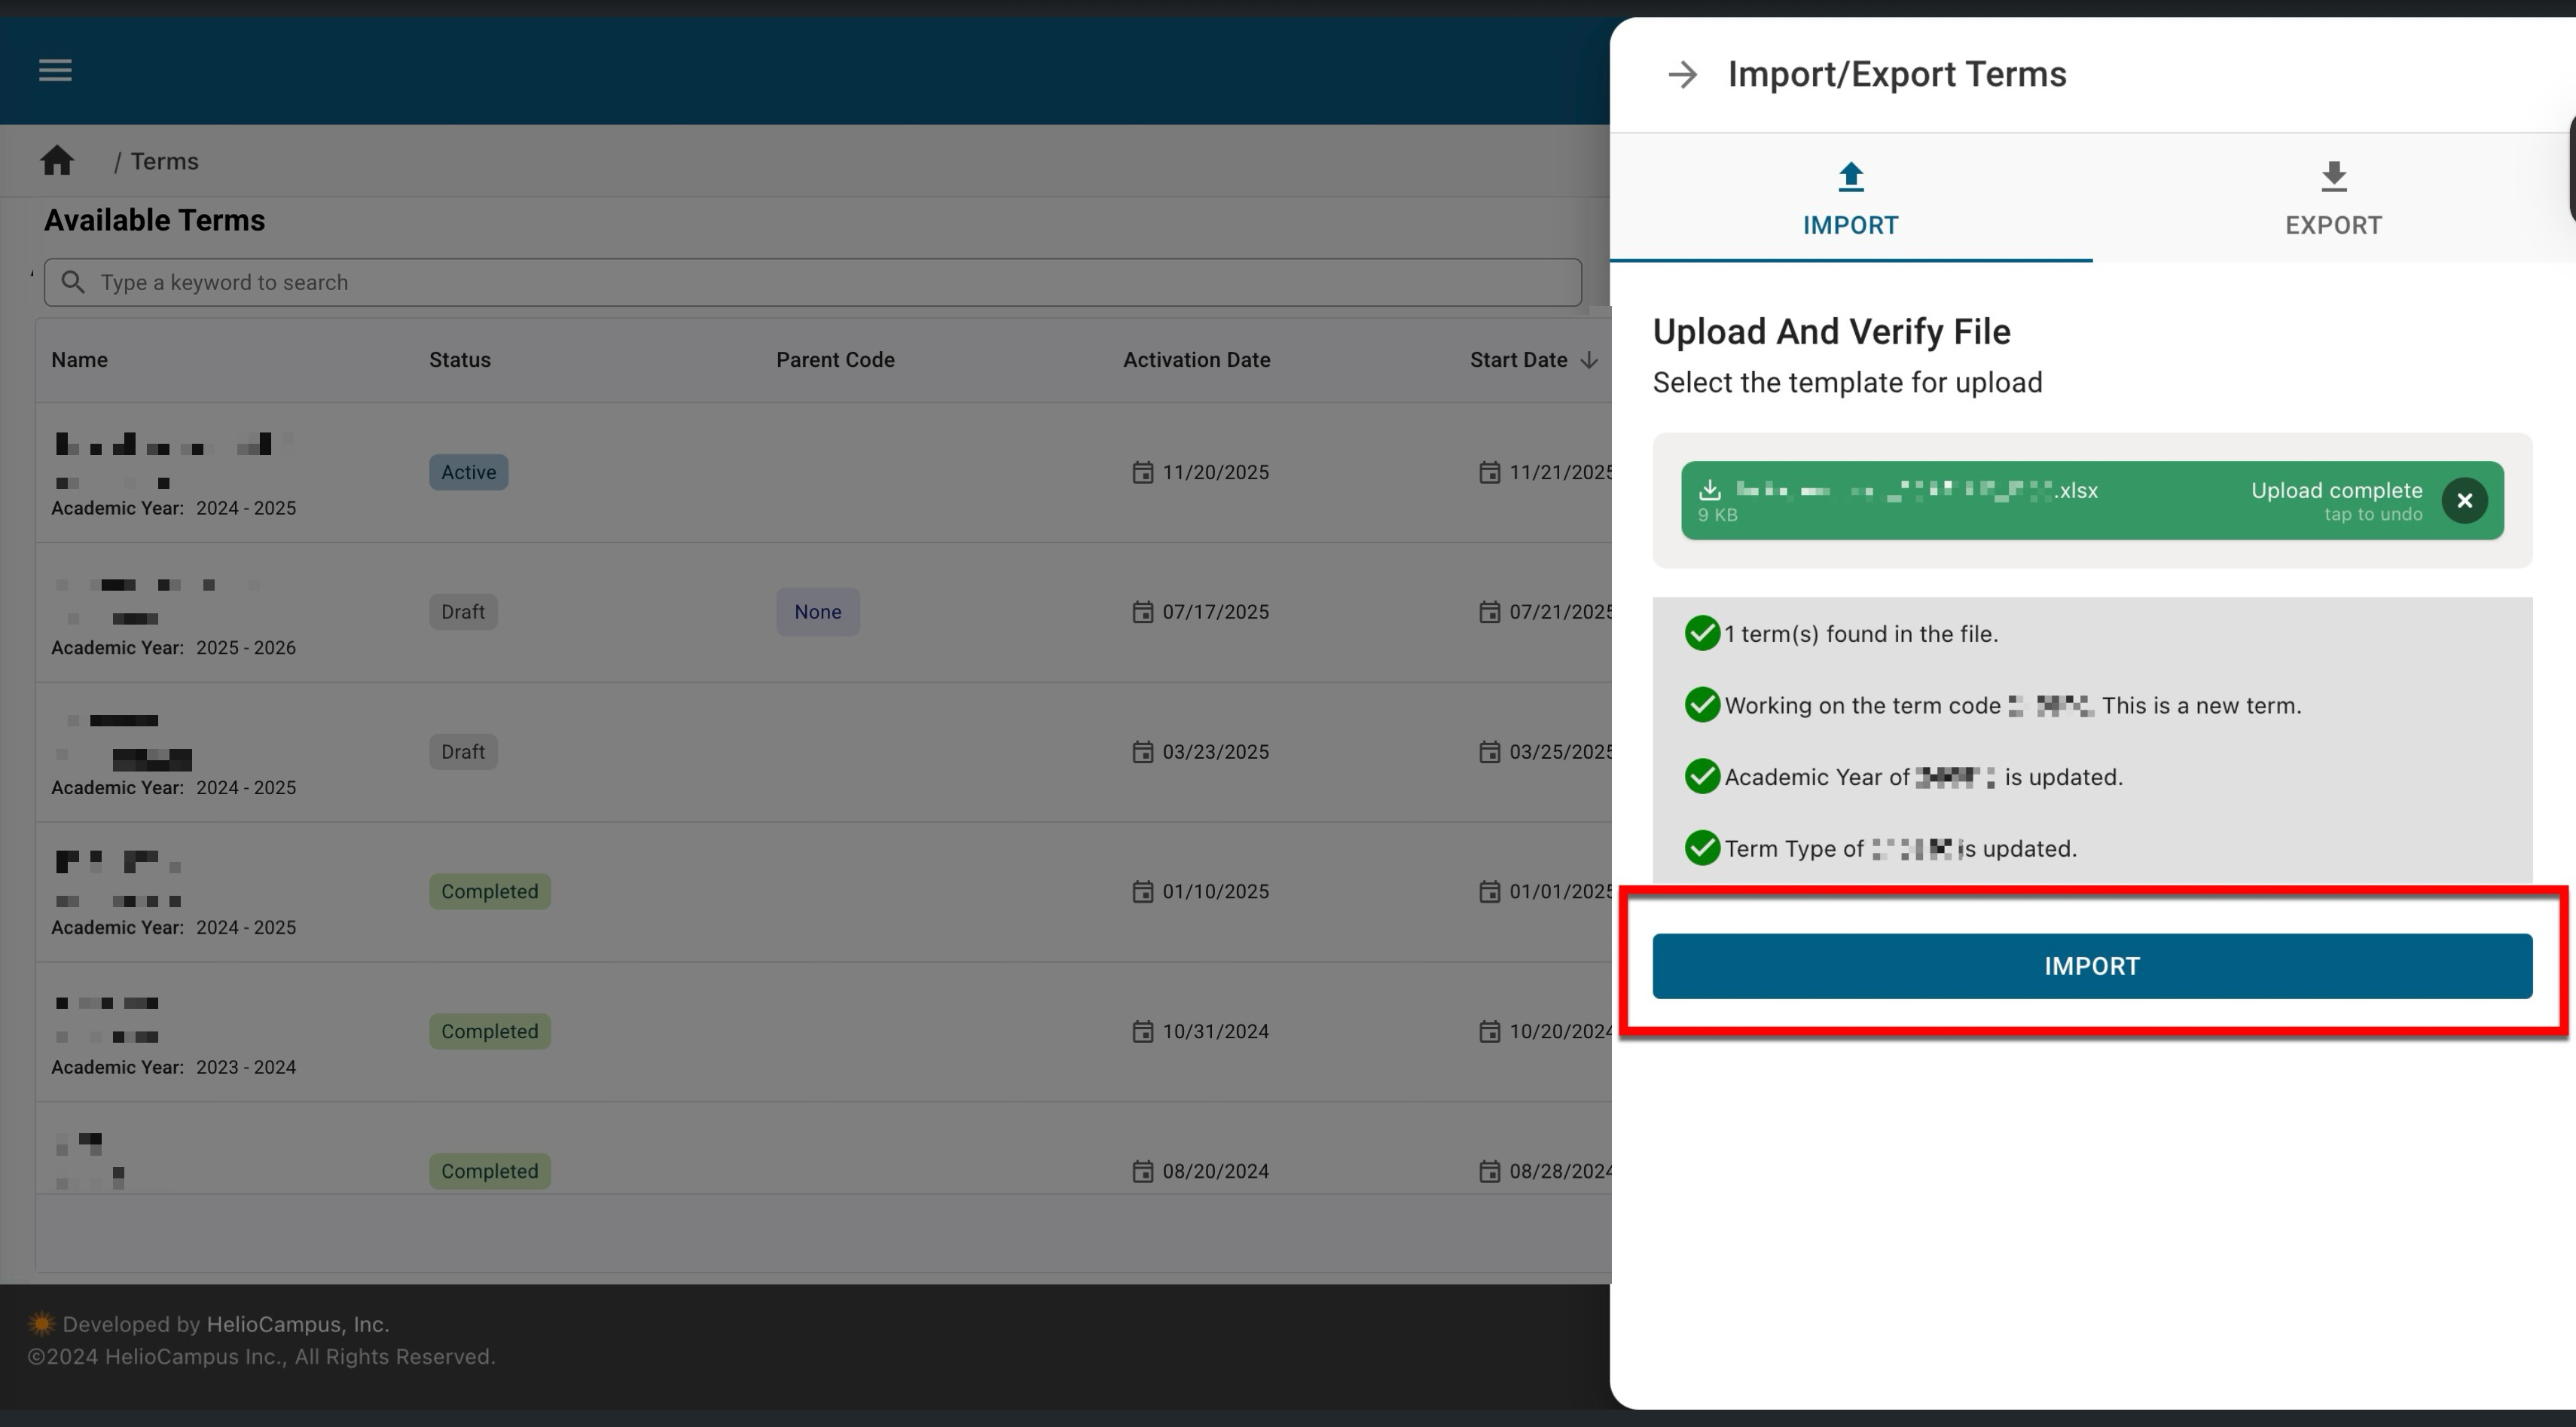
Once verification is complete and no errors exist, click Import.
-
-
-
Once the import is complete, new terms will be displayed in the Term Manager.
Edit a Term
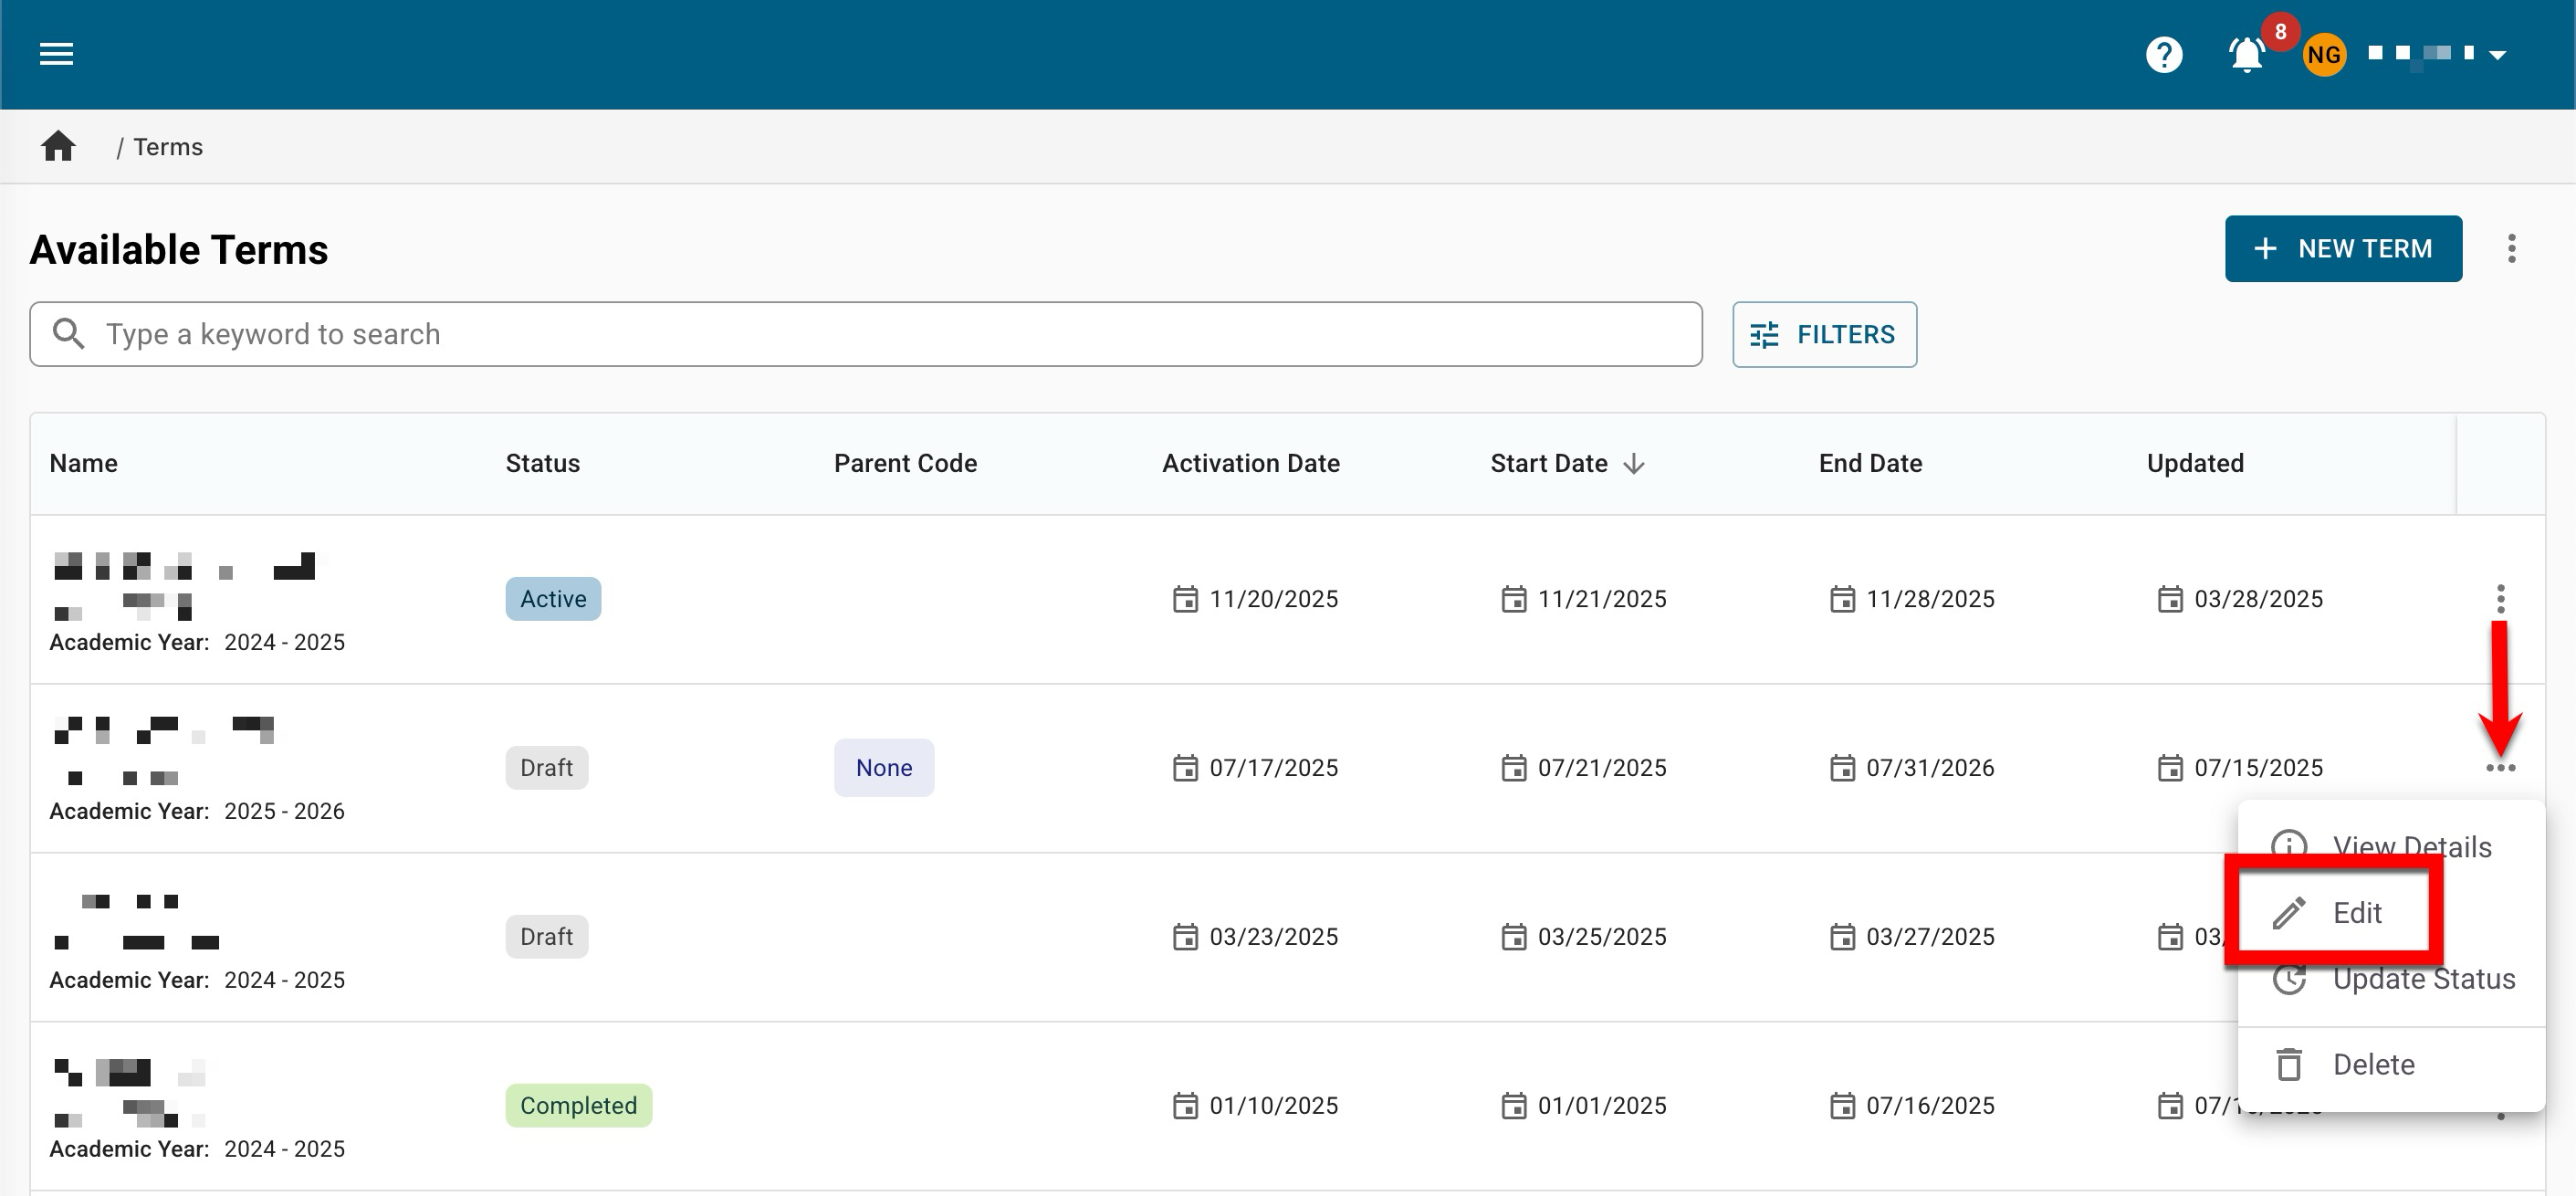
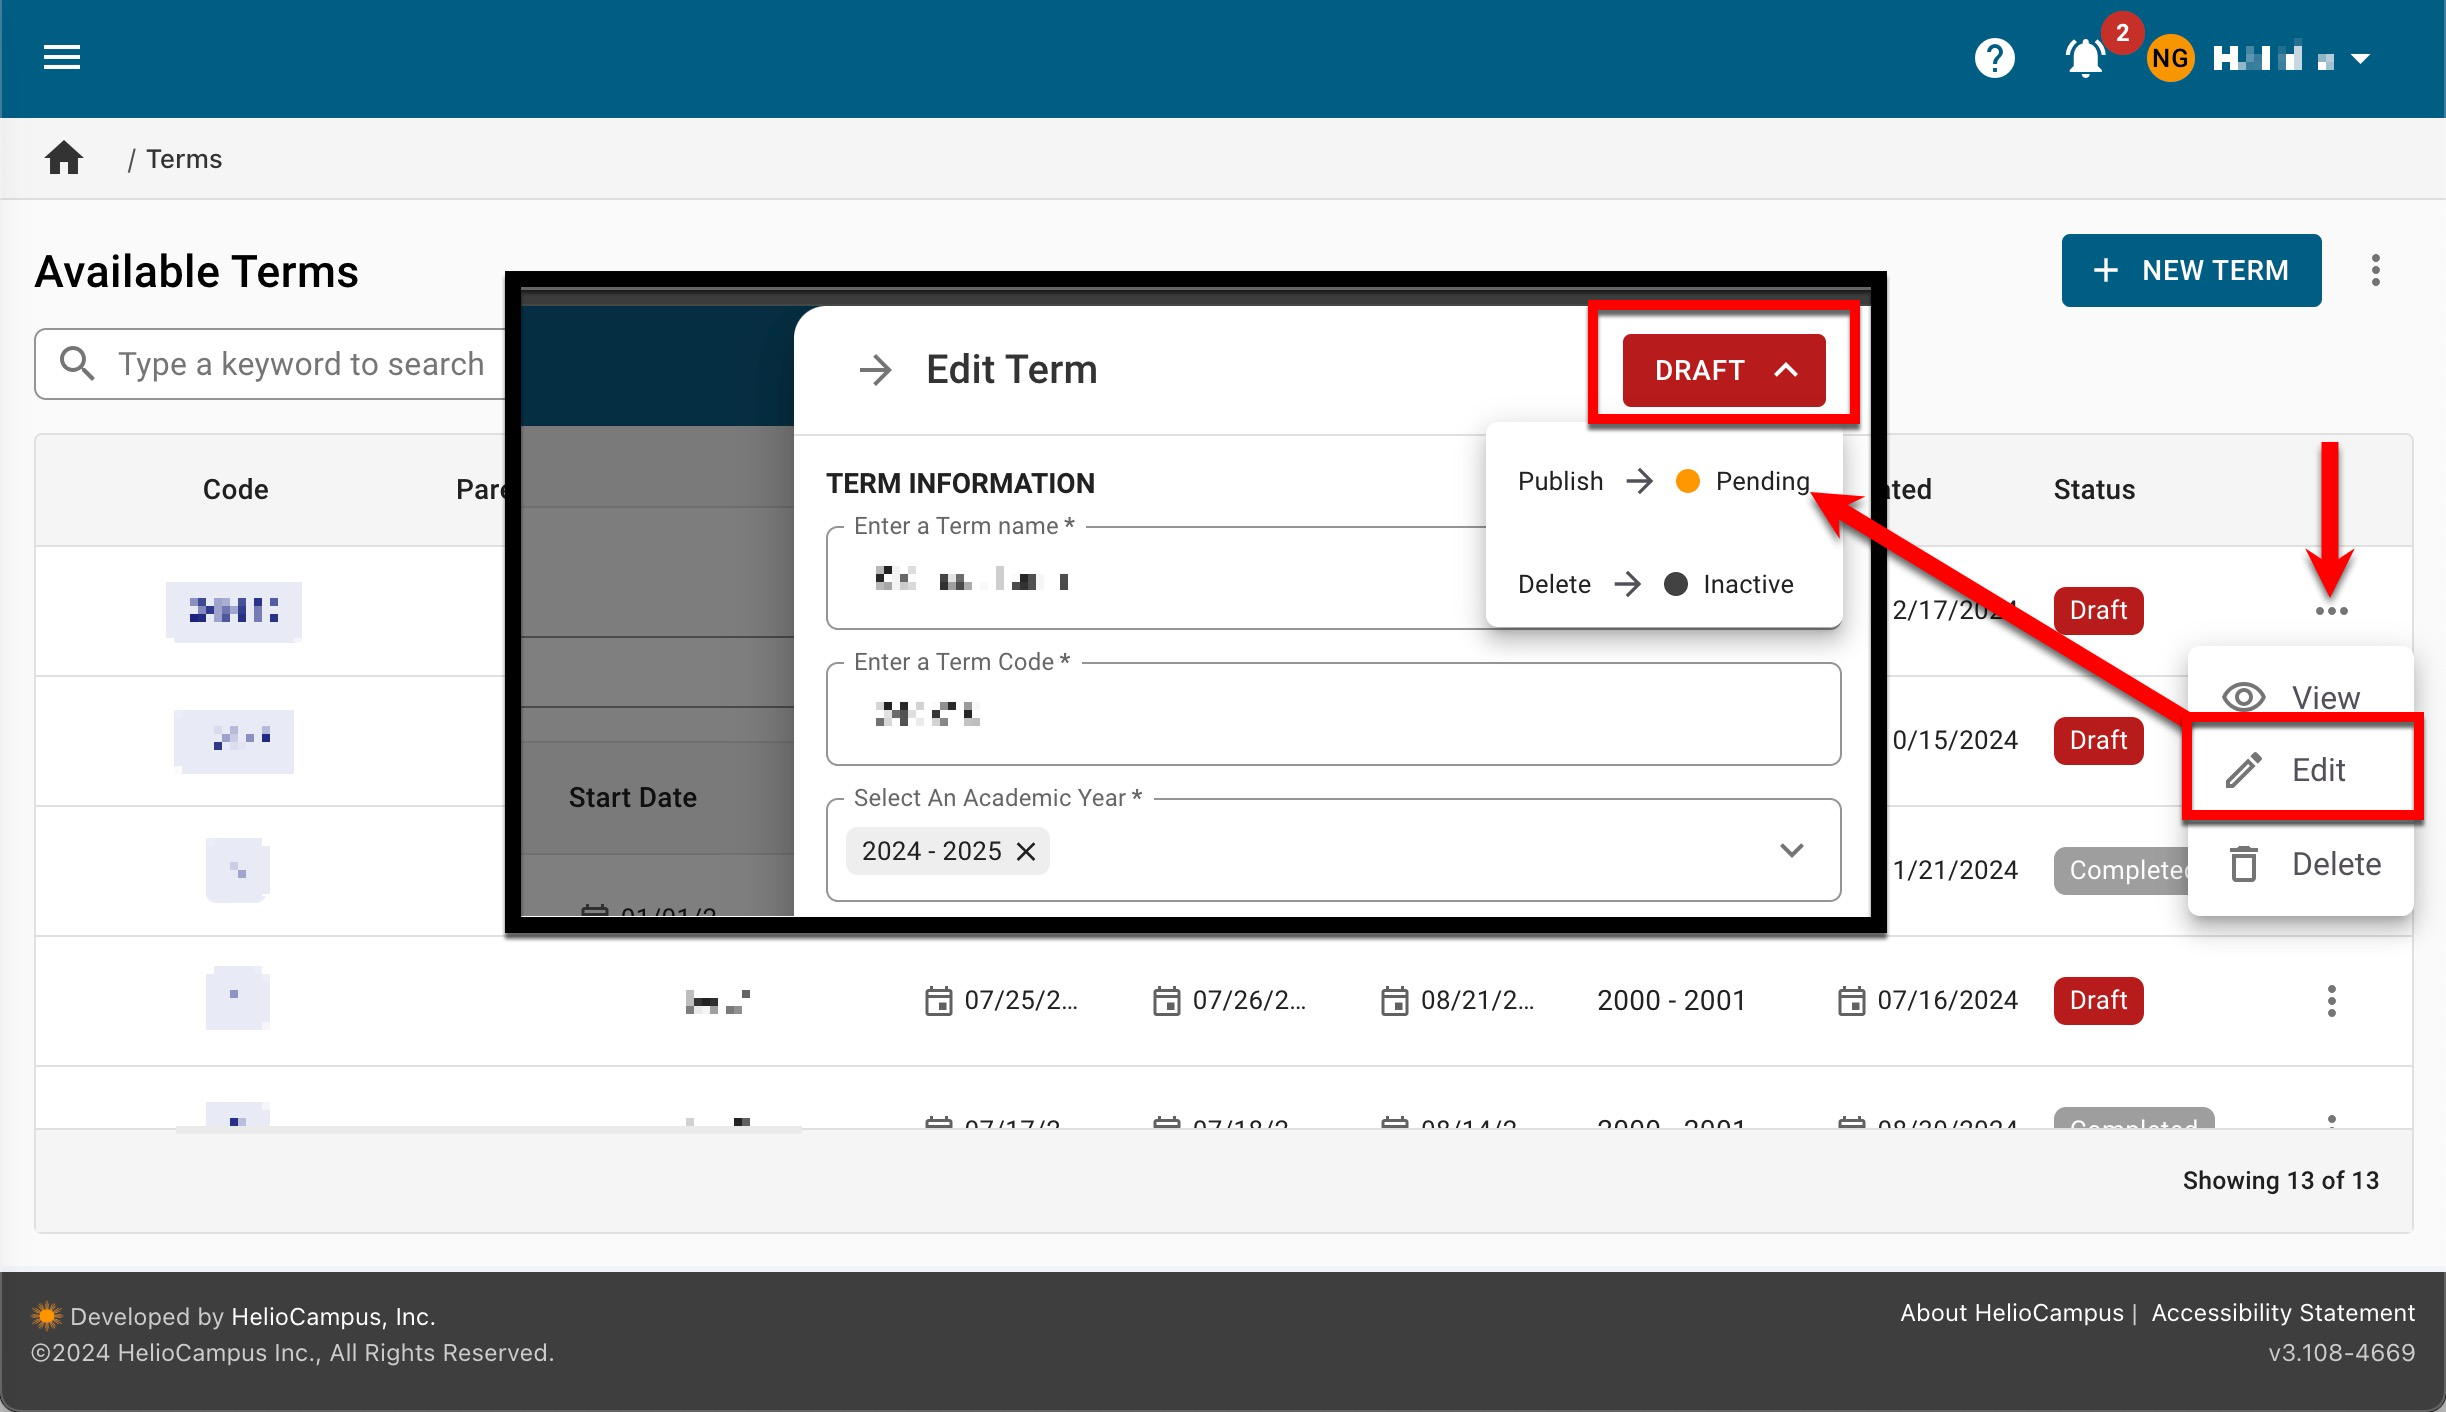
To edit a term, navigate to Main Menu > Term Manager and select Edit from the terms kebab menu. Via the Edit Term drawer, edits can be made to the term; edit capabilities will depend on the term's status. For terms in Draft status, all term information and dates will be editable. Once published and in Pending or In Progress status, only term dates that have not yet passed can be edited. Learn more about the edit capabilities of each term status.
Publishing Individual Terms
To publish an individual term, navigate to Main Menu > Term Manager and select Edit from the terms kebab menu. Via the Edit Term drawer, expand the Draft drop-down and select Publish to update the status from Draft to Pending. For terms in Pending status, once the term activation date has been met, the term status will update to Active status.
Publishing Terms In Bulk
-
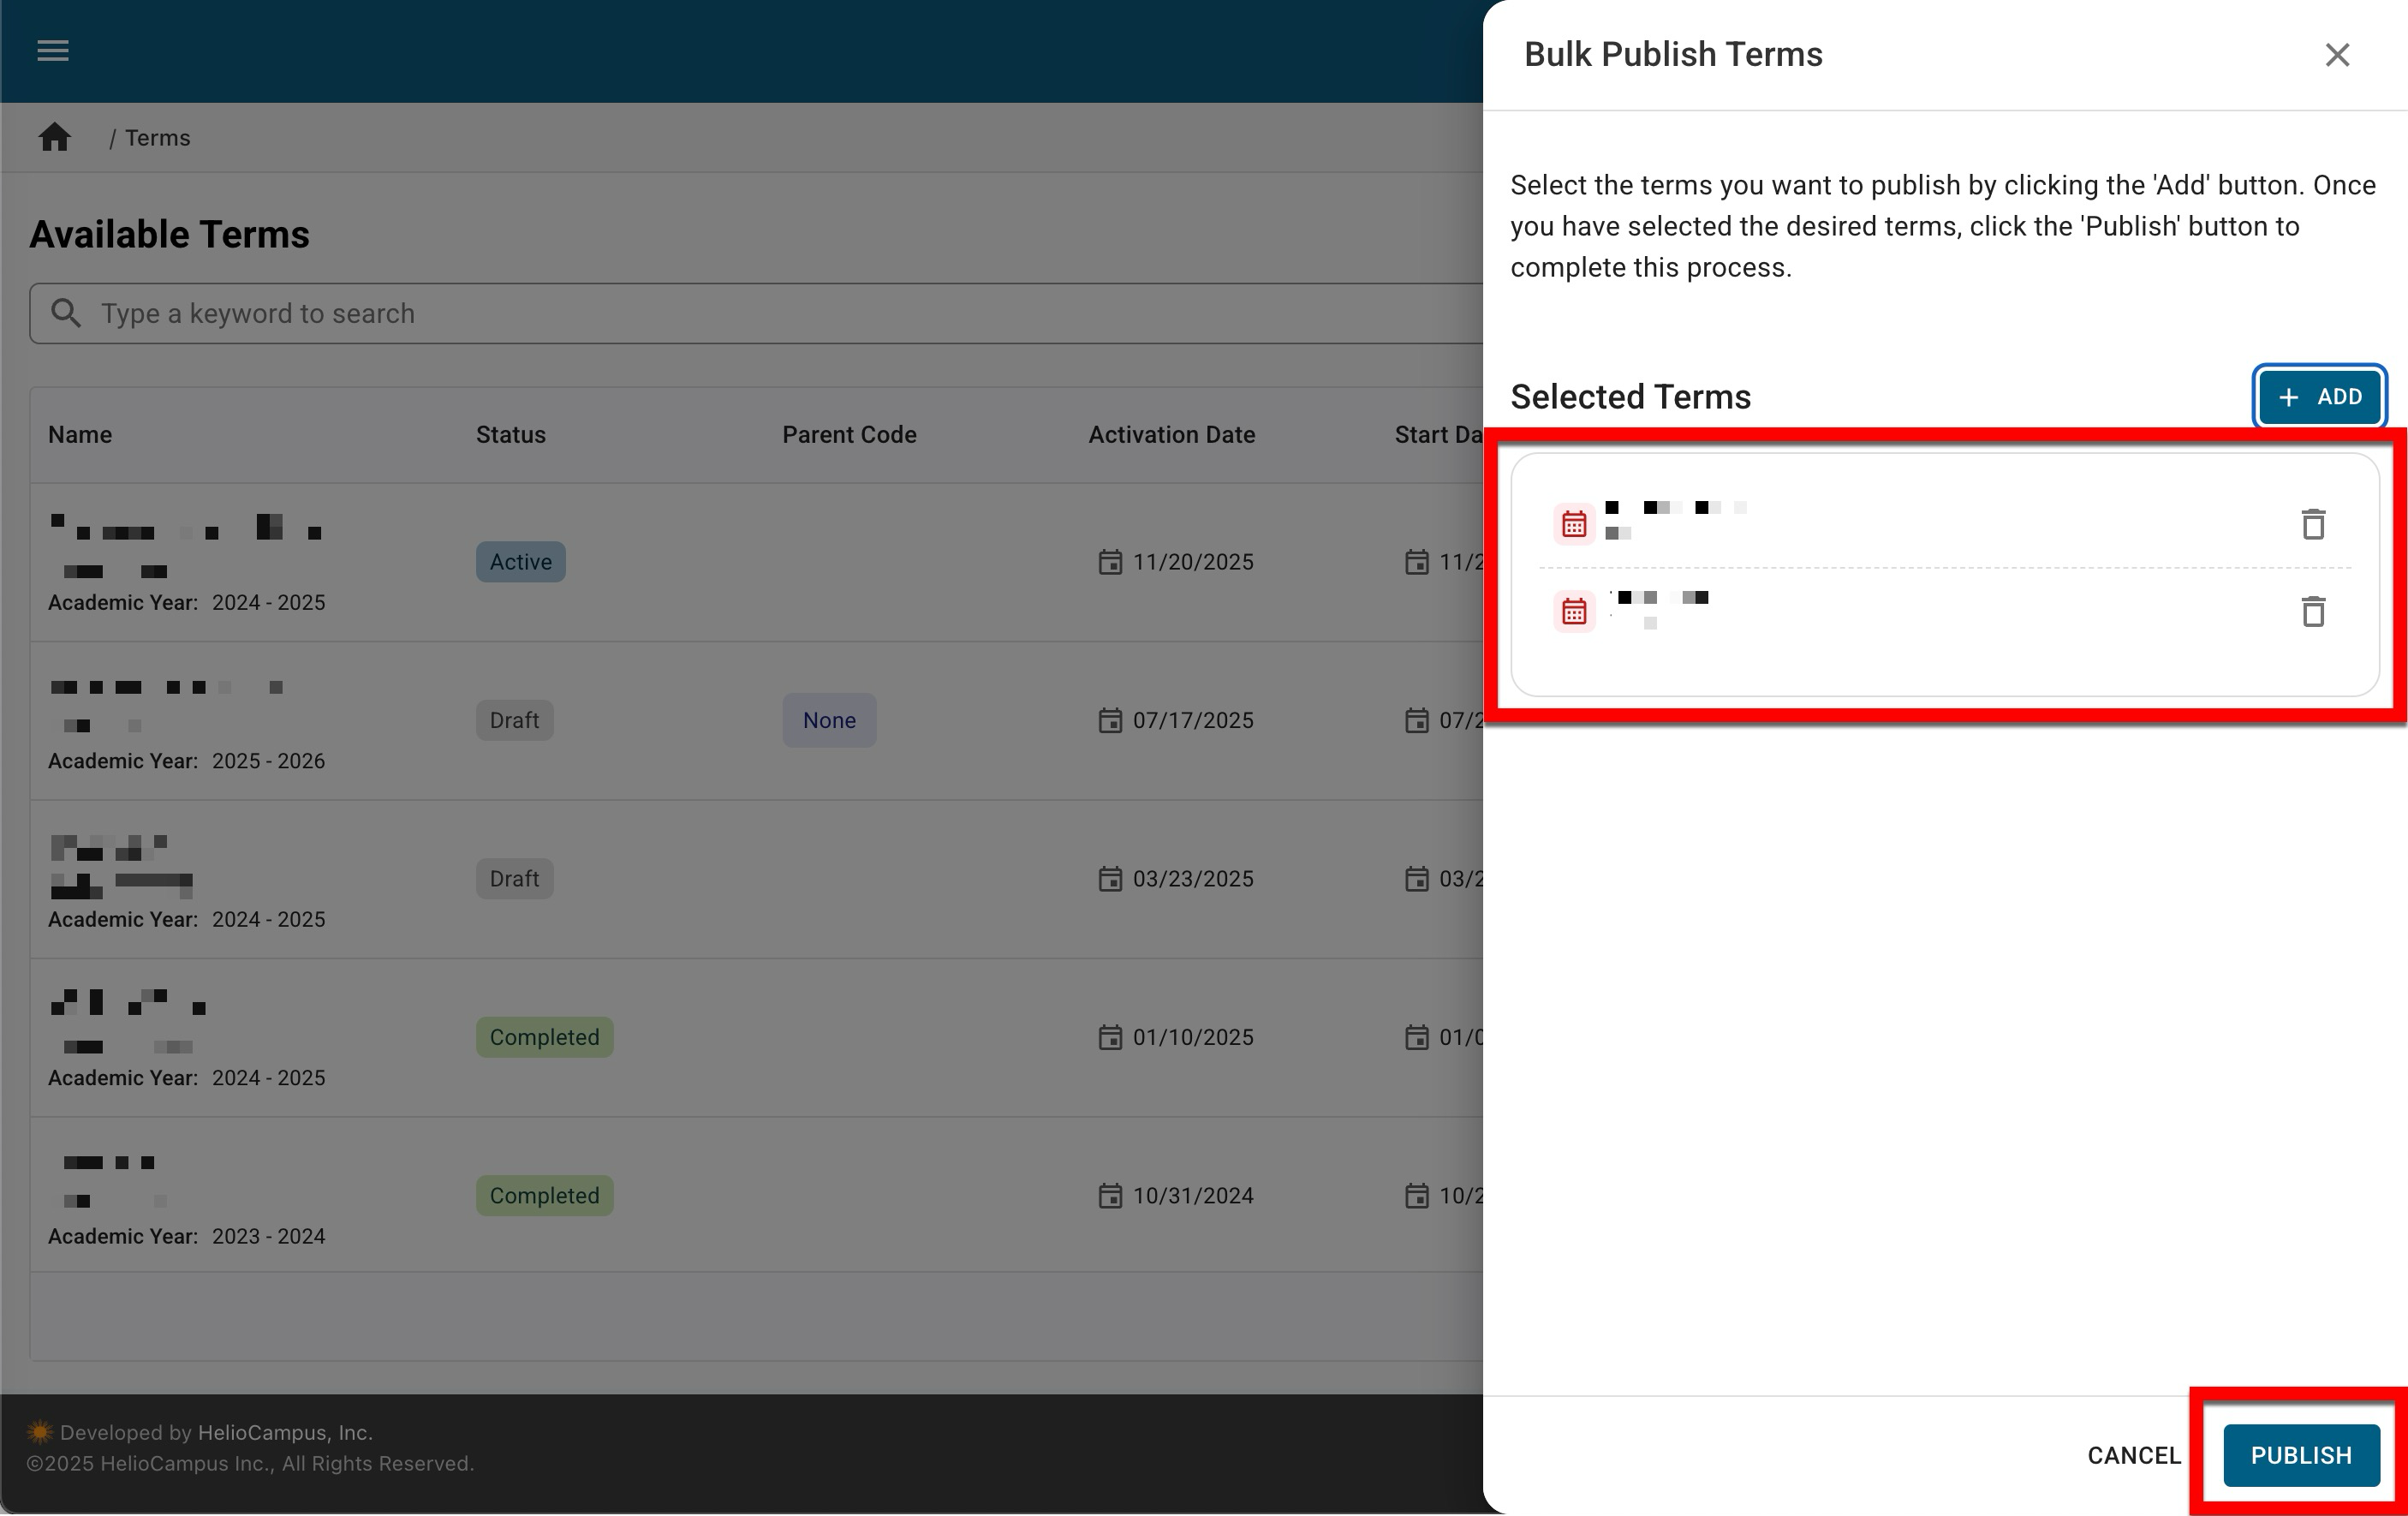
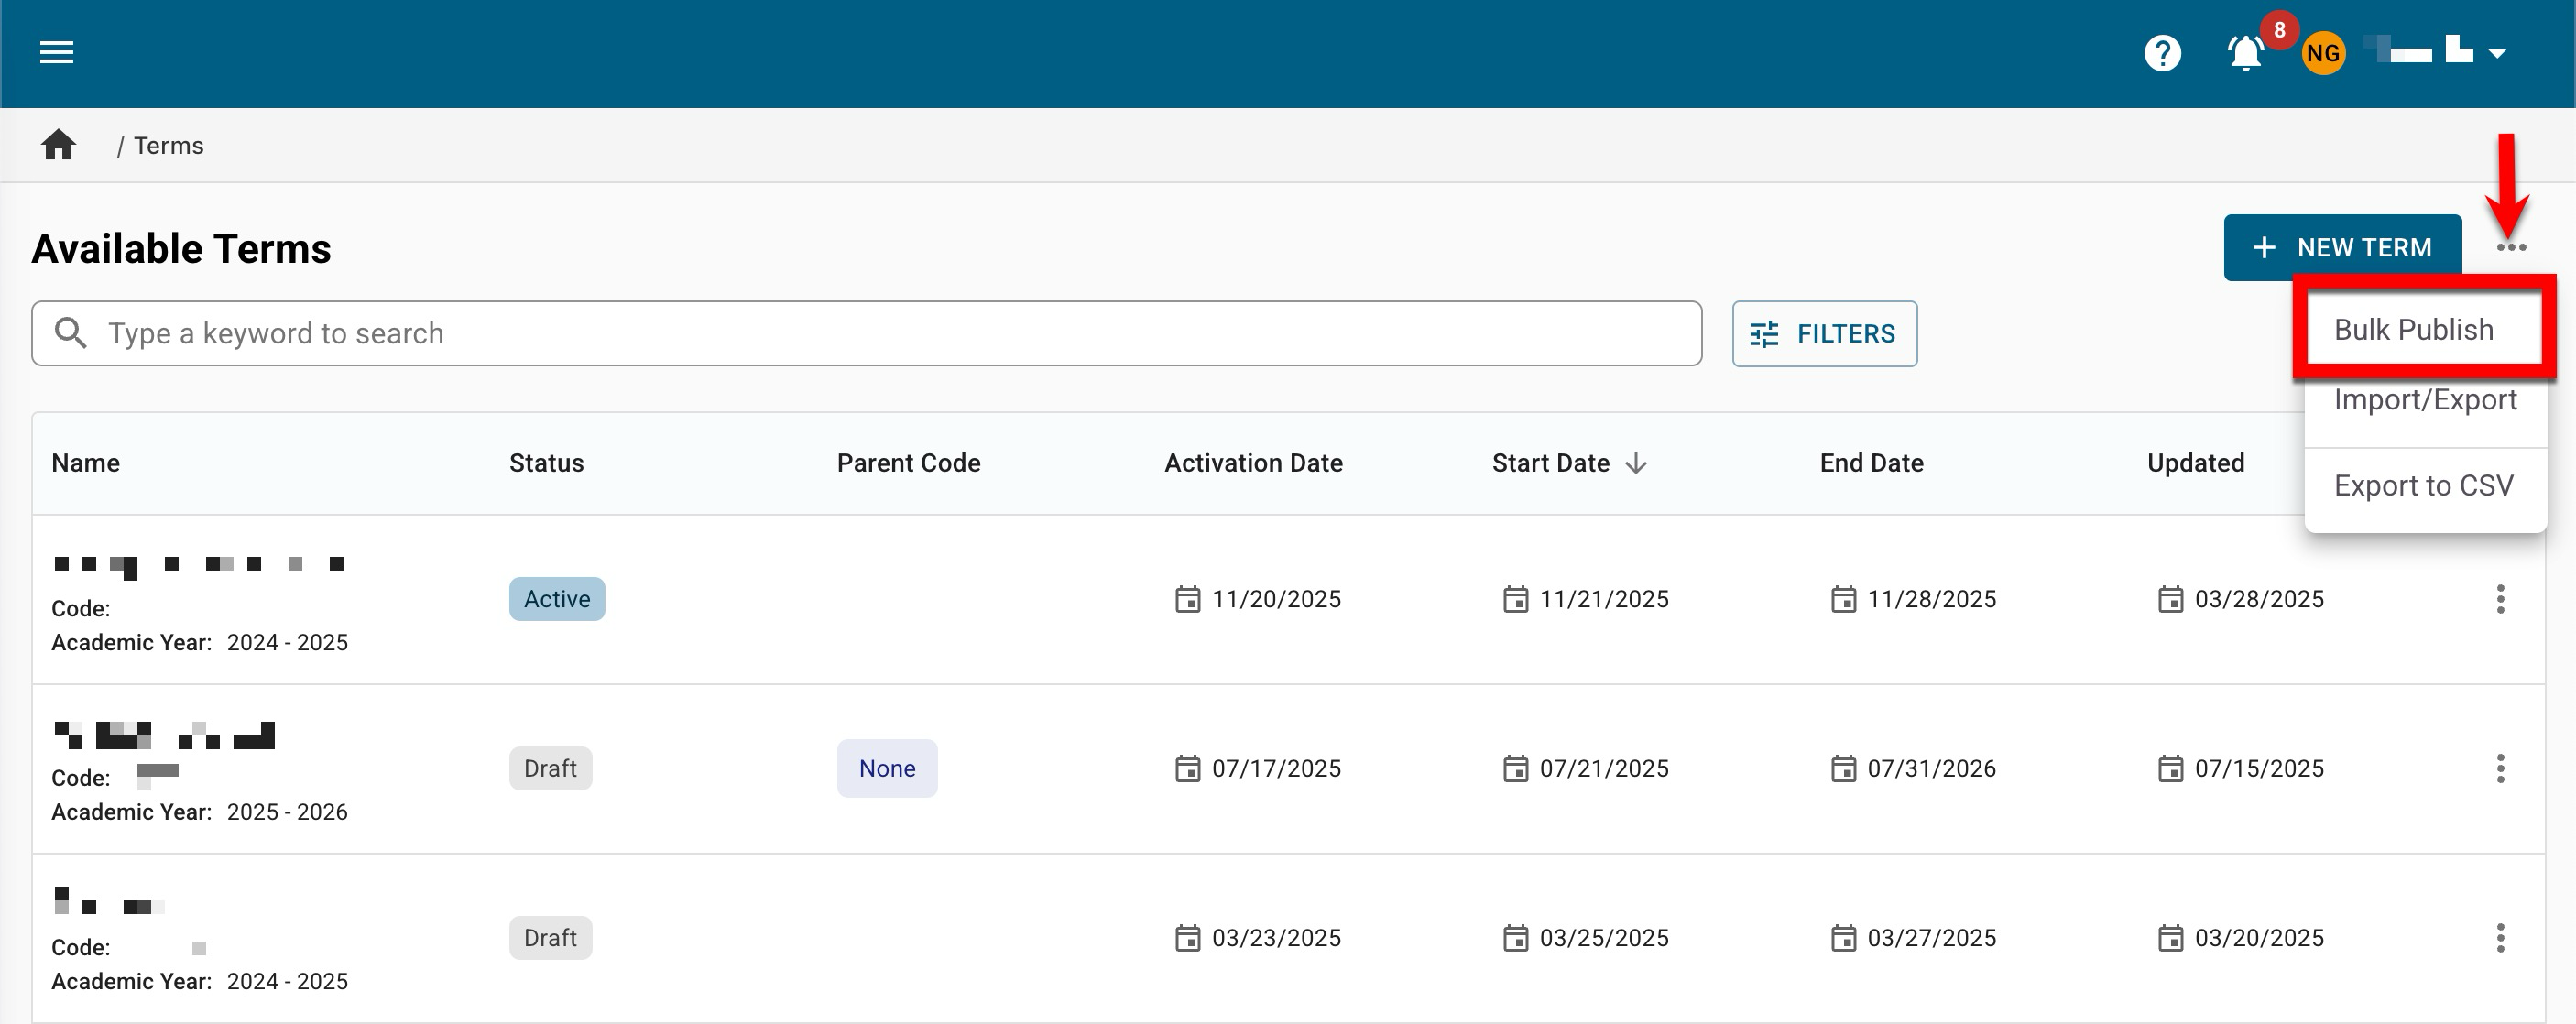
To publish terms in bulk, navigate to Main Menu > Term Manager and select Bulk Publish from the Term Manager's kebab menu.
-
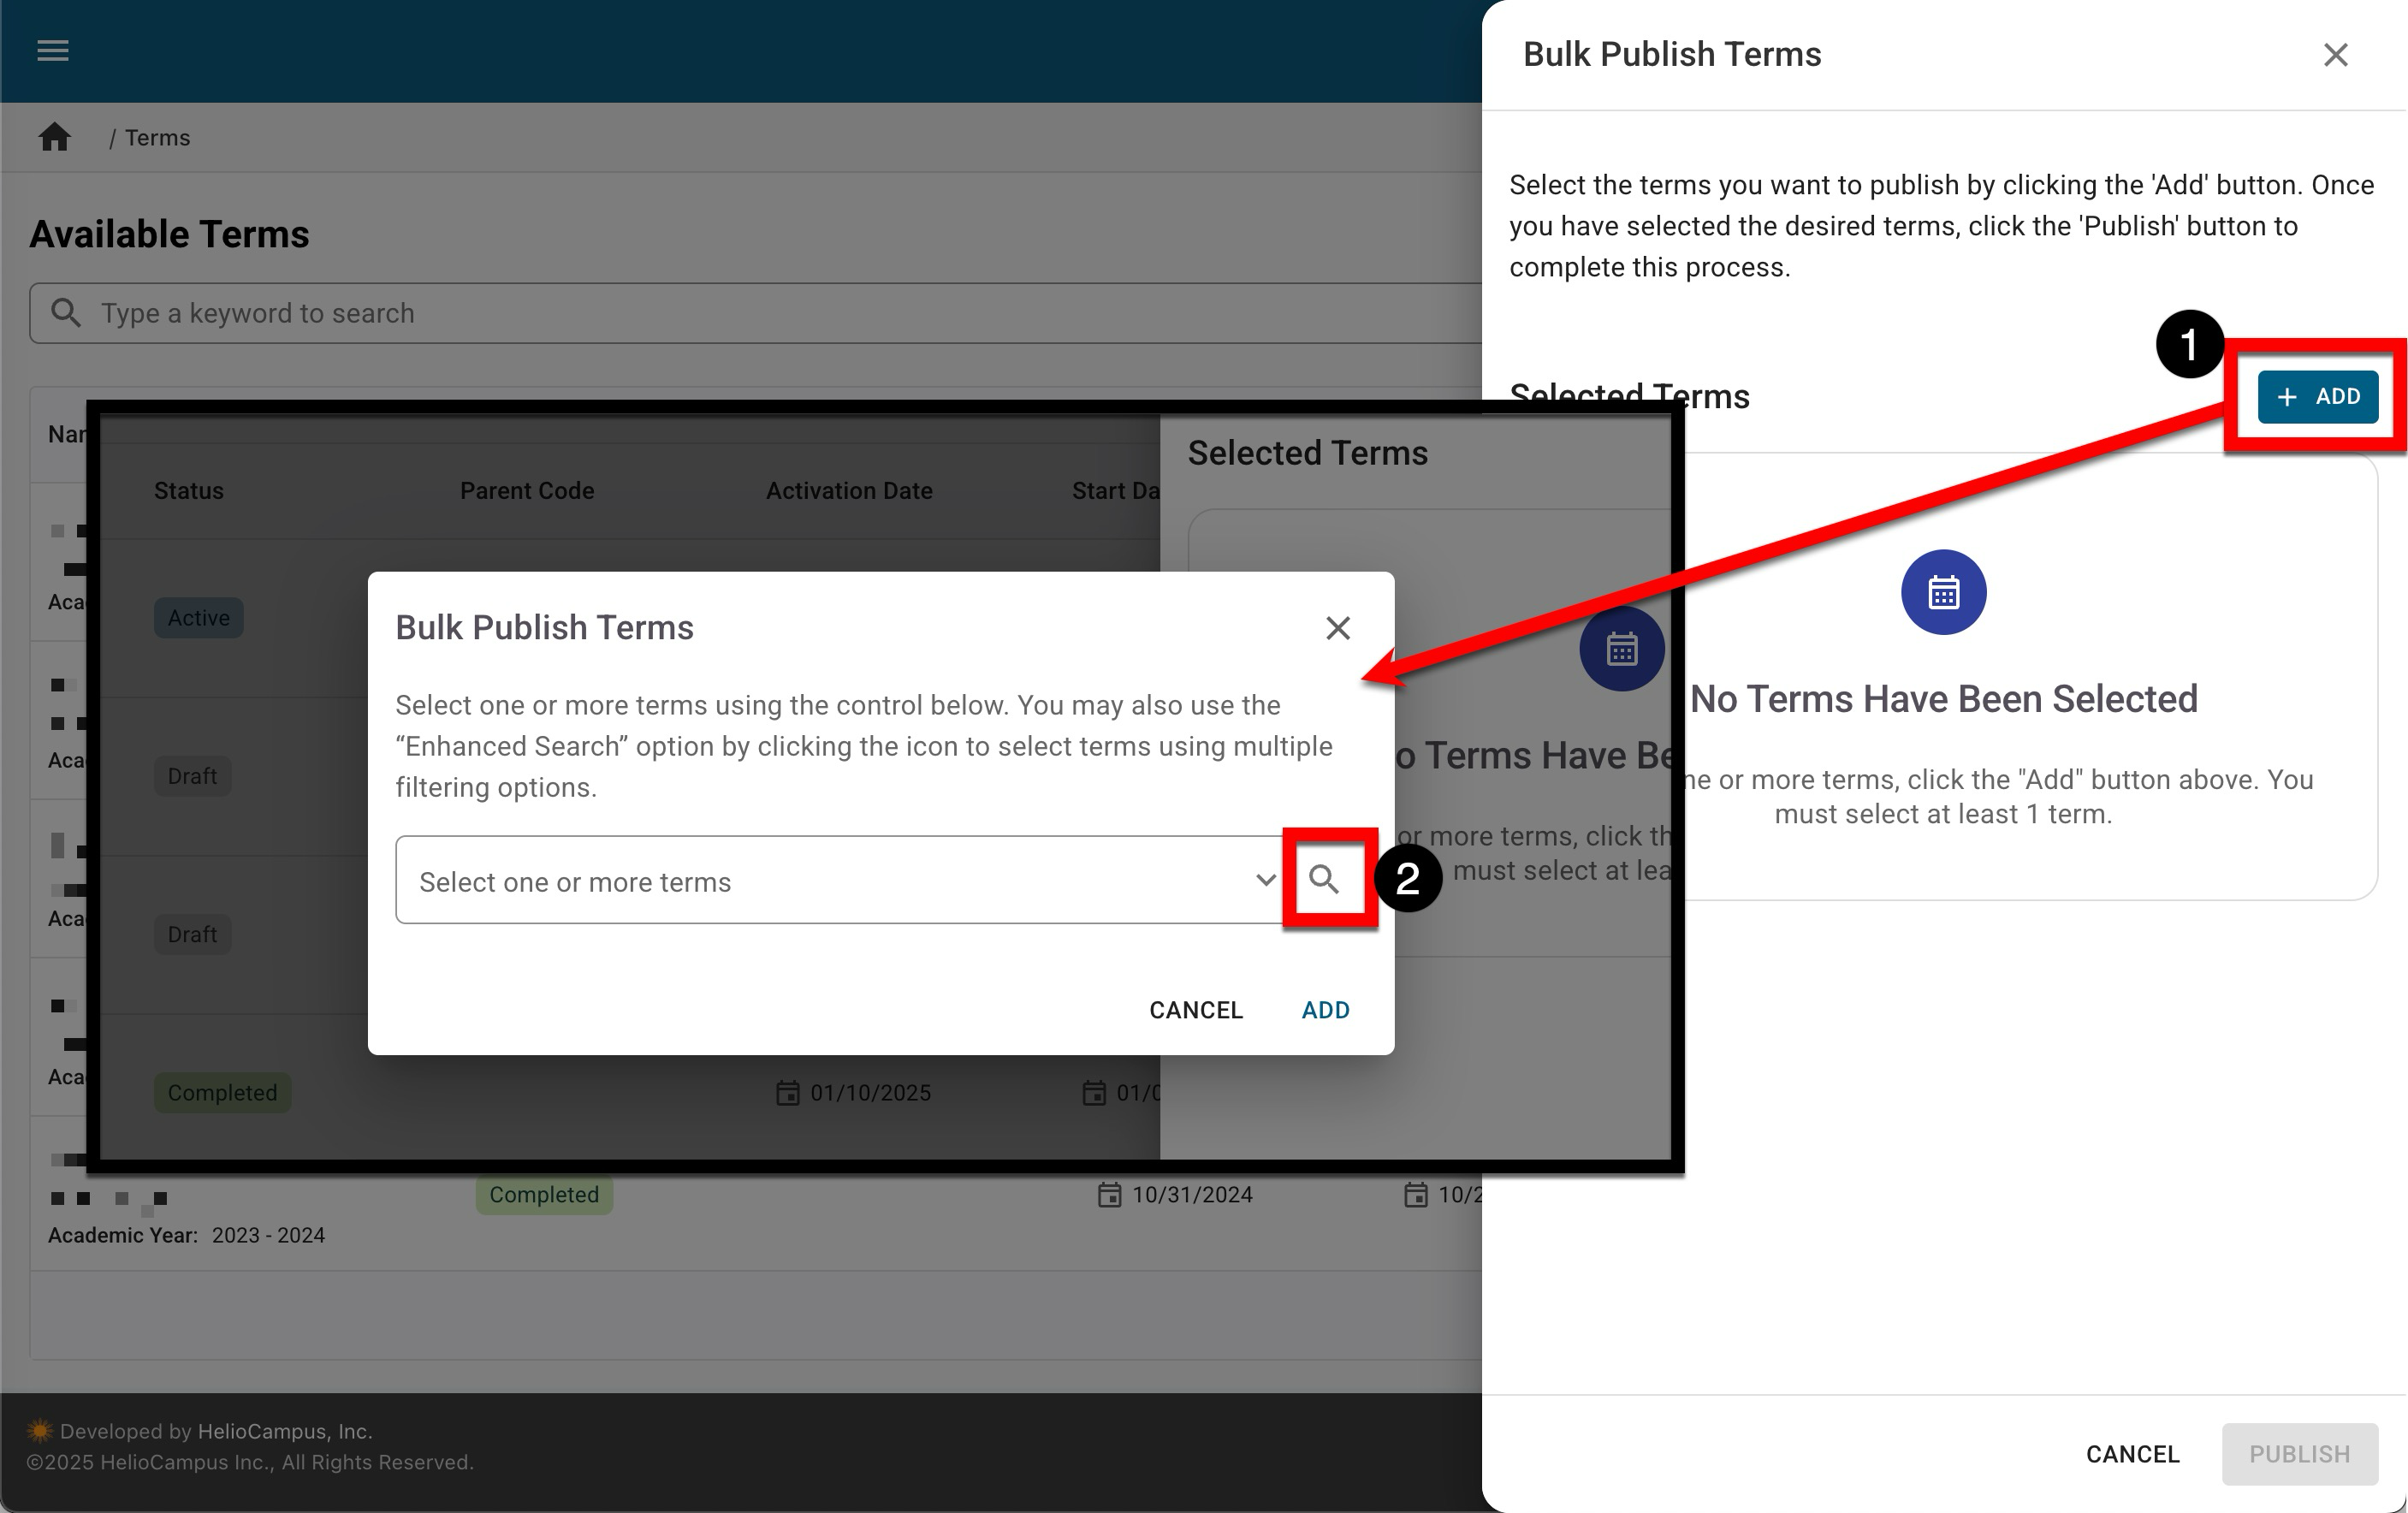
Multiple terms can be searched for and selected by clicking +Add; only terms in Draft status will be displayed for selection. To search for and select multiple draft terms, advanced search can be opened (2).
-
To publish the selected terms, click Publish.