
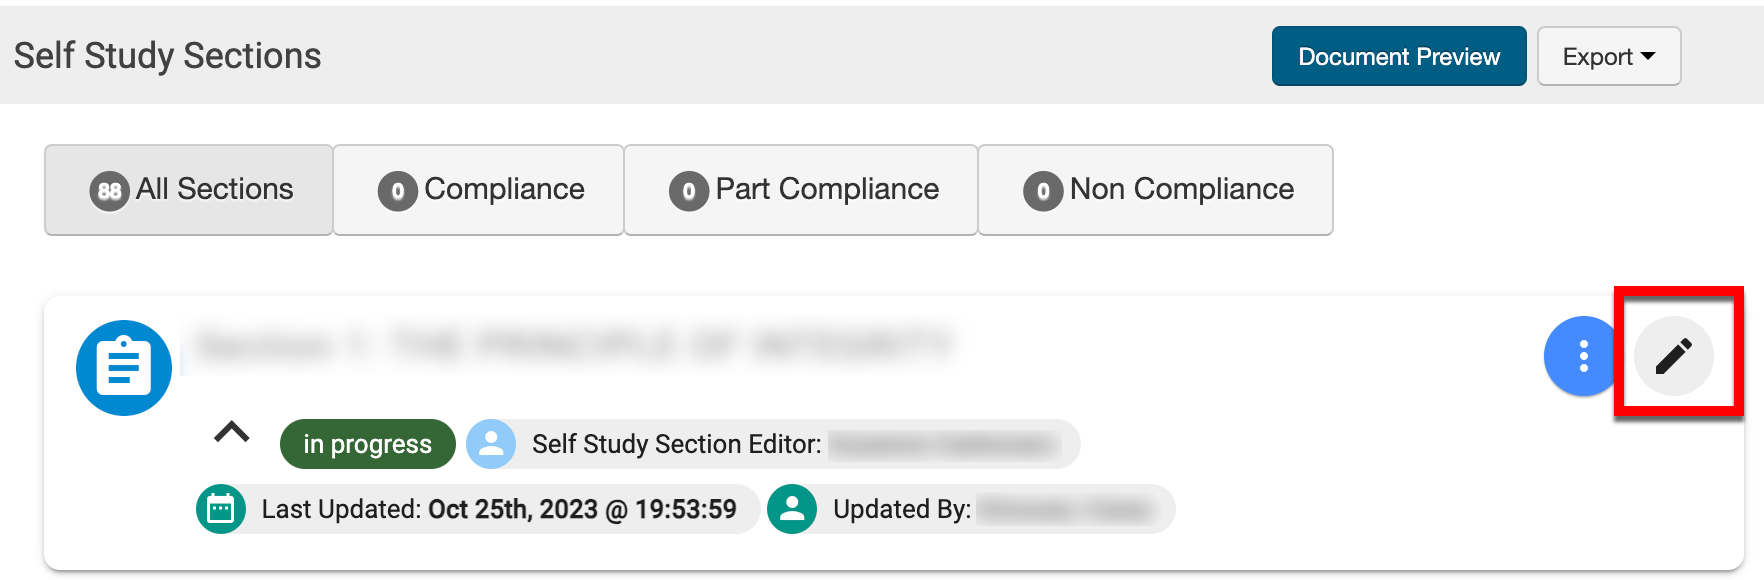
Navigating to Self Study Homepage > Self Study Sections and clicking Edit Content (pencil icon) will open the Self Study Document Editor. This allows Self Study Editors and Approvers to edit documents for self-study sections in Pending status. The editor autosaves every change made; manually saving will create a new version.

|
|
|---|---|
|
OnlyOffice Tab |
Details |
|
File |
This tab provides basic operations such as download and print functions, version history, and access to the OnlyOffice help. |
|
Home |
This tab appears by default when the Self Study Document Editor is opened. It provides formatting for fonts and paragraphs, list views, and headings. |
|
Insert |
This tab provides additional formatting options, such as line and page breaks, and is used to upload visual elements and manage comments. |
|
Layout |
This tab is used to change the appearance of a document,q such as page orientation, size, and margins. The Layout tab can also be used to manage the arrangement and wrapping of visual elements added via the Insert tab. It allows changing the appearance of a document, setting up page parameters, and defining the arrangement of visual elements. |
|
References |
This tab is used to set up page parameters, insert or manage references, table of contents, footnotes, and insert hyperlinks. |
|
Collaboration |
This tab allows for collaboration on documents. Self Study Editors and Approvers can manage collaborative edits on documents via comments and co-editing modes; compare functionality and version history are accessible via this tab. Comment (1) and chat (2) functionality can be accessed on the Collaboration tab and the left-hand tool menu. 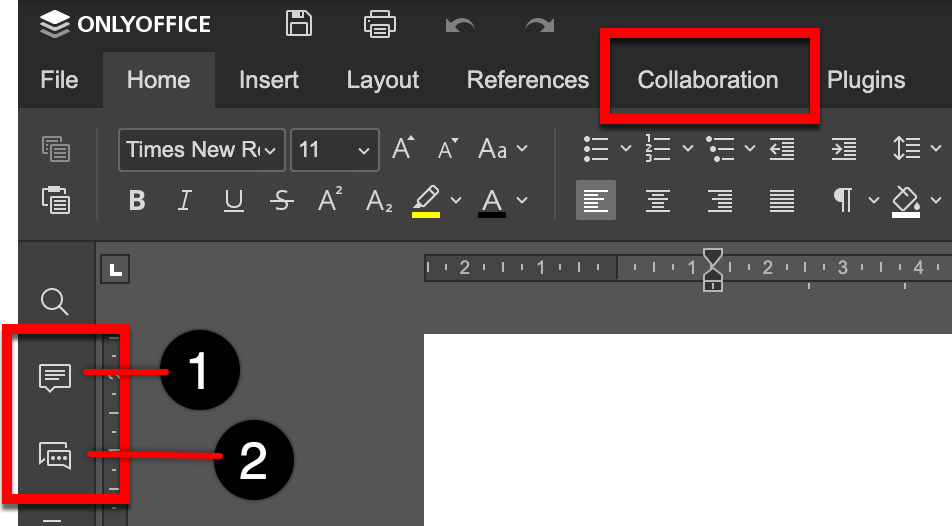
|
|
Plugins |
This tab provides advanced editing features using plugins and can be used to link to evidence on a document. Evidence can be searched for and inserted by clicking Insert Evidence and selecting Start. 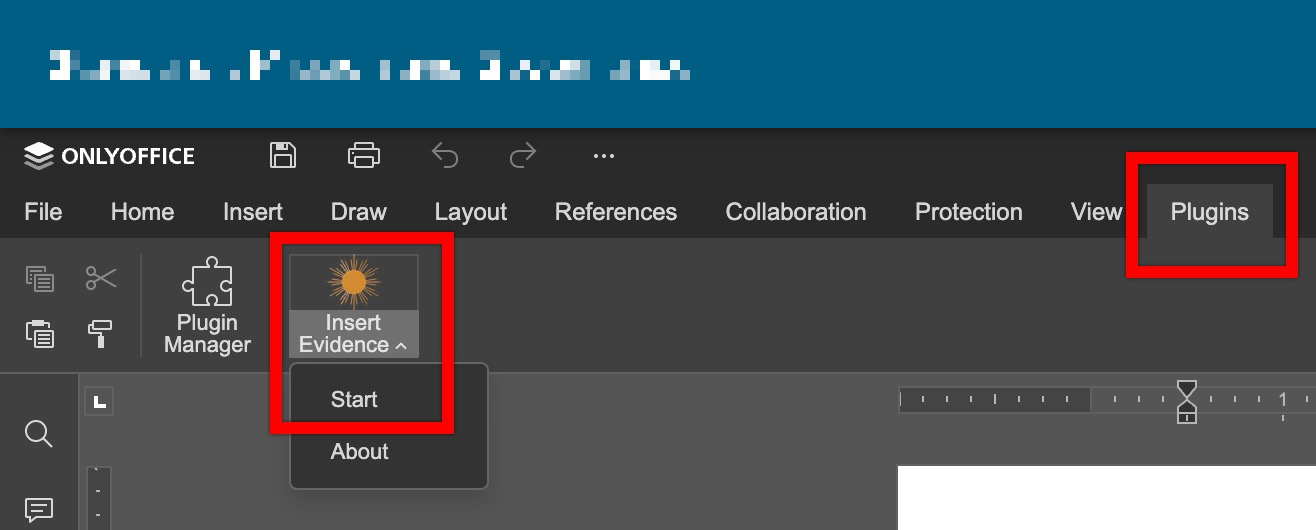
Once inserted, the editor will display the evidence link between double curly brackets. When previewing a self study document via the Self Study Sections page, the evidence link will display as the evidence title. 
|
📔 Additional Resources