Evidence can be related to self studies by navigating to Self Study Homepage > Related Documentation. When relating evidence, existing evidence from the platform’s Evidence Bank can be used, or new evidence can be created for specific self studies, bypassing the Evidence Bank.
Product Tip
Evidence cannot be added to a self study until users have been assigned to sections via the Self Study Sections page.
|
|
|---|---|
|
1 |
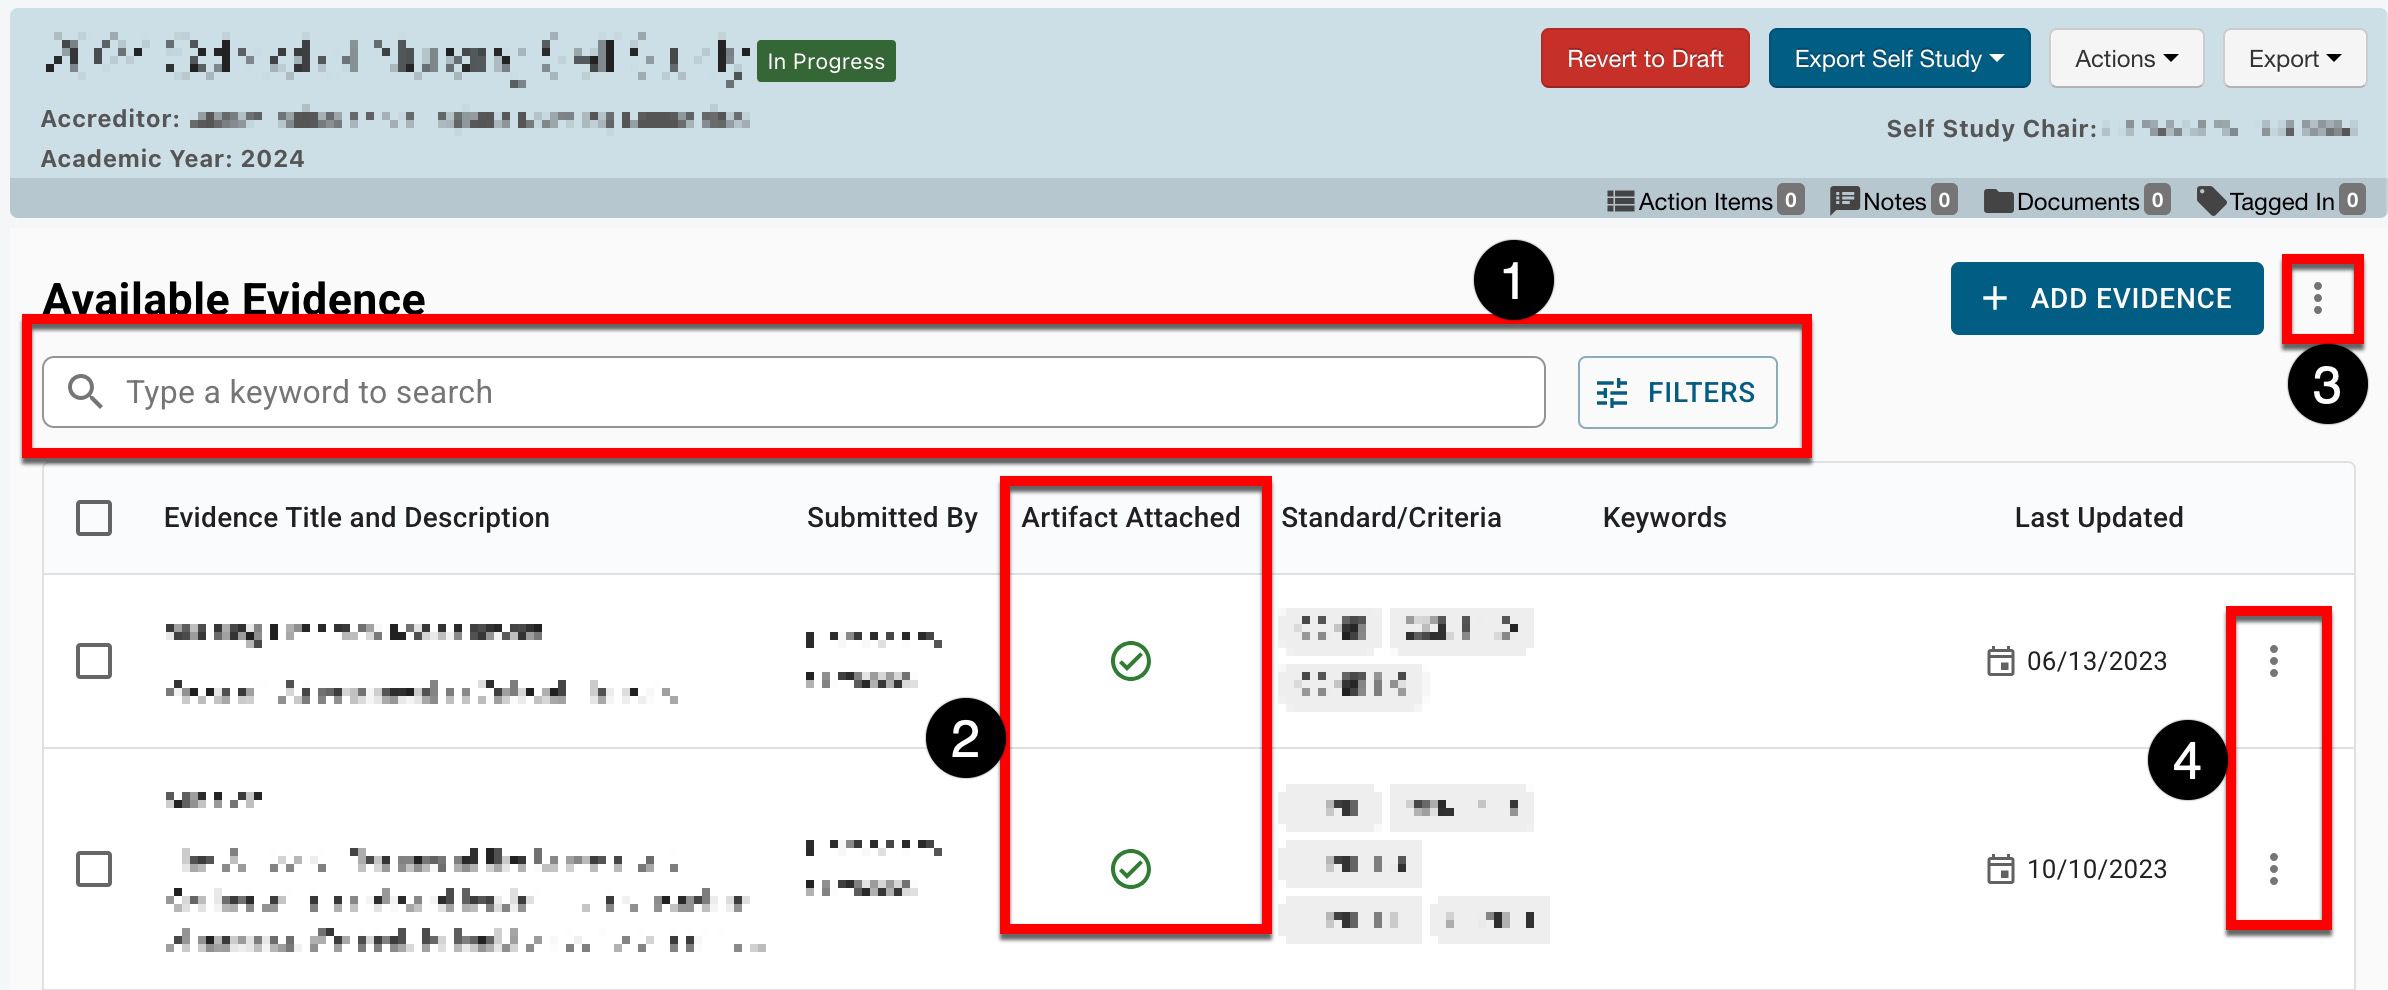
Search functionality is available, and by clicking the Filters option, specific filters can be applied. Once filters have been applied, they will display below the search bar and can be removed individually (1) or in bulk (2). 
|
|
2 |
The Artifact column will display a green checkmark when a file has been attached to evidence. Hovering over the checkmark will display the file name and if the checkmark is clicked, the file will automatically download. 
|
|
3 |
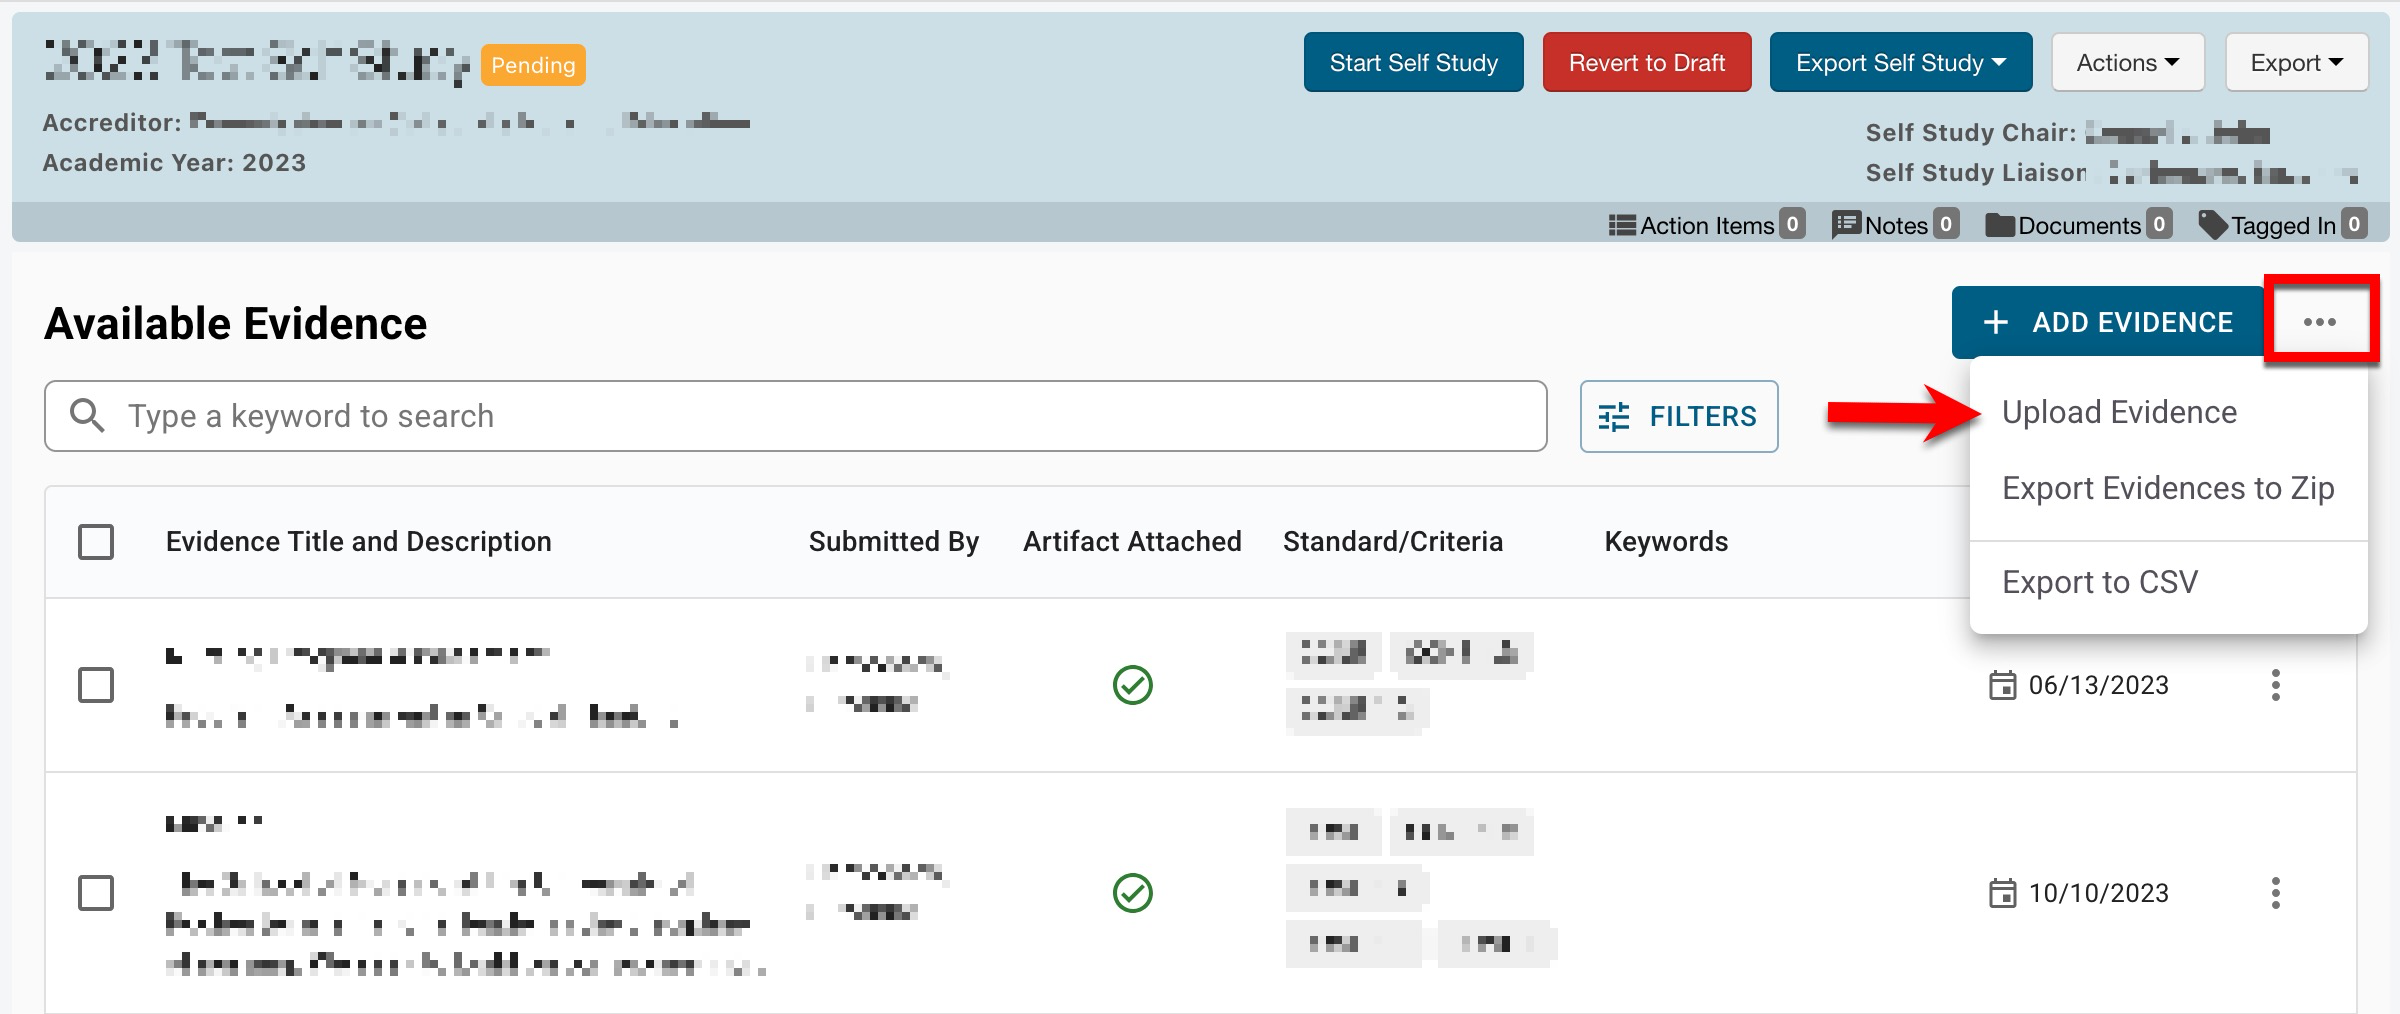
Expanding the More Options kebab displays options to add evidence from the Evidence Library via an import/export template process or to export the Related Documentation page. Evidence can be added in bulk by selecting Upload Evidence from the expanded More Options kebab. When importing evidence, multiple keywords can be added by entering them as a comma-delineated list. When exporting to CSV format, the export will display the actual file name (including the file type extension) and the name provided when the evidence was added to the platform. To export specific evidence, the evidence can be selected (1), and from the More Options kebab (2), Export Evidences to Zip can be selected to export only the selected evidence to a Zip file. 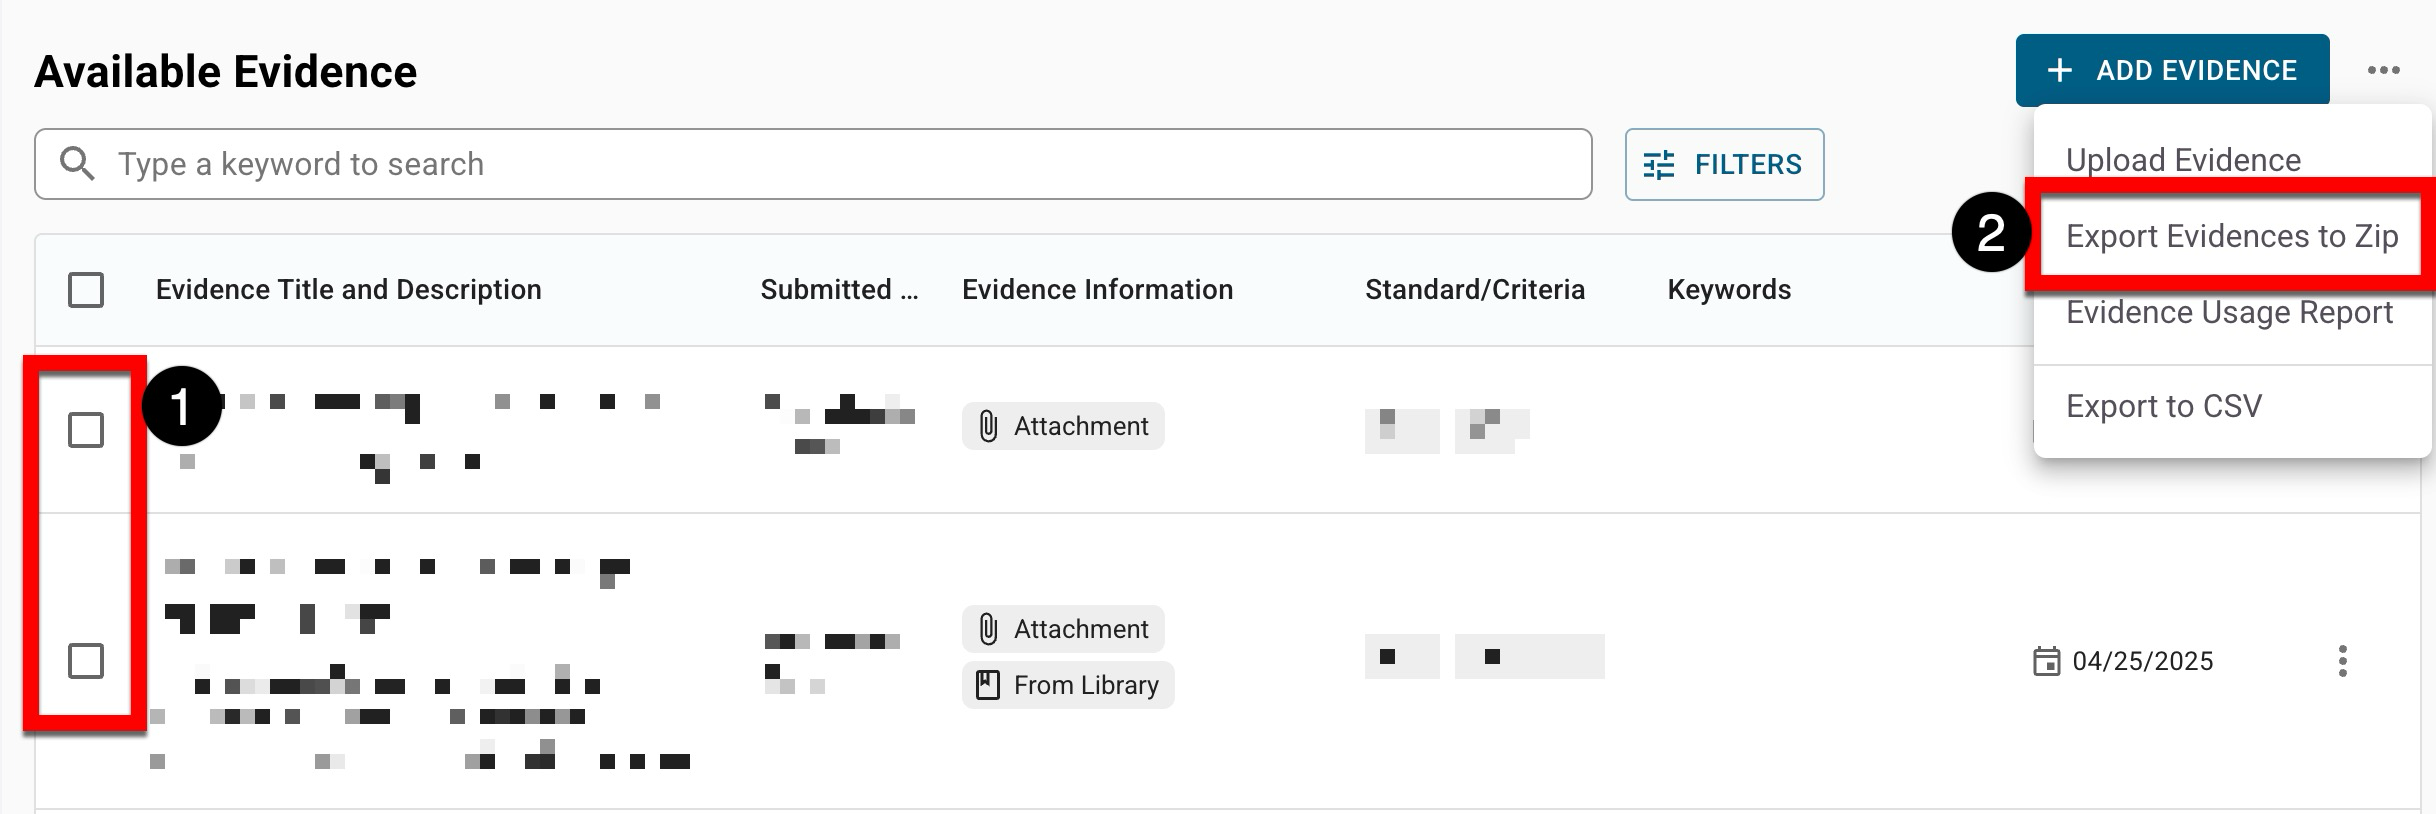
When the Evidence Usage Audit Report option is selected, a CSV report will be automatically downloaded. This report provides associated evidence information, including submitter, criteria, last updated date and version, and more. This report also displays whether evidence was added from the Evidence Bank library and what self study sections the evidence has been associated with. Learn more about the Evidence Bank. |
|
4 |
Selecting the View or Edit options opens the evidence drawer with read-only or edit functionality. Selecting View Details will open the details drawer to display more information. Preview, download, and delete functionality are also available. 
|
Add New Evidence
-
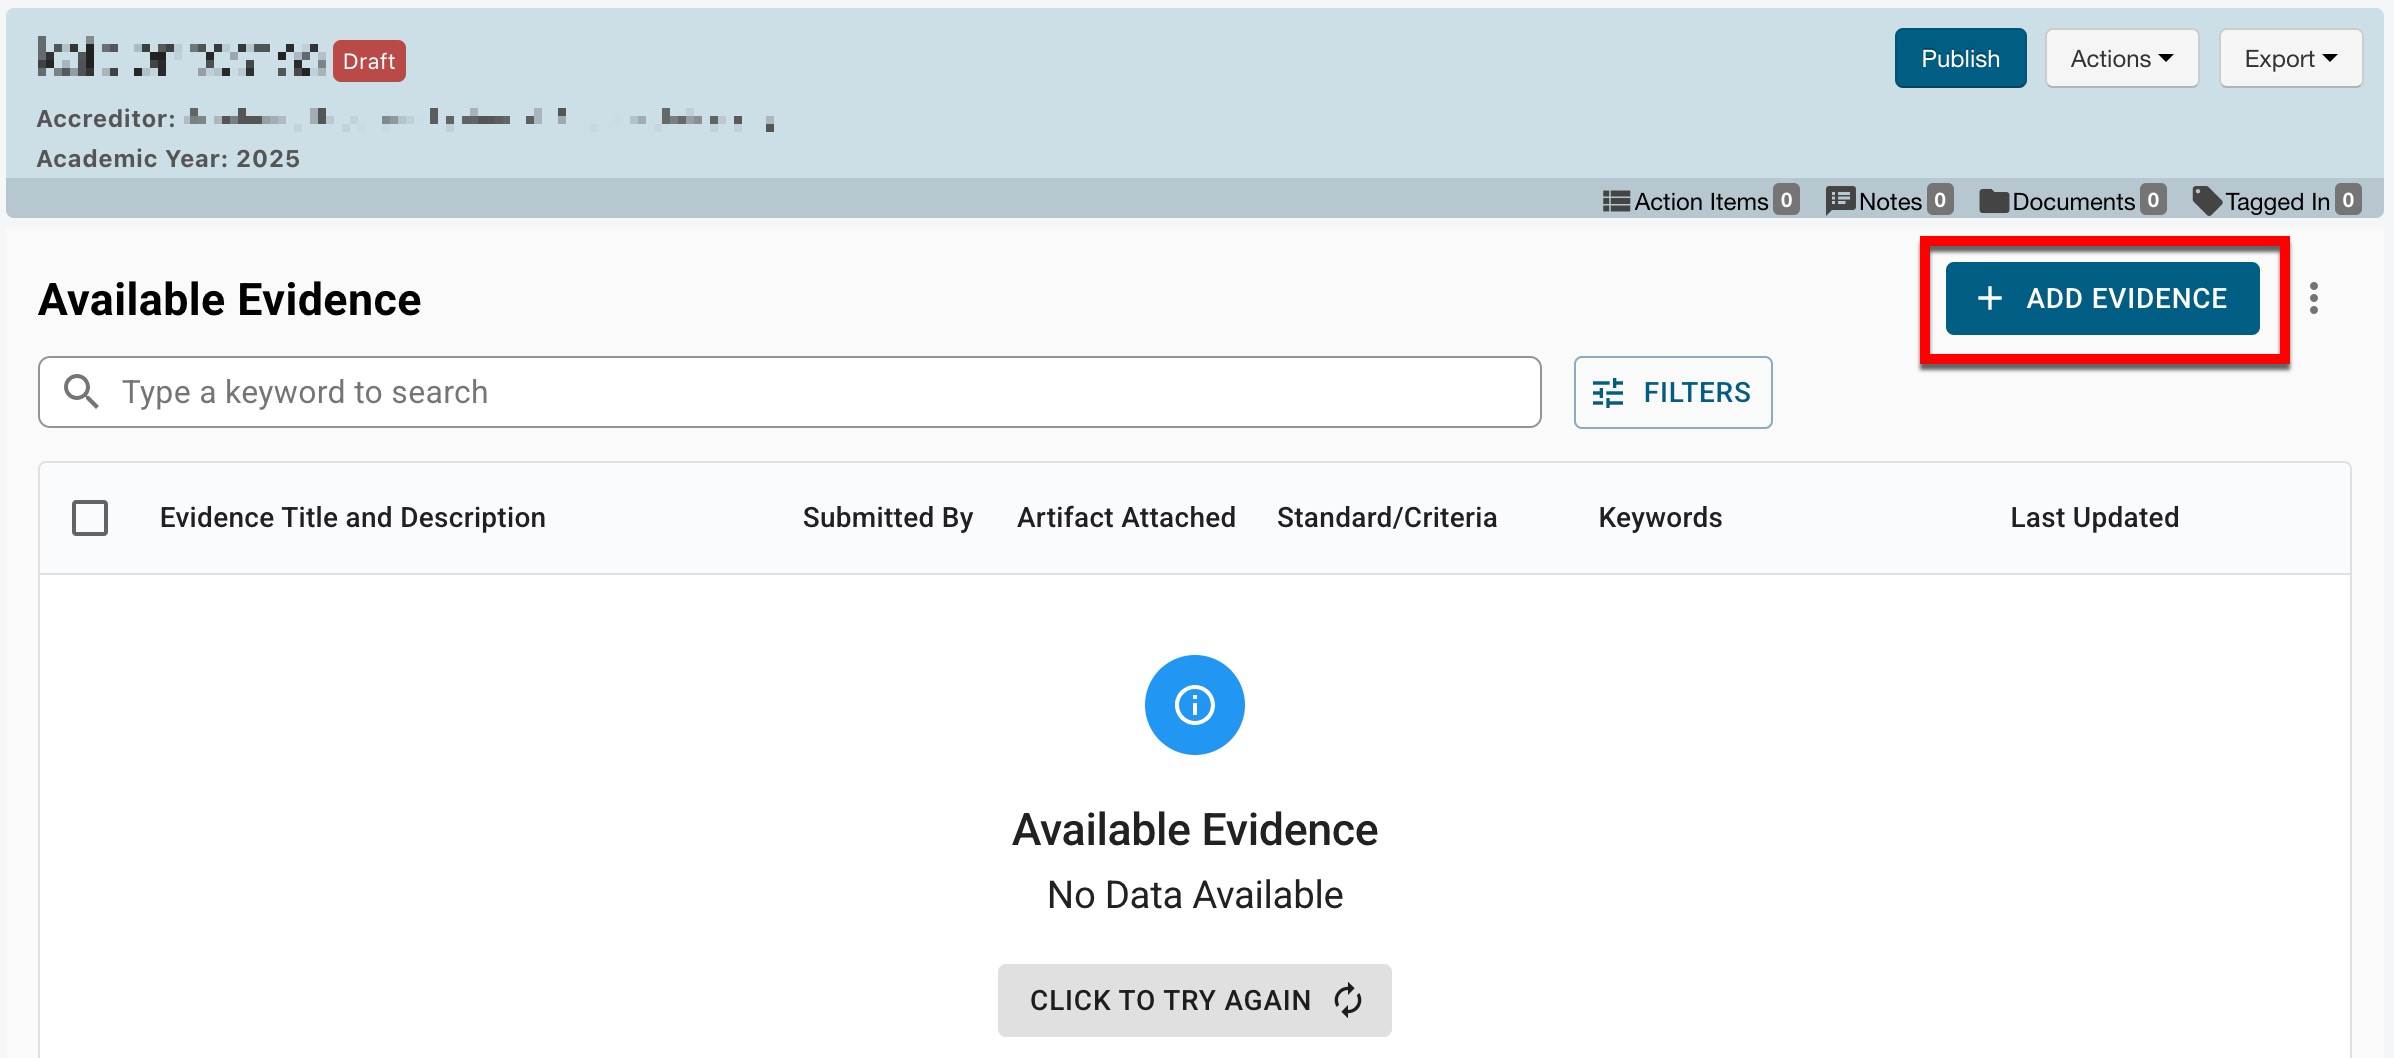
To add evidence to a self study, navigate to Self Study Homepage > Related Documentation and click + Add Evidence.
-
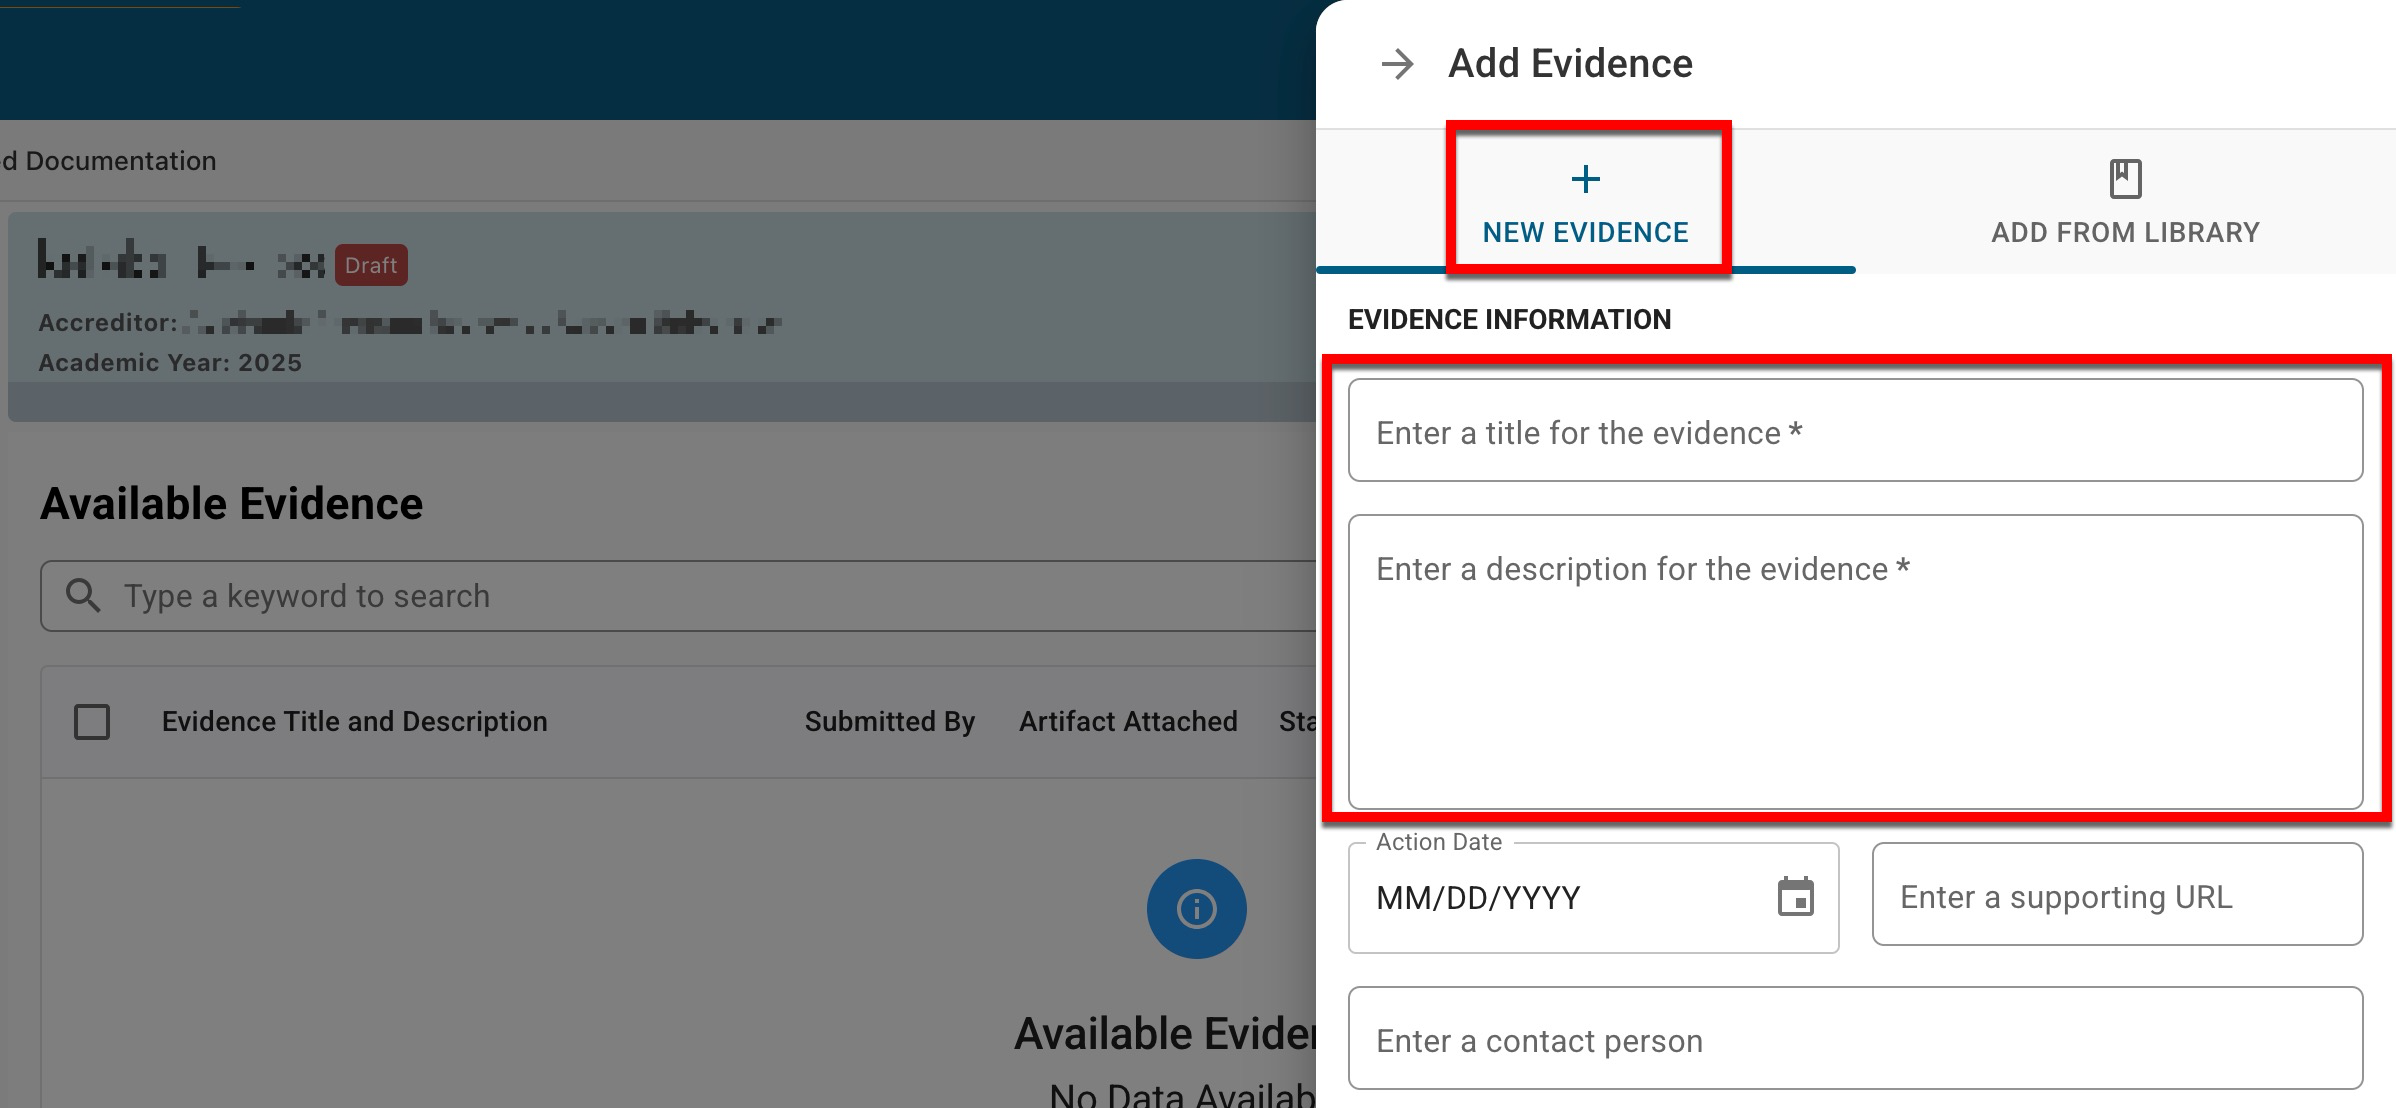
Via the New Evidence tab of the Add Evidence drawer, enter the evidence information. The title and description fields are required, and all others are optional.
As a best practice, evidence should include a support URL or a file attachment.
-
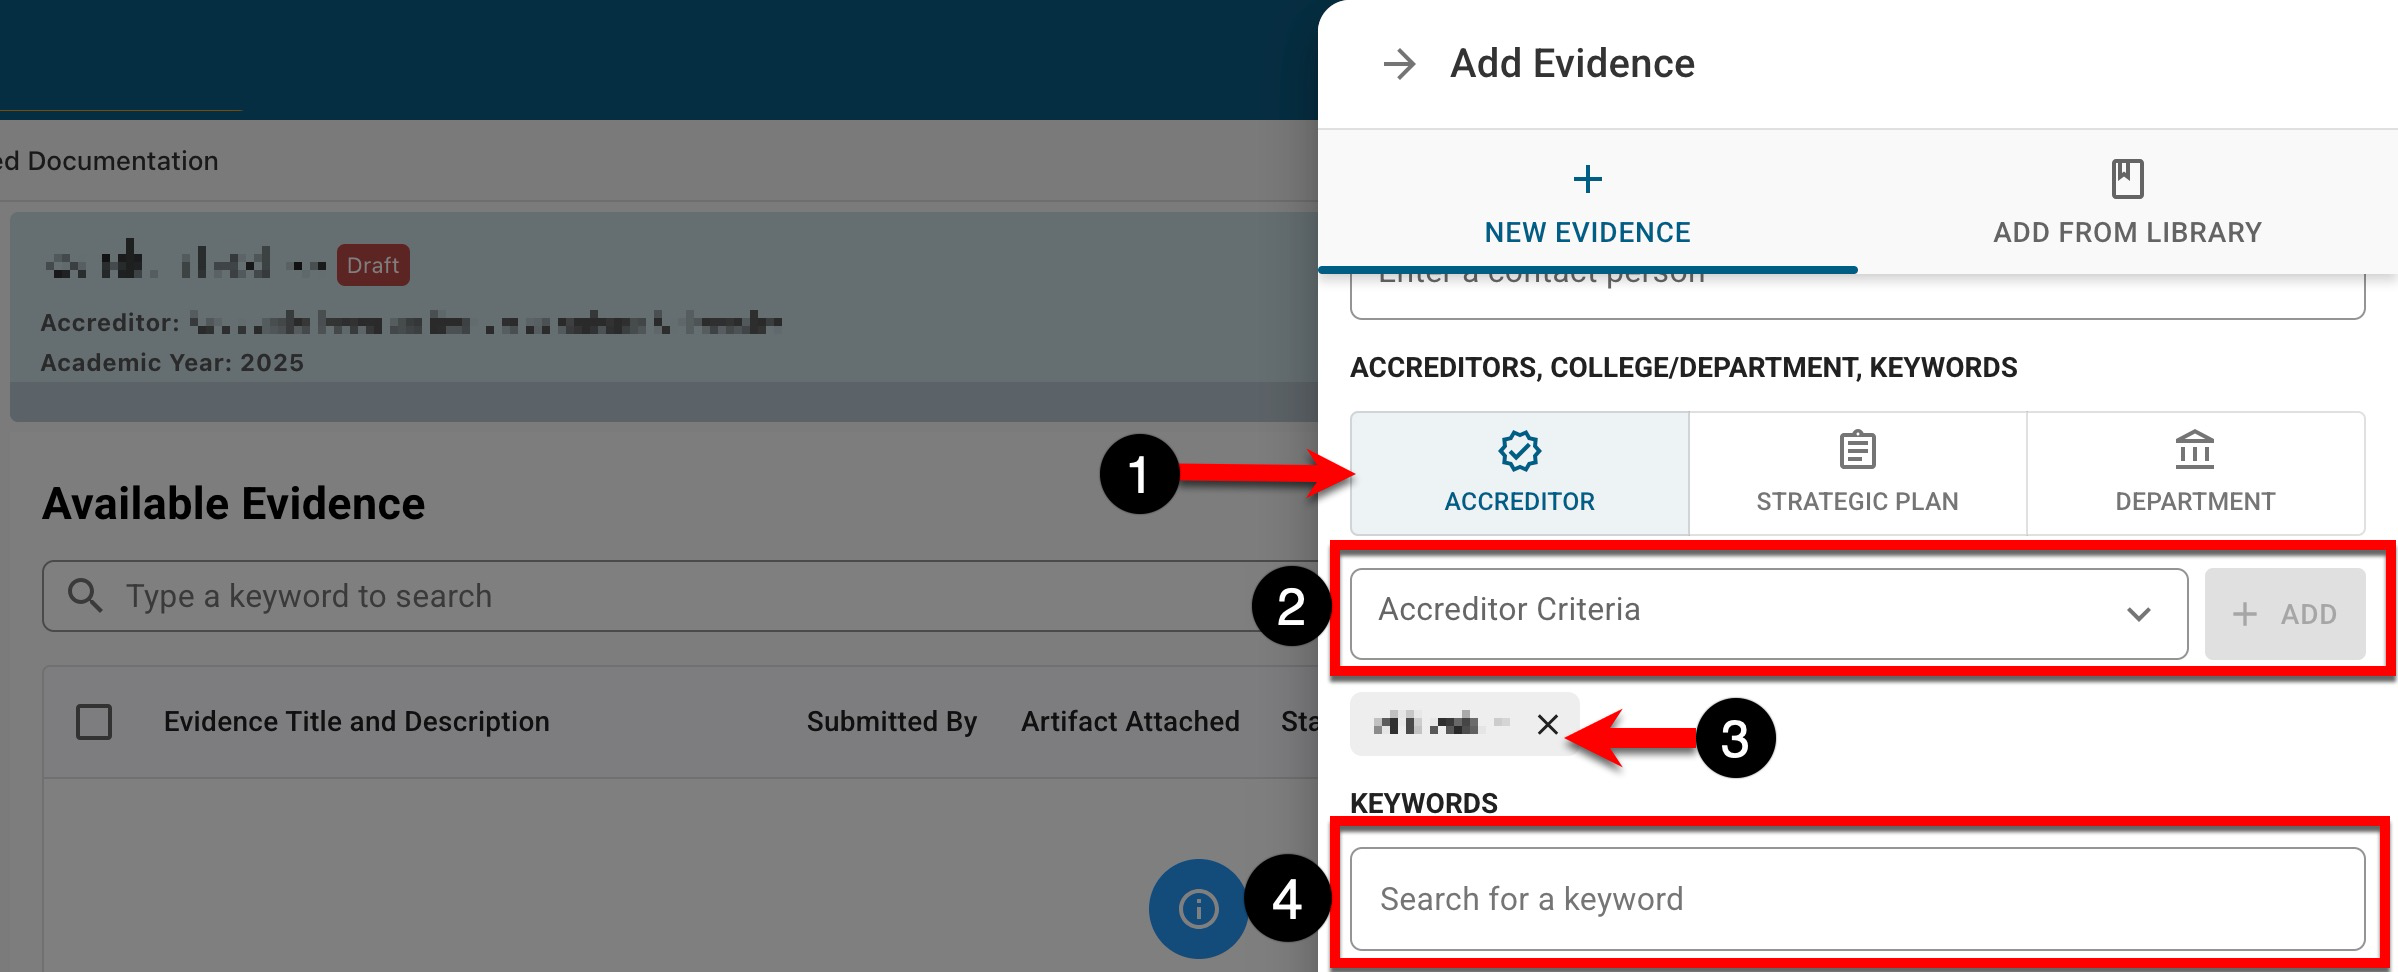
To relate evidence to accreditor or strategic plan criteria or a department, select the applicable tab (1). Additional fields will be displayed to search and make selections based on the selection. Search for a click Add (2) to relate criteria or departments to the evidence. By default, evidence will be tagged with the associated self study template (3). Additionally, keywords can be searched for and associated with the evidence.
-
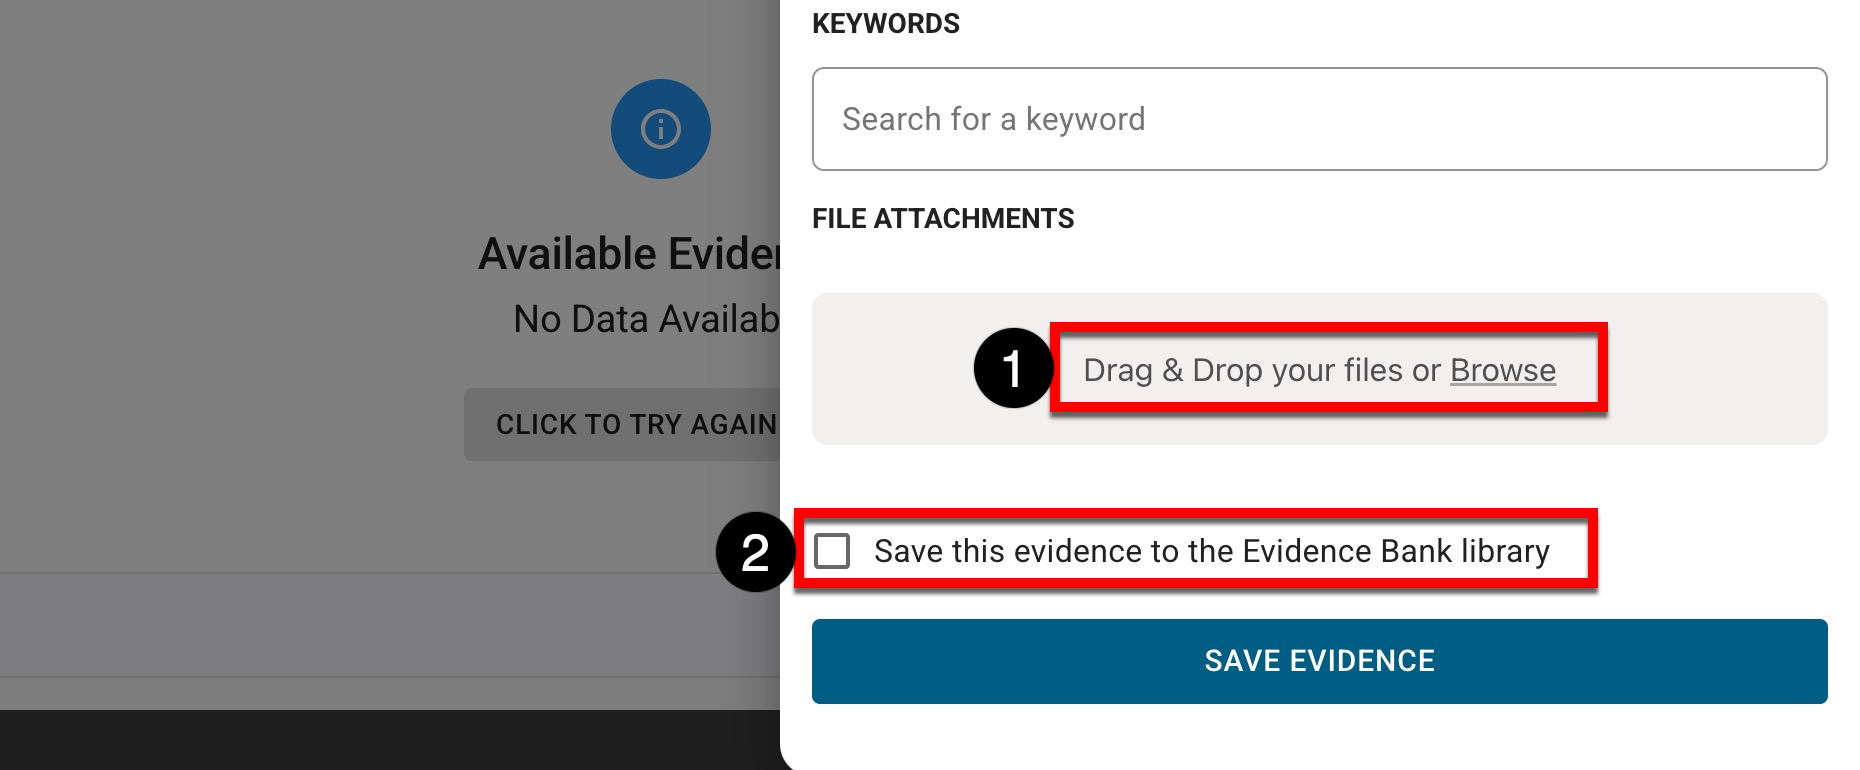
File attachments can be added by clicking the File Attachments section (1) to open a file explorer or by dragging and dropping the attachment to the File Attachments section (1). To add evidence, click Save Evidence.
-
Optionally, new evidence being added to a self study can be saved to the platform’s Evidence Library (2). When disabled, evidence will not be saved in the Evidence Bank, and only users associated with the self-study section can view it. When enabled, the Evidence Bank Curator and Contributor roles can access and download the evidence via the Evidence Bank.
-
-
Add Evidence from the Evidence Library
-
To associate evidence from the platform’s Evidence Library with a self study, navigate to Self Study Homepage > Related Documentation and click + Add Evidence.
-
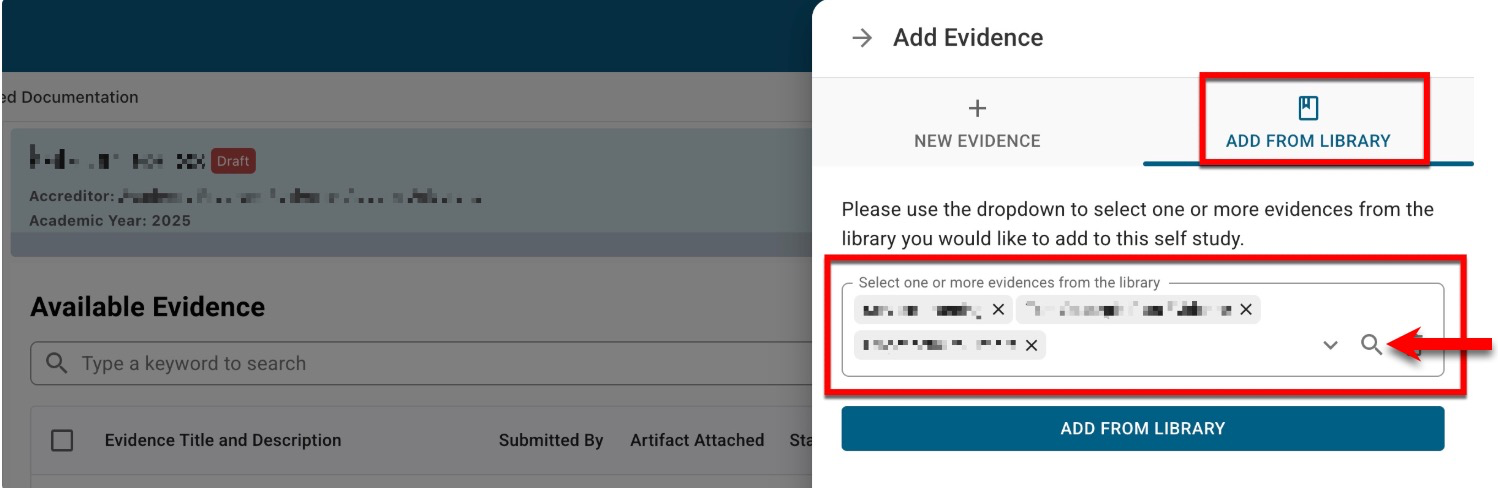
Via the Add From Library tab of the Add Evidence drawer,
-
-
Via the Add From Library tab, select one or more pieces of evidence from the dropdown; by clicking the magnifying glass, an advanced search can be used. To add the selected evidence from the Evidence Library, click Add From Library.
Add Evidence via Template Export/Import
-
Navigate to Self Study Homepage > Related Documentation and from the expanded More Options kebab, select Upload Evidence.
-
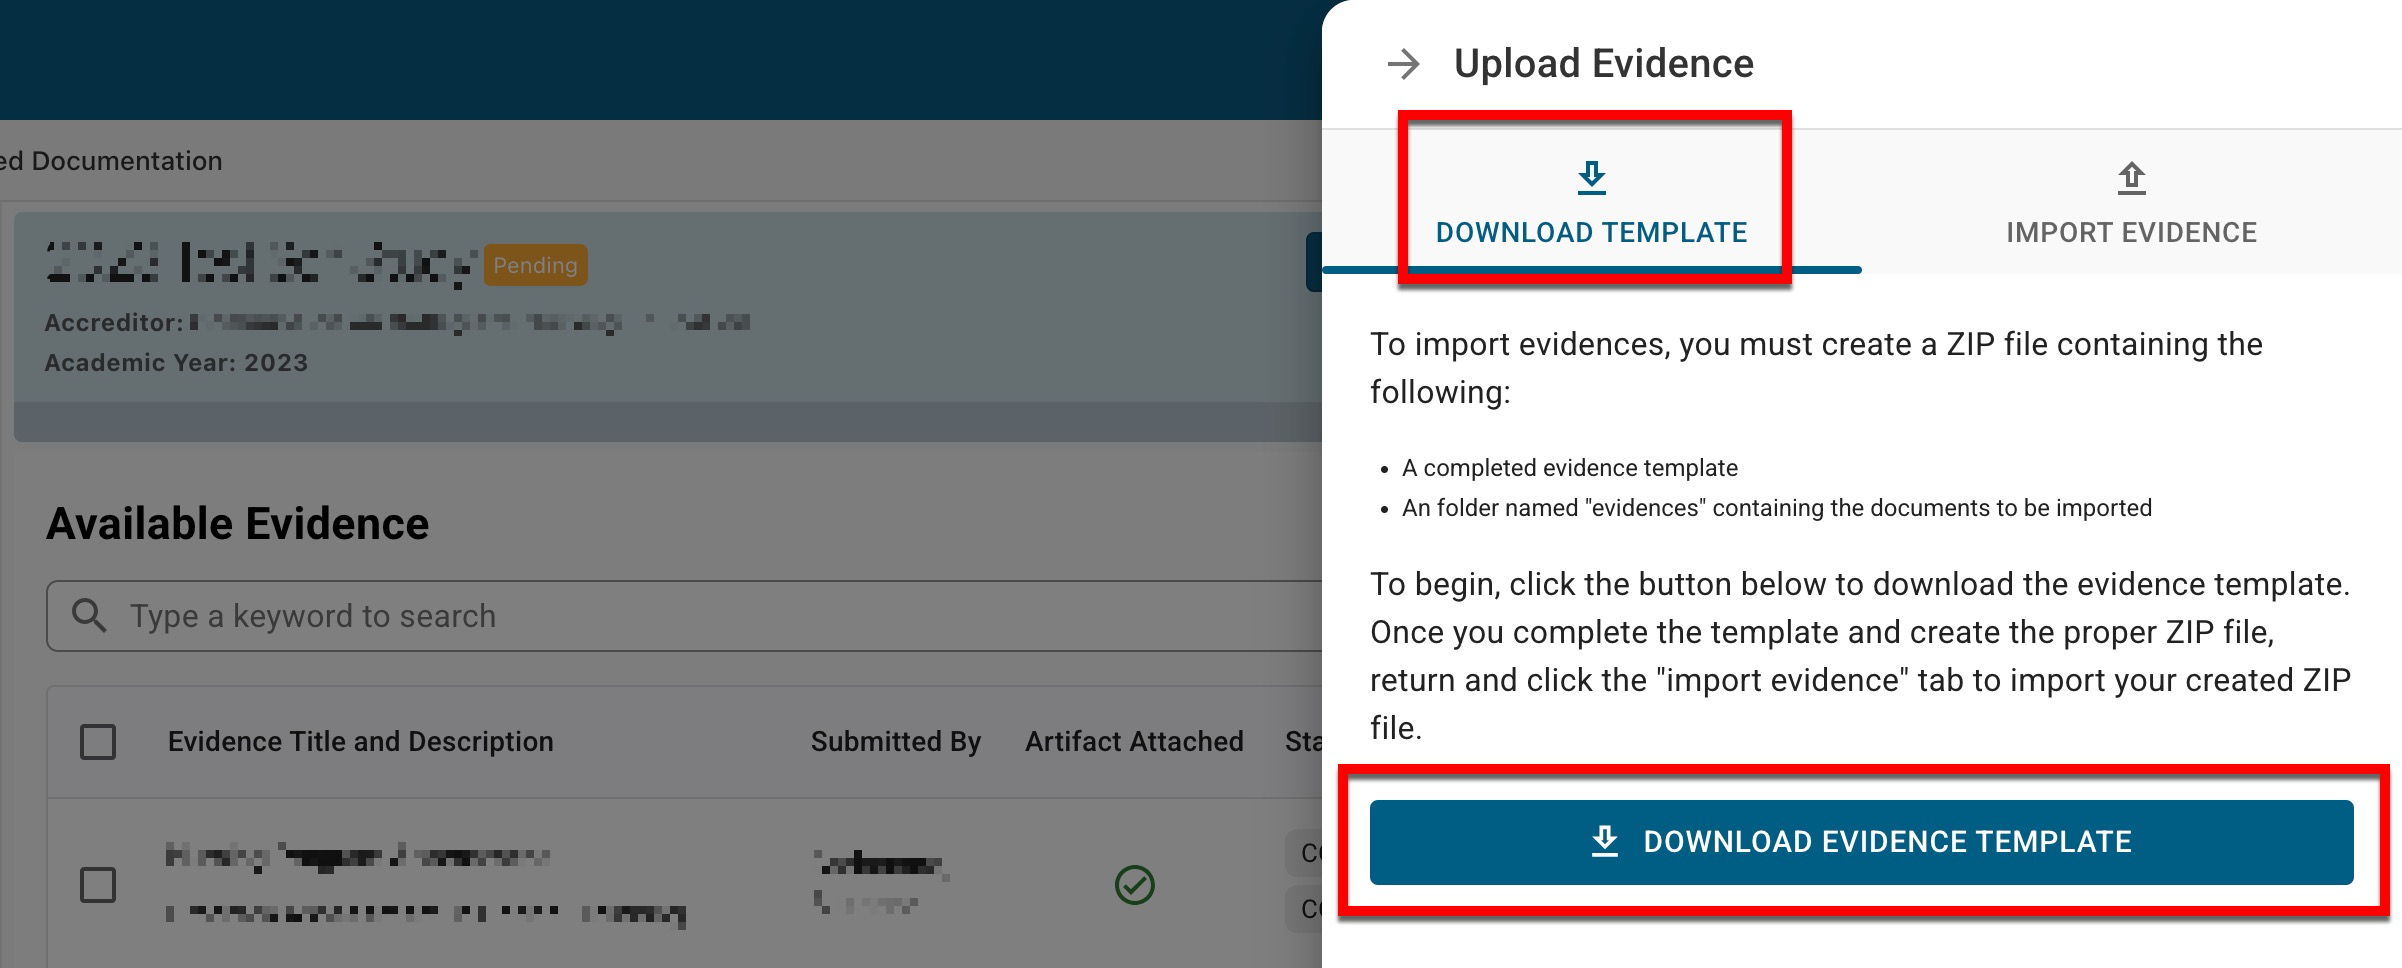
Via the Download Template tab of the Upload Evidence drawer, click Download Evidence Template.
-
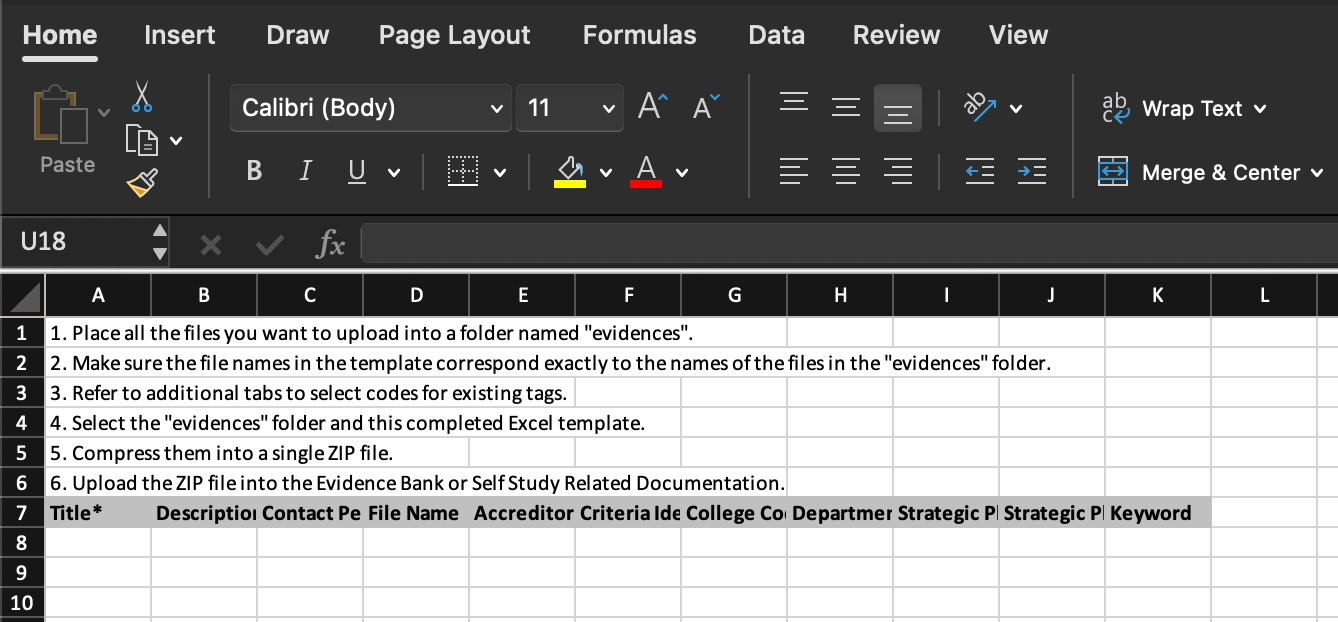
Follow all instructions included in the template; additional tabs are available to list accreditors and standards, colleges and departments, strategic plans and objectives, and keywords.
⚠️ The file name included in column D must match the file name included in the ‘evidences' column.
-
-
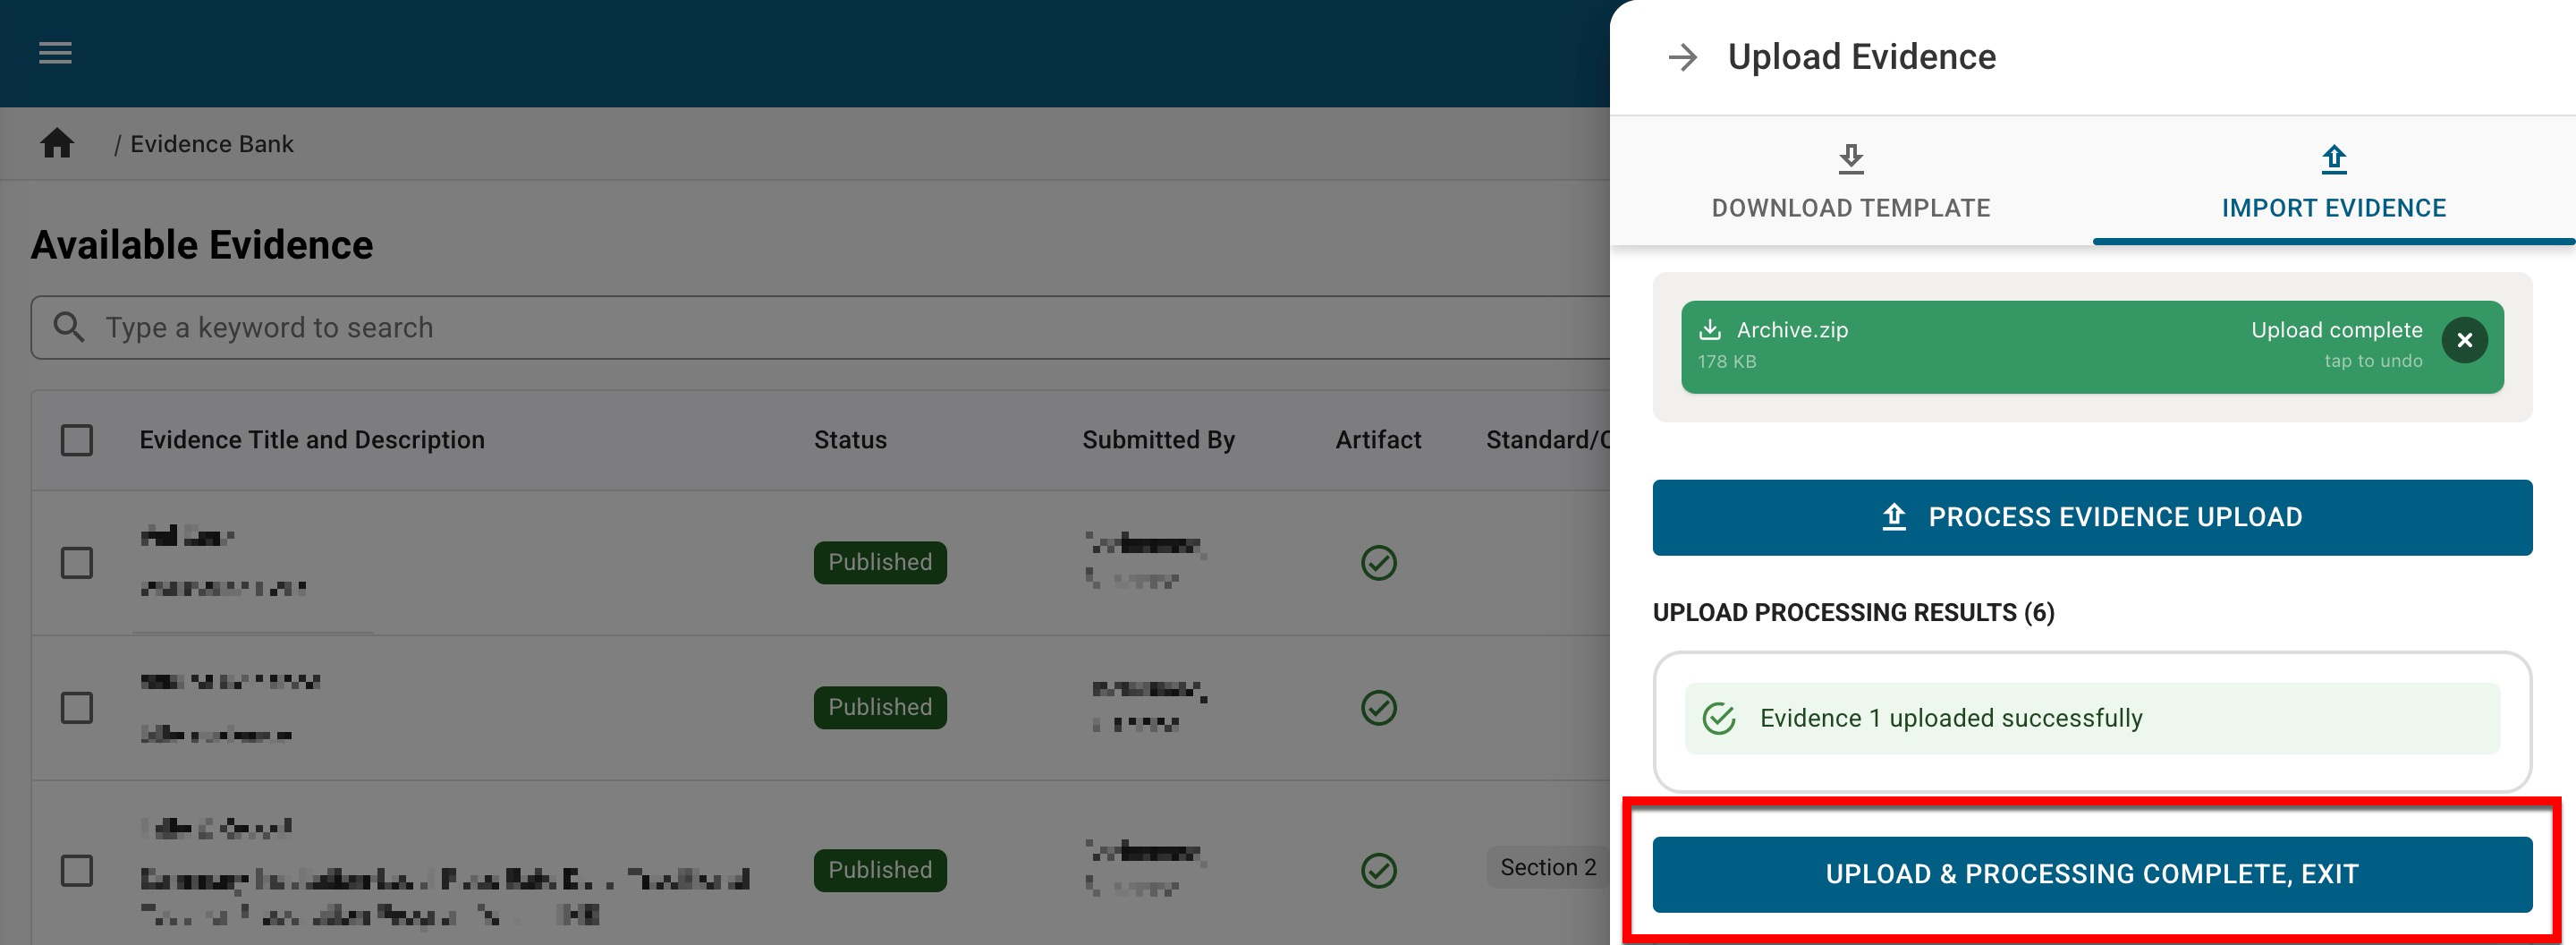
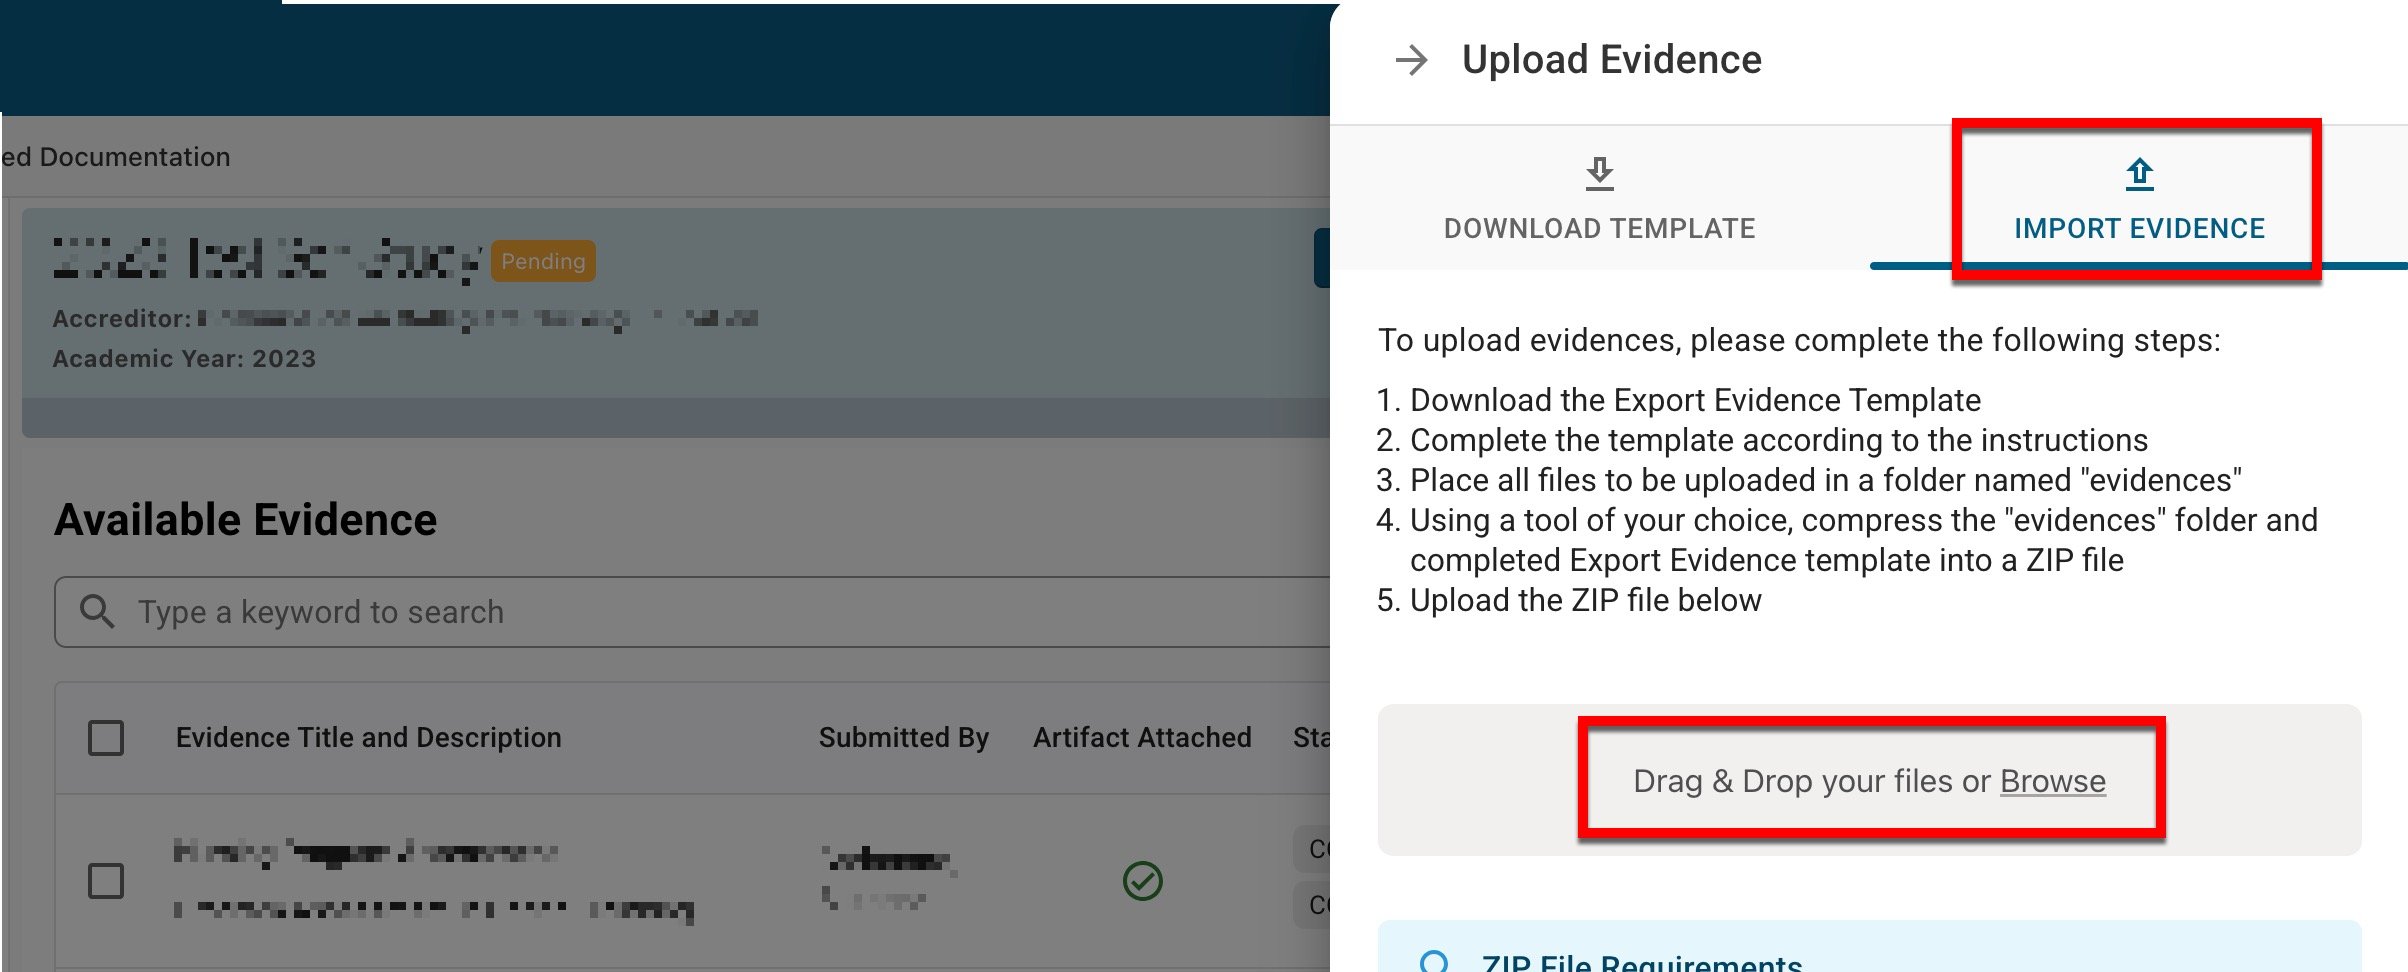
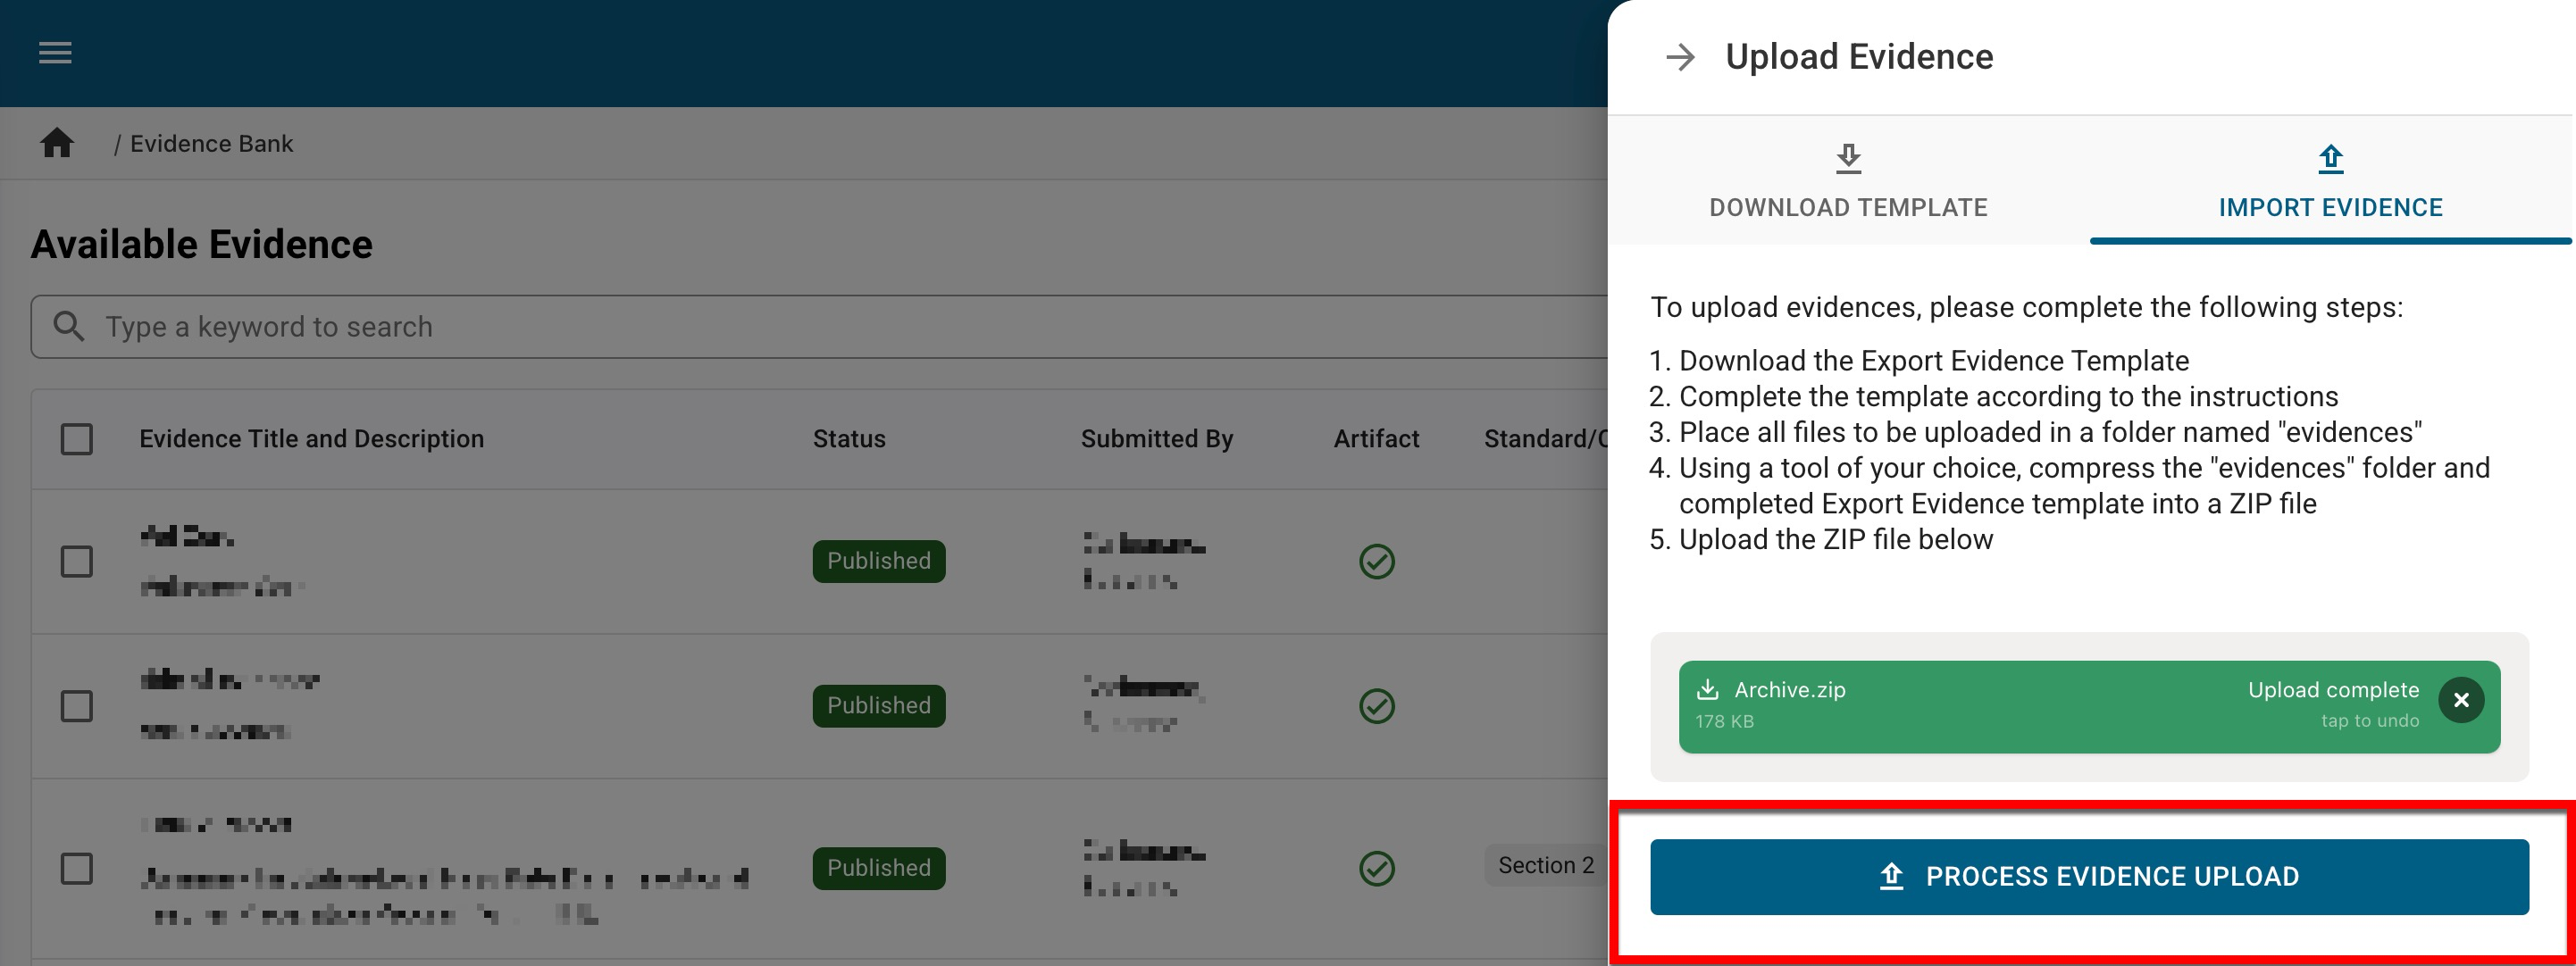
Via the Import Evidence tab of the Upload Evidence drawer, click the file section to open the file explorer to search for and select the zip file, or drag and drop the attachment to the File Attachments section.
-
Once uploaded, click Process Evidence Upload.
-
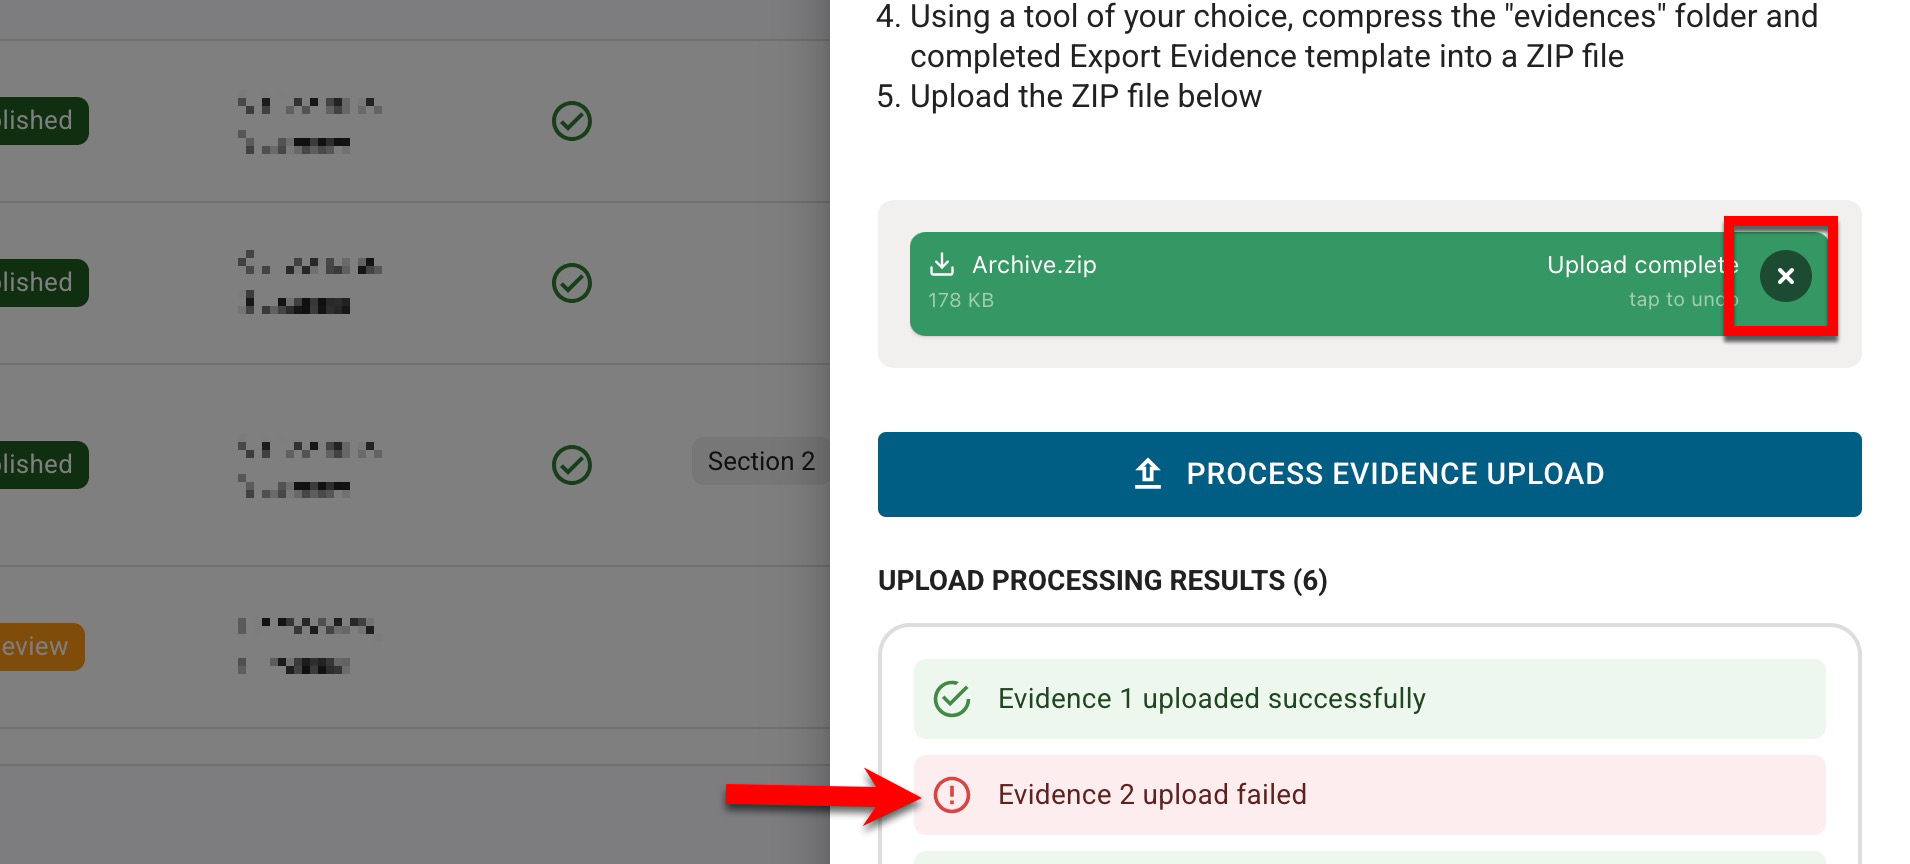
If errors are found during processing, they will be displayed for correction. Once corrected, the zip file can be removed and replaced with the corrected zip.
-
-
Once successful, click Upload & Processing Complete, Exit.