
|
On This Page |
|---|
Introduction
Welcome to the HelioCampus D2L Brightspace Additional LTI 1.3 Integration Guide. This guide provides step-by-step instructions for configuring optional LTI 1.3 tools—in addition to the default LTI 1.3 tool configured D2L Brightspace LTI 1.3 Integration —to integrate HelioCampus Assessment & Credentialing with Canvas using the LTI 1.3 standard and completing the HelioCampus Assessment and Credentialing Additional LTI 1.3 Form.
HelioCampus Additional LTI 1.3 Tool
If needed, you can create multiple LTI 1.3 connectors for different purposes, such as one directing users to the Assignments page and another to the Survey page.
HelioCampus Assessment and Credentialing Additional LTI 1.3 Form
Please complete the HelioCampus Assessment and Credentialing Additional LTI 1.3 Form to provide the necessary details for LMS integration.
Start HelioCampus Assessment and Credentialing Additional LTI 1.3 Form
Required Fields:
-
Institution Name: Select your institution from the list.
-
LMS: Choose D2L.
-
LMS Contact Name: Enter your full name.
-
LMS Contact Email: Provide your email address.
-
LMS Server URL: Enter your LMS URL without
https://or trailing slashes (e.g.,d2l.institution.edu or institution.brightspace.com).-
If your D2L Brightspace instance has a vanity URL (e.g., d2l.institution.edu) that most users use to access D2L Brightspace, be sure to use that URL.
-
Keep the form open, as you will be filling it out while completing the steps below. Look for the HelioCampus Assessment and Credentialing Additional LTI 1.3 Form in the upcoming instructions.
Additional LTI 1.3 Tool Unique Identifier
You must create a unique identifier to distinguish this connector from the default one set up during the initial integration.
For example, if you are creating an LTI 1.3 connection that directs users to the Assignment Linking page, you could use a unique identifier like "assignmentlinking" or "linking".
Note:
This value will not be visible to users.
It cannot contain spaces.
Type the unique identifier you came up with in the LTI 1.3 Unique Identifier field on the HelioCampus Assessment and Credentialing Additional LTI 1.3 Form.
Creating the External Learning Tool
A D2L Brightspace Administrator must create the External Learning Tool within the institution's D2L Brightspace instance by following these steps:
1. Navigate to External Learning Tool Settings
-
Log into D2L Brightspace as an Admin.
-
Click the Admin Tools (gear icon) in the top right.
-
Under Organization Related, select Manage Extensibility.
-
Click LTI Advantage.
-
Find and select your existing HelioCampus tool, e.g. HelioCampus LTI 1.3 Integration
2. Configure the External Learning Tool Settings
-
In the External Learning Tool Settings dialog, enter the following details:
Note: Replace <HelioCampus_URL> with your institution’s HelioCampus Assessment & Credentialing URL.
Note: Replace <unique identifier> with the custom value you came up with above.
|
Field |
Value |
|---|---|
|
Redirect URIs |
|
-
Scroll down and copy the Client ID and paste it into the LTI 1.3 Client ID field on the HelioCampus Assessment and Credentialing Additional LTI 1.3 Form.
-
Click Save.
-
Click View Deployments
3. Create Deployment for External Learning Tool
-
Click New Deployment
-
In the Deployment Settings dialog, enter the following details:
Note: Replace <unique identifier> with the custom value you came up with above.
|
Field |
Value |
|---|---|
|
Enabled |
Toggled On |
|
Auto Migrate Links |
Toggled Off |
|
Tool |
Click the drop-down and select HelioCampus LTI 1.3 Integration |
|
Name |
This is the name only Admins see, we suggest, HelioCampus LTI 1.3 Deployment <unique identifier> |
|
Description |
HelioCampus is a web-based assessment management solution that facilitates the collection and application of real-time assessment data. |
|
Extensions |
Leave blank. |
|
Security Settings |
|
|
Anonymous |
Leave unchecked. |
|
Org Unit Information |
Check this option. |
|
User Information |
Check this option and keep all fields checked. |
|
Link Information |
Check this option and keep all fields checked. |
|
Classlist including users not known to this deployment |
Leave unchecked. |
|
Configuration Settings |
|
|
Open as External Resource |
Check this option. |
|
Grades created by LTI will be included in Final Grade |
Leave unchecked. |
|
Auto Create Grade Items |
Leave unchecked. |
|
Substitution Parameters |
Leave blank. |
|
Custom Parameters |
Leave blank. |
|
Make tool available to |
Click Add Org Units, find your D2L Brightspace Org, select This org unit and all descendants, and click Add. |
-
Click Create Deployment
-
Copy the Deployment ID from the pop-up and paste it into the LTI 1.3 Deployment ID field on the HelioCampus Assessment and Credentialing Additional LTI 1.3 Form.
-
Click View Links
4. Create Link for External Learning Tool
-
Click New Link
-
In the Link Settings dialog, enter the following details:
Note: Replace <HelioCampus_URL> with your institution’s HelioCampus Assessment & Credentialing URL.
Note: Replace <unique identifier> with the custom value you came up with above.
|
Field |
Value |
|---|---|
|
Name |
This is the name only Admins see, we suggest, HelioCampus LTI 1.3 Link <unique identifier> |
|
URL |
https://<HelioCampus_URL>/index.cfm/page/AefisFramework.login?authenticatorcode=<unique identifier> |
|
Description |
HelioCampus is a web-based assessment management solution that facilitates the collection and application of real-time assessment data. |
|
Type |
Choose Basic Launch |
|
Substitution Parameters |
|
|
Custom Parameters |
Set Up User Matching
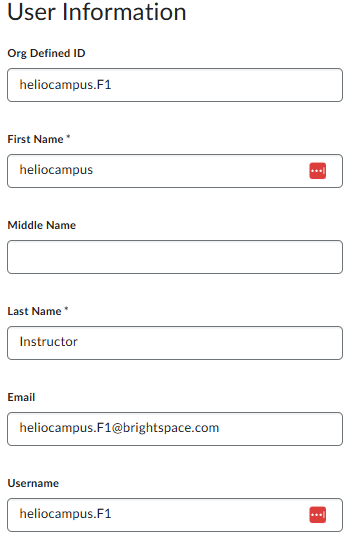
By default, D2L Brightspace LTI 1.3 matches users based on Email. If you prefer a different matching method, we can use Org Defined ID or Username, as long as those values are included in your HelioCampus Data Feed User Files.
Matching on Org Defined ID or Username
If you need to match on Org Defined ID or Username, follow these steps:

-
Navigate to Substitution Parameters → Name and paste the following:
lis_person_sourcedid -
Open the Value drop-down menu and scroll to the bottom.
-
Under User, select one of the following options:
-
$User.idor$Person.sourcedIdfor Org Defined ID -
$User.usernamefor Username
-
If you use any Substitution Parameters, be sure to check the corresponding box under LTI User Match on the HelioCampus Assessment and Credentialing Additional LTI 1.3 Form.
Additionally, under API User Match Options on the same form, select the appropriate option:
-
If using
$User.idor$Person.sourcedId, choose OrgDefinedId -
If using
$User.username, choose UserName
Customizing the LTI 1.3 Connection
If you want to customize the LTI 1.3 Tool between D2L Brightspace and HelioCampus Assessment & Credentialing, refer to the D2L Brightspace Customizing LTI 1.3. A custom configuration allows you to:
-
Modify the landing page for the tool.
-
Modify the menu items shown the tool.
5. Save the Link
-
Click Save and Close.
6. Add The LTI 1.3 Link To NavBar
The following steps will add the LTI 1.3 Link directly to the NavBar, making it accessible to all users. If you prefer to restrict access to specific child org units or user roles, you can adjust the settings according to your institution’s policies.
-
Click the Admin Tools (gear icon) in the top right.
-
Click Navigation & Themes.
-
Click on the course navbar you want to modify.
-
Click Add Links.
-
Click Create Custom Link.
-
In the Link Settings dialog, enter the following details:
|
Field |
Value |
|---|---|
|
Name |
This is the course menu item that users will see in D2L Brightspace. We recommend choosing a name that reflects the tool’s purpose, such as "HelioCampus Assignment Linking." |
|
URL |
|
|
Behavior |
Choose Same Window. |
|
Description |
HelioCampus is a web-based assessment management solution that facilitates the collection and application of real-time assessment data. |
|
Icon |
Leave blank. |
|
Availability |
|
|
Limit to specific roles |
Leave this unchecked unless you need to restrict access to specific users. |
|
Limit to specific locales |
Leave this unchecked unless you need to restrict access to specific locales. |
-
Click Create.
-
Click Add.
-
Drag and place the new link in your desired position under Links.
-
Click Save and Close.