
|
On This Page |
|---|
Introduction
Welcome to the HelioCampus Canvas API Integration Guide. This document provides step-by-step instructions for configuring the integration between HelioCampus Assessment & Credentialing and Canvas using API standards and completing the HelioCampus Assessment & Credentialing LMS Information Form.
Generating a Canvas API Developer Key
A Canvas API Developer Key is required to enable HelioCampus to retrieve data from Canvas for use in HelioCampus Assessment & Credentialing. A Canvas Administrator must generate an API Developer Key within the institution's Canvas instance by following these steps:
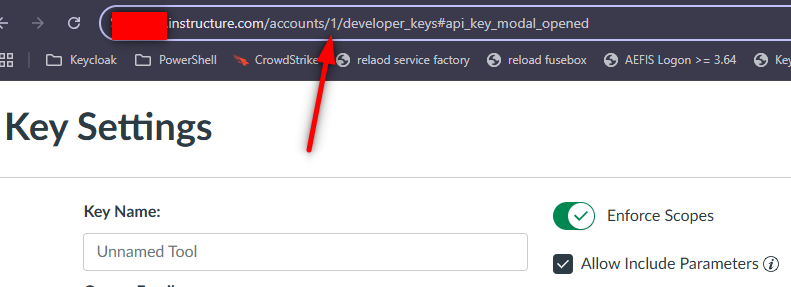
1. Navigate to Developer Key Settings
-
Log into Canvas as an Admin.
-
Navigate to Admin and select the appropriate managed account.
-
Click Developer Keys.
-
Click the + Developer Key button and choose API Key.
2. Configure the Key Settings
In the Key Settings dialog, enter the following details:
Note: Replace <HelioCampus_URL> with your institution’s HelioCampus Assessment & Credentialing URL.
|
Field |
Value |
|---|---|
|
Key Name |
Only Canvas Admins will be able to view the Key Name. HelioCampus suggests using “HelioCampus Canvas API Integration.” |
|
Owner Email |
|
|
Redirect URIs |
Leave blank |
|
Redirect URI (Legacy) |
https://<HelioCampus_URL>/index.cfm/page/AefisLmsIntegration.authCallback |
|
Vendor Code (LTI 2) |
Leave blank |
|
Icon URL |
https://<HelioCampus_URL>/assets/images/logos/AefisLogoNoTextSmall-alt@2x.png |
|
Notes |
Leave blank |
|
Test Cluster Only |
Leave unchecked |
|
Client Credentials Audience |
Choose Canvas |
3. Save and Activate the Key
-
Click Save.
-
Verify that the key appears in the list.
-
Change the State of the key to ON.
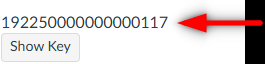
4. Copy Developer Key Details
-
Locate the Developer Key ID and copy it.
-
Paste the Developer Key ID into the API Developer Key field on the HelioCampus Assessment & Credentialing LMS Information Form.
-
Click Show Key to reveal the Developer Key Secret.
-
Copy the Developer Key Secret and paste it into the API Developer Secret field on the HelioCampus Assessment & Credentialing LMS Information Form.
If you are not going to enable scopes on the API key and have completed the LTI 1.3 integration steps, you may now submit the HelioCampus Assessment and Credentialing LMS Information Form and continue to HelioCampus Canvas Service Account
Otherwise, continue to Applying scopes to HelioCampus API integration below.
Applying scopes to HelioCampus API integration
If your institution requires developer keys in Canvas LMS to enforce scopes, you must configure the necessary scopes in the developer key created during integration.
What Are Scopes?
Enforcing scopes in a Canvas API developer key restricts API calls to predefined permissions, ensuring security and preventing unauthorized access to data. If a request exceeds its allowed scope, it will be denied.
Note: Enforcing scopes requires re-authorizing the API token with HelioCampus when new scopes are added or optional scopes are enabled. This may add complexity to the process.
1. Required Scopes
Check the box under API Developer Key Scoped? on the HelioCampus Assessment and Credentialing LMS Information Form.
To apply the required scopes:
-
Toggle
Enforce Scopesto ON. -
Check
Allow Include Parameters.
To enable the following scopes, locate the corresponding header in the scope list, expand it, and check the required scope.
Assignments
-
GET /api/v1/courses/:course_id/assignments
Courses
-
GET /api/v1/courses -
GET /api/v1/courses/:id -
GET /api/v1/courses/:course_id/users
Sections
-
GET /api/v1/courses/:course_id/sections
Note: The HelioCampus Assessment & Credentialing scheduled job
updateLmsCrosslistedSectionIdsuses this API to determine cross-listed Canvas sections.
Enrollments
-
GET /api/v1/courses/:course_id/enrollments
OAuth2
-
/auth/userinfo
Submissions
-
GET /api/v1/courses/:course_id/assignments/:assignment_id/submissions -
GET /api/v1/courses/:course_id/students/submissions
2. Optional Scopes
Account Reports
If your institution utilizes cross-listed courses, enable the following scopes:
If enabled, Check the box under Account Reports scopes on the HelioCampus Assessment and Credentialing LMS Information Form.
-
POST /api/v1/accounts/:account_id/reports/:report -
GET /api/v1/accounts/:account_id/reports/:report/:id -
GET /api/v1/accounts/:account_id/reports -
GET /api/v1/accounts/:account_id/reports/:report
Additionally, you will have to supply the account_id found in the institution’s Canvas URL (typically 1)
Type the account_idin Account Reports Account ID on the HelioCampus Assessment and Credentialing LMS Information Form.
Note: The HelioCampus Assessment & Credentialing scheduled job
updateLmsCrosslistedSectionIdsrelies on this API to determine cross-listed Canvas sections.
Quiz Report Scopes
If your institution assesses quiz data in HelioCampus, enable:
If enabled, Check the box under Quiz Reports scopes on the HelioCampus Assessment and Credentialing LMS Information Form.
Quiz Reports
-
GET /api/v1/courses/:course_id/quizzes/:quiz_id/reports -
GET /api/v1/courses/:course_id/quizzes/:quiz_id/reports/:id -
POST /api/v1/courses/:course_id/quizzes/:quiz_id/reports
Note: HelioCampus Assessment & Credentialing requires
POSTAPI scope to retrieve quiz grades and answers in a batch format, avoiding multiple calls per student.
Example API Call:https://<Canvas_URL>/api/v1/courses/<Course_ID>/quizzes/<Quiz_ID>/reports?quiz_report[report_type]=student_analysis&access_token=XXXX
Quiz Questions
If your institution assesses quiz data in HelioCampus, enable:
If enabled, Check the box under Quiz Questions scopes on the HelioCampus Assessment and Credentialing LMS Information Form.
-
GET /api/v1/courses/:course_id/quizzes/:quiz_id/questions -
POST /api/quiz/v1/courses/:course_id/quizzes/:assignment_id/reports -
GET /api/v1/progress/:id
Files
If your institution assesses quiz data in HelioCampus, enable:
If enabled, Check the box under Files scopes on the HelioCampus Assessment and Credentialing LMS Information Form.
-
GET /api/v1/files/:id
Note: This scope allows HelioCampus Assessment & Credentialing to access student submission files for quiz questions requiring file uploads.
Posting Grades to LMS
If your institution plans on posting grades back to Canvas from , enable:
If enabled, Check the box under Submissions scopes on the HelioCampus Assessment and Credentialing LMS Information Form.
Submissions
-
POST /api/v1/courses/:course_id/assignments/:assignment_id/submissions/update_grades
If you have also completed the LTI 1.3 integration steps, you may now submit the HelioCampus Assessment and Credentialing LMS Information Form and continue to HelioCampus Canvas Service Account.
HelioCampus Canvas Service Account
This section outlines the steps to create a service account for REST API calls between Canvas environment and HelioCampus Assessment & Credentialing. This integration enables HelioCampus to gather necessary data for assessment purposes. The following steps must be completed by a Canvas Administrator and a HelioCampus Institutional Admin at your institution.
1. Create the Service Account in Canvas
Create an account in Canvas, the type of account (local Canvas account or university account) should follow your institution’s policies.
Ensure that the account setup follows the same format as other user accounts (e.g., if user login includes an email address and SIS ID, the service account should follow the same format).
-
Log into Canvas as an Admin.
-
Navigate to Admin and select the appropriate managed account.
-
Click People
-
Click the + People button
-
Fill out the required fields:
|
Field |
Value |
|---|---|
|
Full Name |
HelioCampus Canvas Service Account |
|
Login |
heliocampusserviceaccount |
|
Email Address |
This does not need to be a real email, we suggest heliocampusserviceaccount@<YOUR INSTITUTION EMAIL DOMAIN>.edu |
-
Uncheck Email the user about this account creation
-
Click Add User
If you plan on matching on SIS ID or Integration ID:
-
Find and click on the user that you just created.
-
Under Login Information, click the Edit (pencil icon).
-
Add the following values:
|
Field |
Value |
|---|---|
|
SIS ID |
heliocampusserviceaccount |
|
Integration ID |
heliocampusserviceaccount |
-
Click Update Login to save the changes.
2. Create a Service Role in Canvas
Create an Account Role that grants the service account the necessary permissions.
-
Log into Canvas as an Admin.
-
Navigate to Admin and select the appropriate managed account.
-
Click Permissions
-
Click Account Roles
-
Click Add Role
-
Role Name: HelioCampus Service Role
-
Click Save
-
Enable Required Permissions:
-
Course Content - view -
Courses - view list -
Grades - view all grades -
SIS Data - read -
Users - view login IDs -
Users - view primary email address
-
-
Enable Optional Permissions:
-
Manage Assignments and Quizzes- Enable if your institution plans on assessing quiz data in HelioCampus Assessment & Credentialing. -
Grades - edit- Enable if your institution plans on sending student grades for converted assignments in HelioCampus Assessment & Credentialing back to Canvas. -
Reports - manage- Enable if your institution utilizes cross-listed courses.
-
-
Click X to close the new role.
3. Assign the Service Role to the Service Account
-
Log into Canvas as an Admin.
-
Navigate to Admin and select the appropriate managed account.
-
Click Settings
-
Click Admins
-
Scroll to the bottom and Click + Account Admins
-
Click the Add More drop-down menu, select the service role created in Step 2.
-
Enter the email address or username of the service account created in Step 1.
-
Click Continue.
-
If the user appears with a check, Click OK, Looks Good, Add This 1 User to finalize the setup.
Create the Service Account in HelioCampus Assessment & Credentialing
To integrate the service account you created in Canvas with HelioCampus Assessment & Credentialing, follow these steps.
This step should be completed by one of your institution’s HelioCampus Assessment & Credentialing Institutional Admins.
-
Log into your institution’s HelioCampus Assessment & Credentialing
-
Click the hamburger menu in the top left corner.
-
Scroll down to the Admin Tools section of the menu.
-
Click on User Accounts Manager.
-
Click + NEW USER in the top right corner.
-
Choose Local User Account.
-
Fill in the User Details with the service account information from Canvas.
|
Field |
Value |
|---|---|
|
User First Name |
HelioCampus Canvas |
|
User Last Name |
Service Account |
|
User University ID |
heliocampusserviceaccount |
|
User username |
heliocampusserviceaccount |
|
User email address |
The email you created in Canvas for the service account. |
|
Enter a strong password |
Create a strong password for the service account and be sure to securely record it, as you will need it later during the API authorization process |
|
Re-enter the password |
Re-enter the password |
-
Click + ADD ROLE
-
Click the Select a role category drop-down menu, select General.
-
Click the Select a role category drop-down menu, select Institutional Admin.
-
Click the Select one or more Institutions drop-down menu, select your institution.
-
Click ADD ROLE.
Once all steps are completed, return to the main Canvas Integration Guide to finalize the integration.