A workflow maps a process, showing who contributes information, who reviews it, and where a data collection form goes next. It’s the sequence of steps a collection form follows. For example, one person might complete a form, another person might review it, and a third person might provide final approval. Workflows are designed for specific processes, so the steps and review options can differ from one workflow to another.
Workflow Elements
|
Element |
Details |
|
|
1 |
Lane |
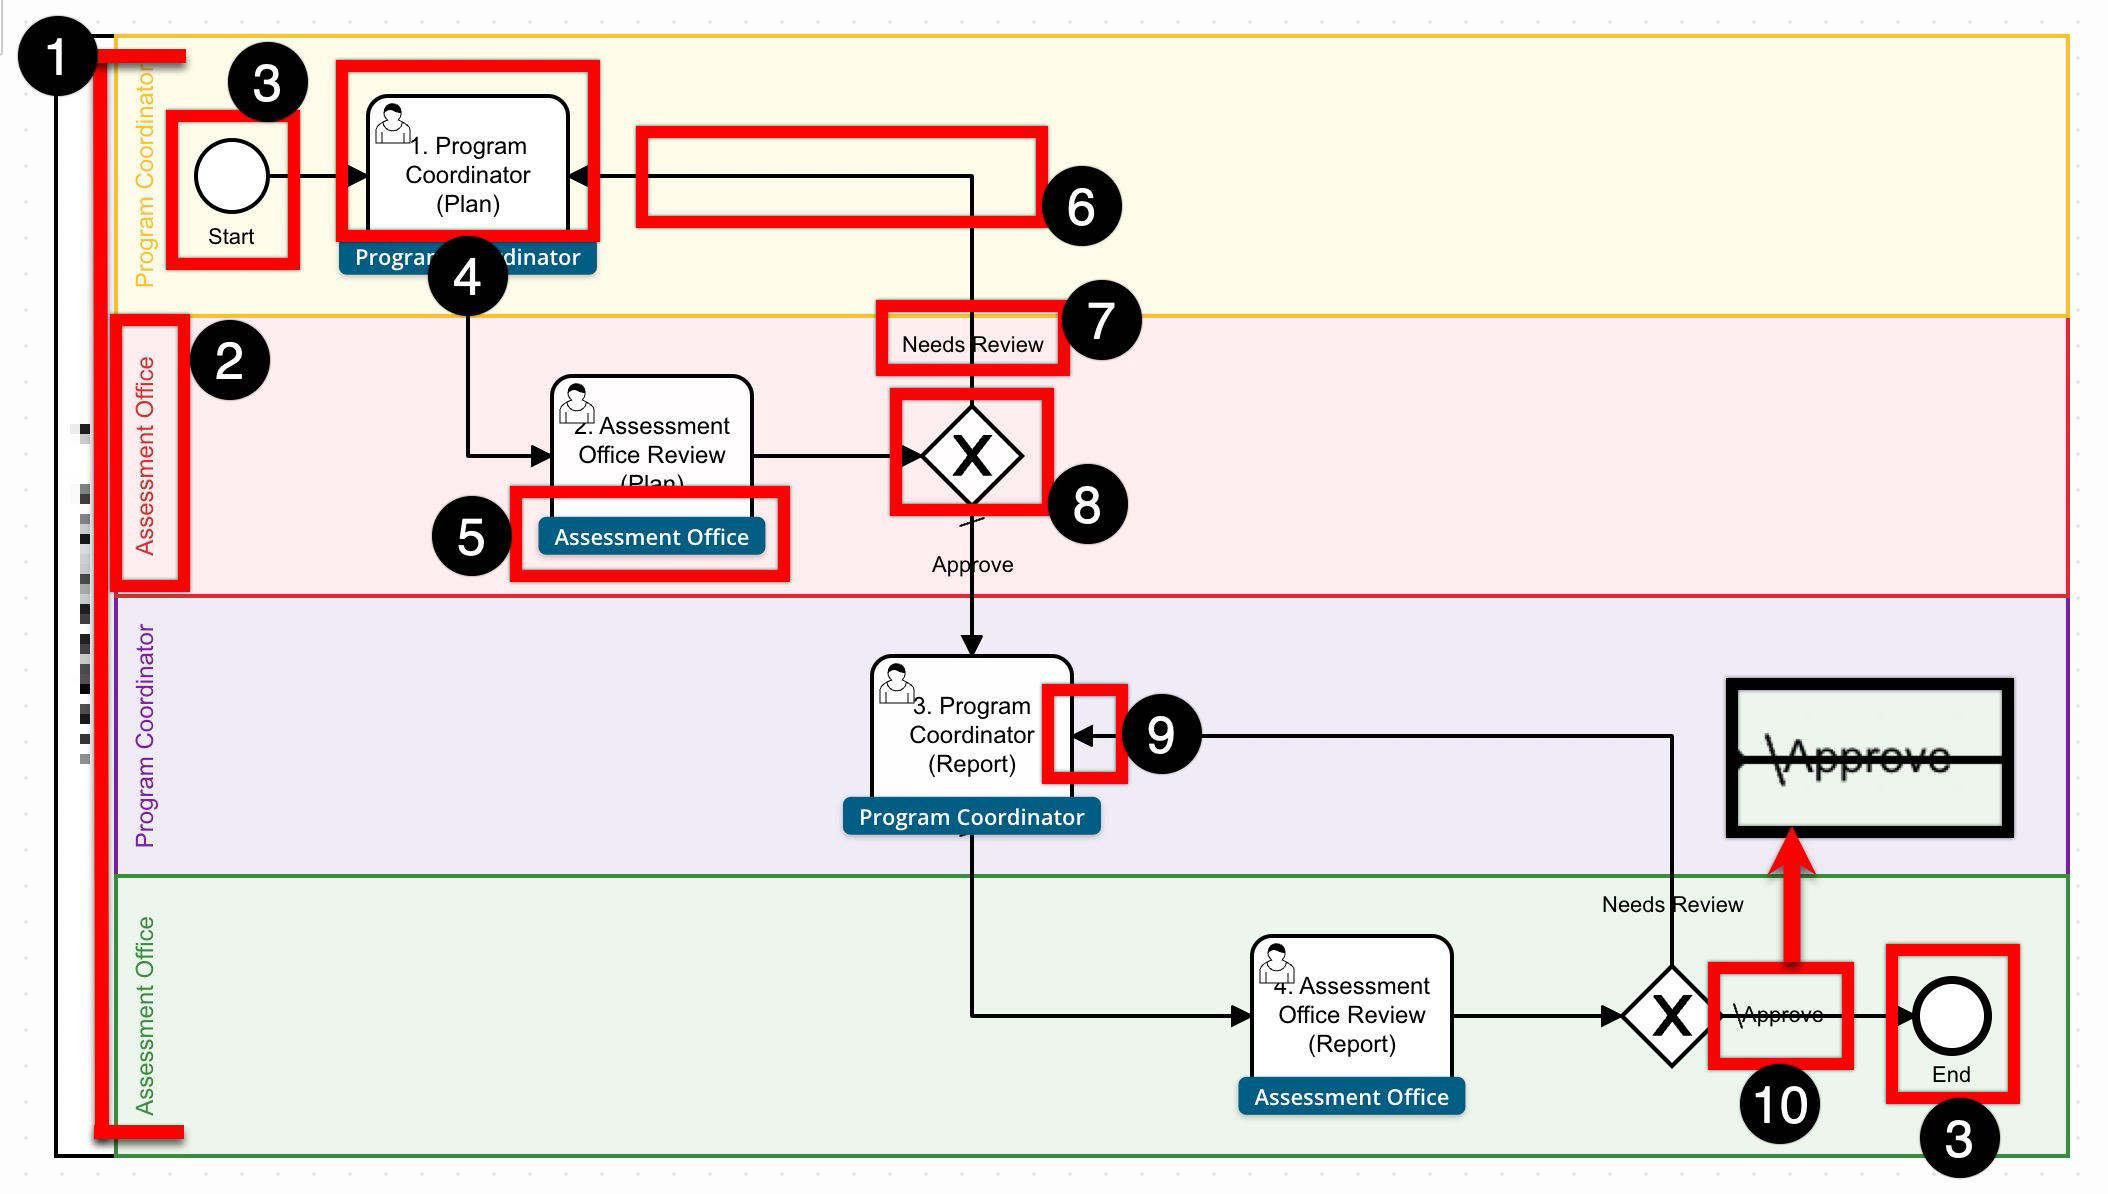
The horizontal rows that define who or which team is responsible for the work. There can be multiple steps per lane. Using lanes is optional as an organizational. |
|
2 |
Lane Label |
Who is responsible for the activity in that part of the diagram. |
|
3 |
Circle |
Start/End. Workflows can have multiple endpoints and each endpoint label can be customized. |
|
4 |
Step |
A step where someone completes an activity, such as entering information or reviewing a submission. |
|
5 |
Aligned Role |
The role associated/responsible with that step. This role directly maps to which role will receive the collection form in platform at that stage whereas the step title is general in nature. |
|
6 |
Route |
The connector or path that shows where the workflow moves next, step to step, and across lanes (if used). For each route, especially routes that result in branches, a default flow is required. |
|
7 |
Route Label |
The action or outcome associated with that route, such as approval or a request for revisions. If branching routes are used, labels should be carefully considered to ensure clarity in the flow. |
|
8 |
Diamond/X |
A decision point where the form follows one of the available routes. |
|
9 |
Arrows |
The direction a form moves as it progresses through the workflow, step to step, and across lanes (if used). |
|
10 |
Default Flow |
The required route that identifies where a form moves when no other route condition applies. Each decision point or set of branching routes must have one default flow so the workflow has a clear next step. |
Reading a Workflow
Find the initial step to identify its responsible role. Read the text inside the rectangle to understand what the step activity is, then look at the role label beside its lane to identify who performs it. The activity and the role are used to identify who does the work for that step, and what the work is.
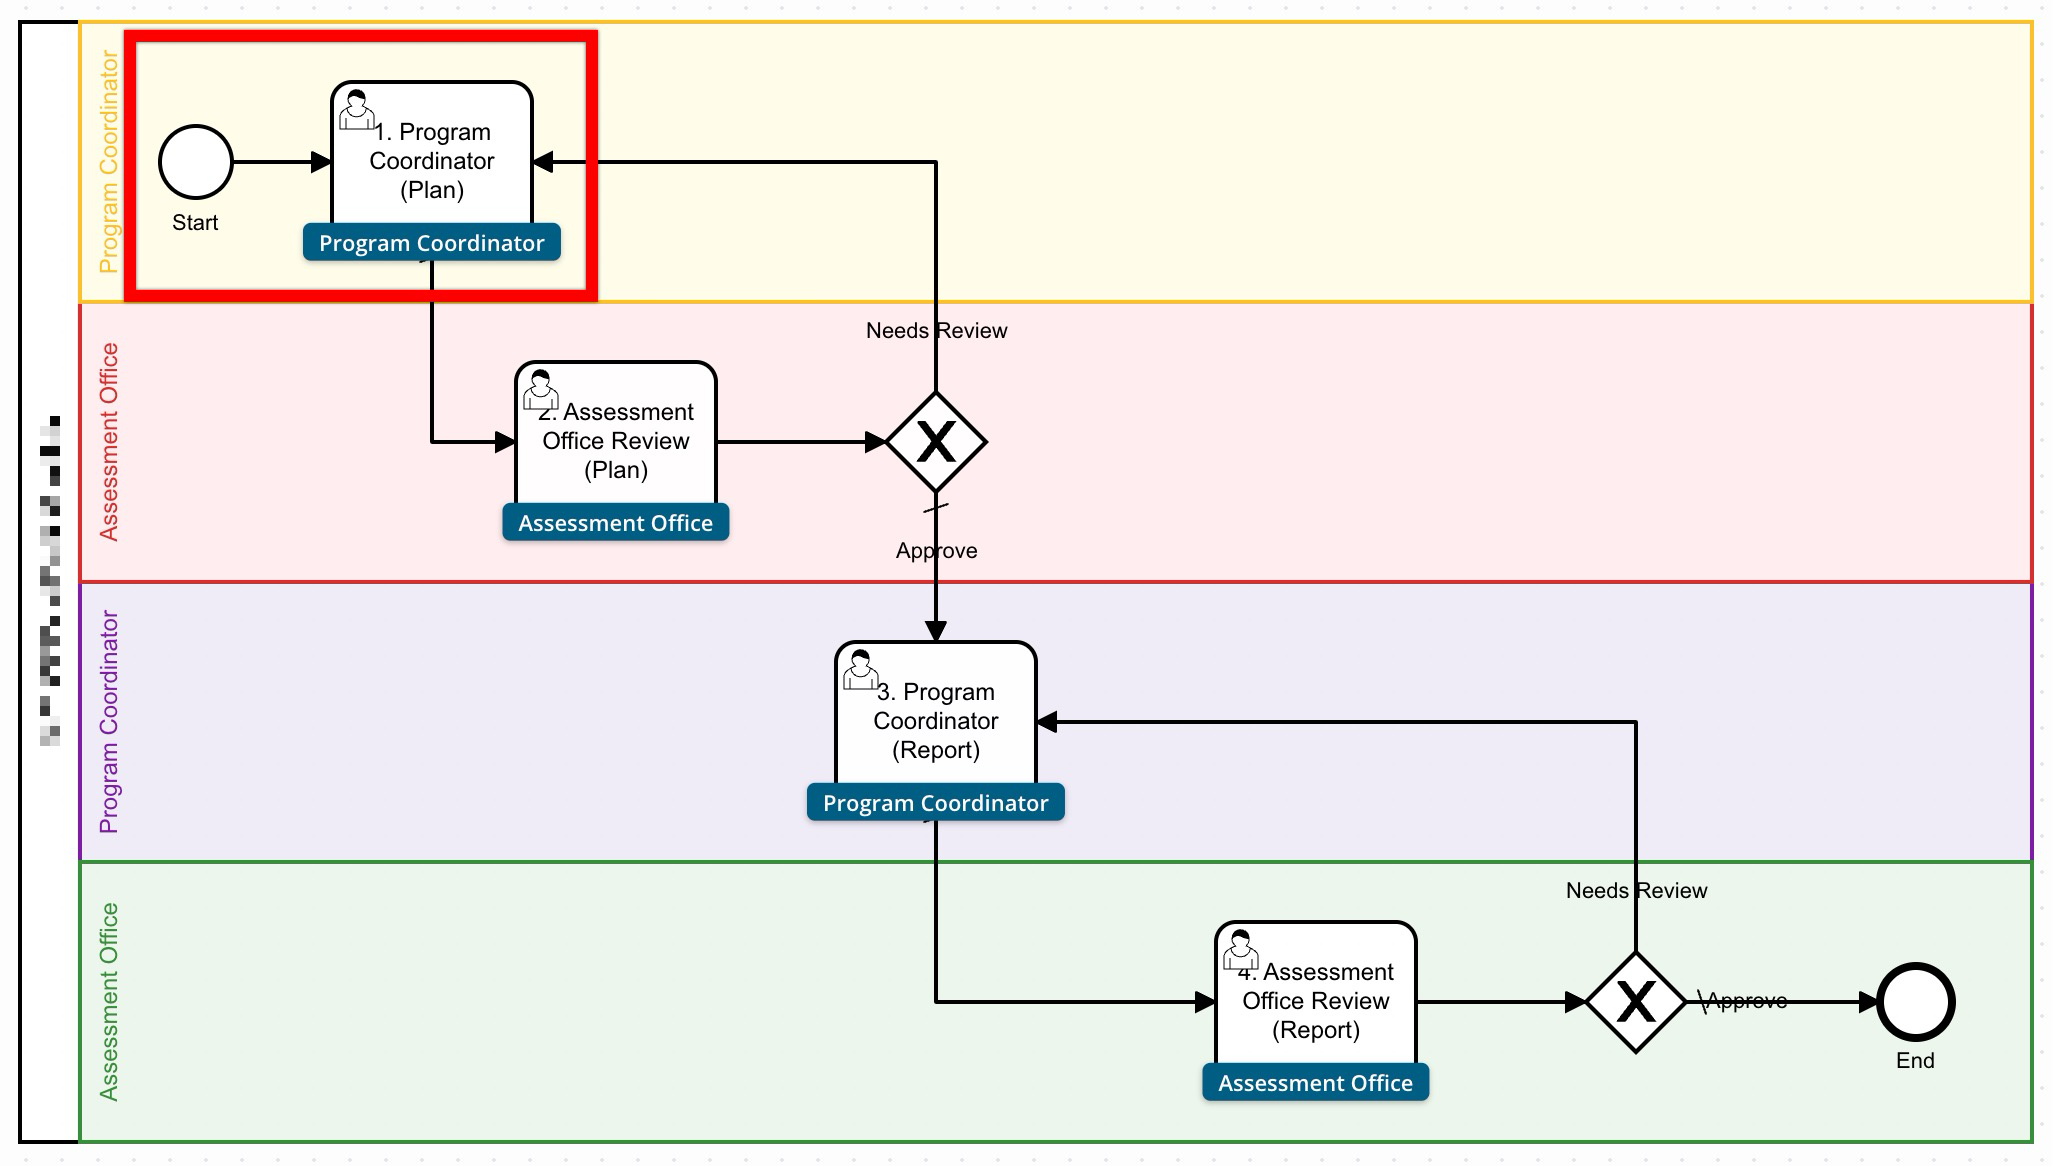
Next, find the arrow leaving the initial step. Follow its to see where the form goes after the initial step is completed and the user submits the form. Do not rely only on where a step sits in the workflow. The arrows show the route, including paths that return to an earlier activity.
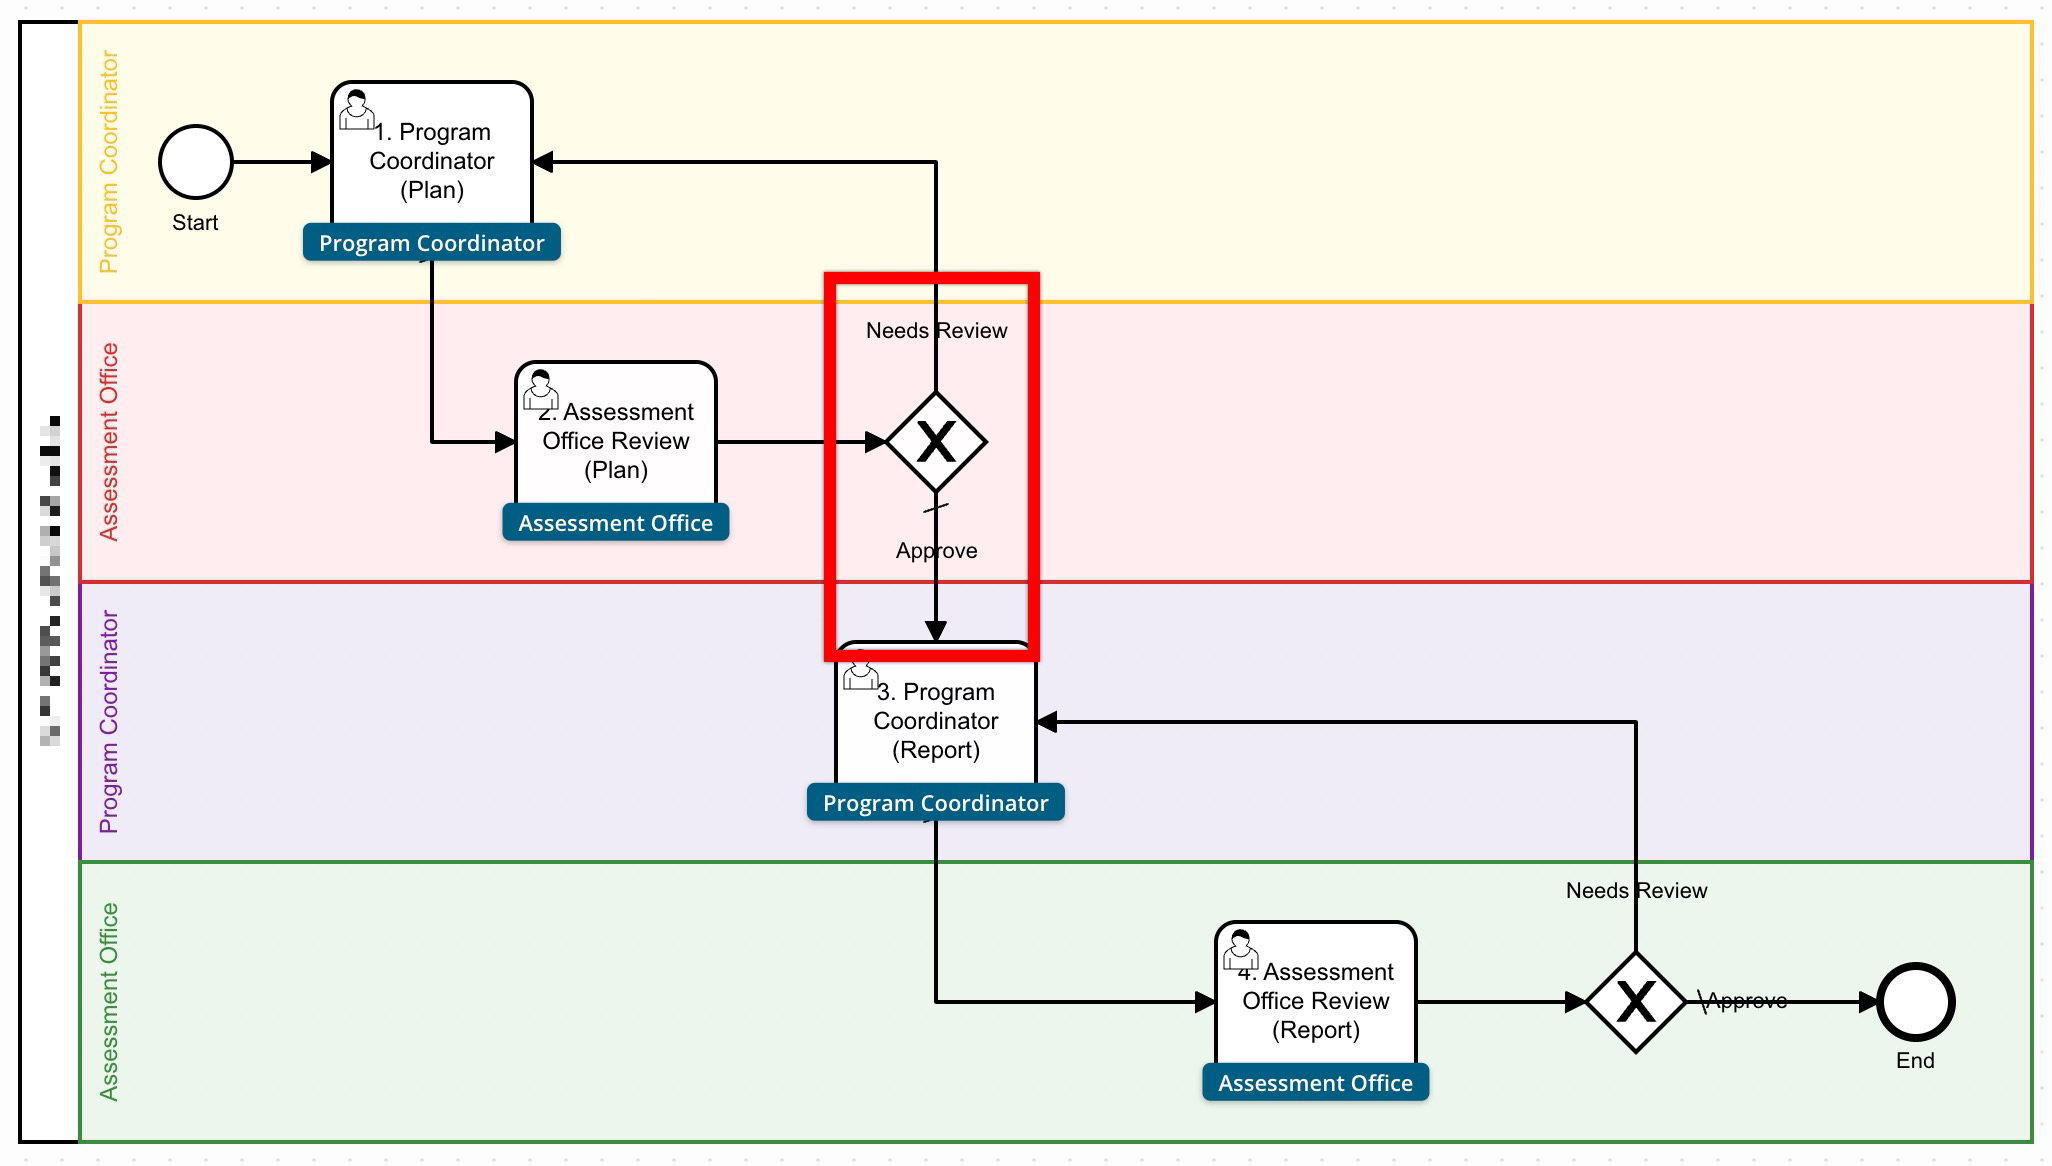
When a route reaches a diamond, look at the outgoing arrows and their labels. Using the activity text and role label, each decision paths resulting activity/role can be identified. Follow each route to its destination rather than assuming that every approval or revision request works the same way.
An arrow pointing back to an earlier activity represents a possible revision cycle. For example:
-
A coordinator submits a plan.
-
A reviewer requests changes or reviews the form again.
-
The form returns to the coordinator or the coordinator updates and resubmits it.
A return path does not mean the workflow is broken or that a new form is being created. It shows how the process allows information to be revised and reviewed again.
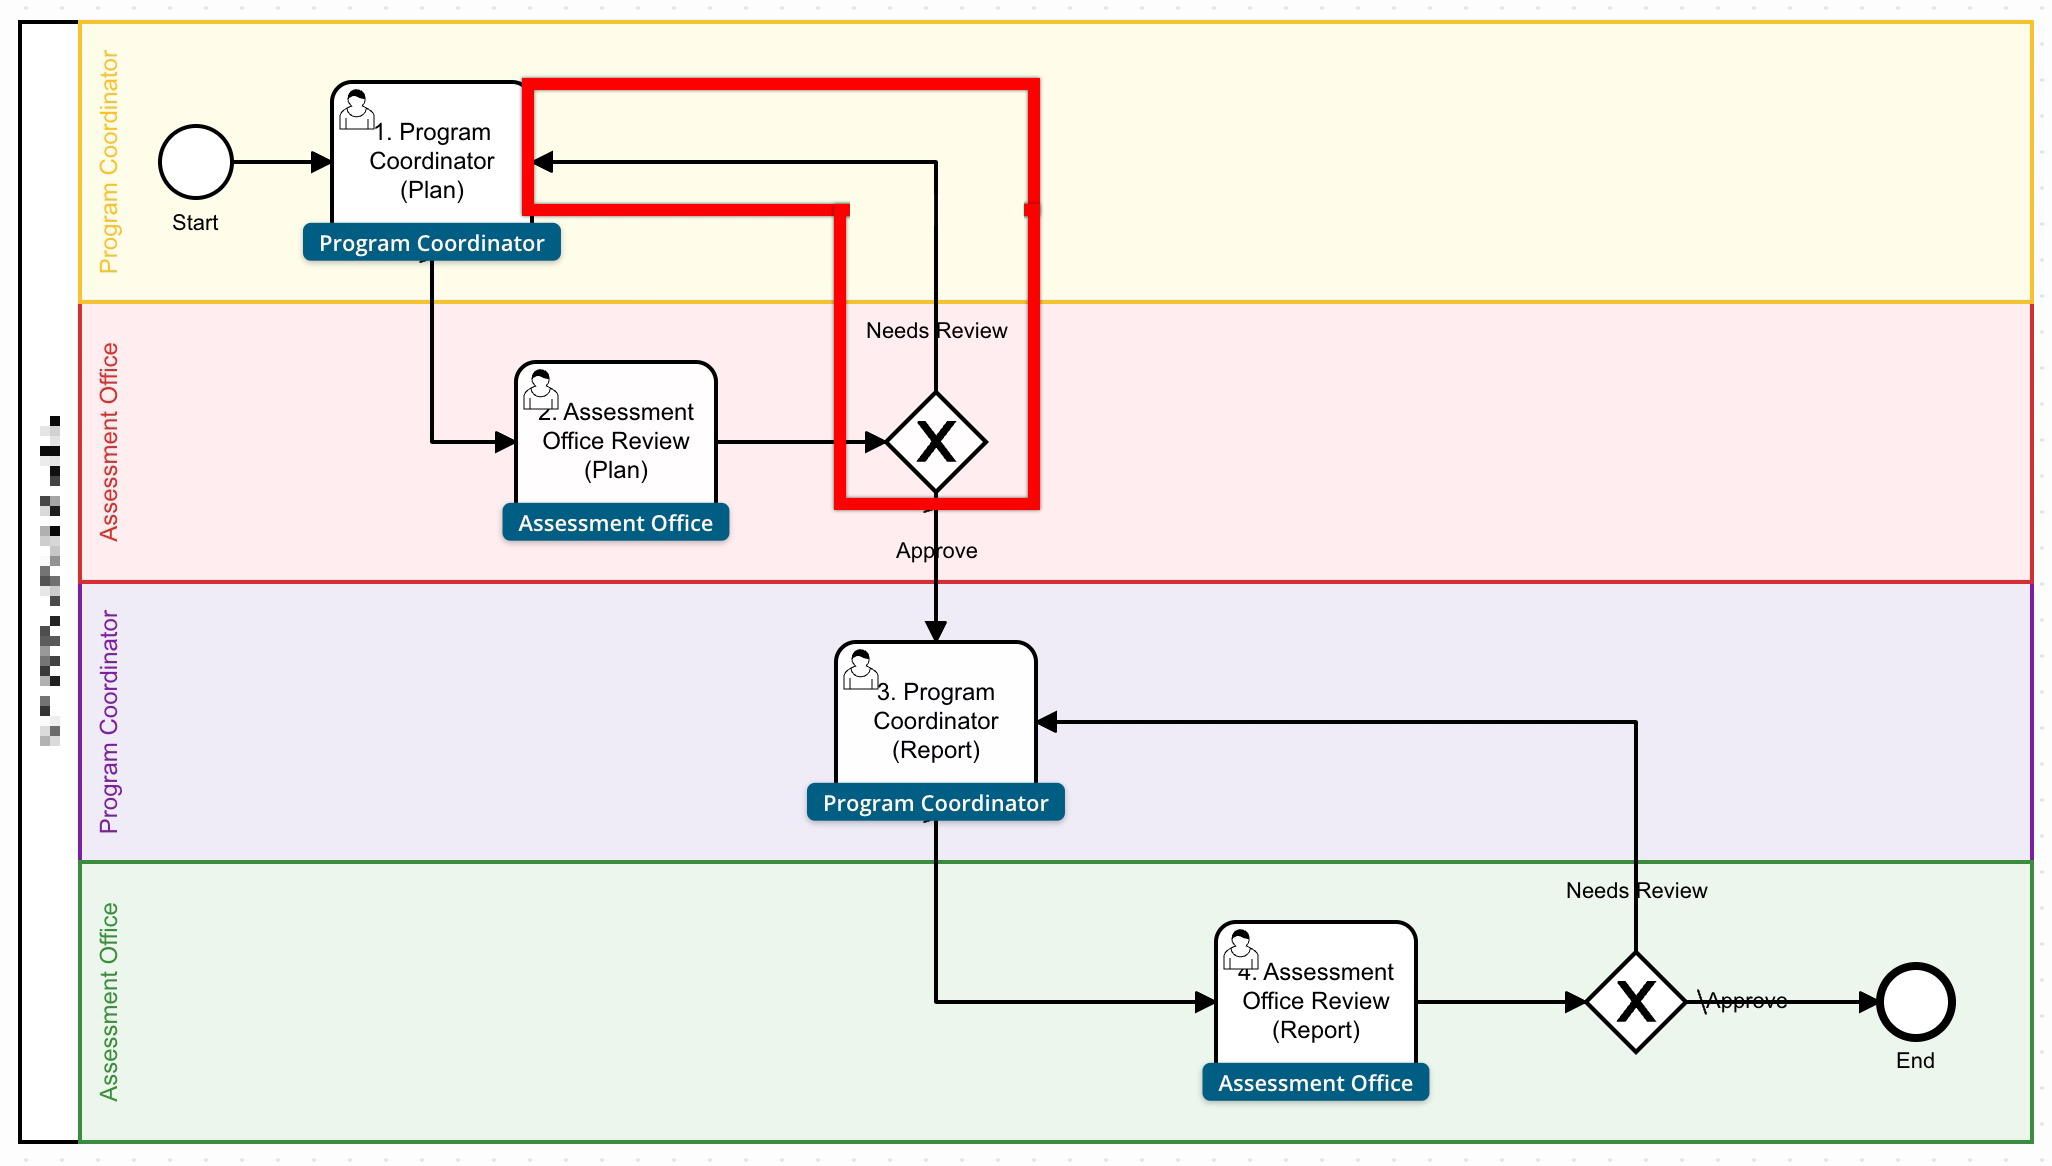
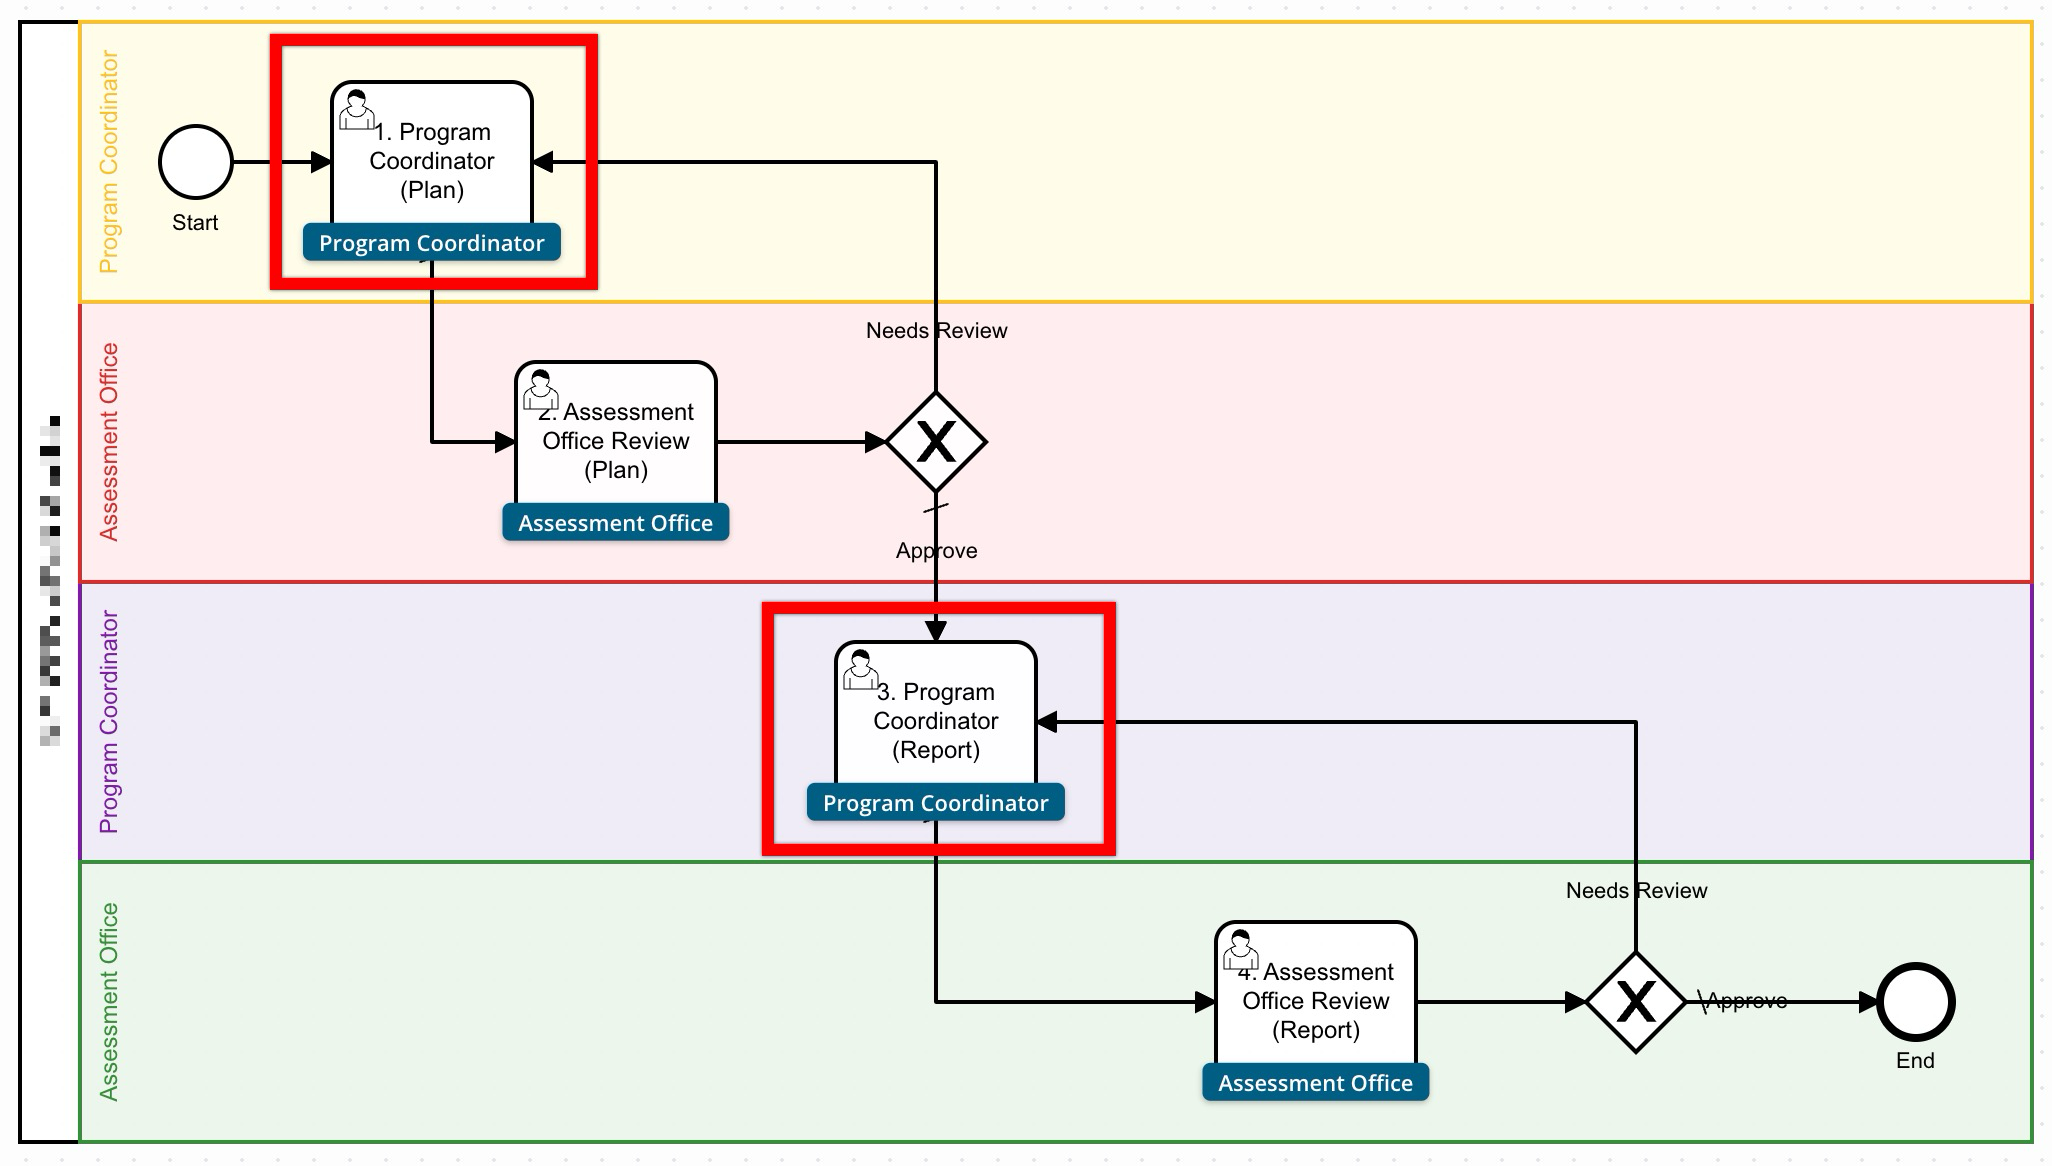
By continuing to follow the routes and arrows users can ensure they’re reading the correct role and activity at each step. The same role may appear more than once. For example, a Program Coordinator might submit an assessment plan early in the process and provide assessment results later. These are different activities, even though the same role performs both.
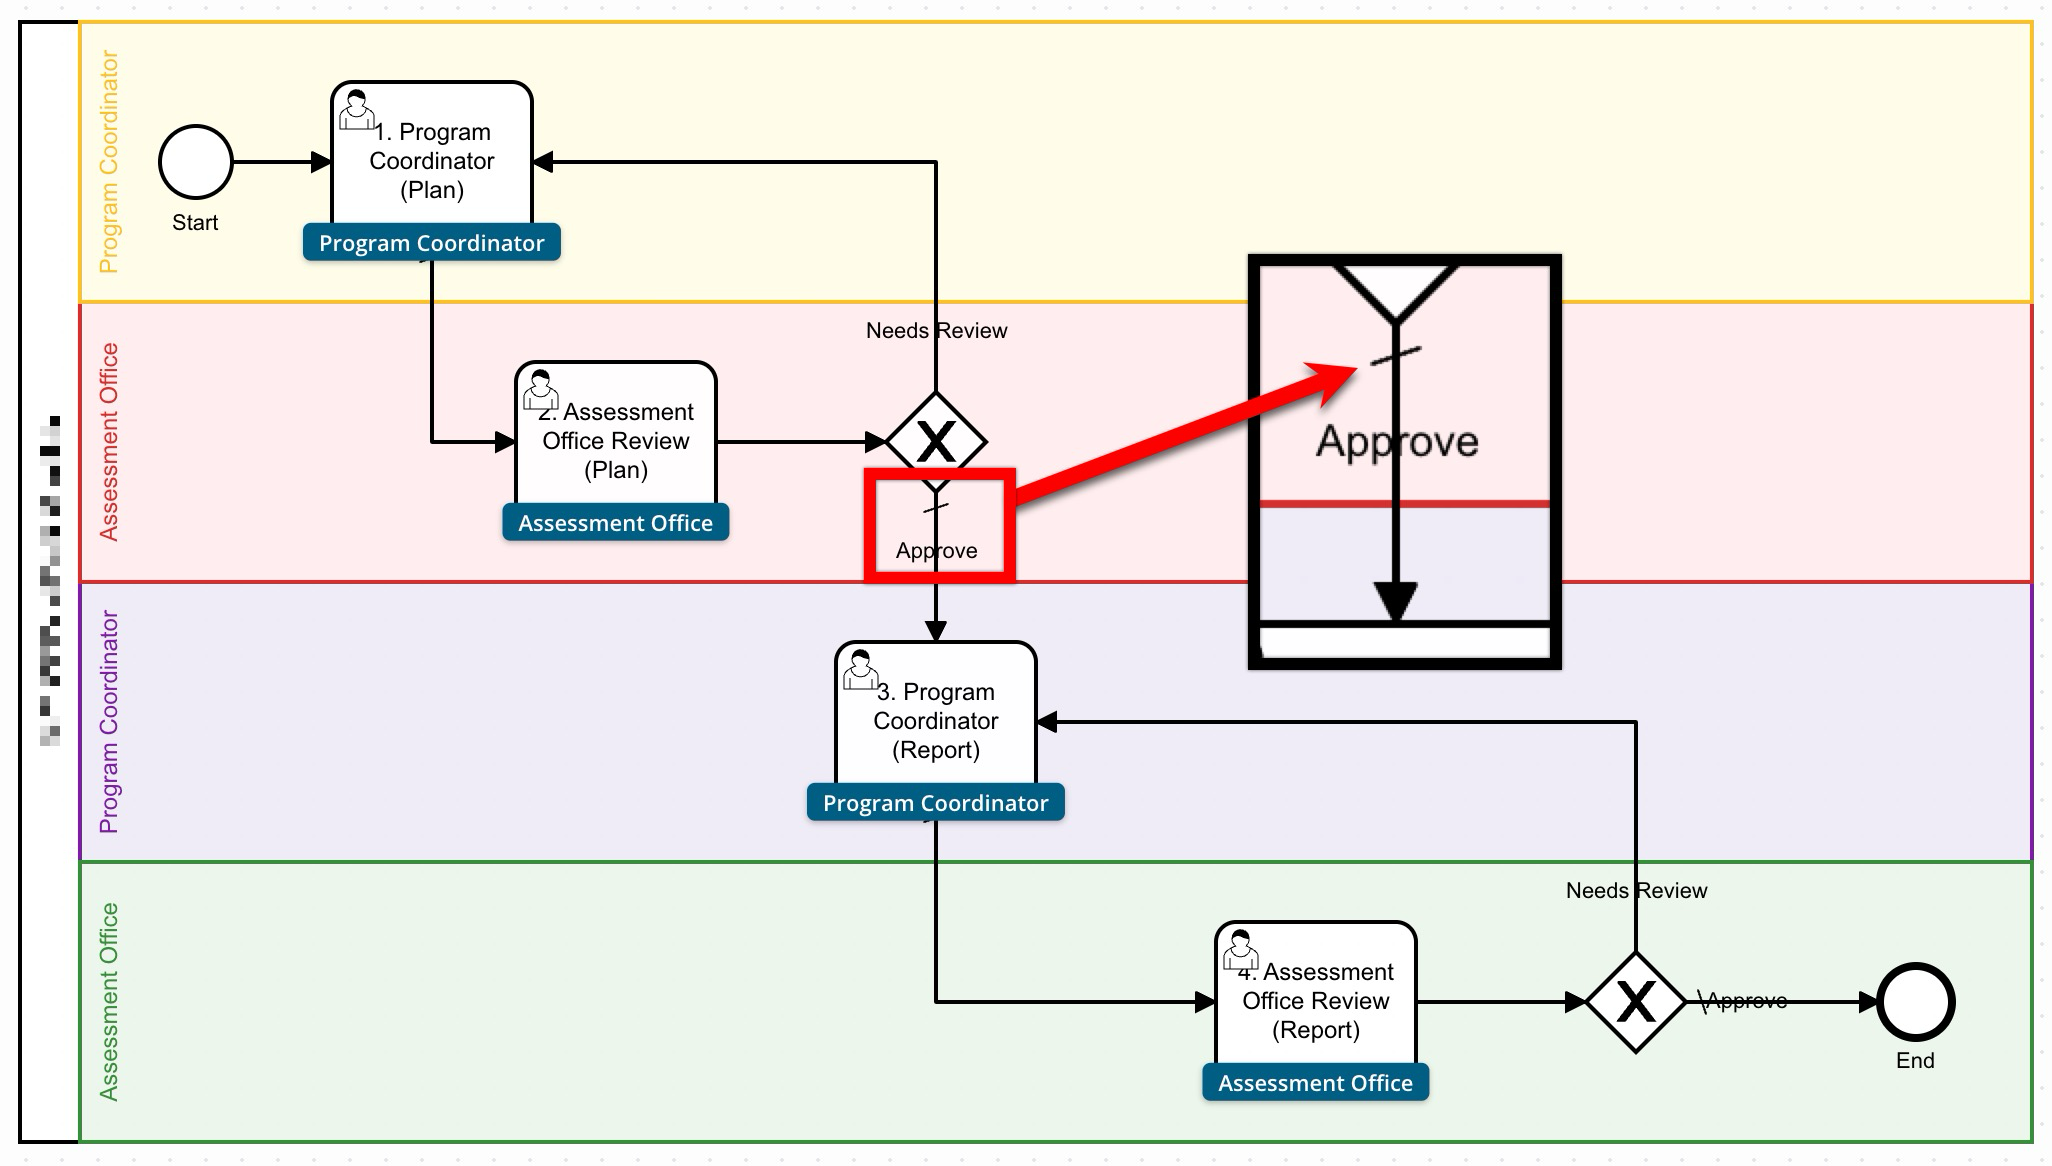
A slash indicates a workflow’s default flow. This is the required route that identifies where a form moves when no other route condition applies. In practice, the default flow acts as the workflow’s fallback path: if none of the configured conditions on the other routes are met, the form automatically follows the slashed route to the next step. Each decision point must have one default flow so the process never stalls and users always have a clear next action.
Example Workflow Diagram
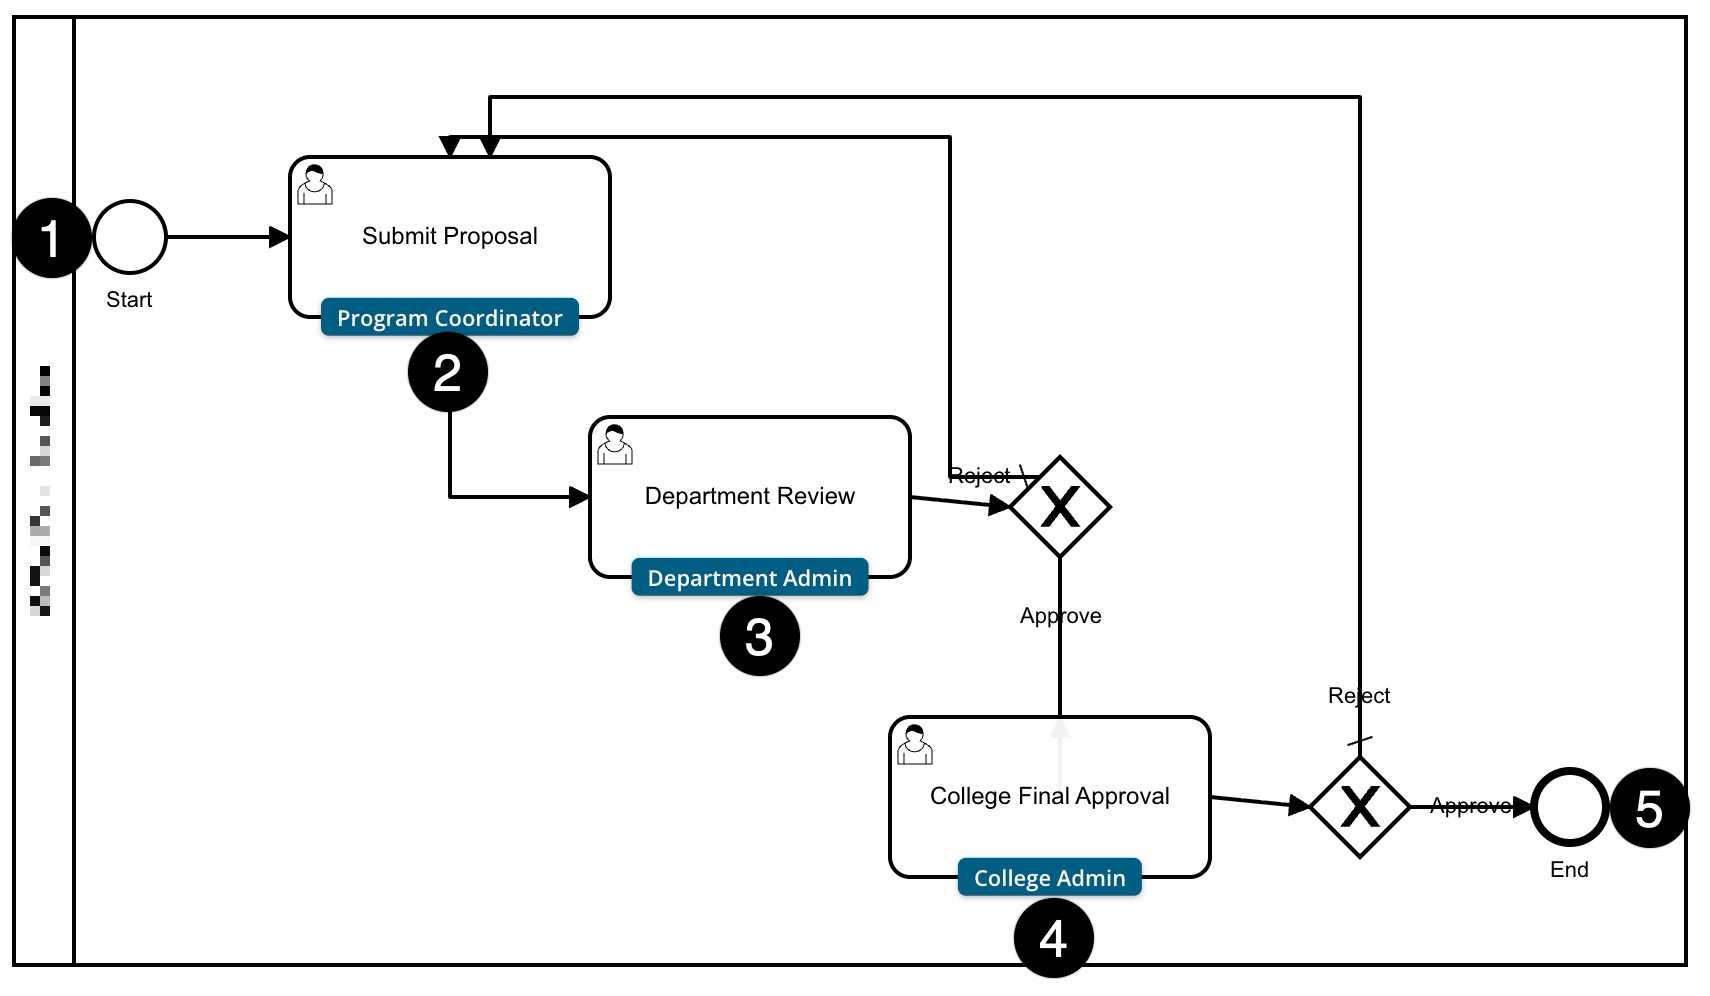
The workflow example shown below begins with Submit Proposal, assigned to a Program Coordinator (1). The form then moves to Department Review, assigned to the Department Admin (2). If approved, it advances to College Final Approval, assigned to the College Admin (4). If rejected during Department Review (3), it returns to the Program Coordinator’s Submit Proposal step (2). At the College Final Approval step (4), approval sends the form to End (5), while rejection returns it to Submit Proposal (1), allowing the Program Coordinator to revise and resubmit it through the review process.