
Use workflow editing when an existing draft needs changes before publishing or when a published workflow needs to be updated for a new process, policy, or collection cycle. Review the workflow carefully before saving or publishing changes, especially when the workflow controls required reviews, approvals, or handoffs. Editing a workflow allows users to update the workflow name, refine the process steps, adjust roles or assignments, and confirm that the workflow matches the Institution’s collection process.
After editing workflows, Institutions should always review, save, and test them before publishing and making them available for association with active data collection.
Downstream & Cross-Platform Impacts
-
Siloed Edits: Workflow edits are siloed to only the Workflow Library. Edits will not affect collection schedules or instances unless updates are also made in those locations.
-
Published Workflow Availability: Unpublishing a workflow in Published status will make it unavailable for new collections or future use.
-
Form Routing and User Responsibilities: Changes to workflow steps, transitions, or assignments may affect who receives forms, what actions they must take, and when work moves to the next participant.
-
Status Tracking and Reporting: Changes to workflow stages or completion criteria may affect how collection progress is interpreted.
Considerations
-
Workflow Status and Structure: Determine whether the workflow is in Draft status or has already been published. Before editing a published workflow:
-
Review the current steps and decision points. Identify which steps to add, remove, rename, or reorder, and consider how those changes will affect the path from submission to completion.
-
Confirm the roles or users responsible for each step, including approvals. Ensure that the intended participants have the access needed to complete their work.
-
Review the conditions that move forms between steps or mark them complete. Consider alternate paths, including forms returned for revision, to help prevent incomplete or unintended routing.
-
Best Practices
-
Use clear step names that match the institution’s language.
-
Keep workflow descriptions focused on when the workflow should be used.
-
Review AI-generated or imported workflows before publishing them.
-
Test changes in a training environment before updating a production workflow.
-
Update process guides, training materials, and support instructions that reference changed steps, roles, or approval paths so participants receive consistent guidance.
Understanding The Editor
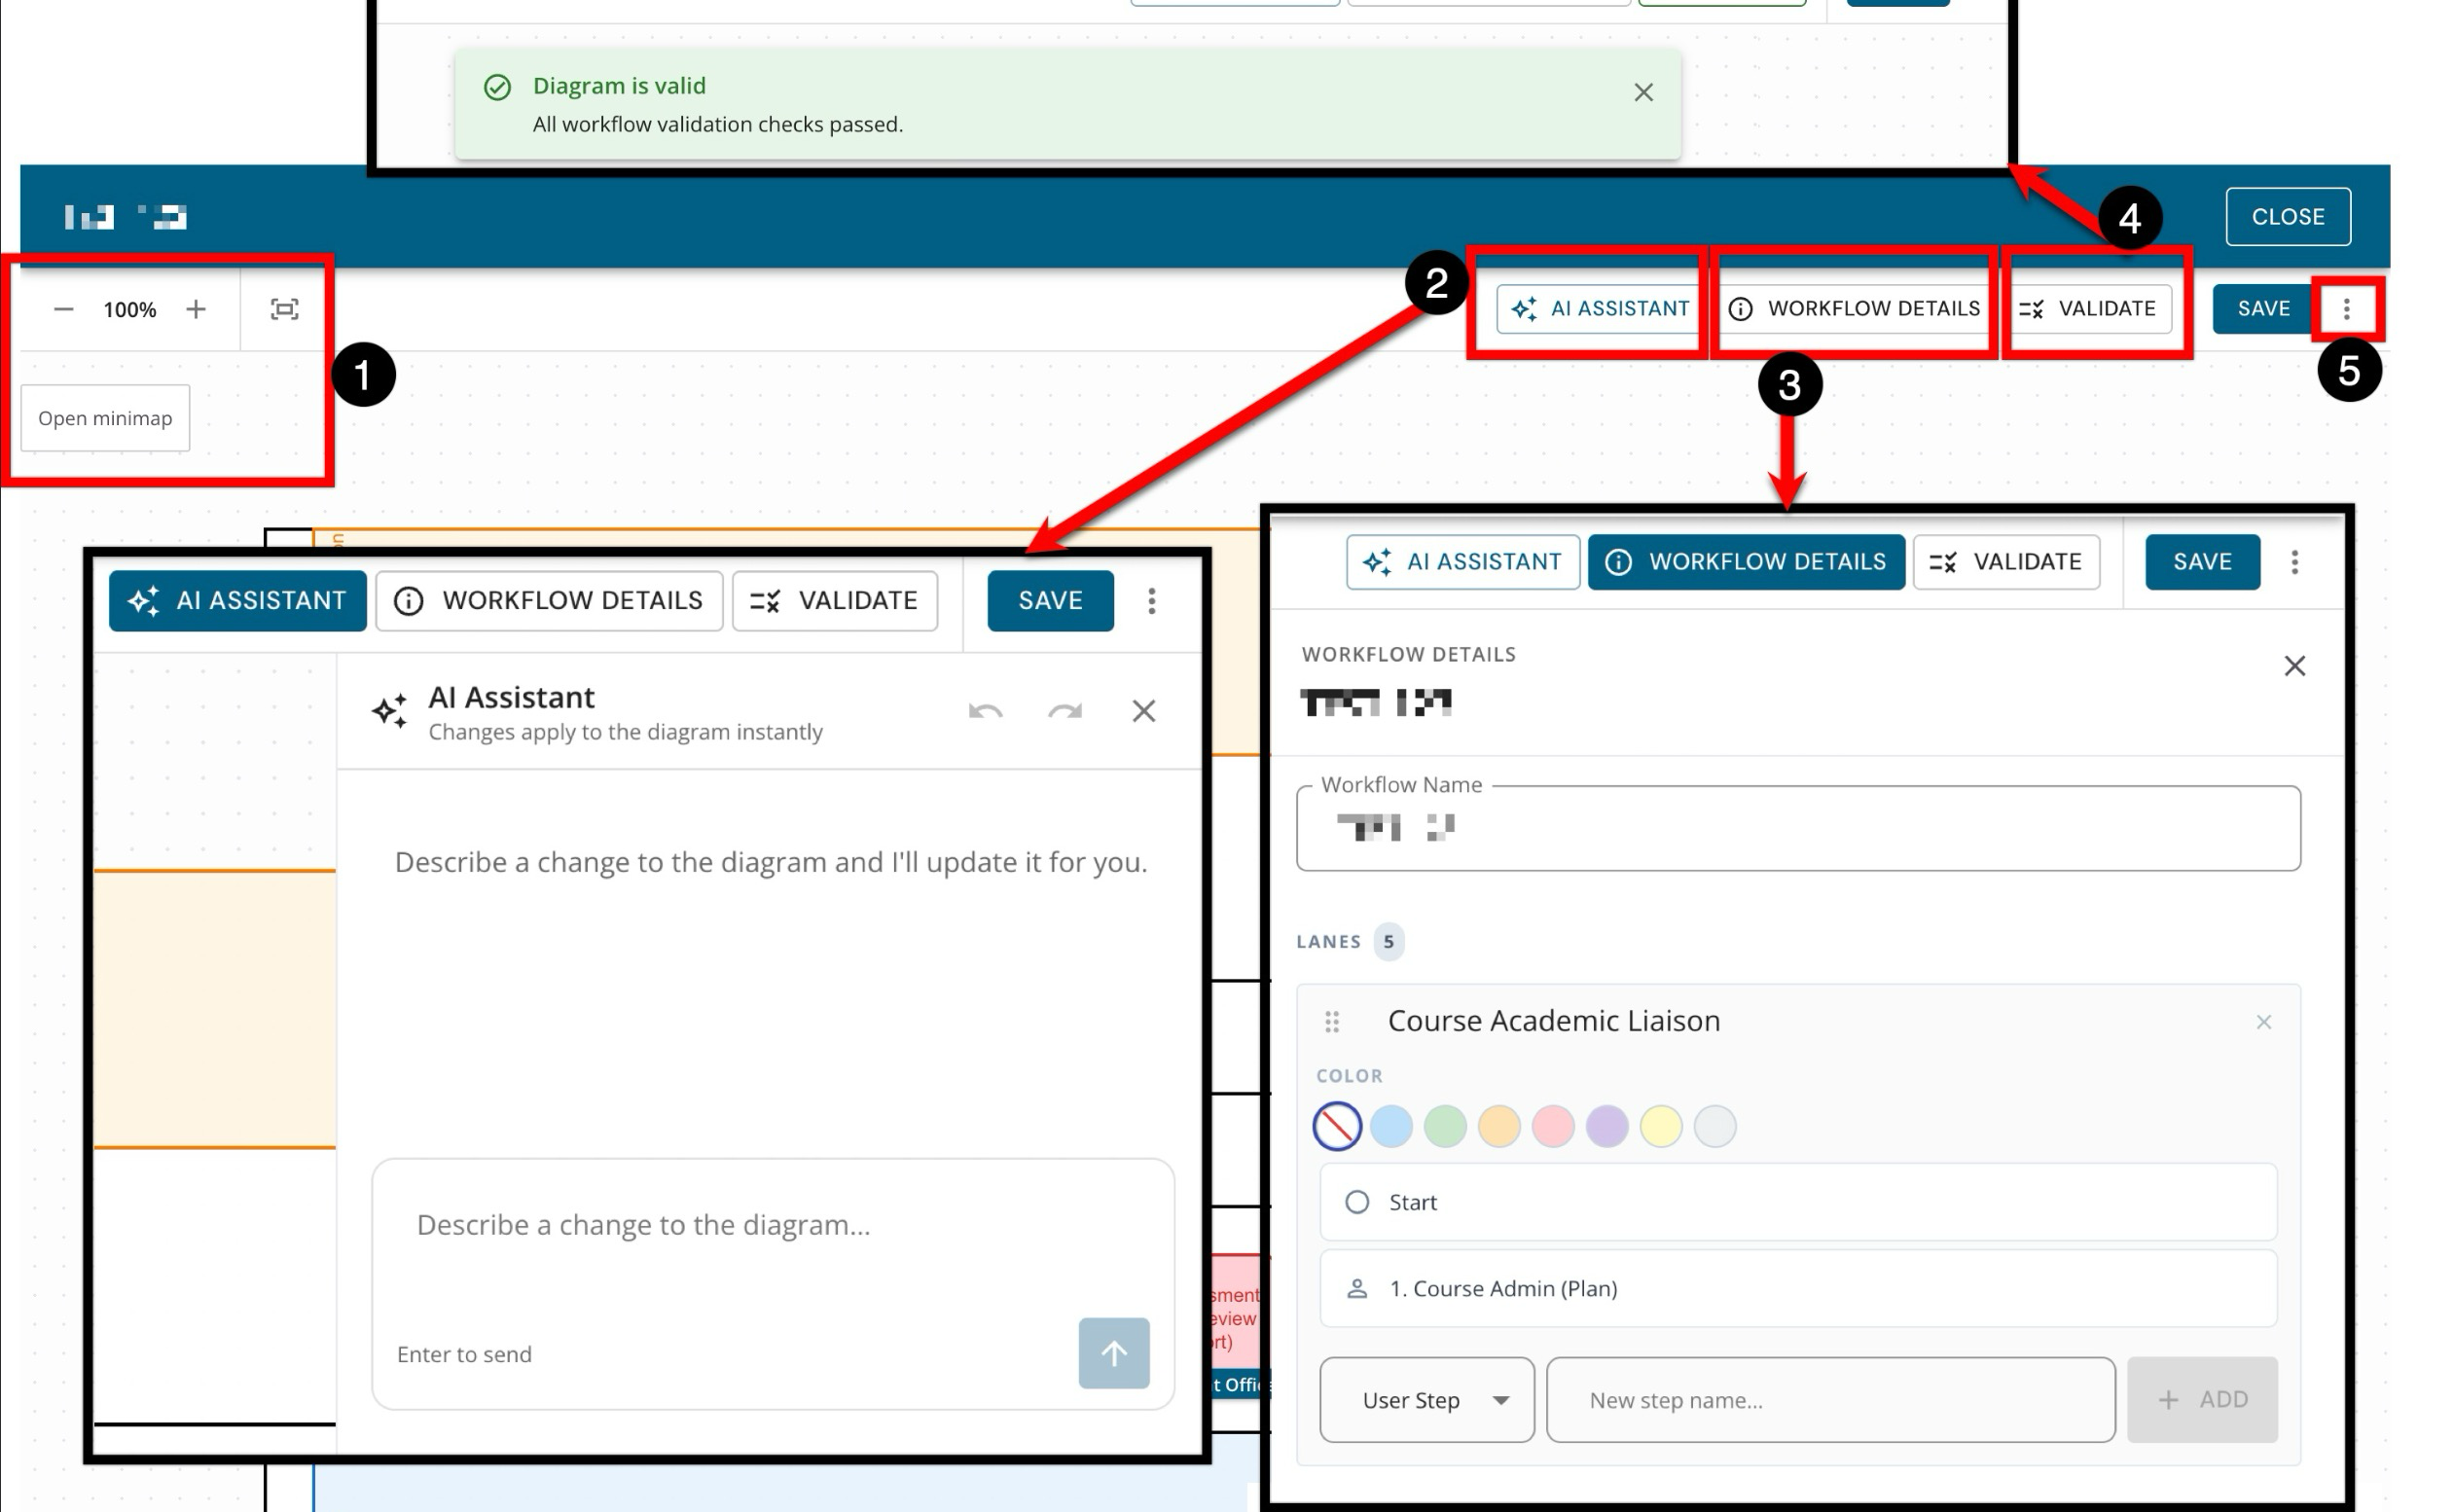
The workflow editor includes tools to navigate the diagram using the zoom controls, the fit-to-view control to fit the diagram within the available workspace, and the open a mini-map option to display a compact overview that helps navigate larger workflows (1). Select AI Assistant to describe workflow edits in plain language and have AI apply them to the diagram immediately for review (2). Selecting Workflow Details will open the details drawer for access to the workflow’s identifying information and lane configuration (3). Selecting Validate will run the editor’s workflow validation checks before final user review (4). The editor also provides the option to export a workflow to XML by expanding the More Options menu (5).
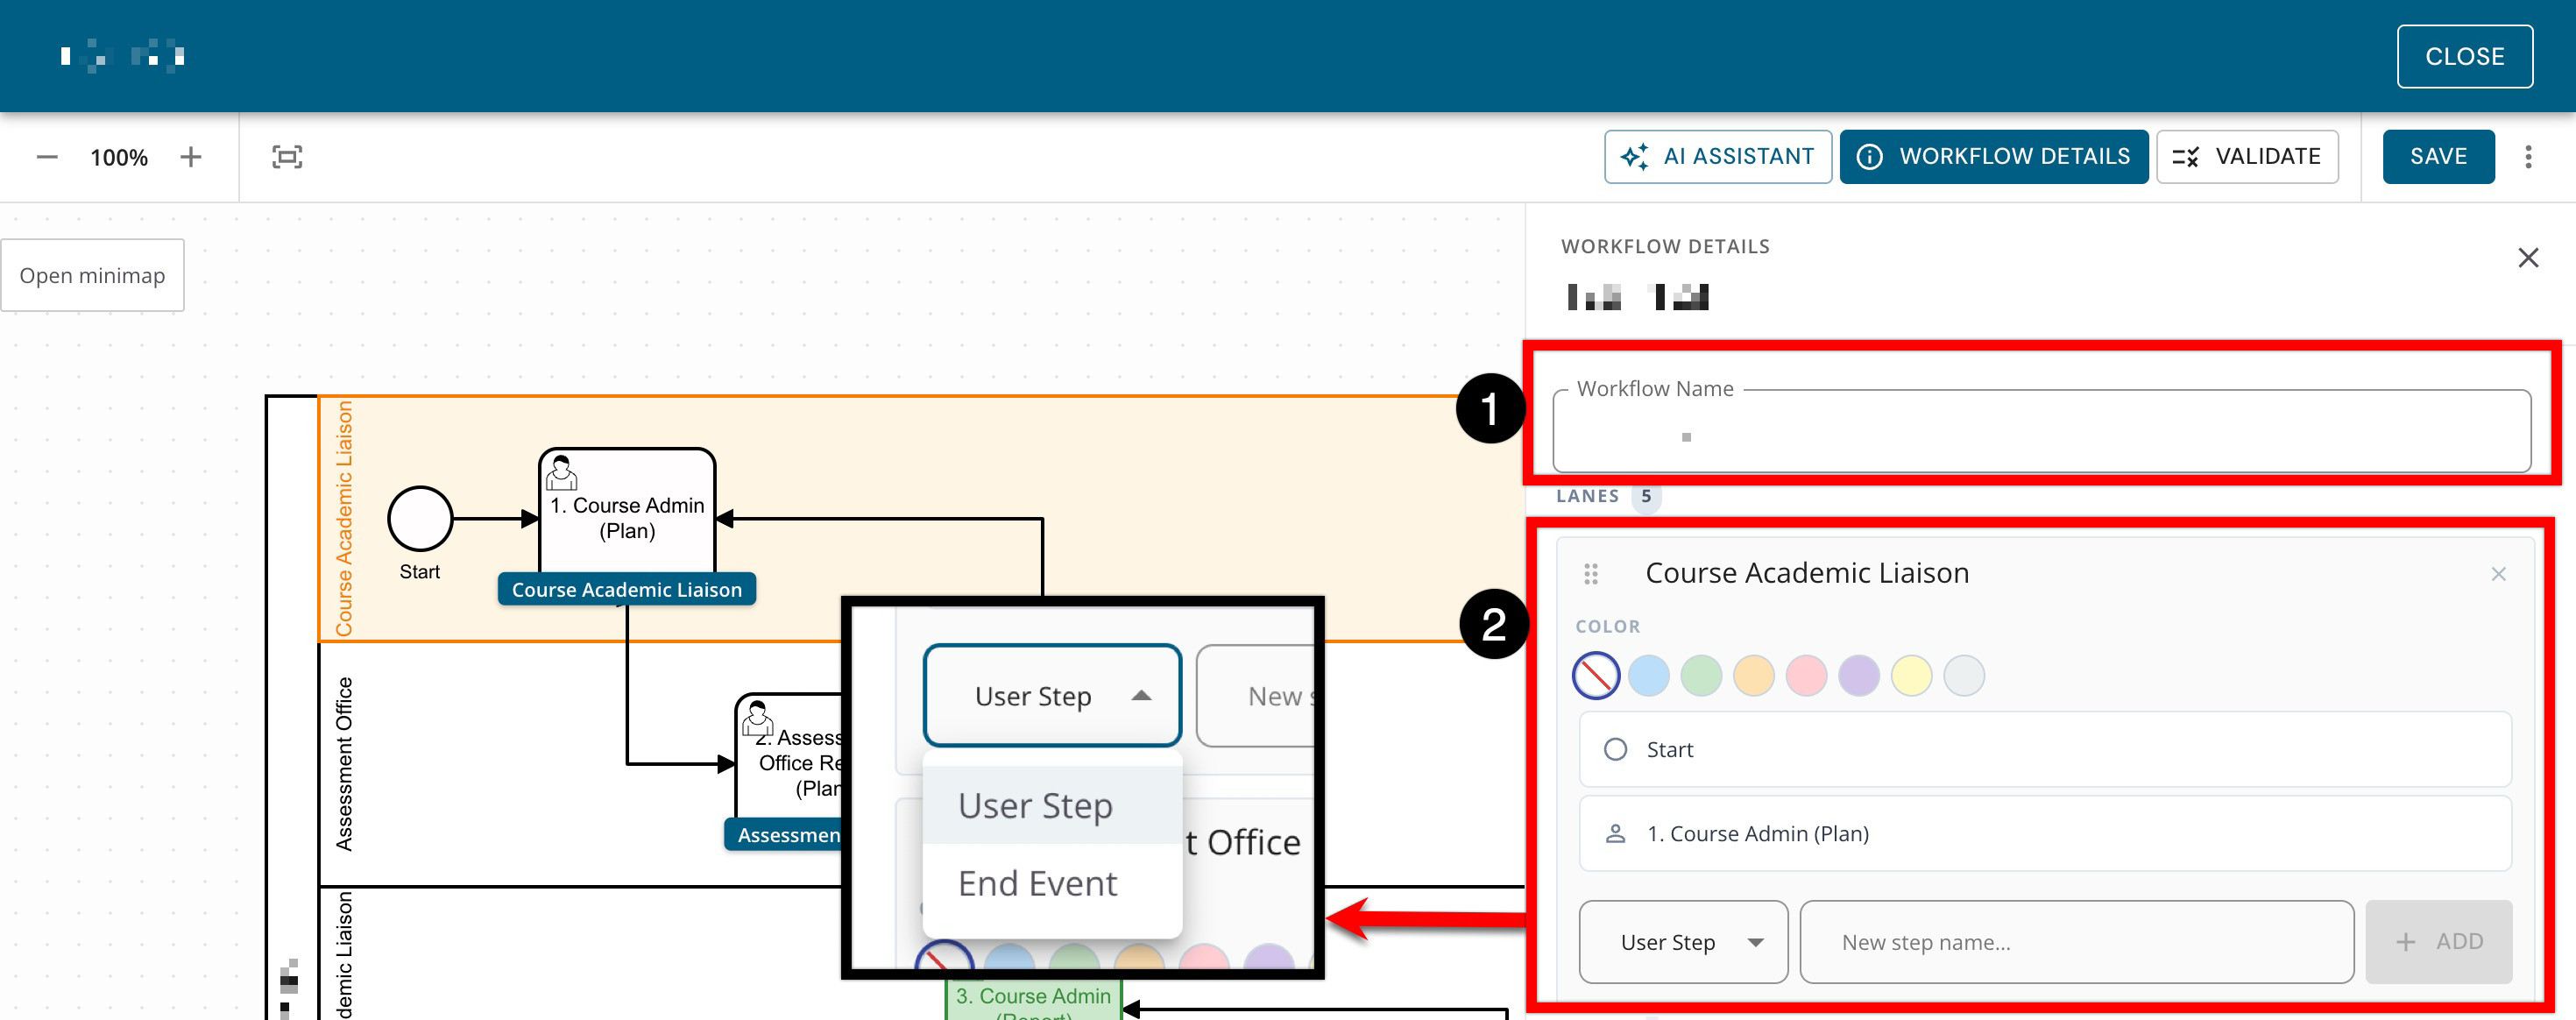
Workflow details display the workflow name, which can be changed during editing (1). While workflow lanes are entirely optional, the Lanes section identifies the roles or participant groups assigned to the workflow (2). Additional lanes can be added from the bottom of the details drawer, and steps can be added or removed from each lane
Editing Workflow Lanes
Lanes are an optional way to organize the steps/routes by showing which role is responsible for each part of the workflow, clarifying which users and roles are assigned to the correct steps, approvals, and handoffs.
-
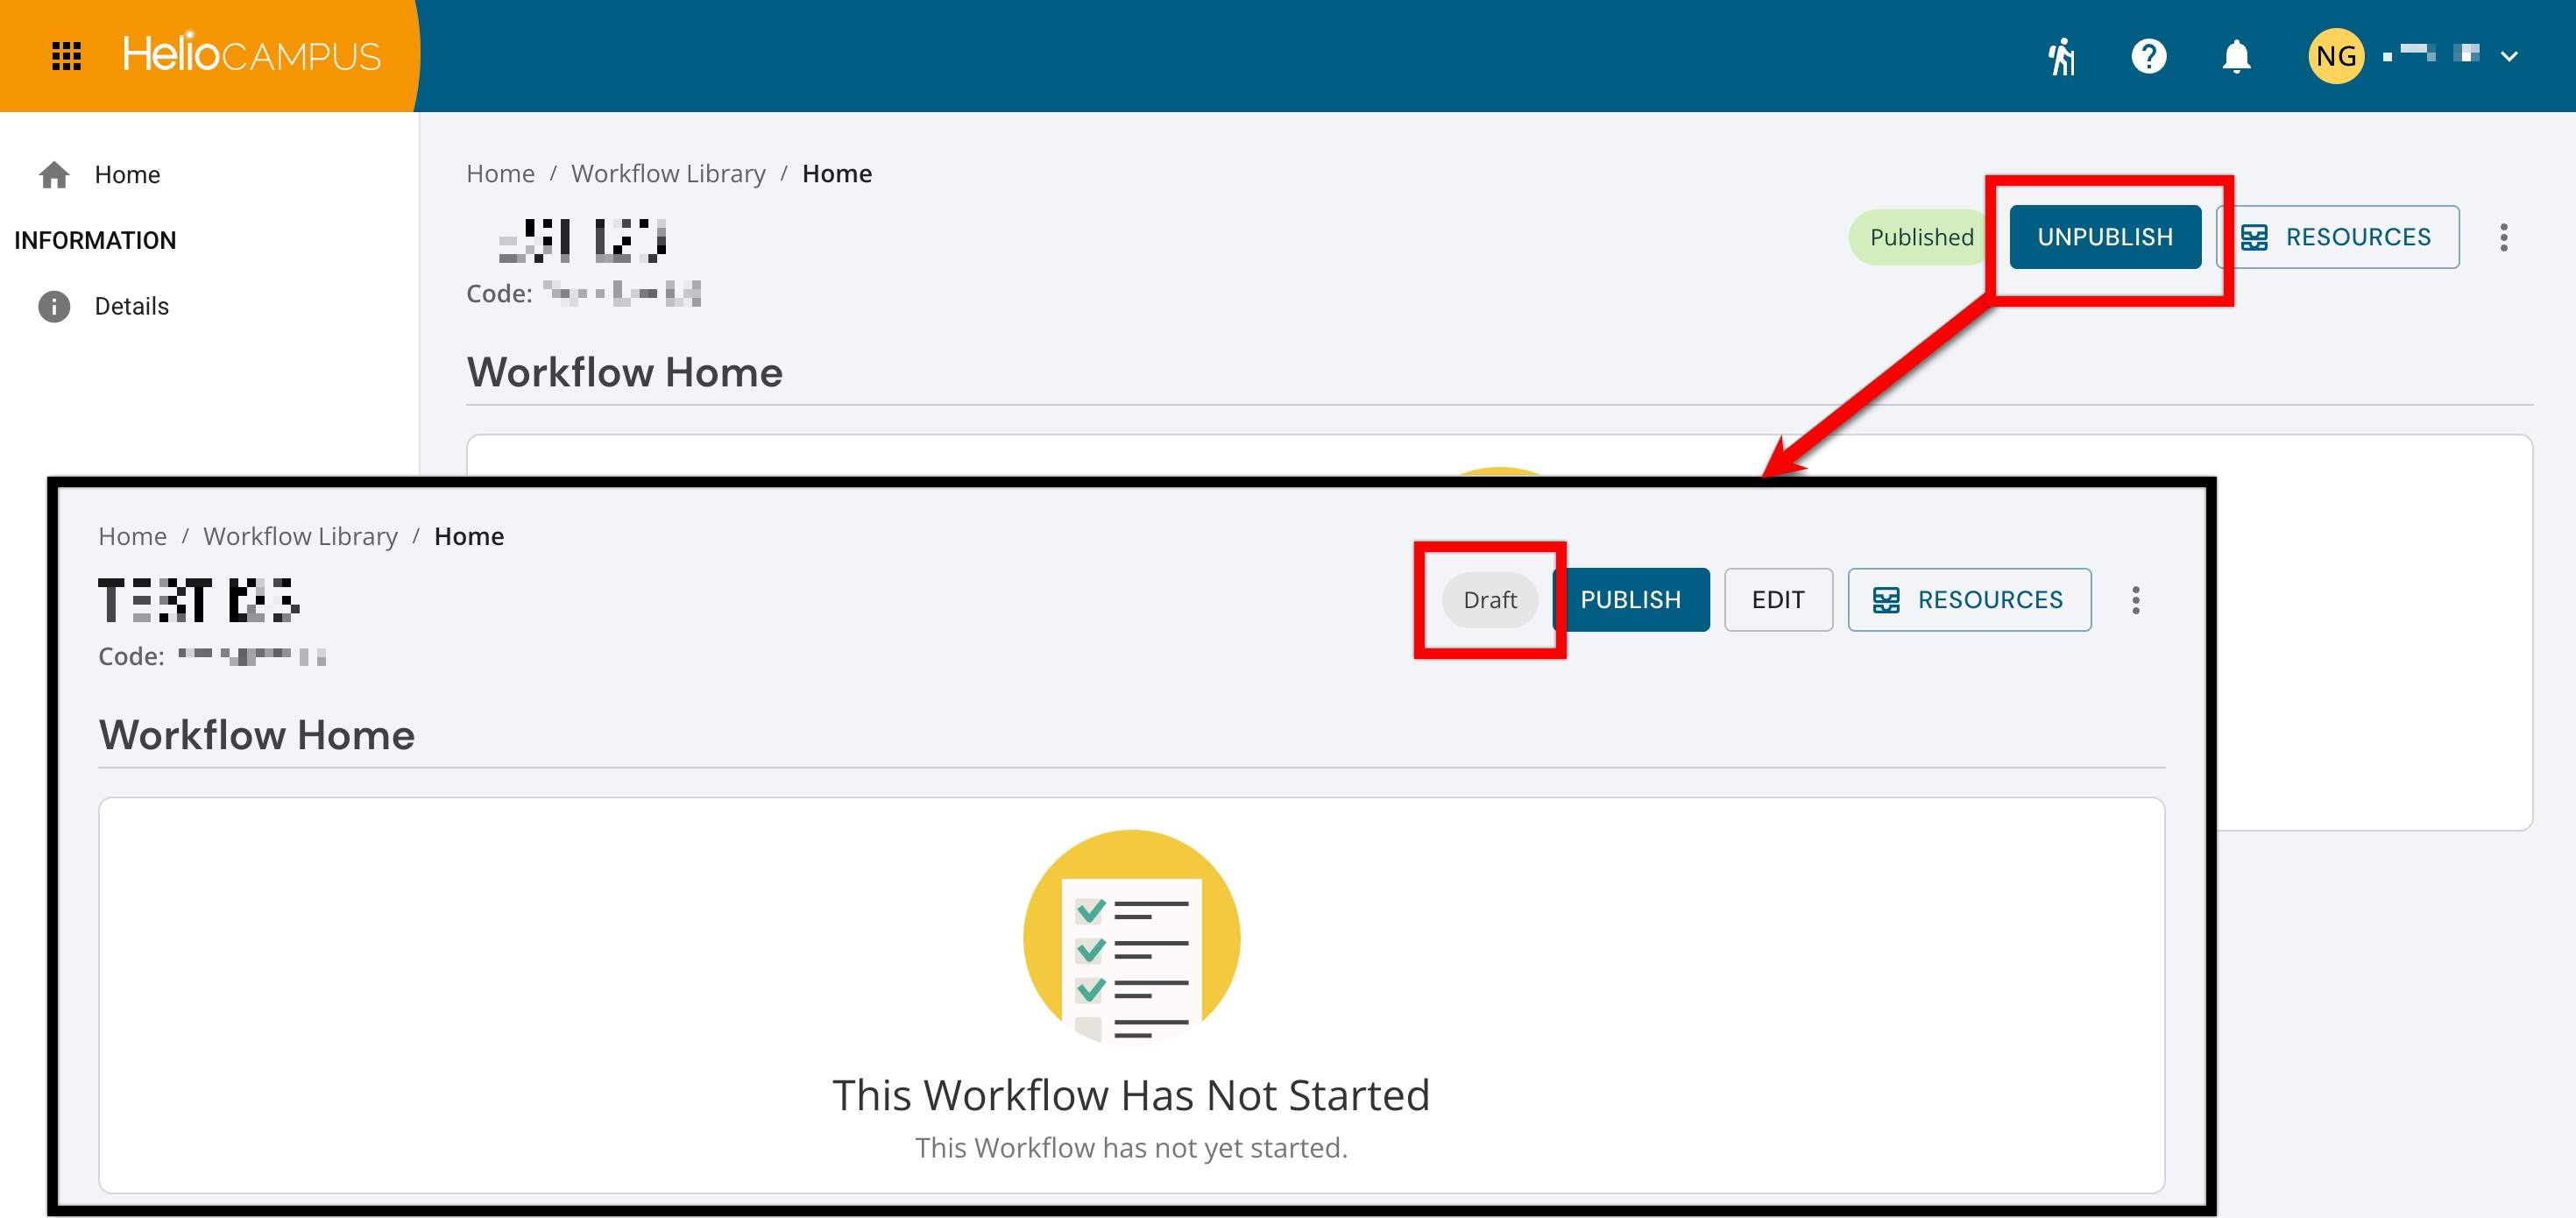
Navigate to the workflow Homepage. Workflows must be in Draft status to be edited; click Unpublish if the workflow is in Published status.
-
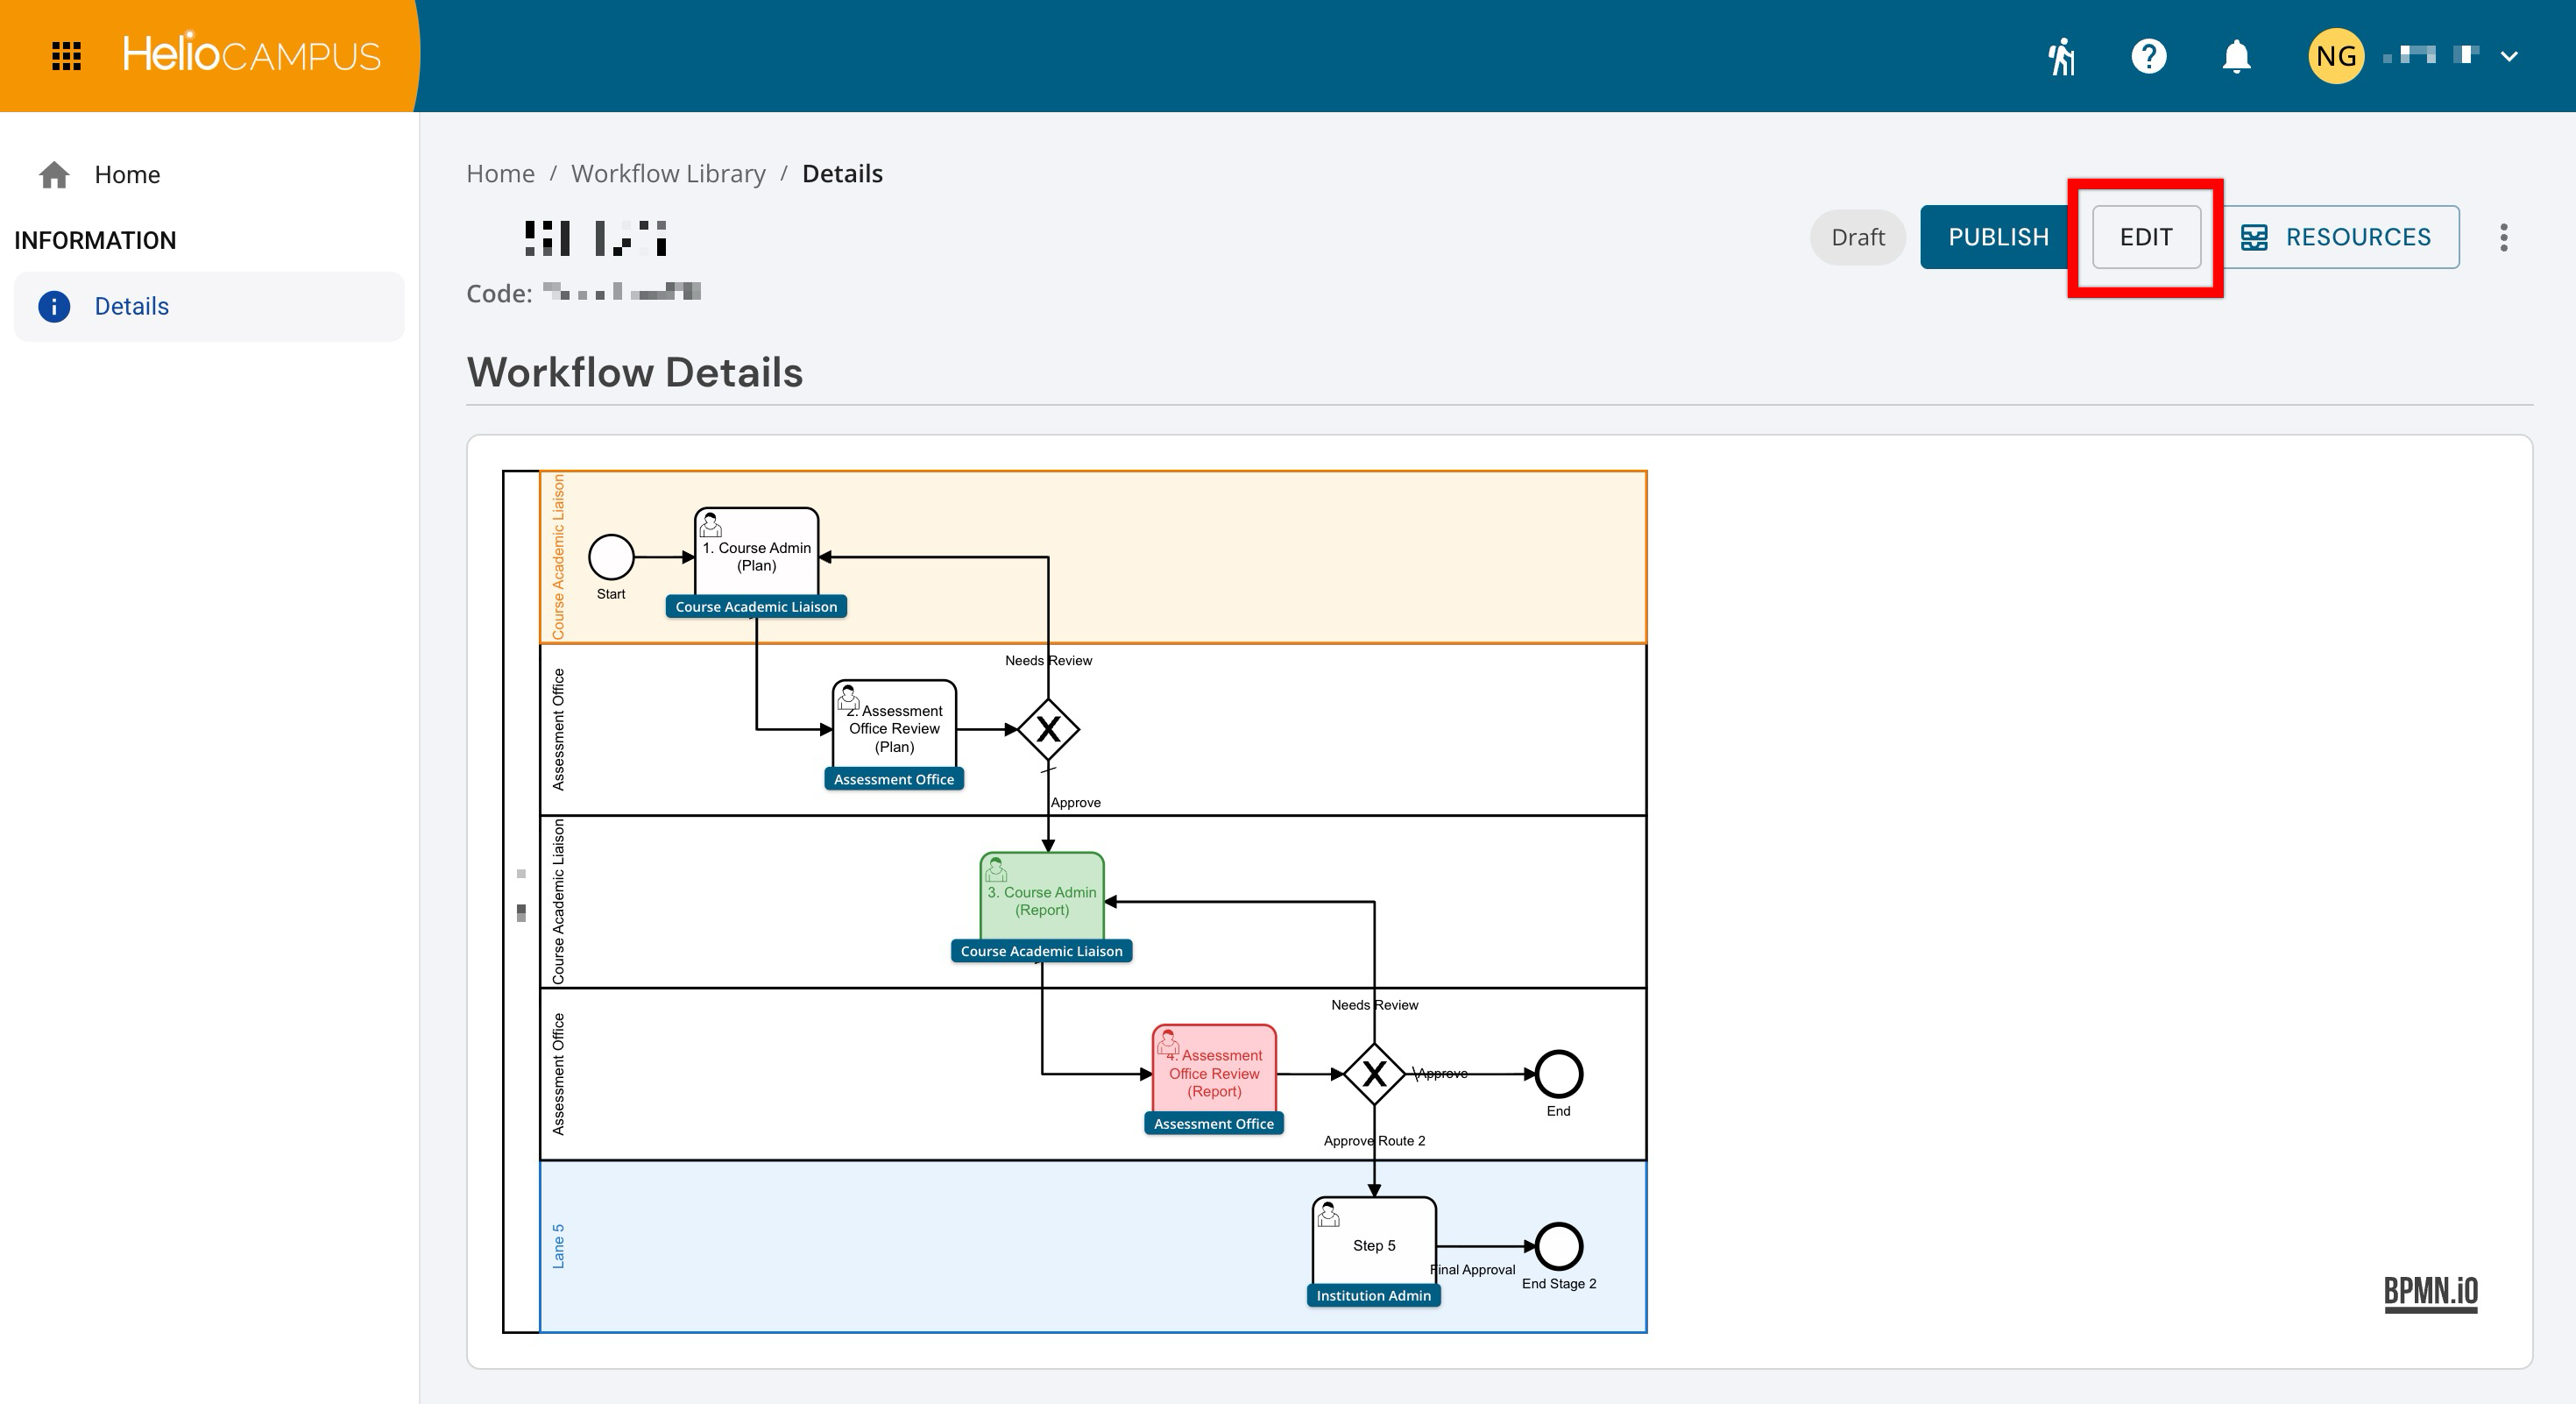
Click Edit to open the workflow editor.
-
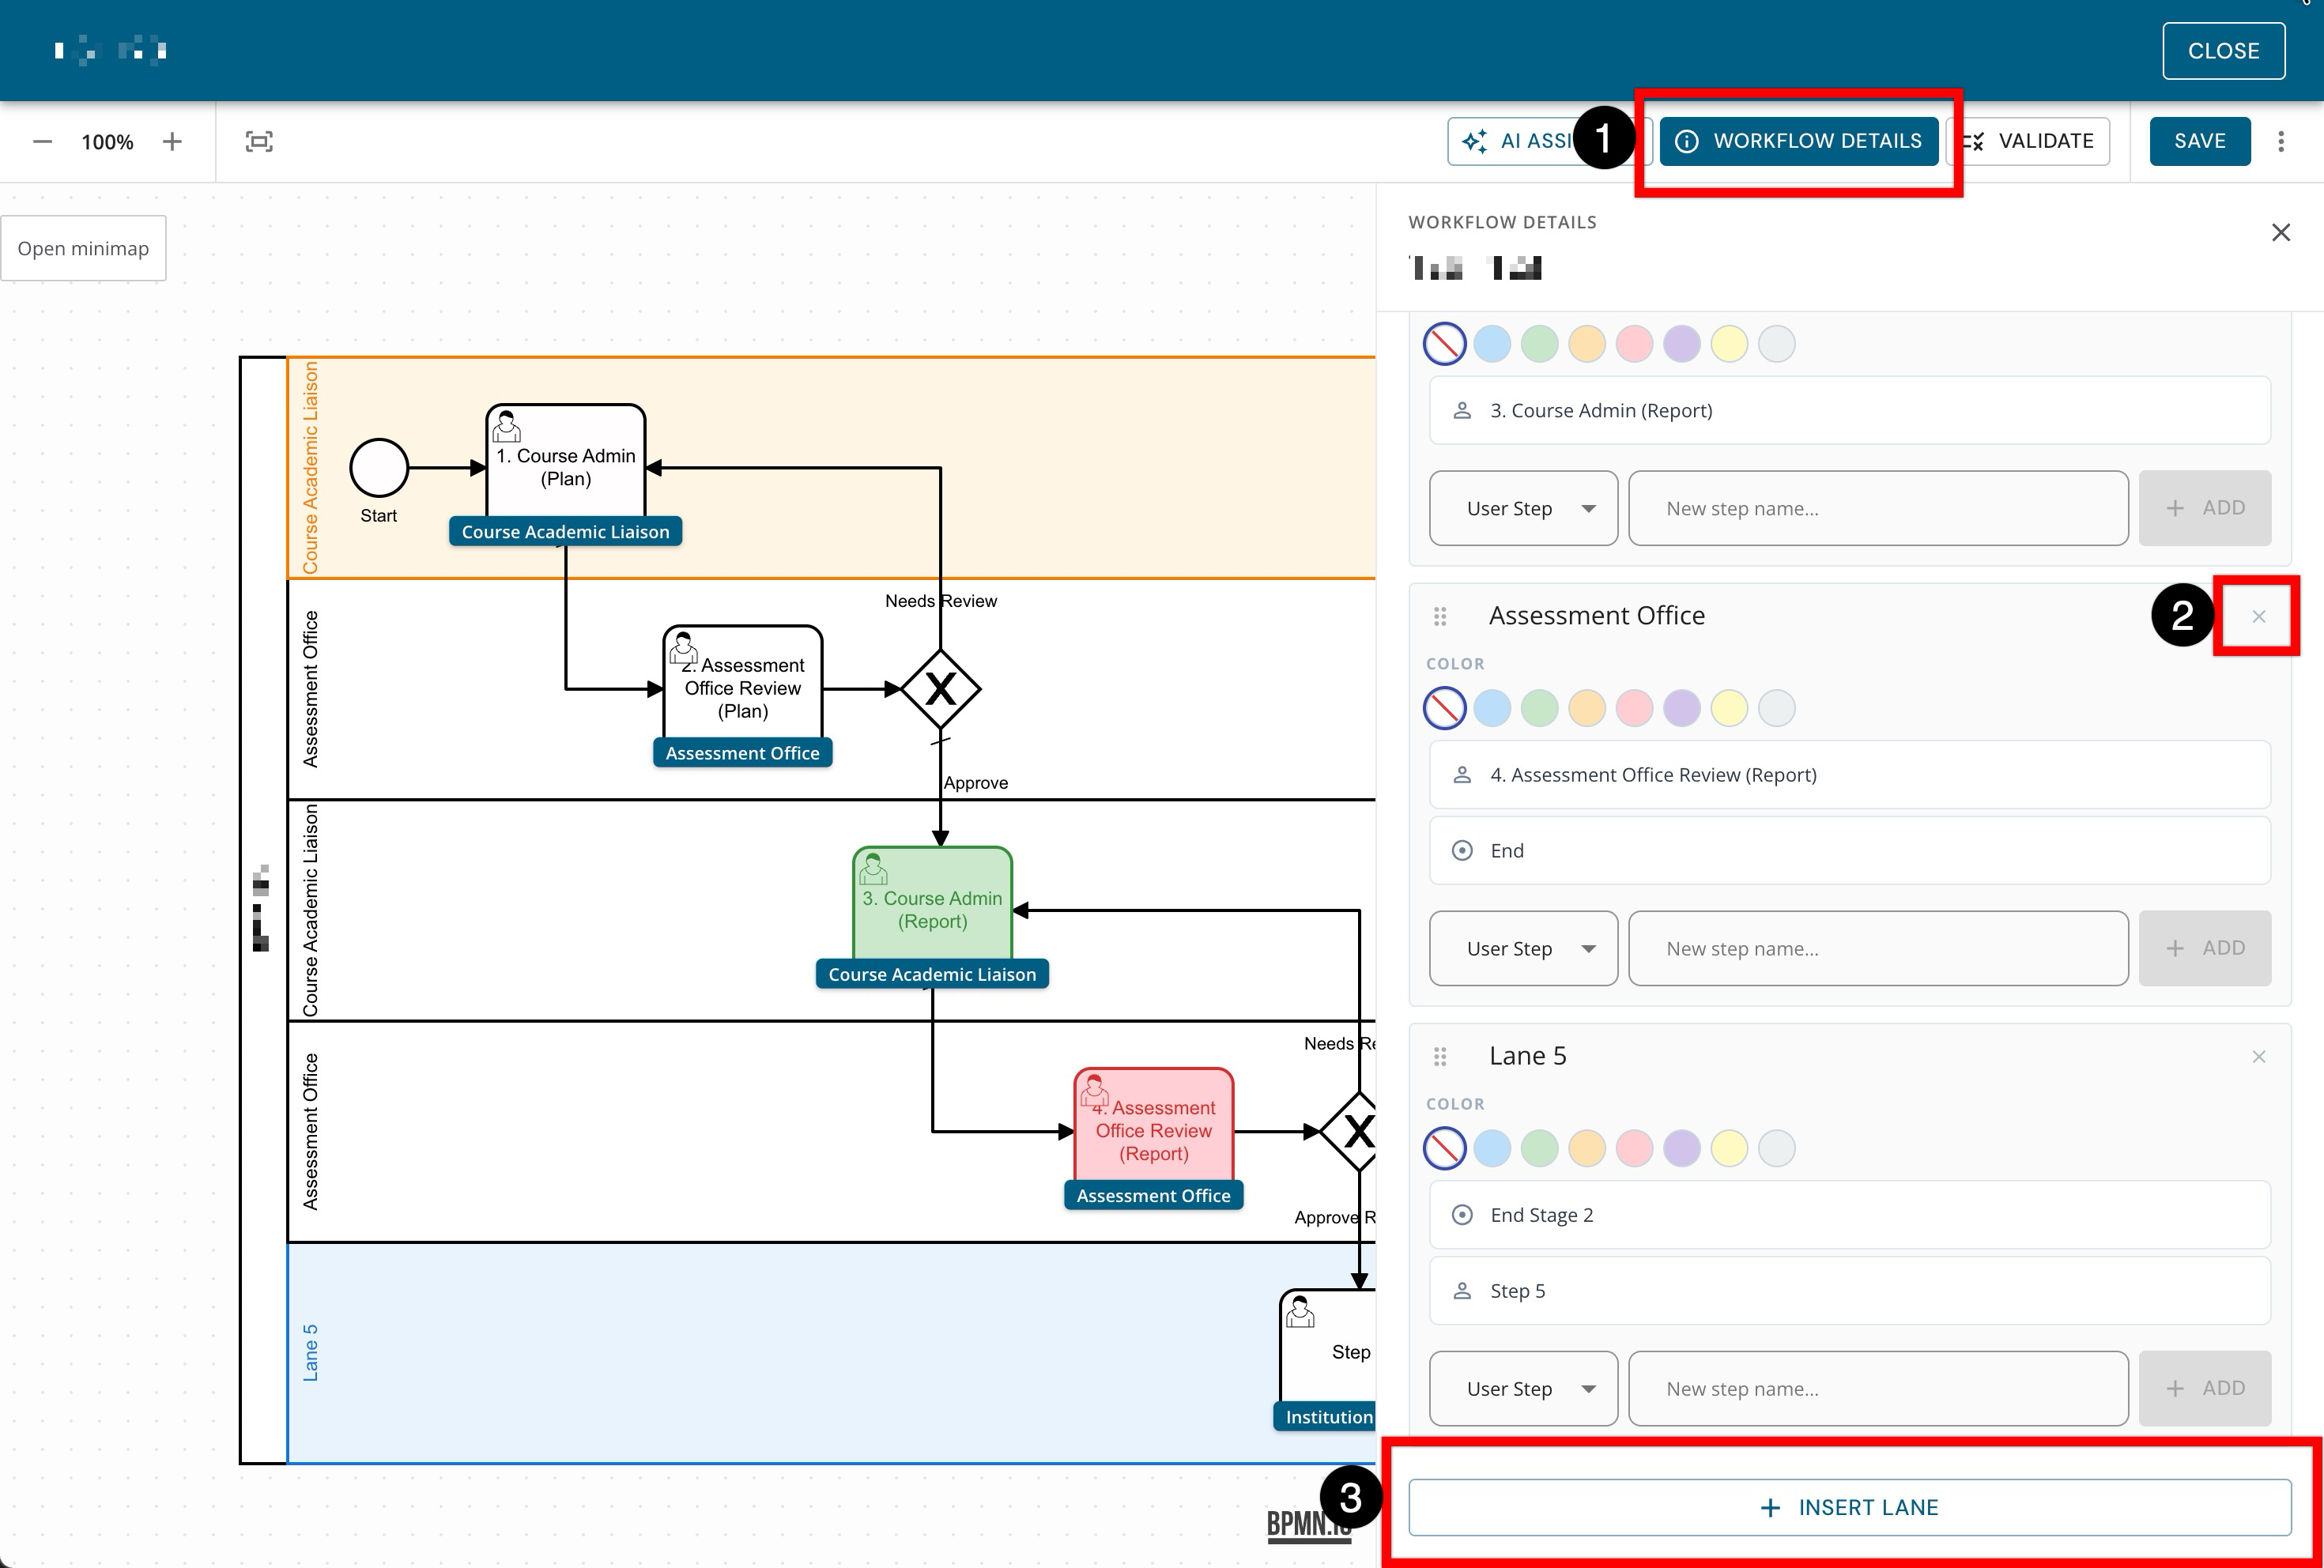
Click Workflow Details to open the detail drawer (1). Lanes can be removed individually as needed (2); when removed, all steps and transitions included in that row will be removed from the workflow. Additional lanes can be added by clicking Insert Lane at the bottom of the details drawer (3). When lanes are added, each lane must have at least one step aligned to it.
-
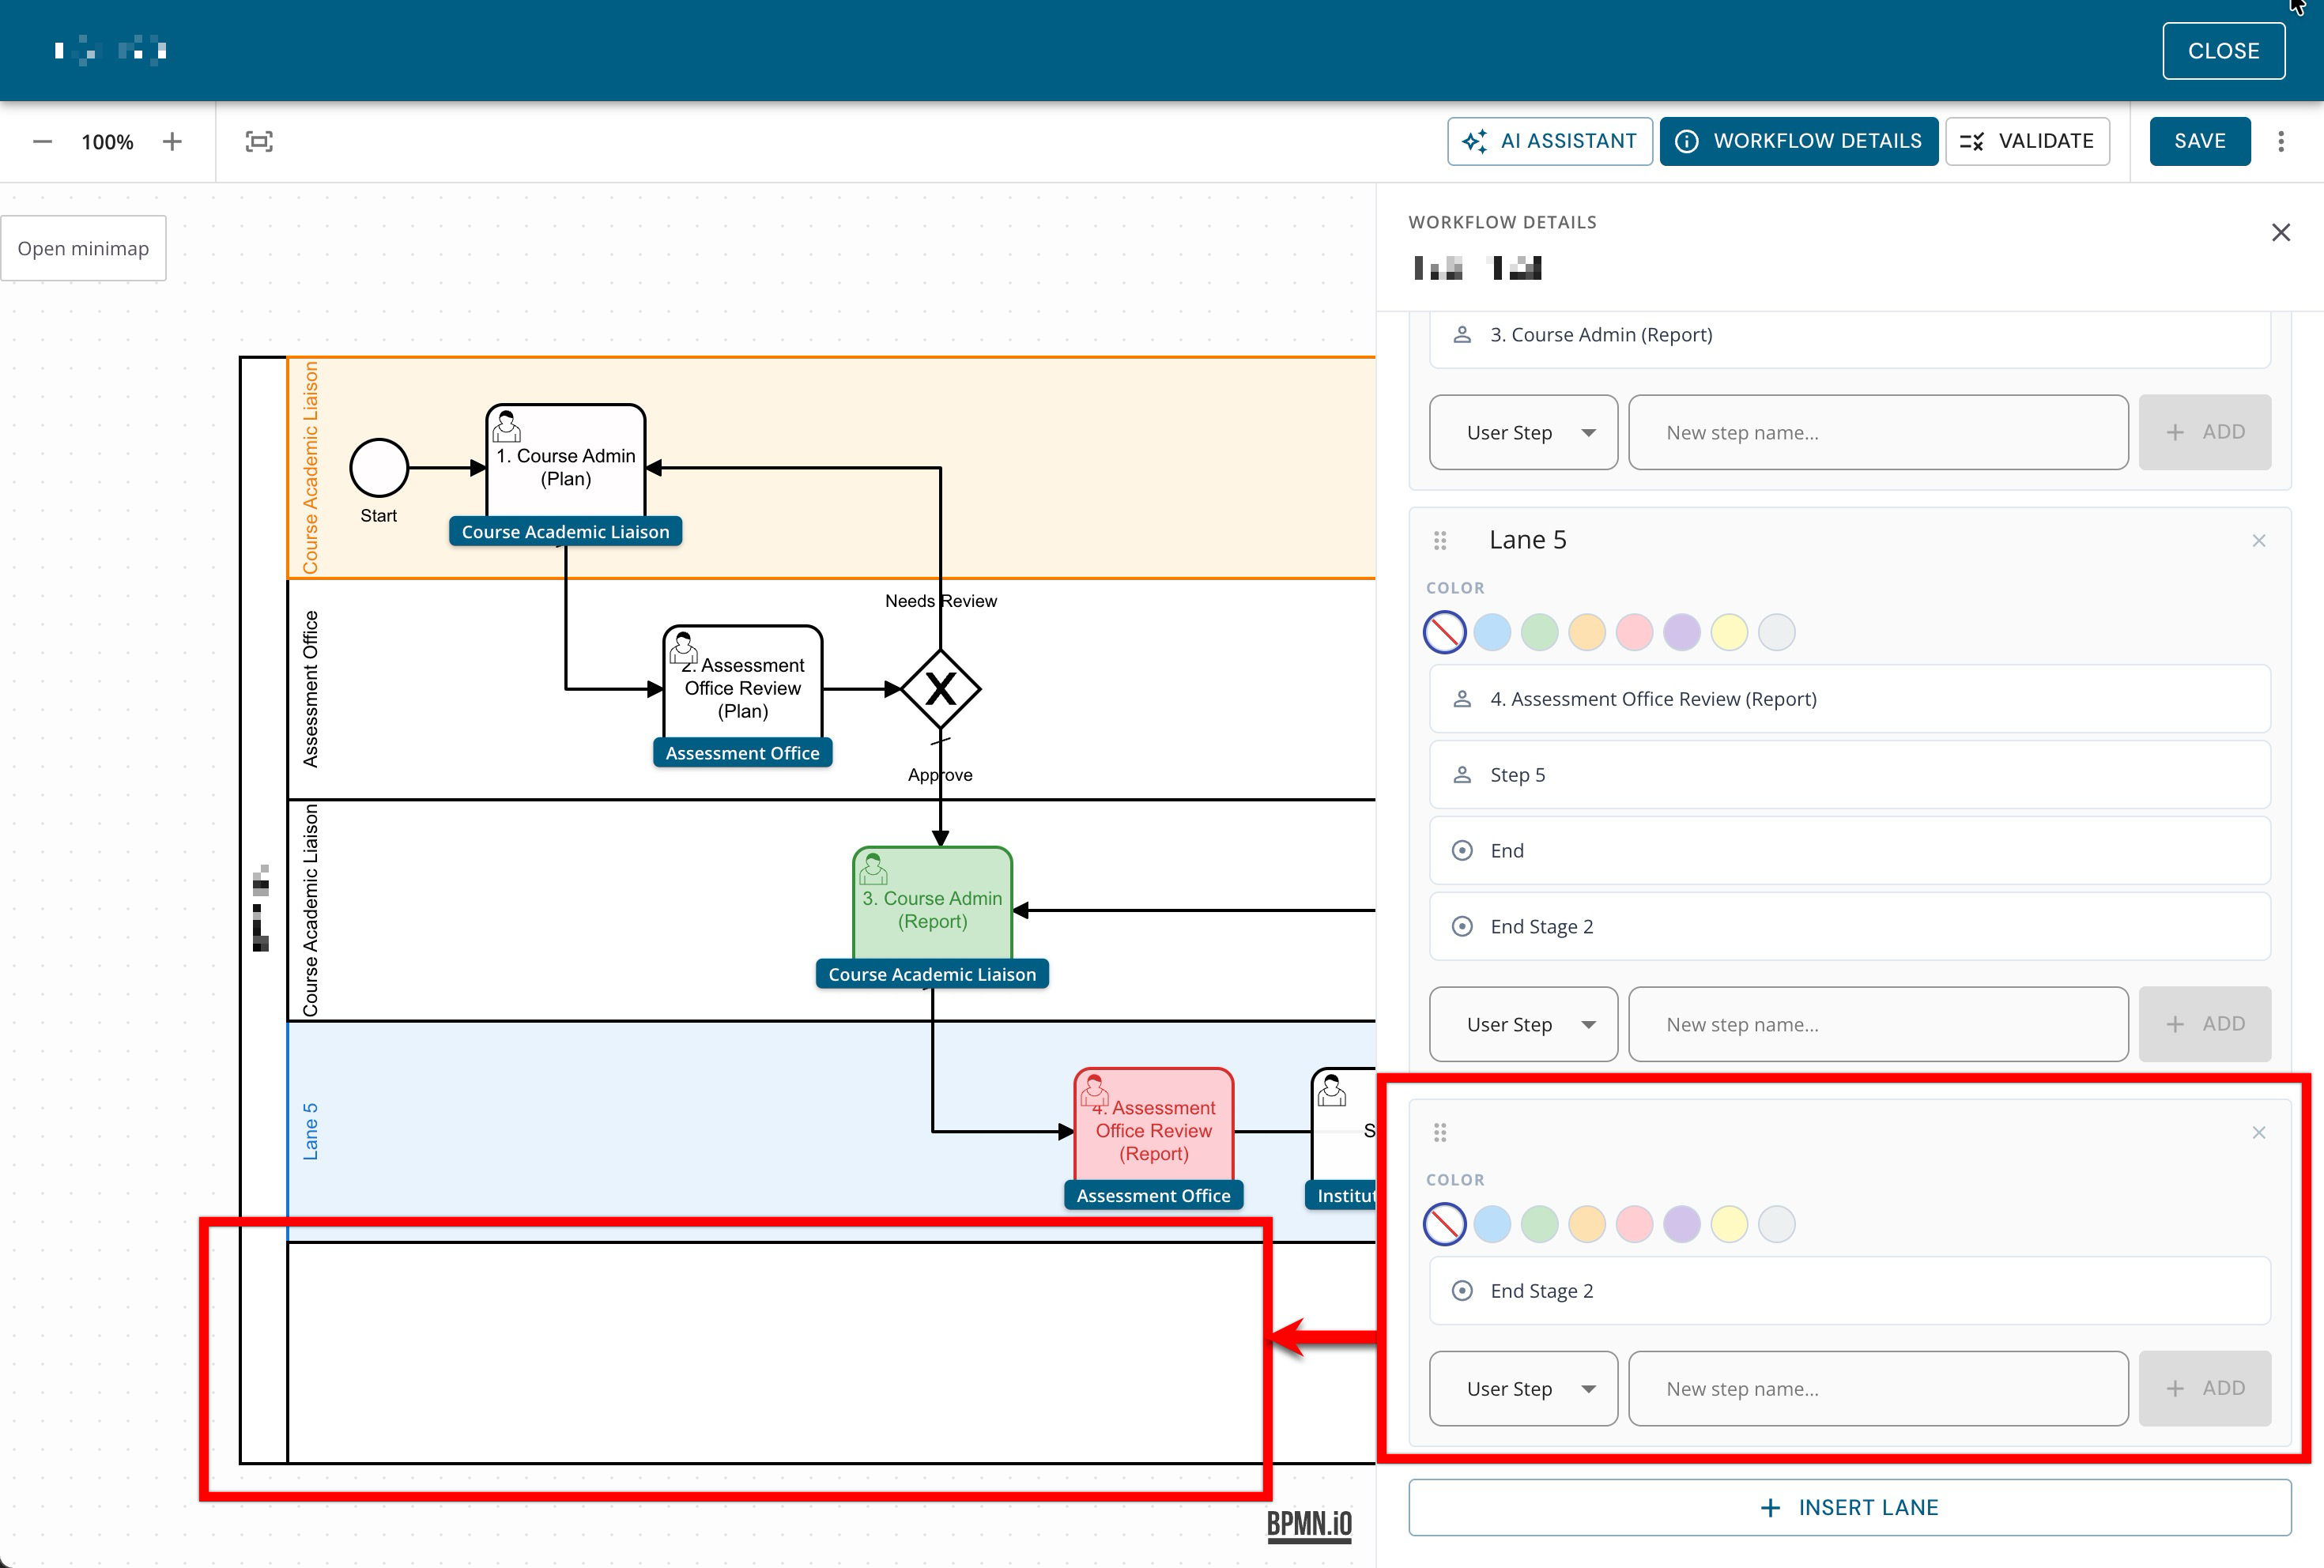
Once added, a new lane will display on the workflow diagram and in the details drawer.
-
-
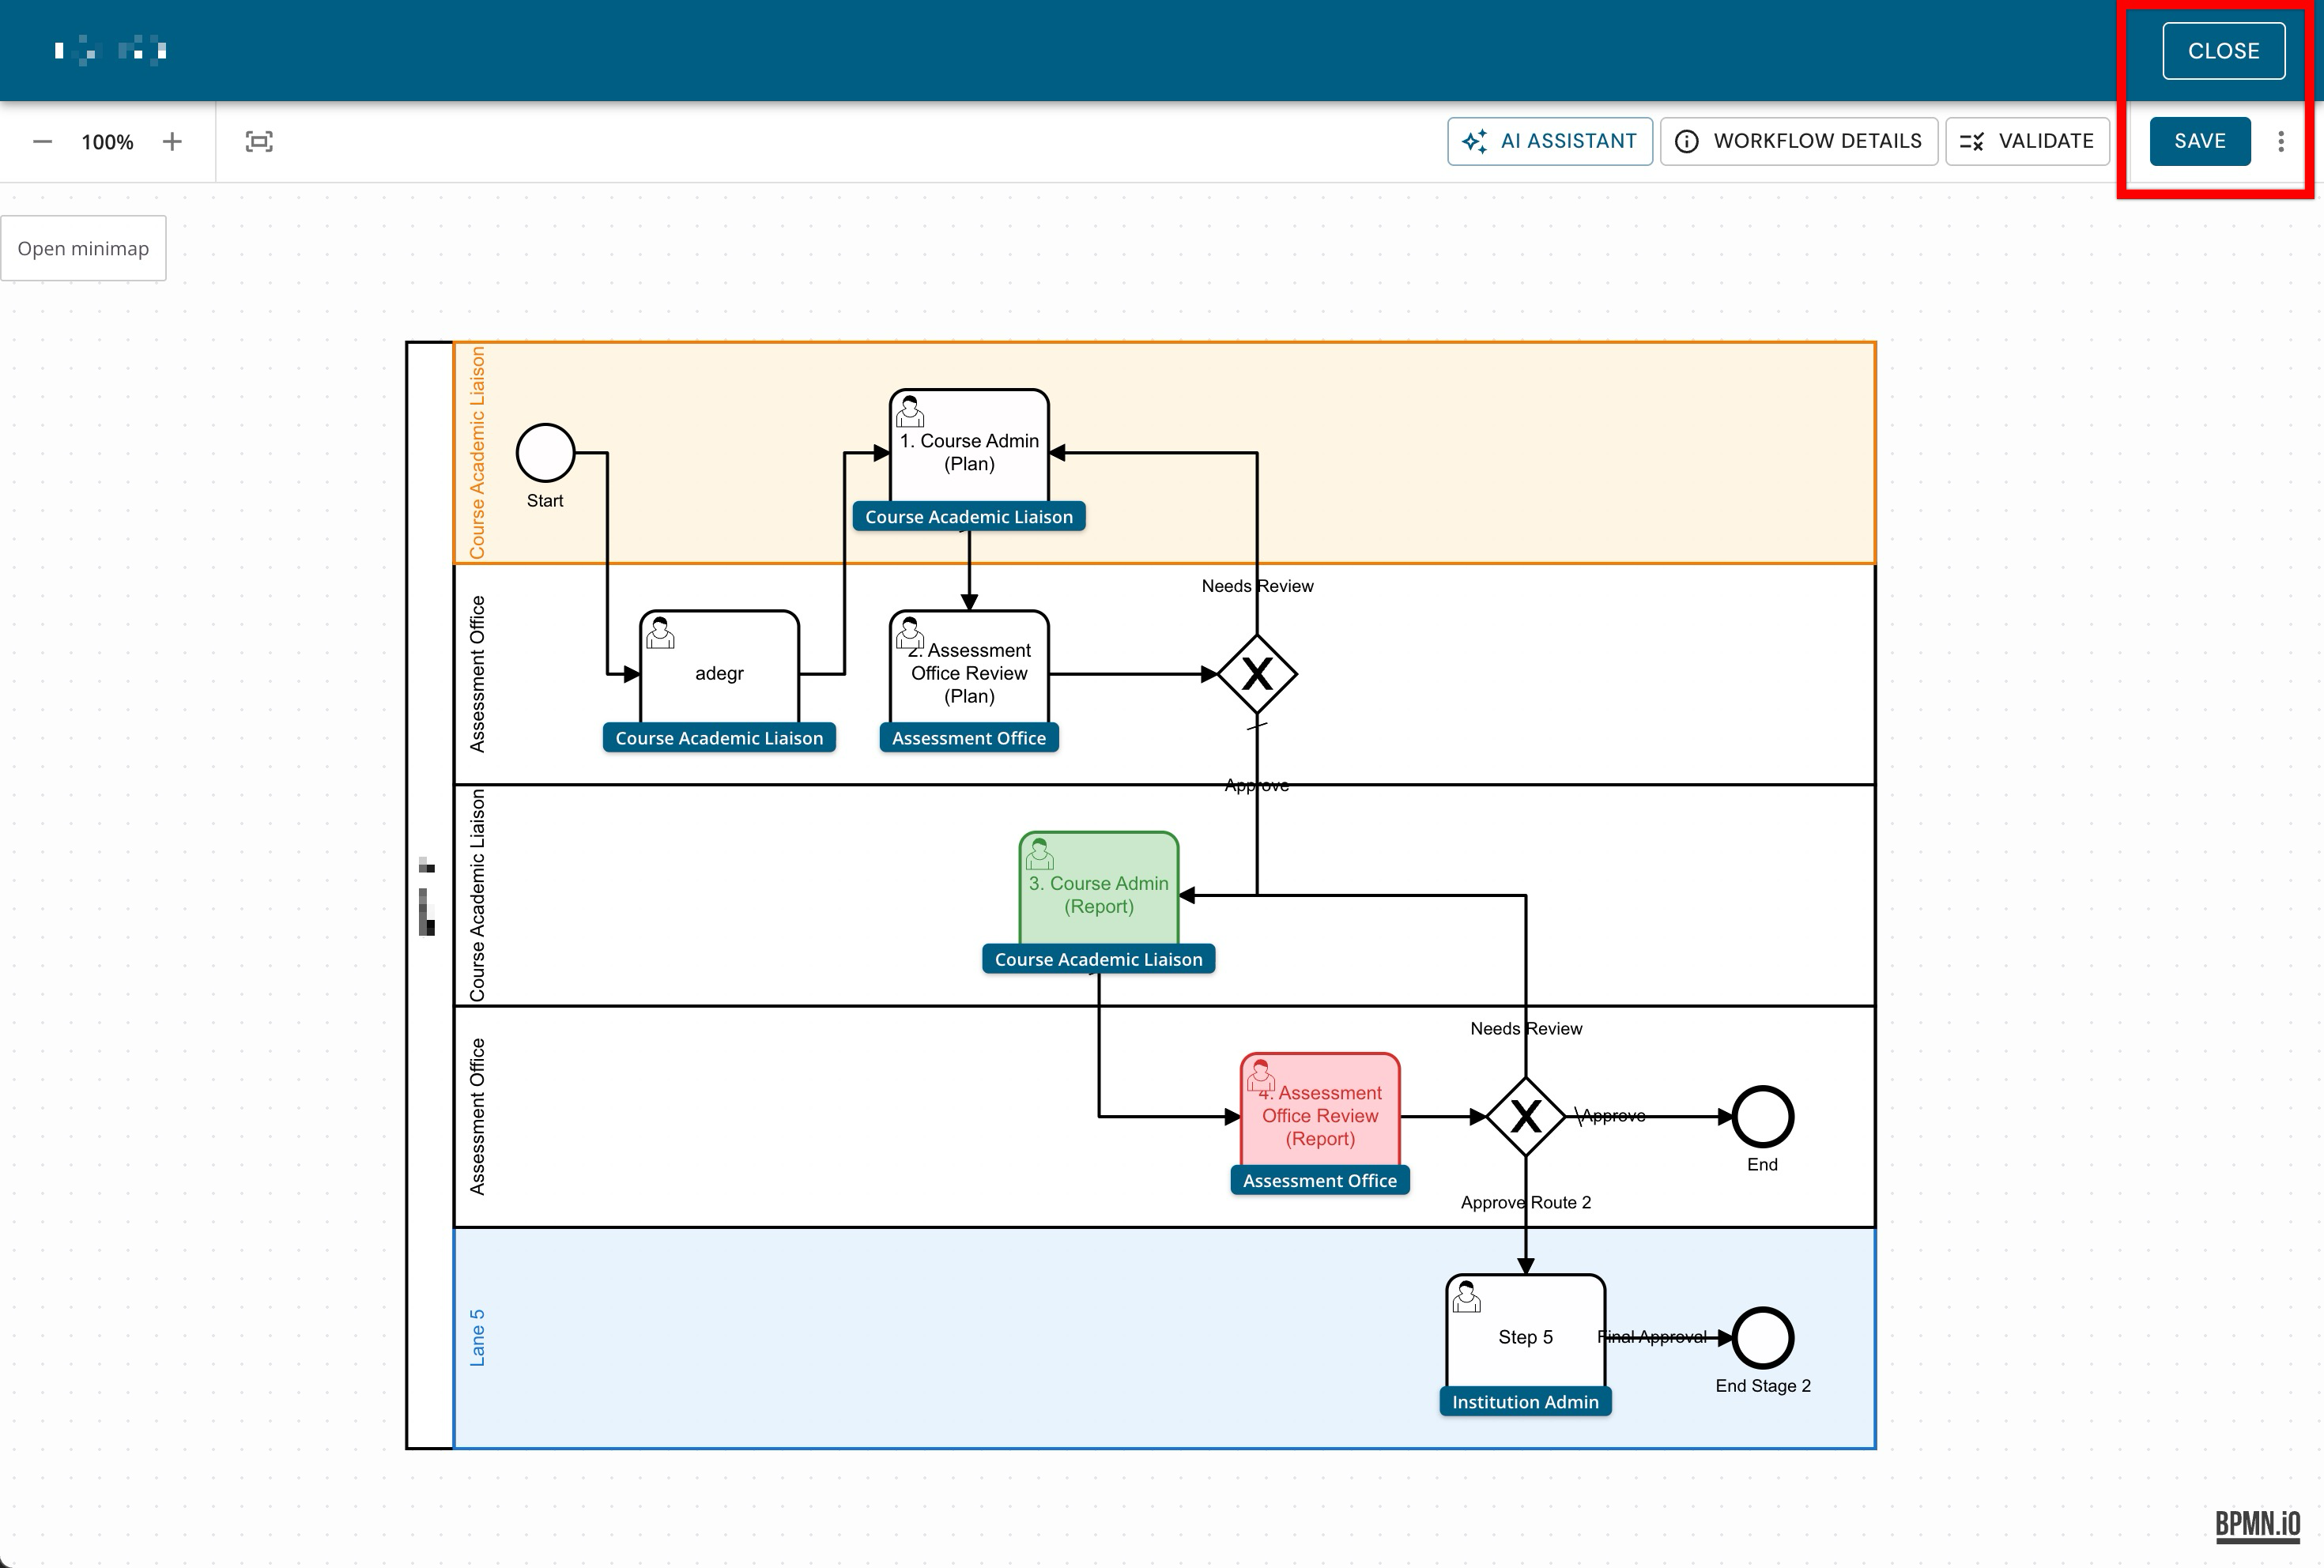
Click Save before selecting Close to exit the editor.
Editing Workflow Steps
Workflow steps define the sequence of routes that users follow. When editing steps, make sure each step has a clear purpose and that the order reflects the real process. For steps, keep in mind:
-
User Steps should be added when additional review, approvals, or handoffs need to occur in the process.
-
End Events should only be added when a process in a workflow is complete.
When using routes and decision points, keep in mind:
-
Routes control how work moves from one step to the next. A default route is required for each branching route.
-
Decision Points depict what happens and where a form goes next when work is approved, returned, rejected, or completed.
-
Navigate to the workflow Homepage. Workflows must be in Draft status to be edited; click Unpublish if the workflow is in Published status.
-
Click Edit to open the workflow editor.
-
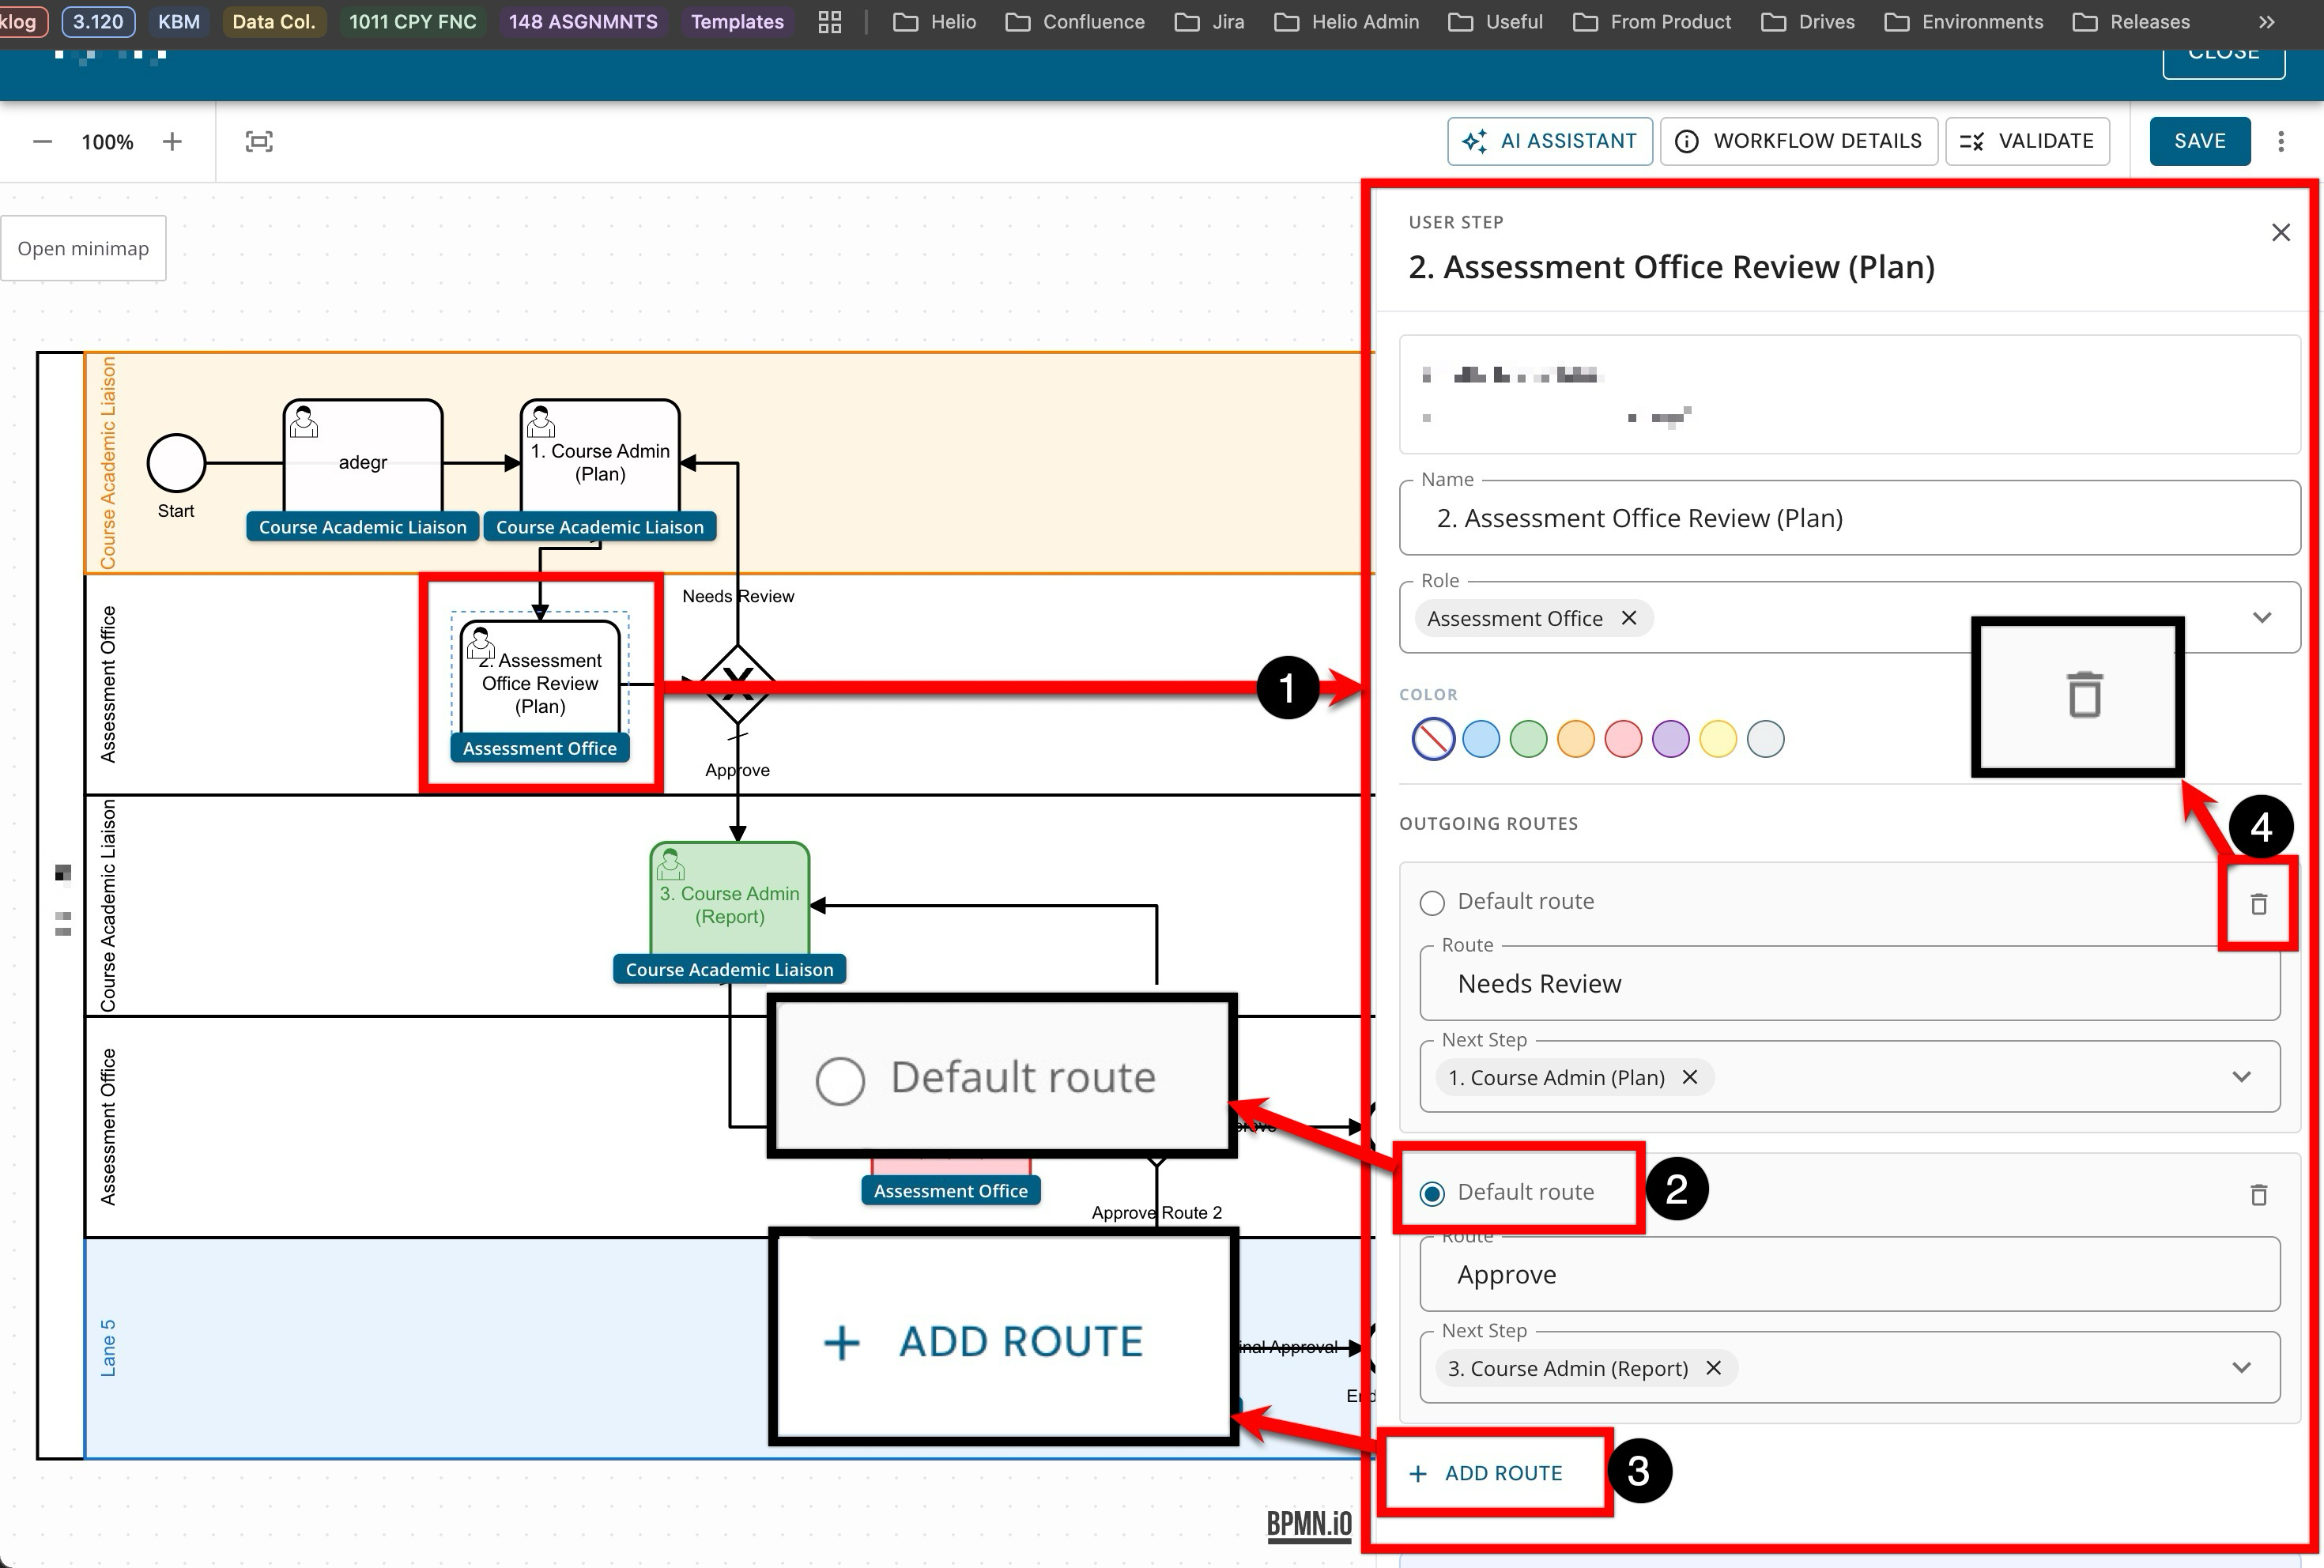
In the editor, select the step to edit. The step drawer opens to show the step details, with the selected step highlighted in the workflow (1).
-
Update the step name, roles, and routes as needed. The default route can be selected for each route branch (2), and new steps/routes can be added for additional reviews, approvals, or handoffs by clicking Add Route (3); remove steps/routes that are no longer part of the process (4). Each step must have at least one incoming or outgoing route.
-
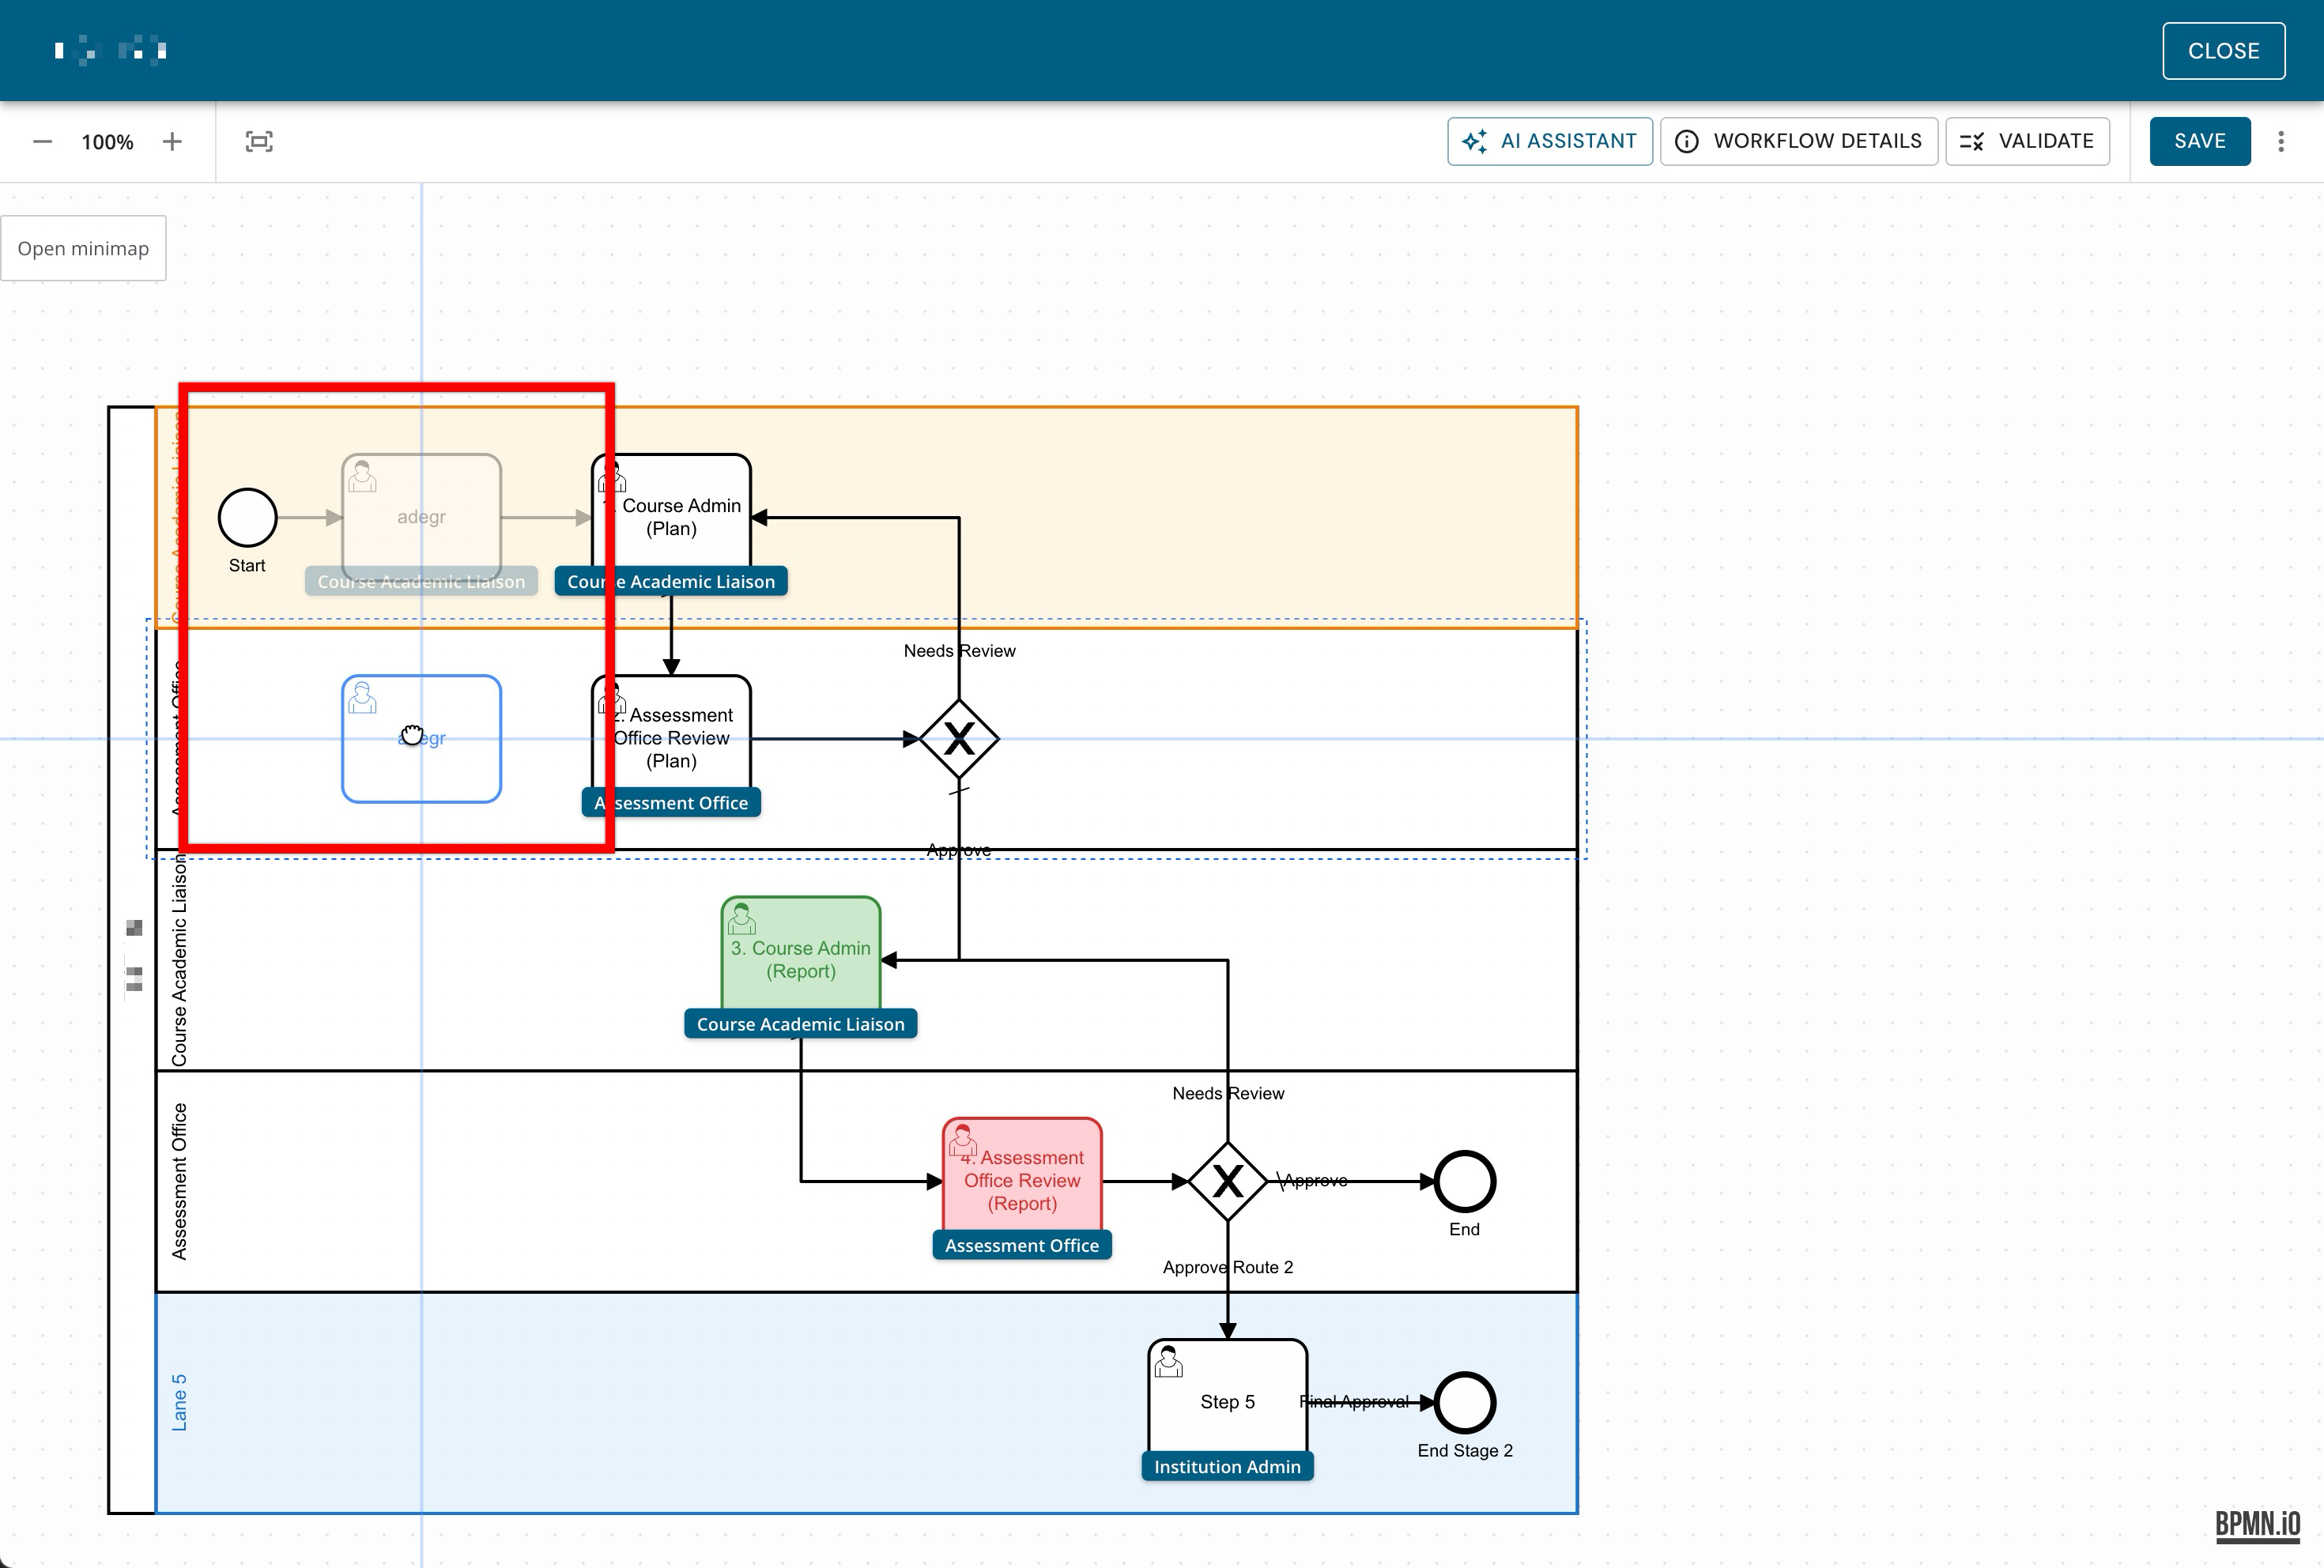
When using lanes, reorder steps by dragging and dropping on the diagram so the workflow follows the desired sequence from start to completion.
-
-
Click Save before selecting Close to exit the editor.
Review, Save, and Test
If a workflow was generated with AI, treat the generated diagram as a suggestion. Review every step, task assignment, and route before publishing to ensure it follows the Institution’s policies and uses familiar terminology.
After editing the workflow, use the validator tool in the editor, save the draft, and review the full process before publishing. Testing confirms the workflow behaves as expected and that users can complete each step without confusion. Review and test the following:
-
Review the updated workflow diagram from beginning to end. Ensure each connection between all workflow steps meets the desired outcome of the workflow.
-
Confirm that each step has the correct name, role, and instructions.
-
-
Check that all required routes and decision paths are present.
-
Confirm a default flow exists for each route.
-
Confirm that each route points to the correct next step.
-
Update labels so the outcome of each route is clear.
-
Remove any routes that are no longer needed.
-
-
Check approval and return paths to make sure work moves to the correct reviewer or contributor.
-
Update labels so the path of each decision is clear.
-
-
When editing in a test environment, initiate the workflow before using it in production. To initiate a workflow in a test environment, contact Support.