
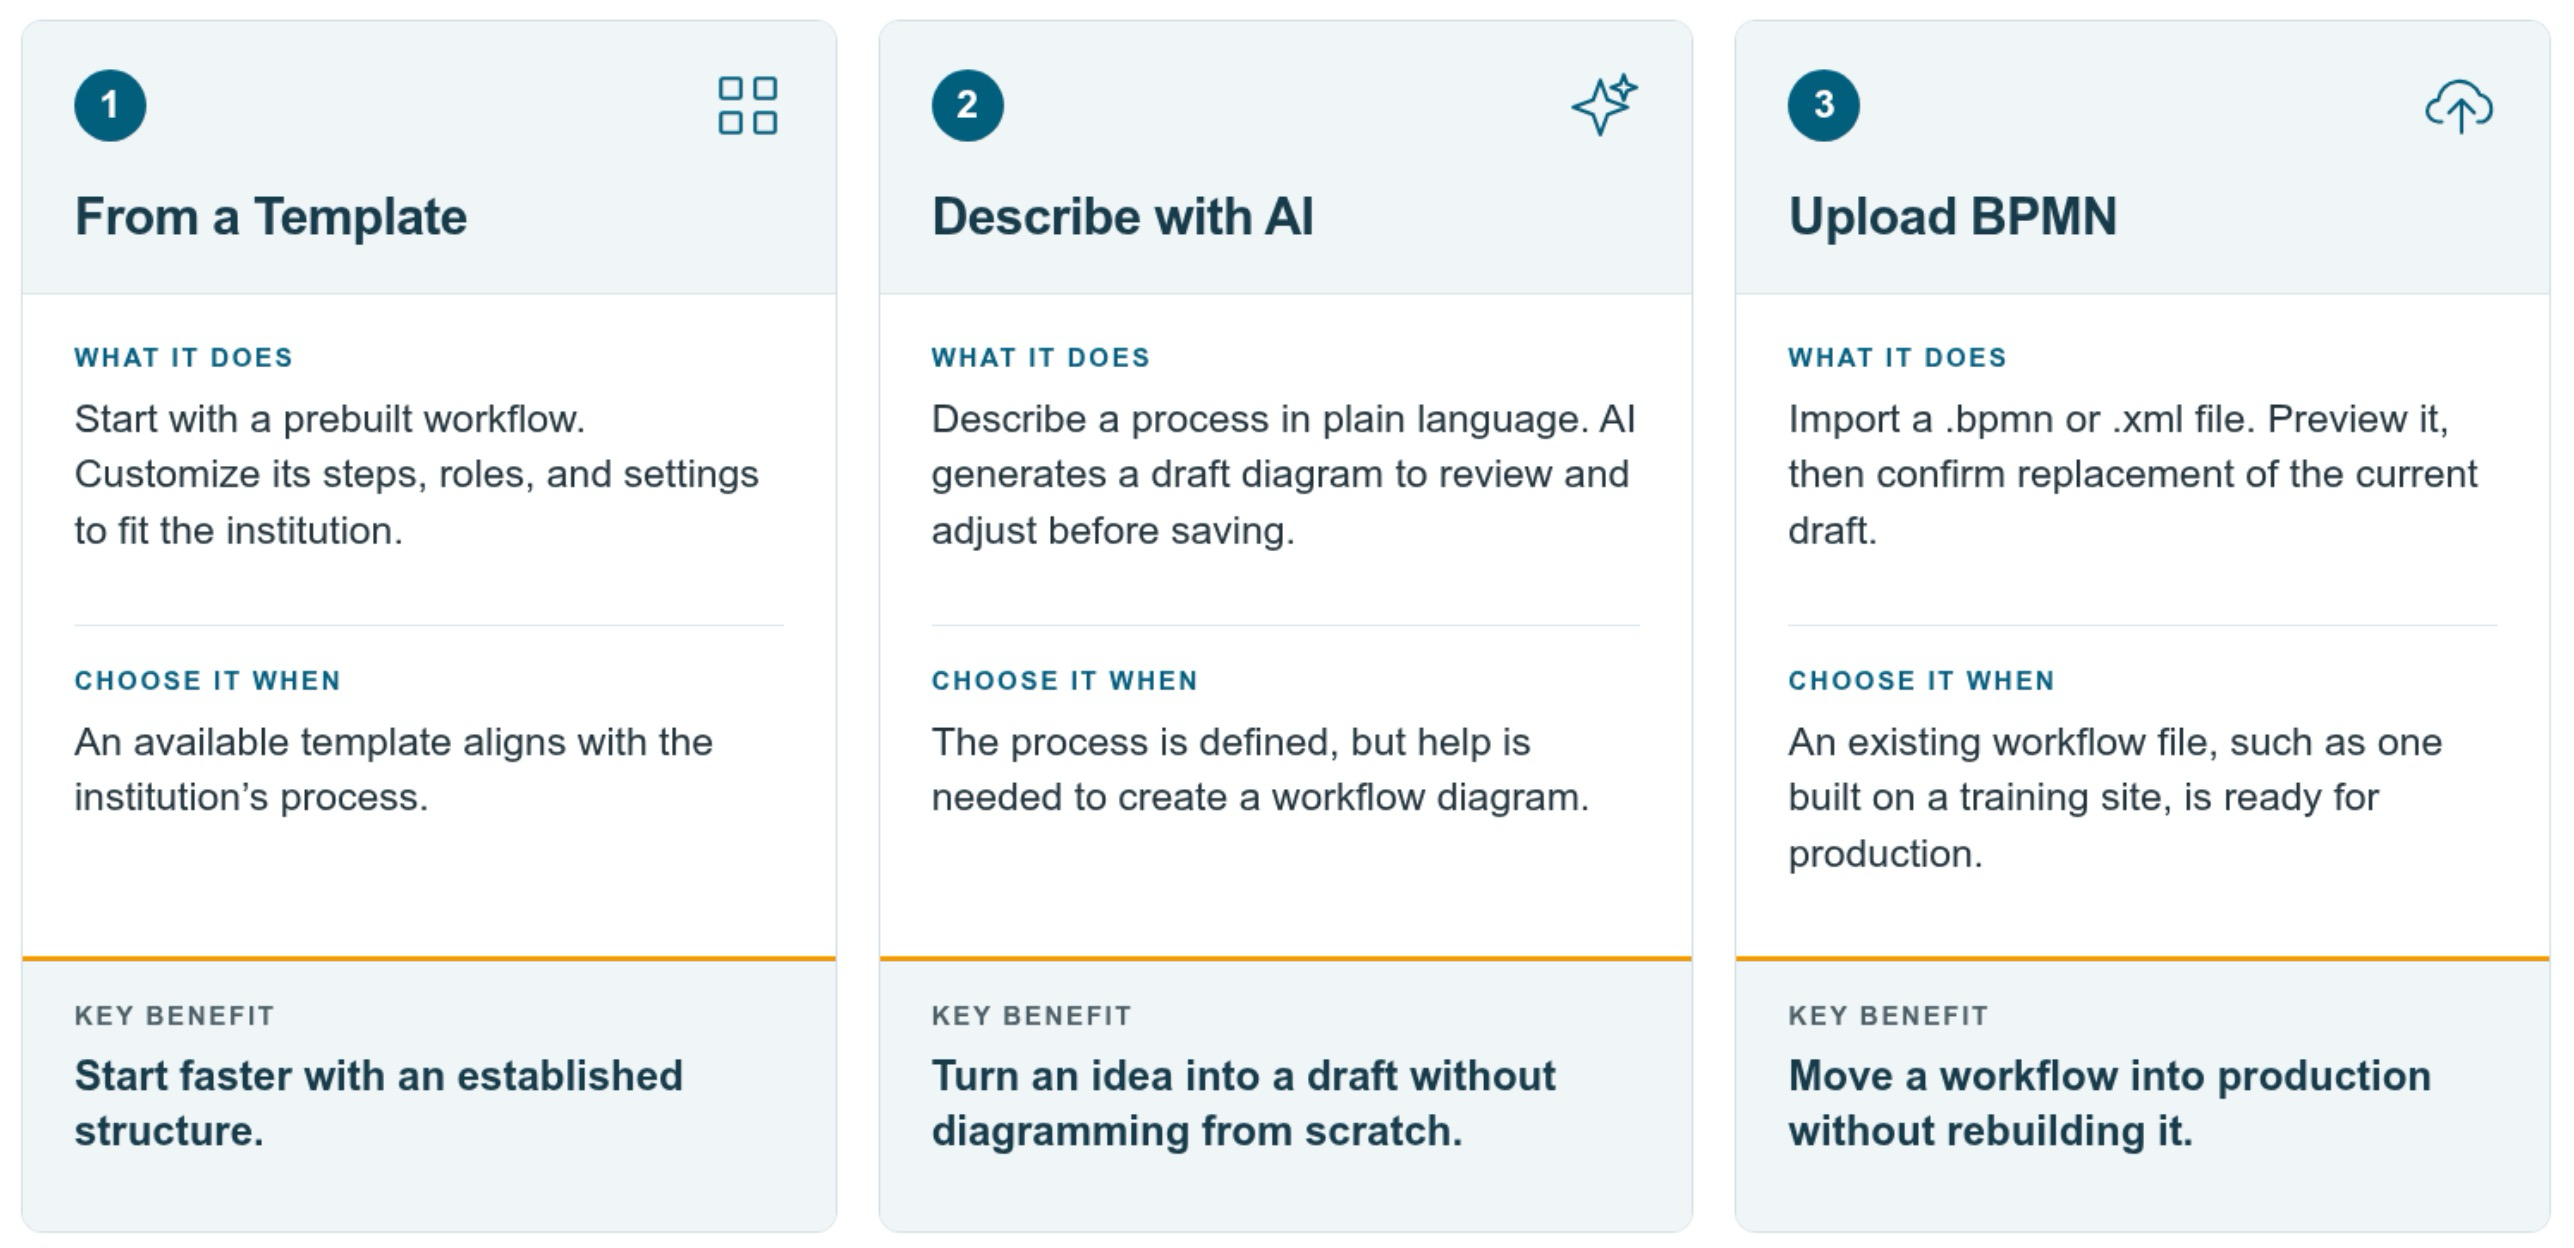
Workflow creation supports multiple starting points. By navigating to the Workflow Library and clicking Create New Workflow, workflows can be created from a prebuilt template, generated with AI, or imported from an existing workflow file:
-
From a Template: Start with a prebuilt workflow template and customize the steps, roles, and settings to match an institution’s process.
-
Describe with AI: Describe the workflow in plain language and use AI to generate a draft workflow diagram that can be reviewed and adjusted before saving.
-
Upload BPMN: Import a .bpmn or .xml workflow file, preview it, and confirm when you’re ready to replace the current draft. Use this option to move a workflow from a training site into production without needing to rebuild it.
After a workflow is created, it will open in Draft status, where further customization of the workflow is done by editing it to customize the labels, lanes, steps, and routes.
Institutions can contact Support to learn about common workflows that have previously been used for collection needs.
From a Template
Use From a Template to create a workflow quickly from an existing starting point. For first-time users, it is usually best to start with the closest template rather than a blank or fully custom workflow, because the template already includes a suggested structure and common workflow steps. Templates provide a prebuilt structure with common steps already included, so first-time users can focus on reviewing, adjusting, and publishing the workflow instead of building the entire process from scratch.
-
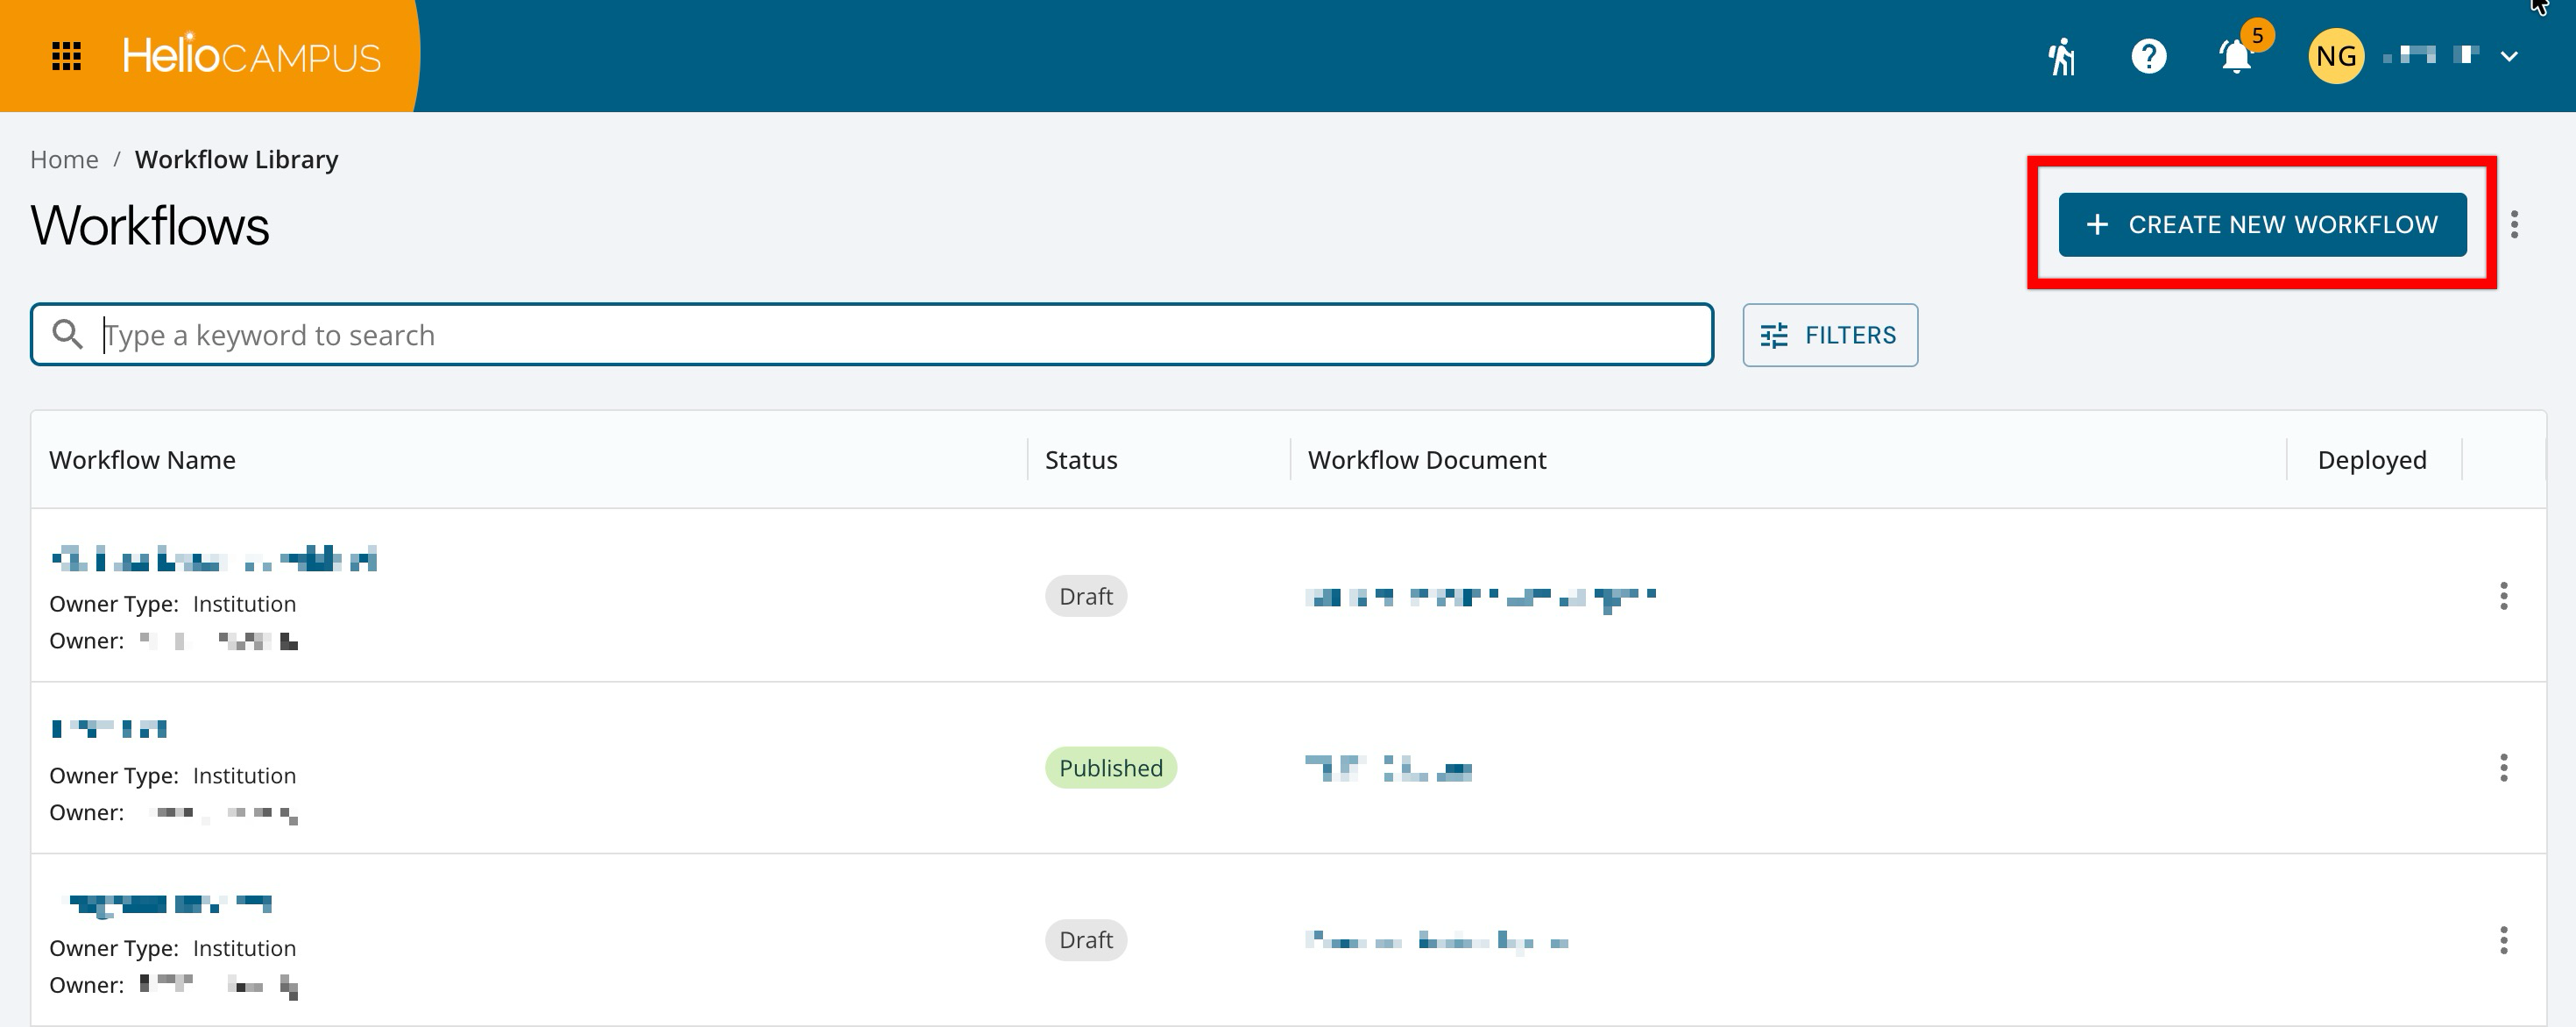
Navigate to the Workflow Library and click Create New Workflow.
-
-
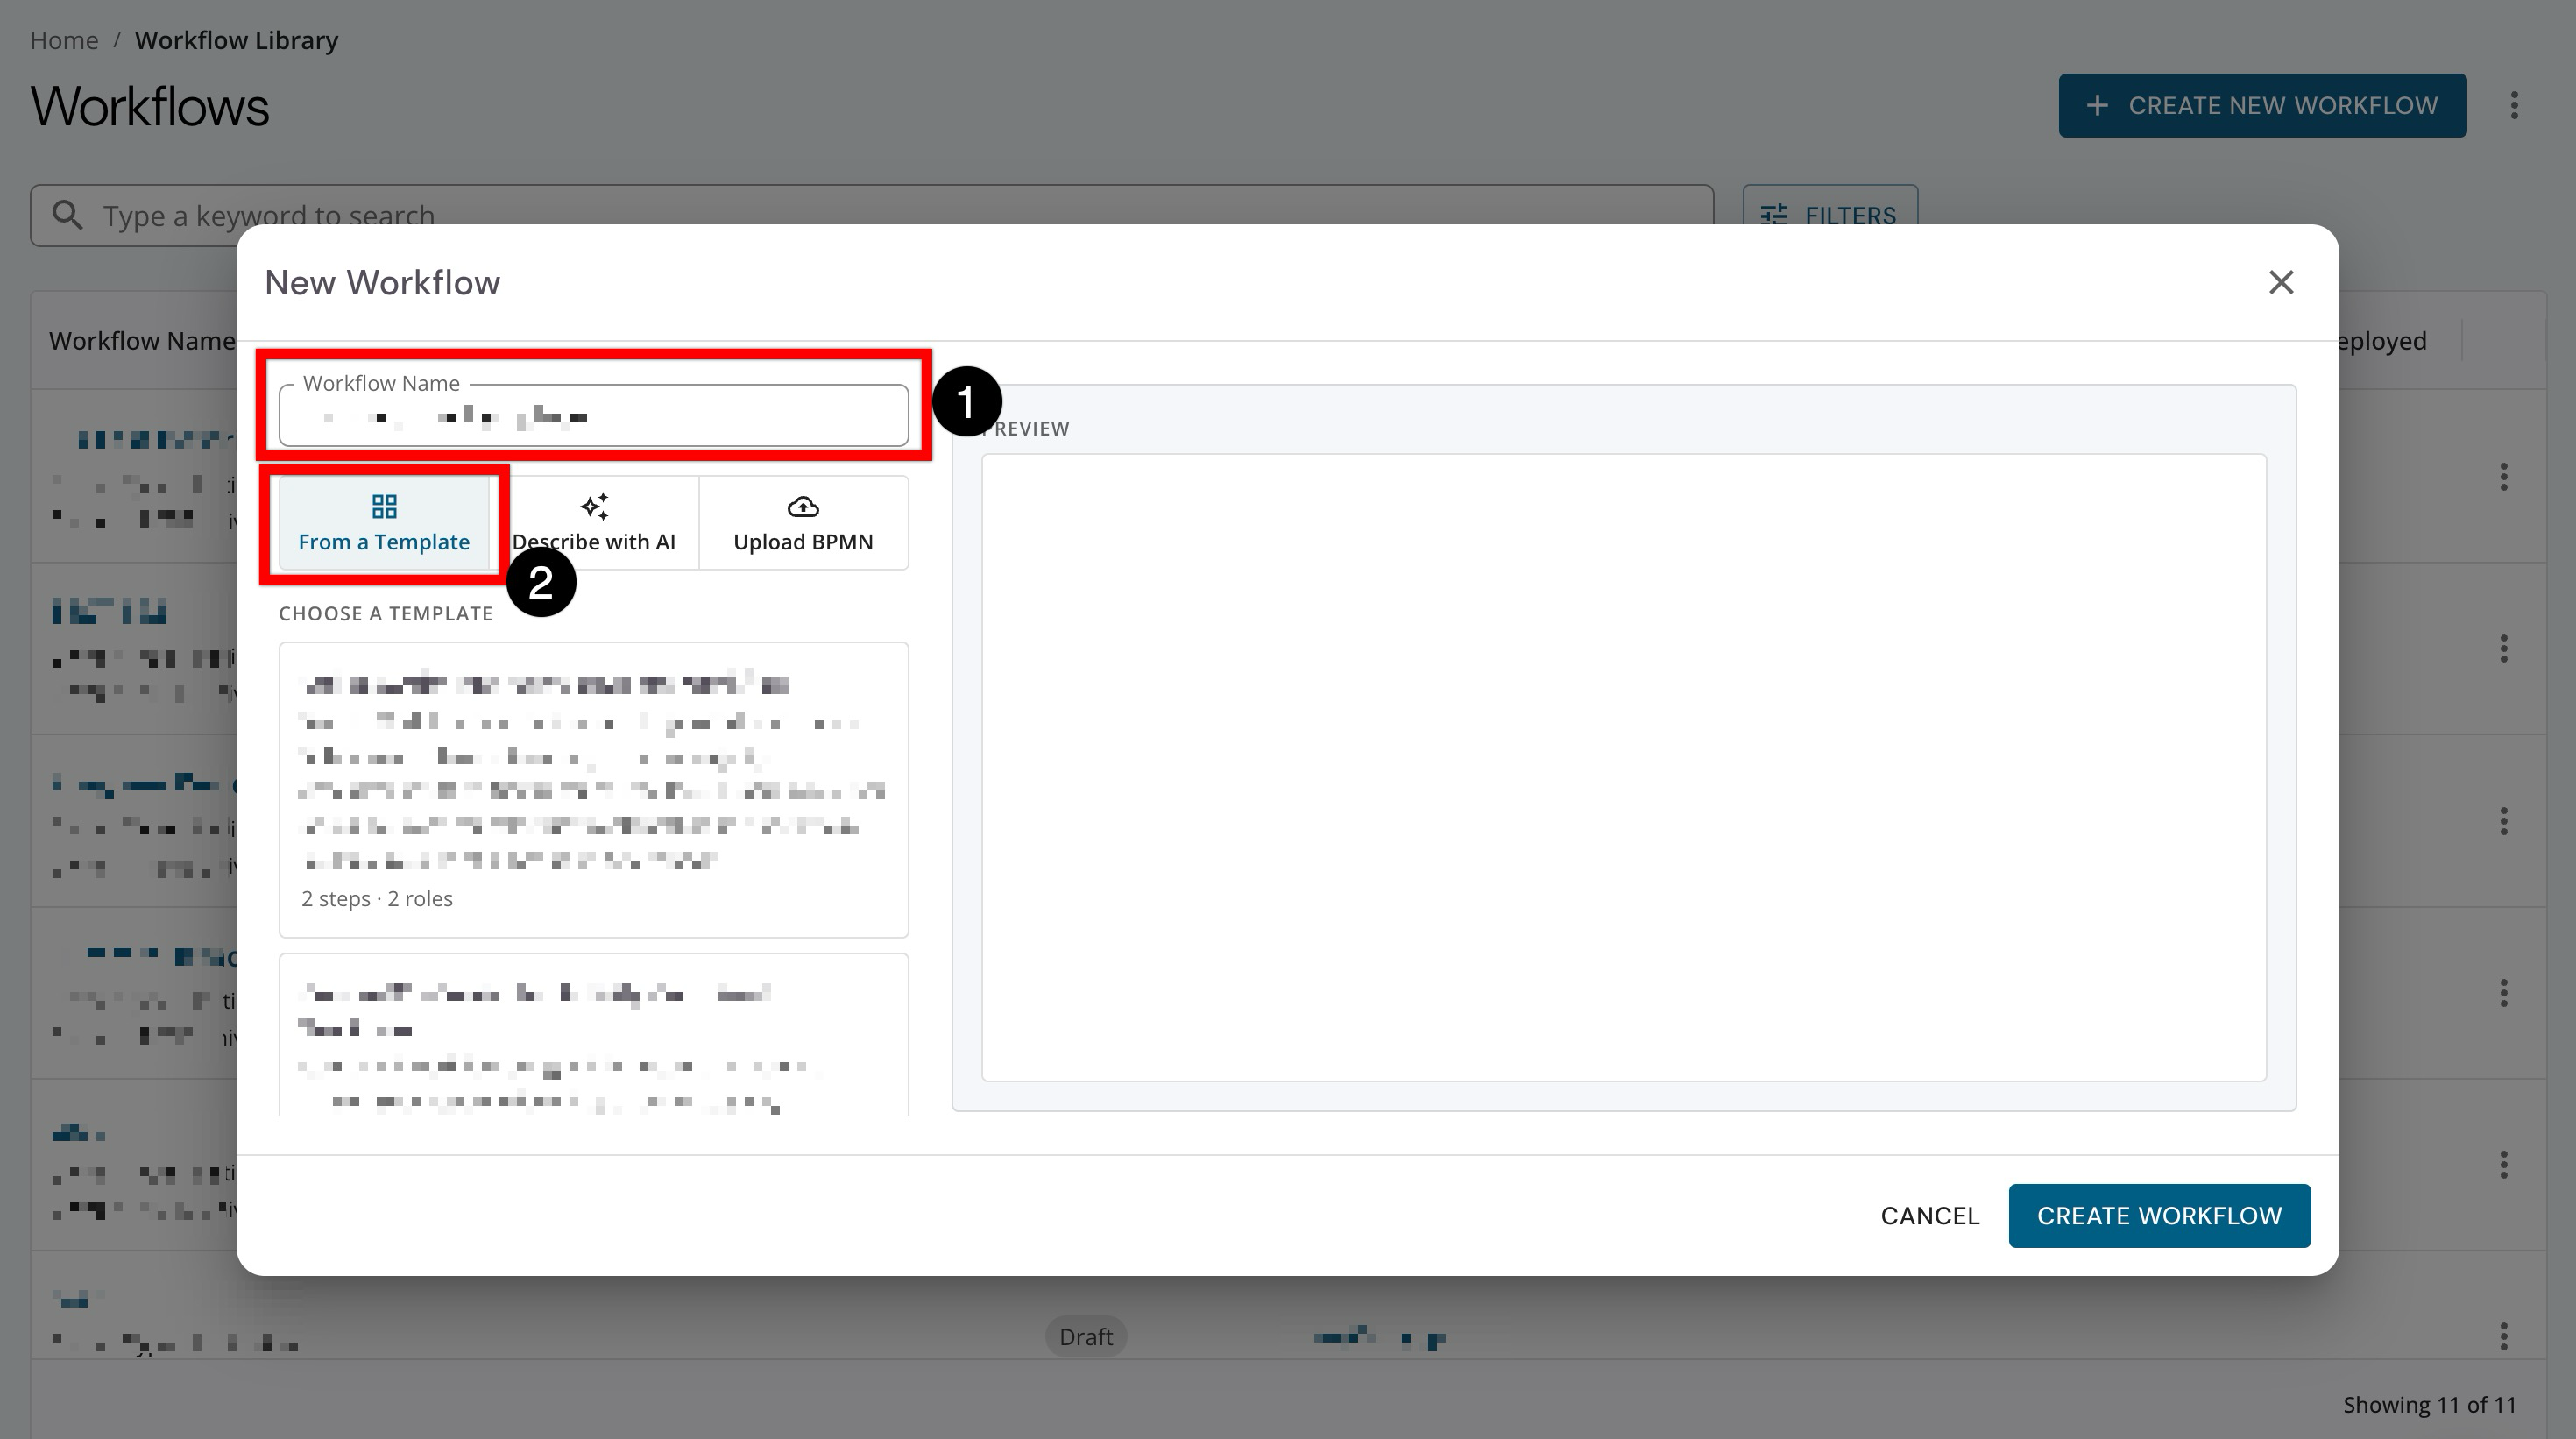
Enter a name for the workflow (1) and select From a Template from the workflow creation options (2). This opens the template selection, where available workflow templates are displayed.
-
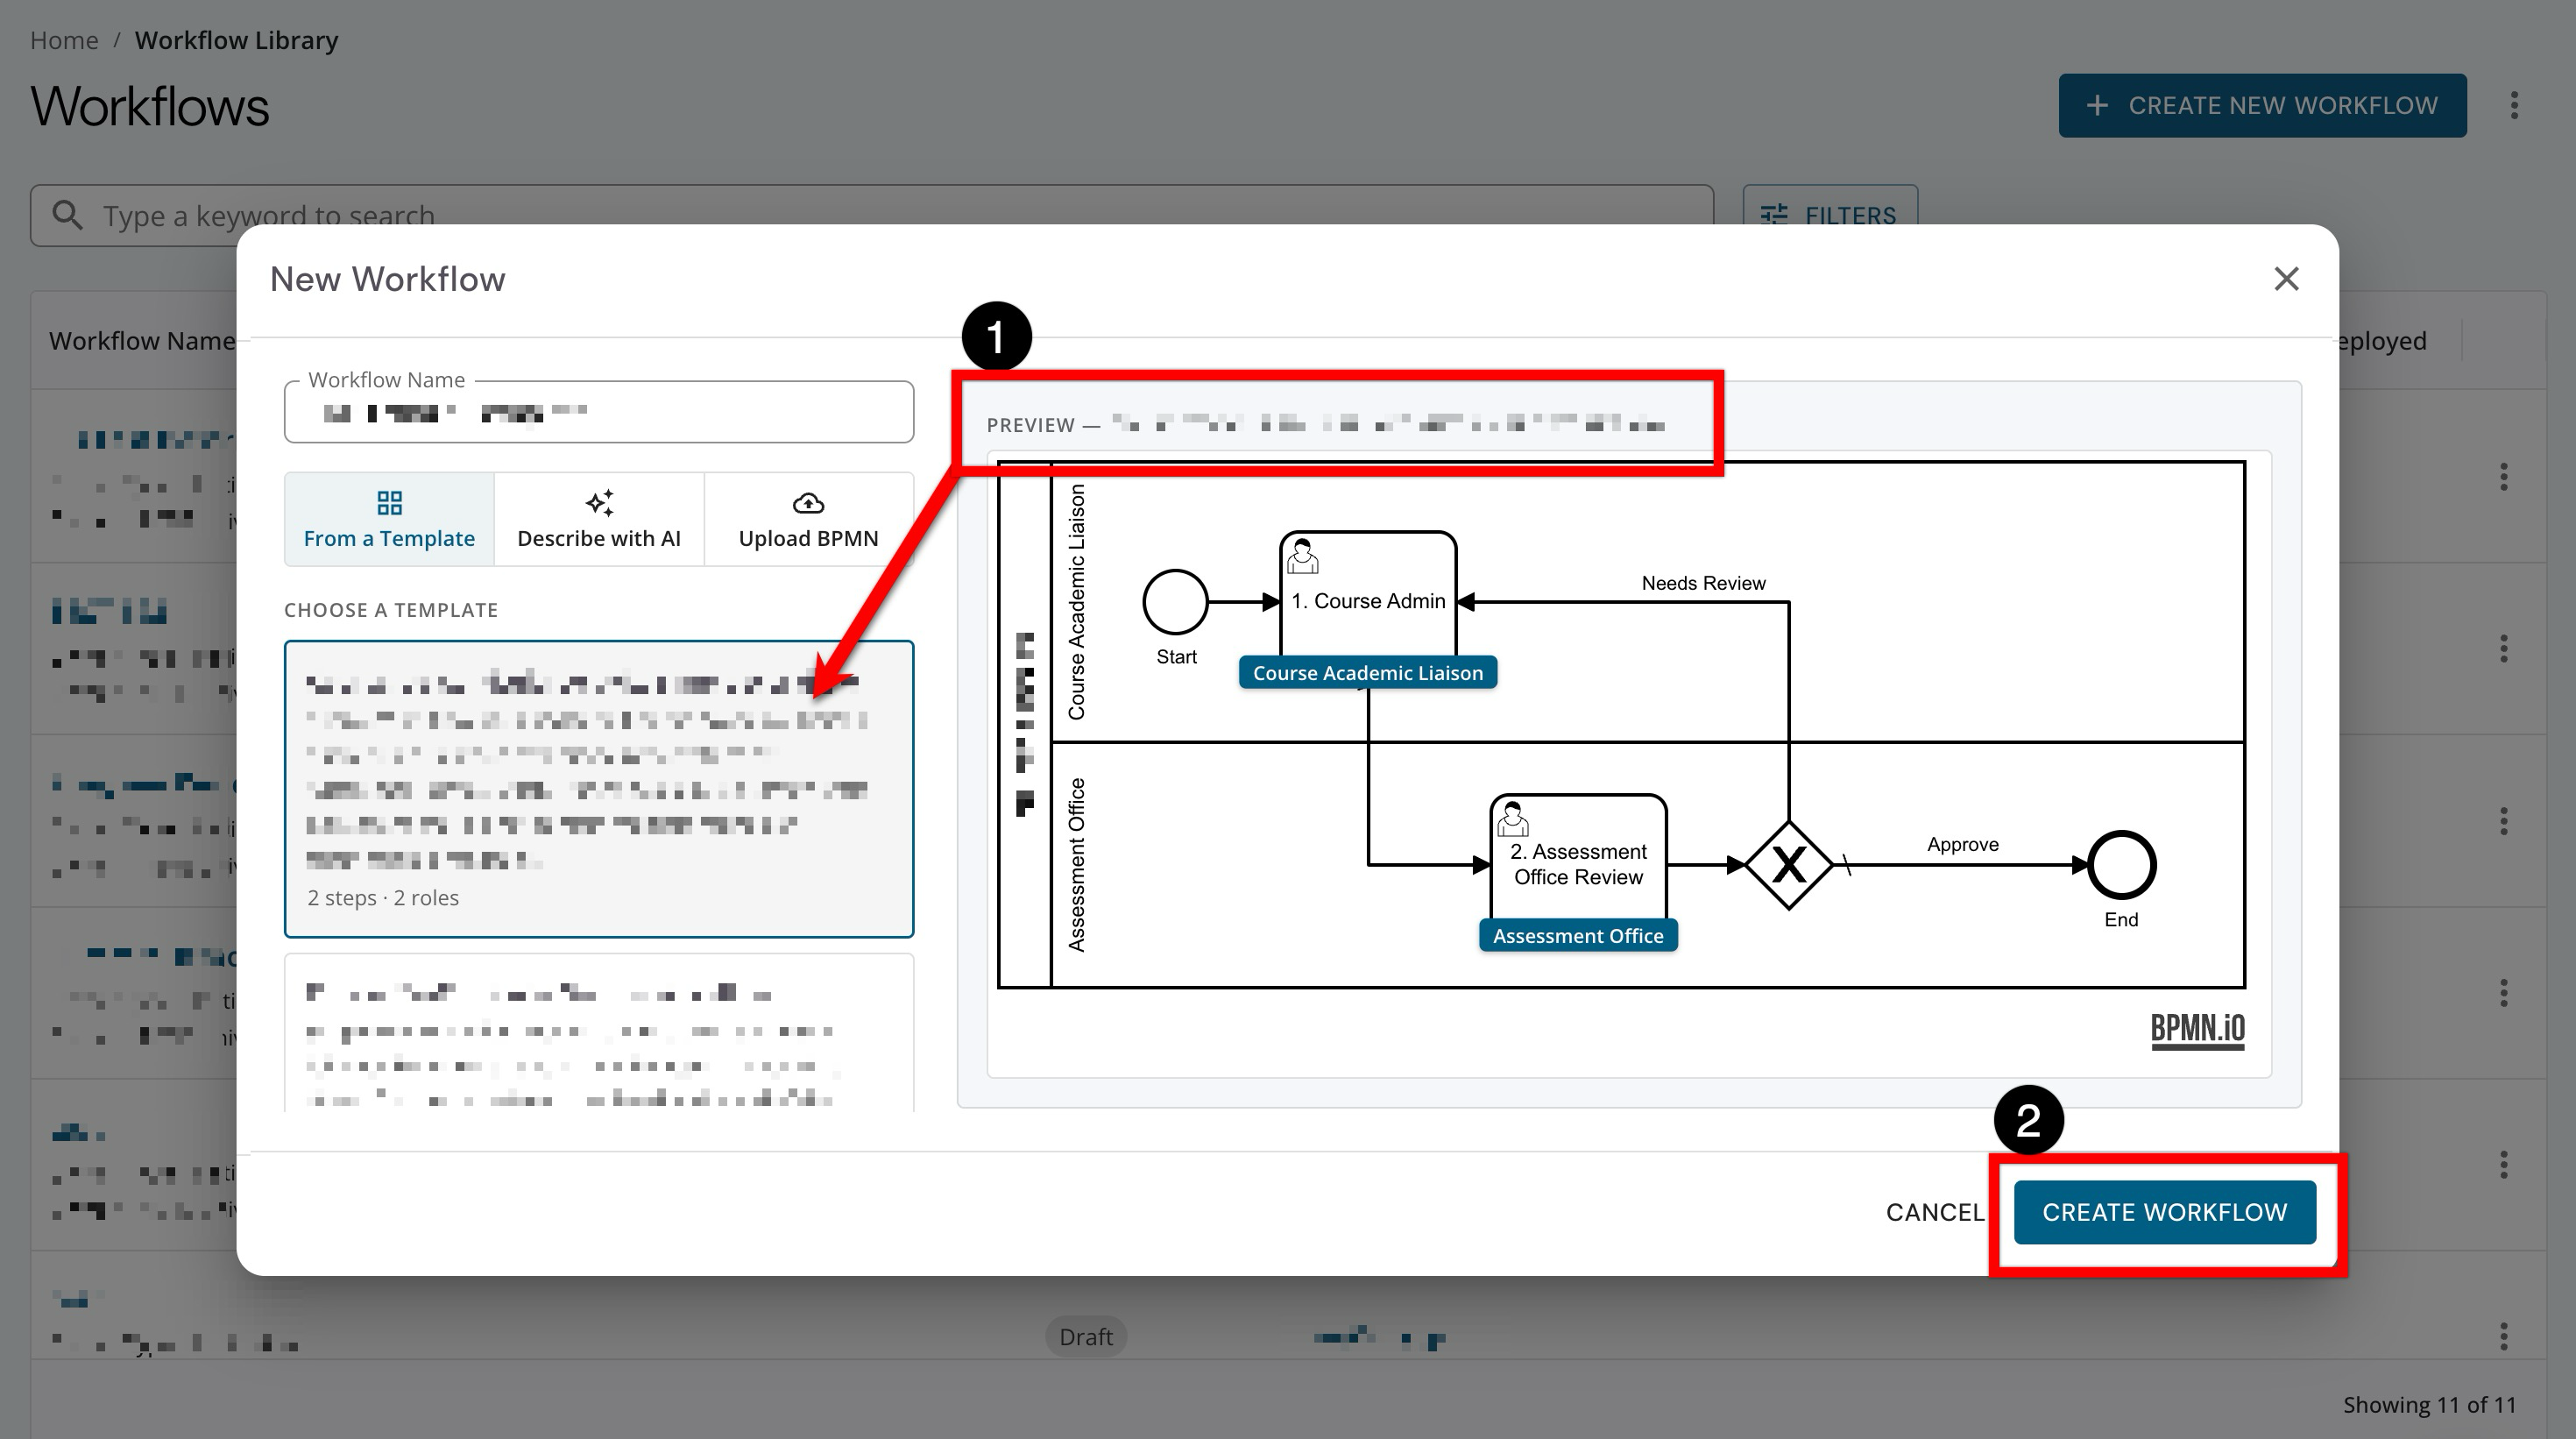
Review the available templates and choose the one that most closely matches the desired collection process. Click a template card to view it in the preview (1) to confirm that the workflow type, steps, and intended use match the new collection needs before continuing. Clicking Create Workflow (2) will open the new workflow in Draft status, where the workflow can be reviewed and further edited before publishing.
-
Describe With AI
Use Describe with AI when the workflow needs to accomplish a clear process, but building every step manually is not necessary. This option lets users describe the process in plain language, then generates a draft workflow that can be reviewed and refined before publishing.
-
Navigate to the Workflow Library and click Create New Workflow.
-
-
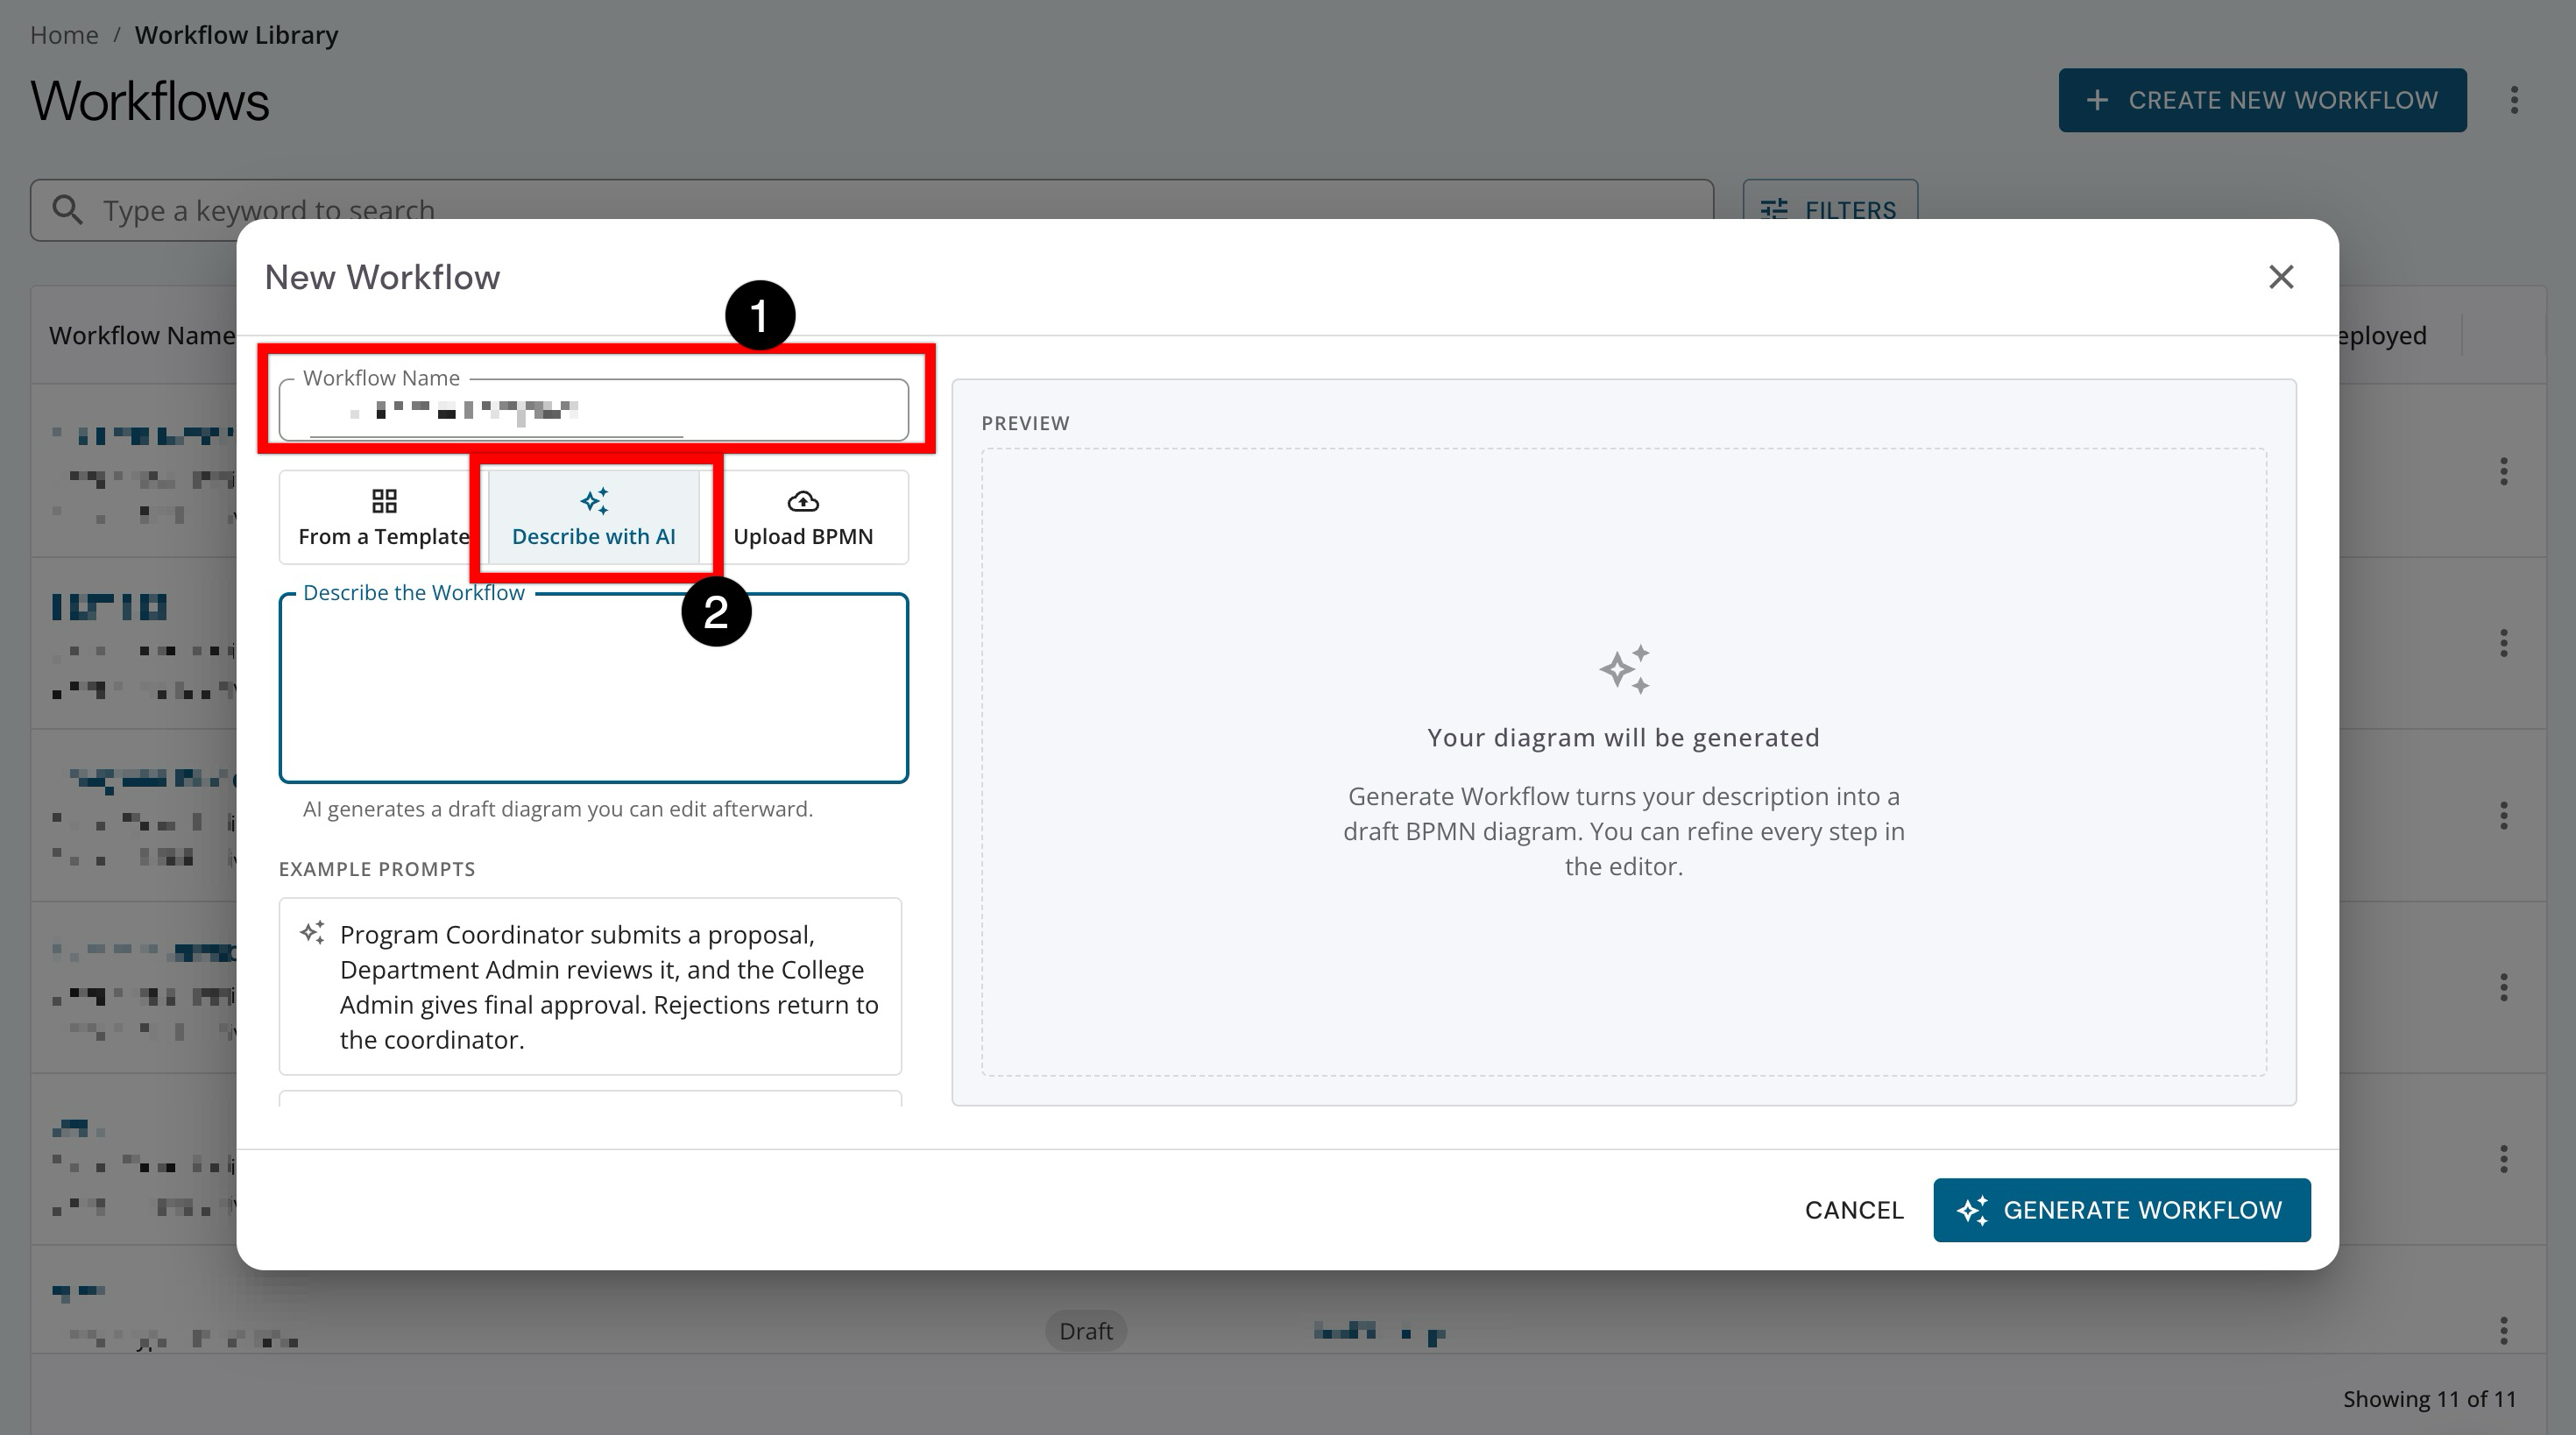
Enter a name for the workflow (1) and select Describe With AI from the workflow creation options (2). This opens the description field and example prompts.
-
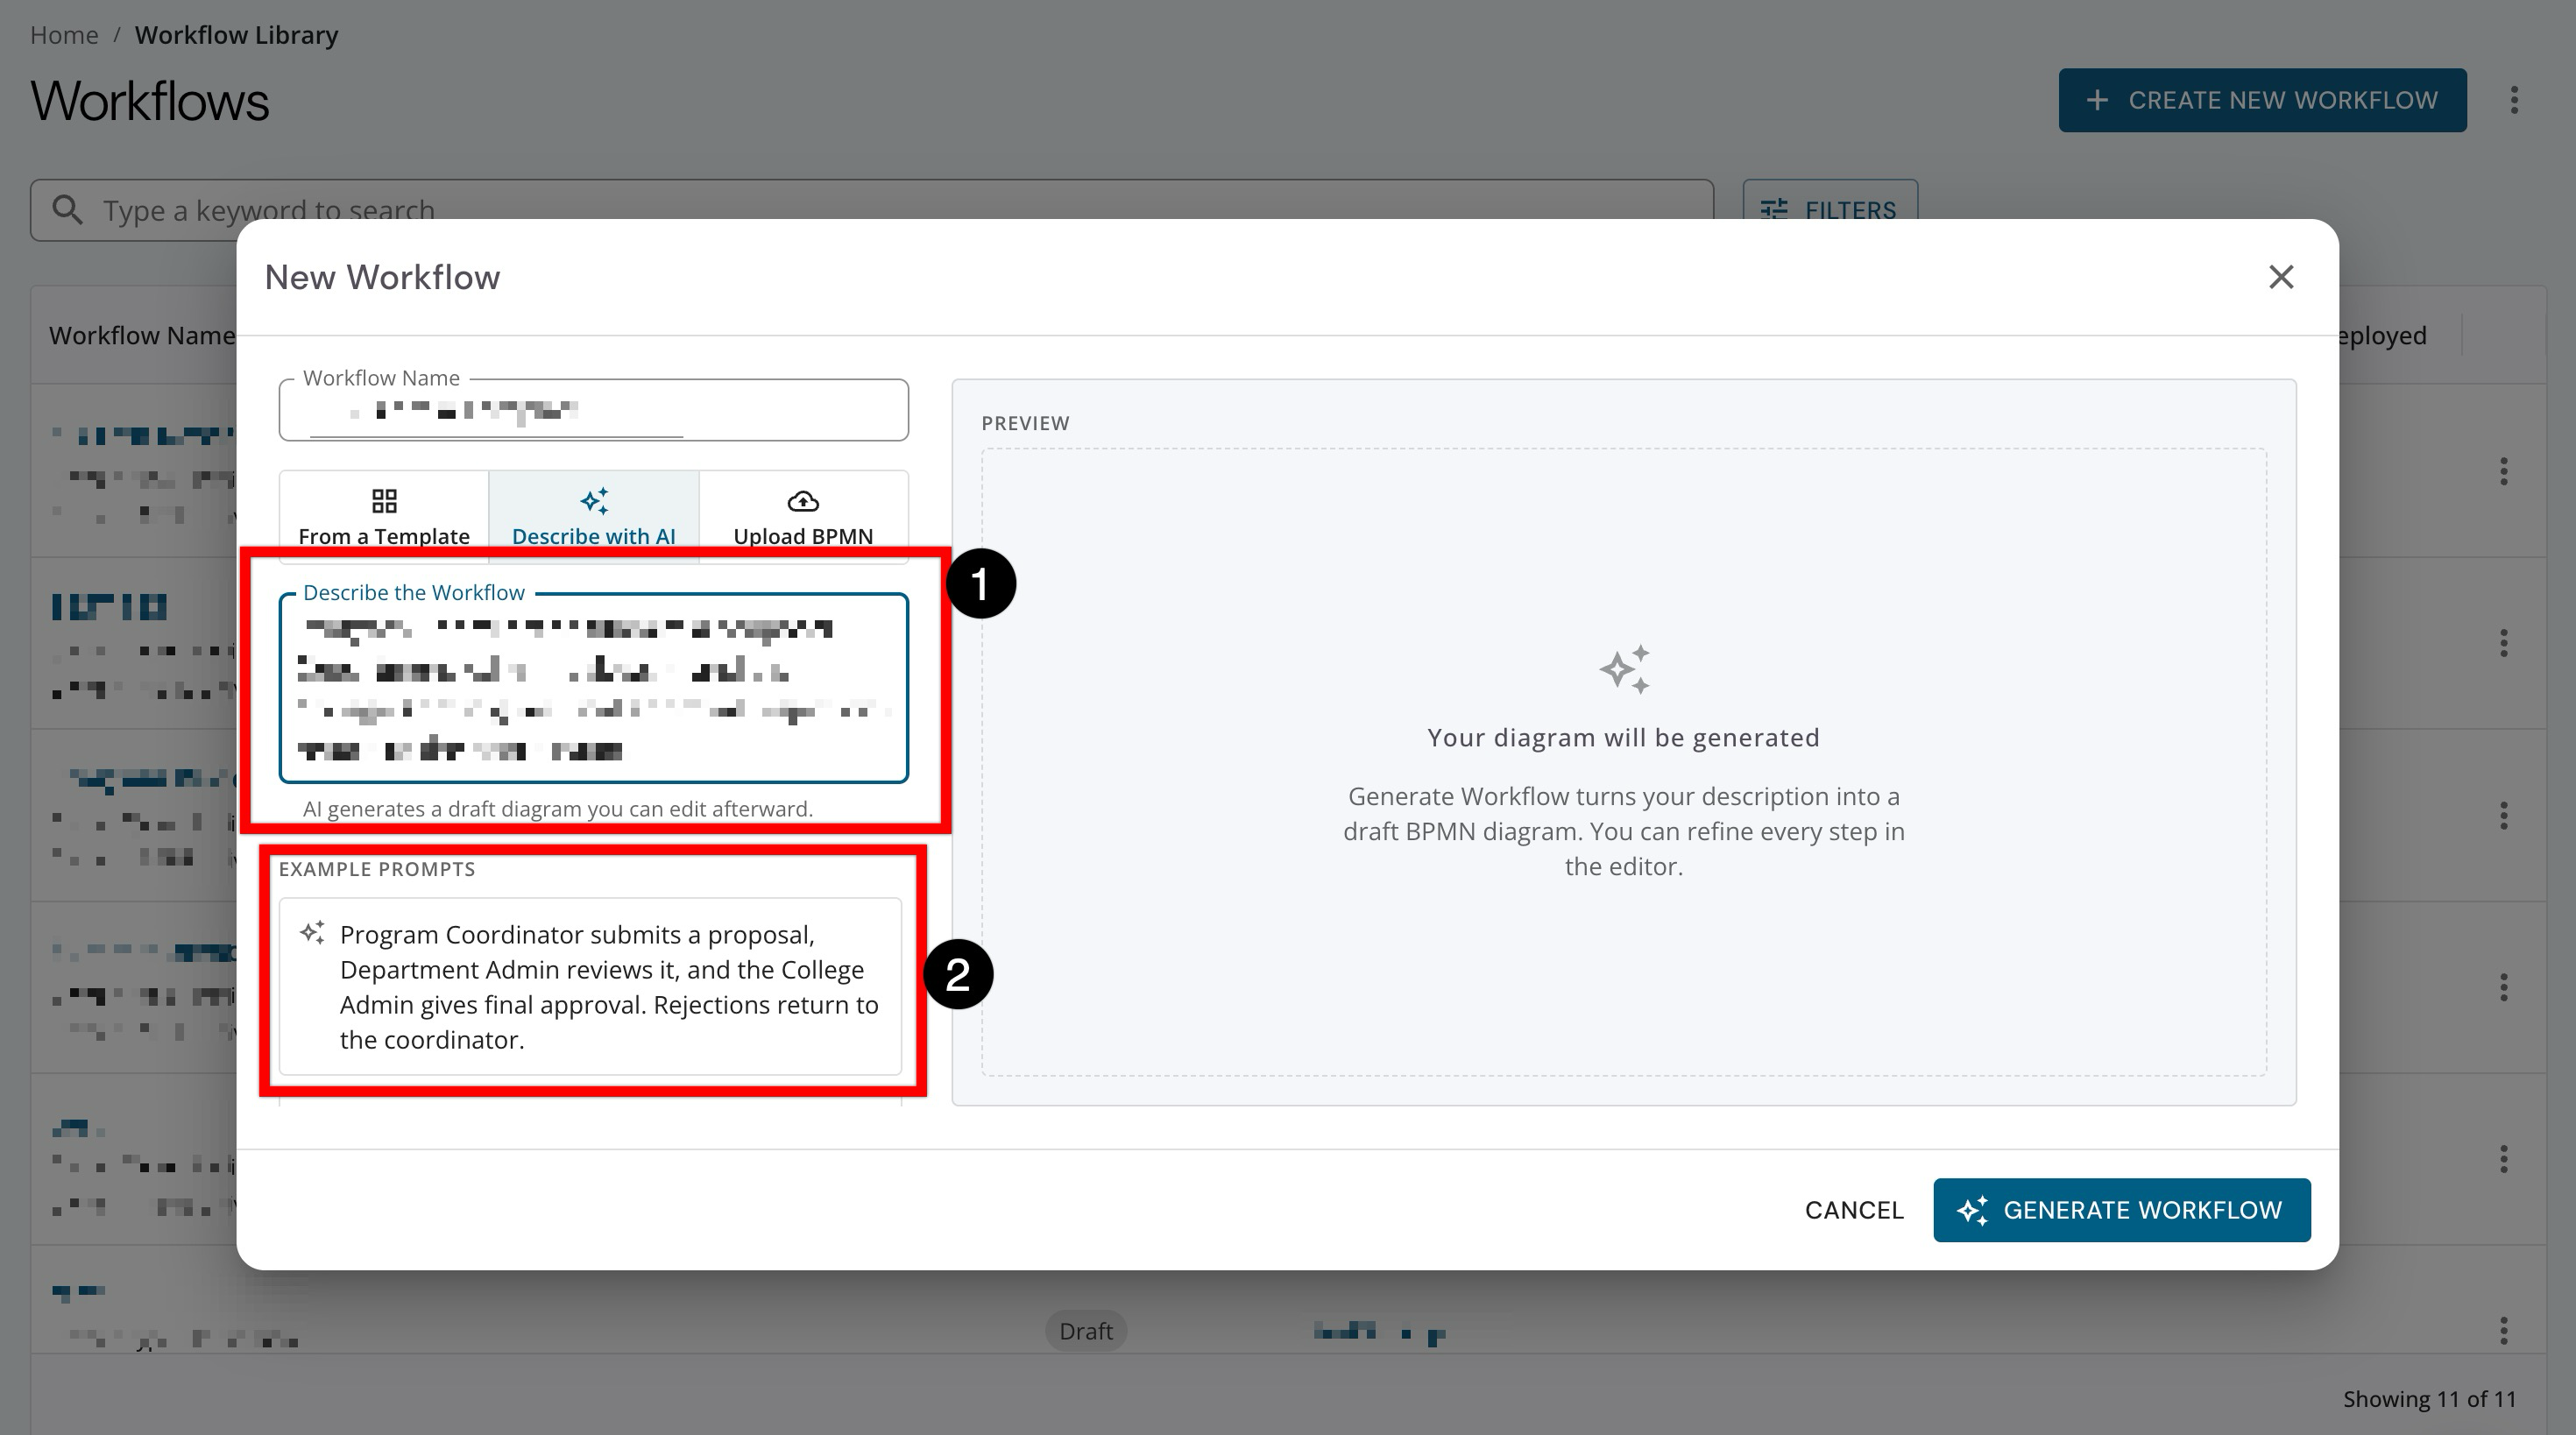
Enter a clear description of the process for the workflow (1). Include the purpose of the workflow, the people or roles involved, the major review or approval steps, and any important outcomes. The more specific the description is, the more useful the generated draft will be. For example, 'replace the lane header with “Program Committee”, update Step 1 title to “1. Program Committee”, and change the role alignment for step 1 to “Program Committee” role.'
-
Optionally, an example prompt (2) can be selected that will automatically be added to the description field.
-
-
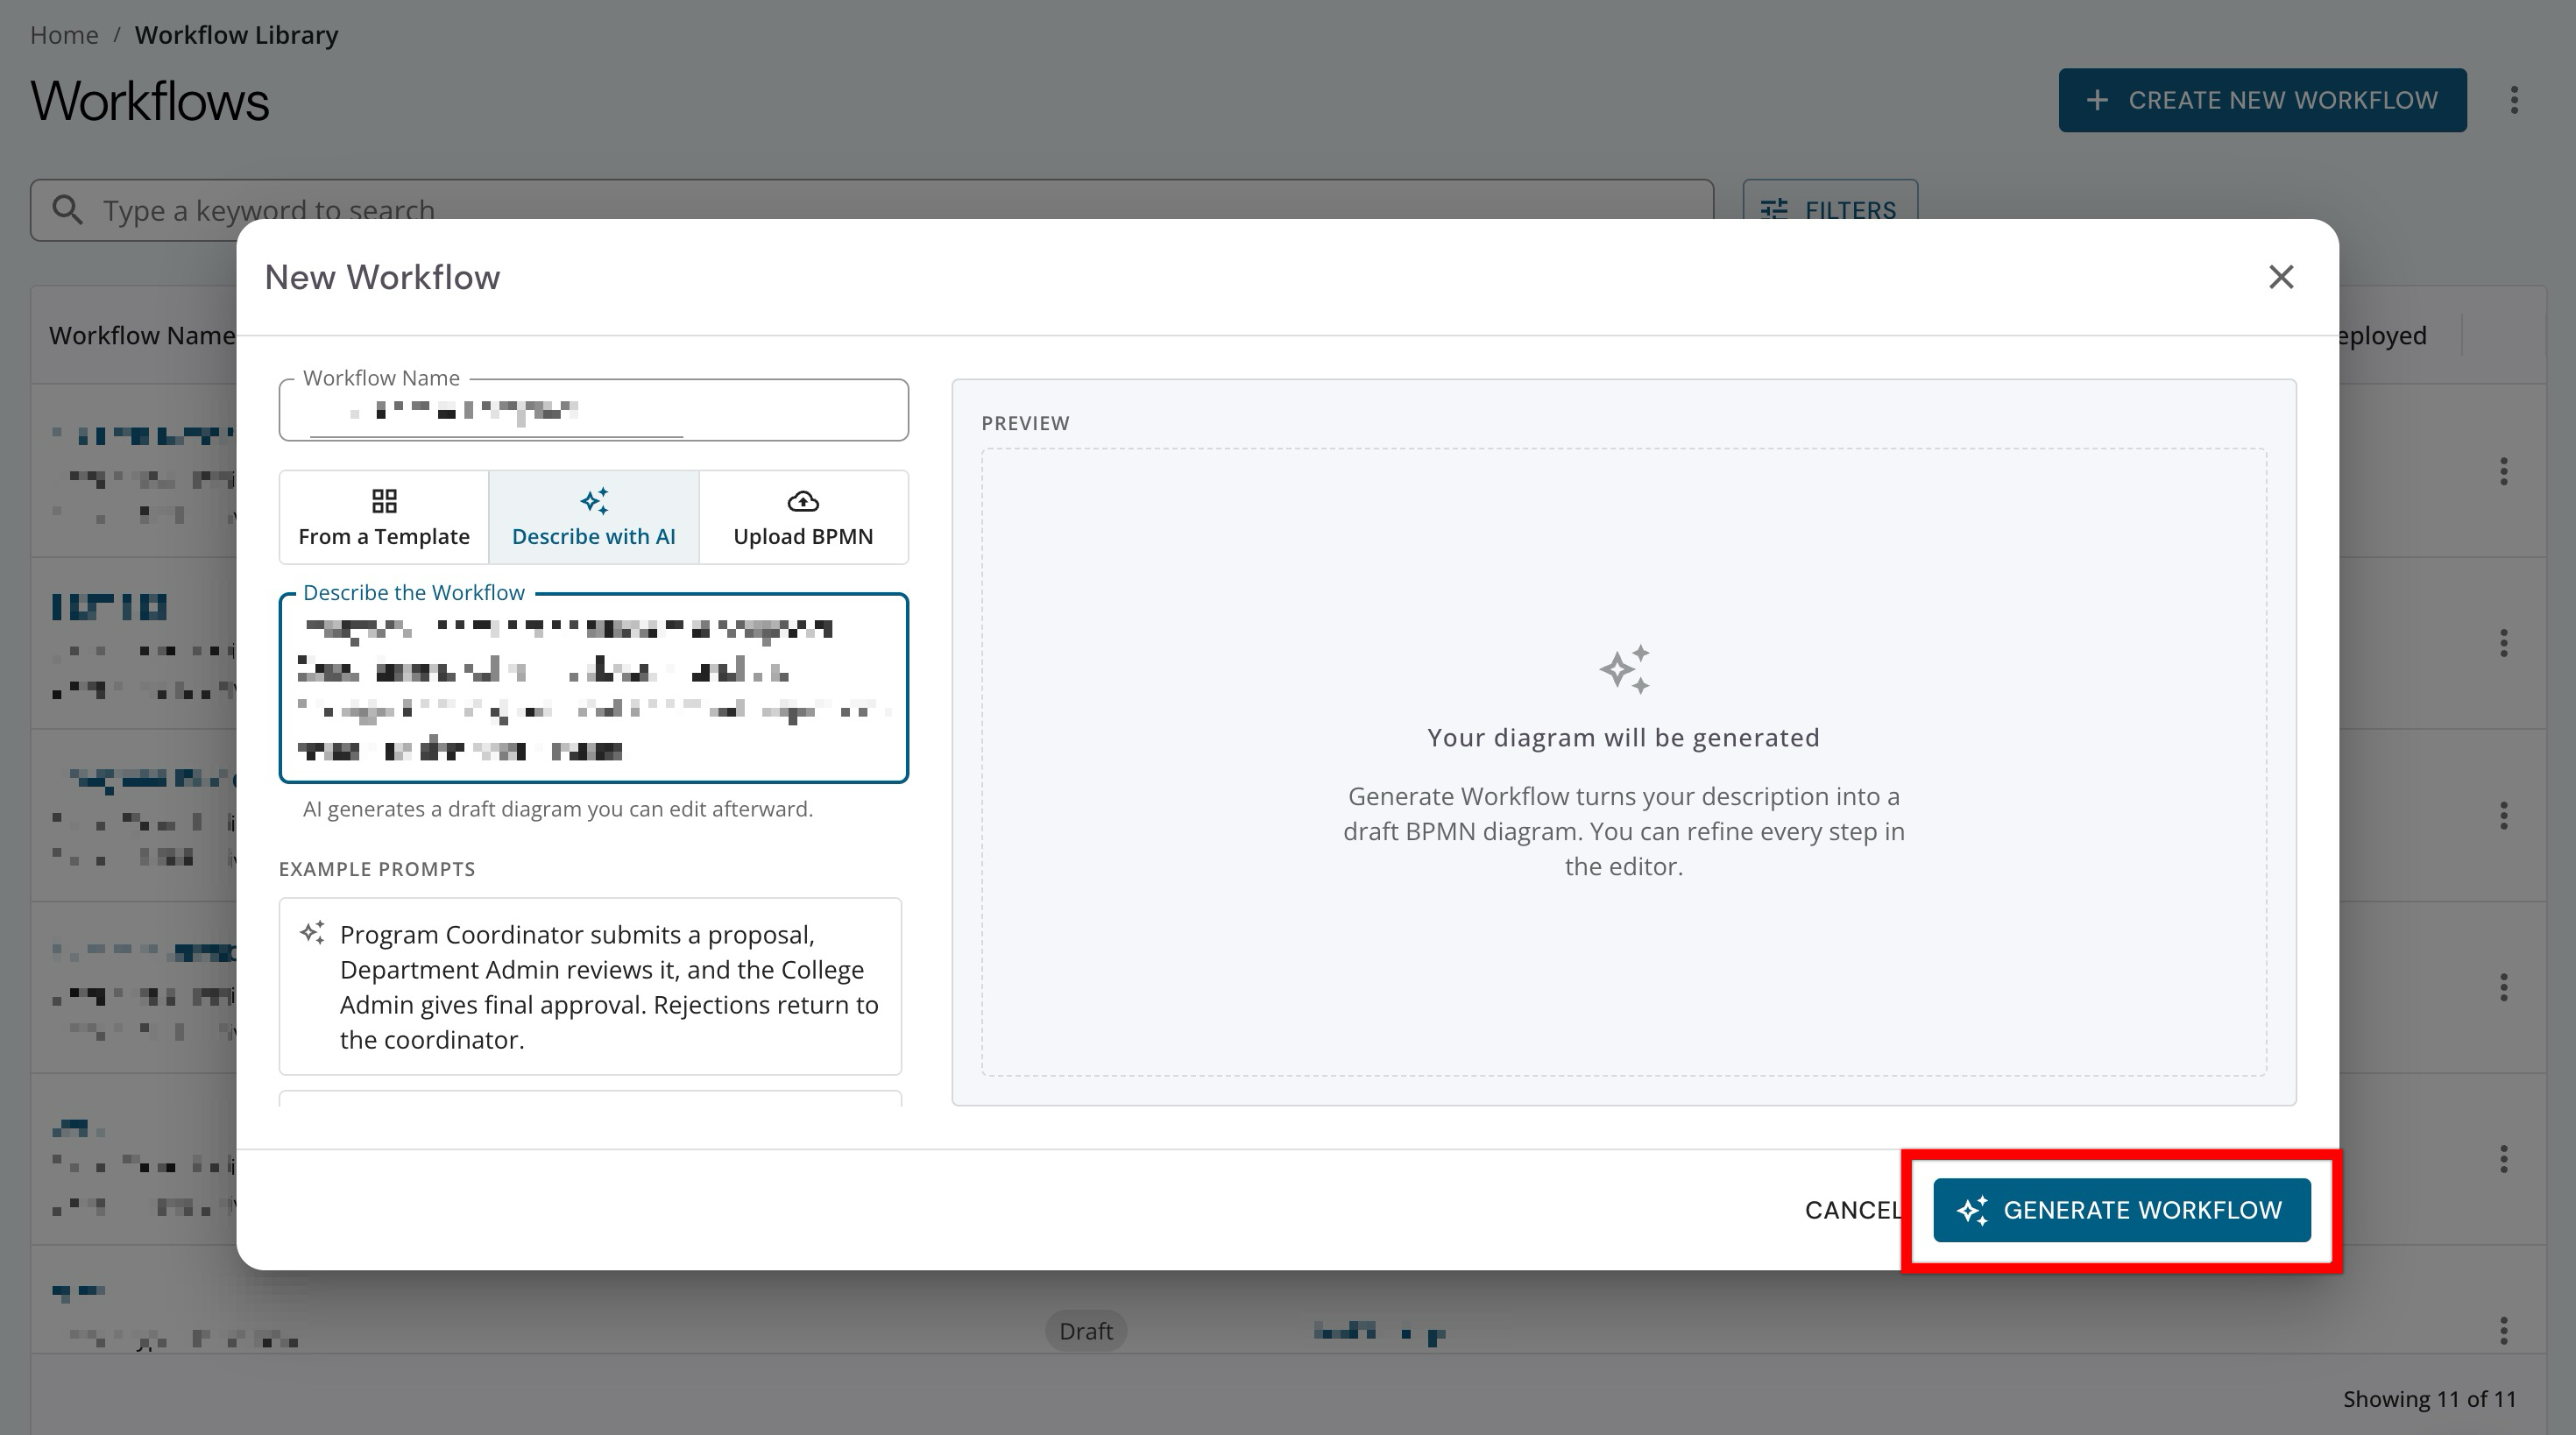
No preview is generated when workflows are described and created by AI, although clicking Create Workflow will open the new workflow in Draft status, where the workflow can be reviewed and further edited before publishing. Edit the draft as needed before publishing. AI-generated workflows should be treated as a starting point, not a final version. Make sure the workflow follows the Institution’s policies and uses recognizable terminology.
-
Upload BPMN
Use Upload BPMN when a workflow file has already been created or exported elsewhere. This is helpful when moving a workflow between environments, such as from a training site to production, or when reusing a workflow that has already been designed.
Legacy workflows may contain errors and require remediation due to the absence of workflow validation functionality at the time of the workflow creation.
-
Navigate to the Workflow Library and click Create New Workflow.
-
-
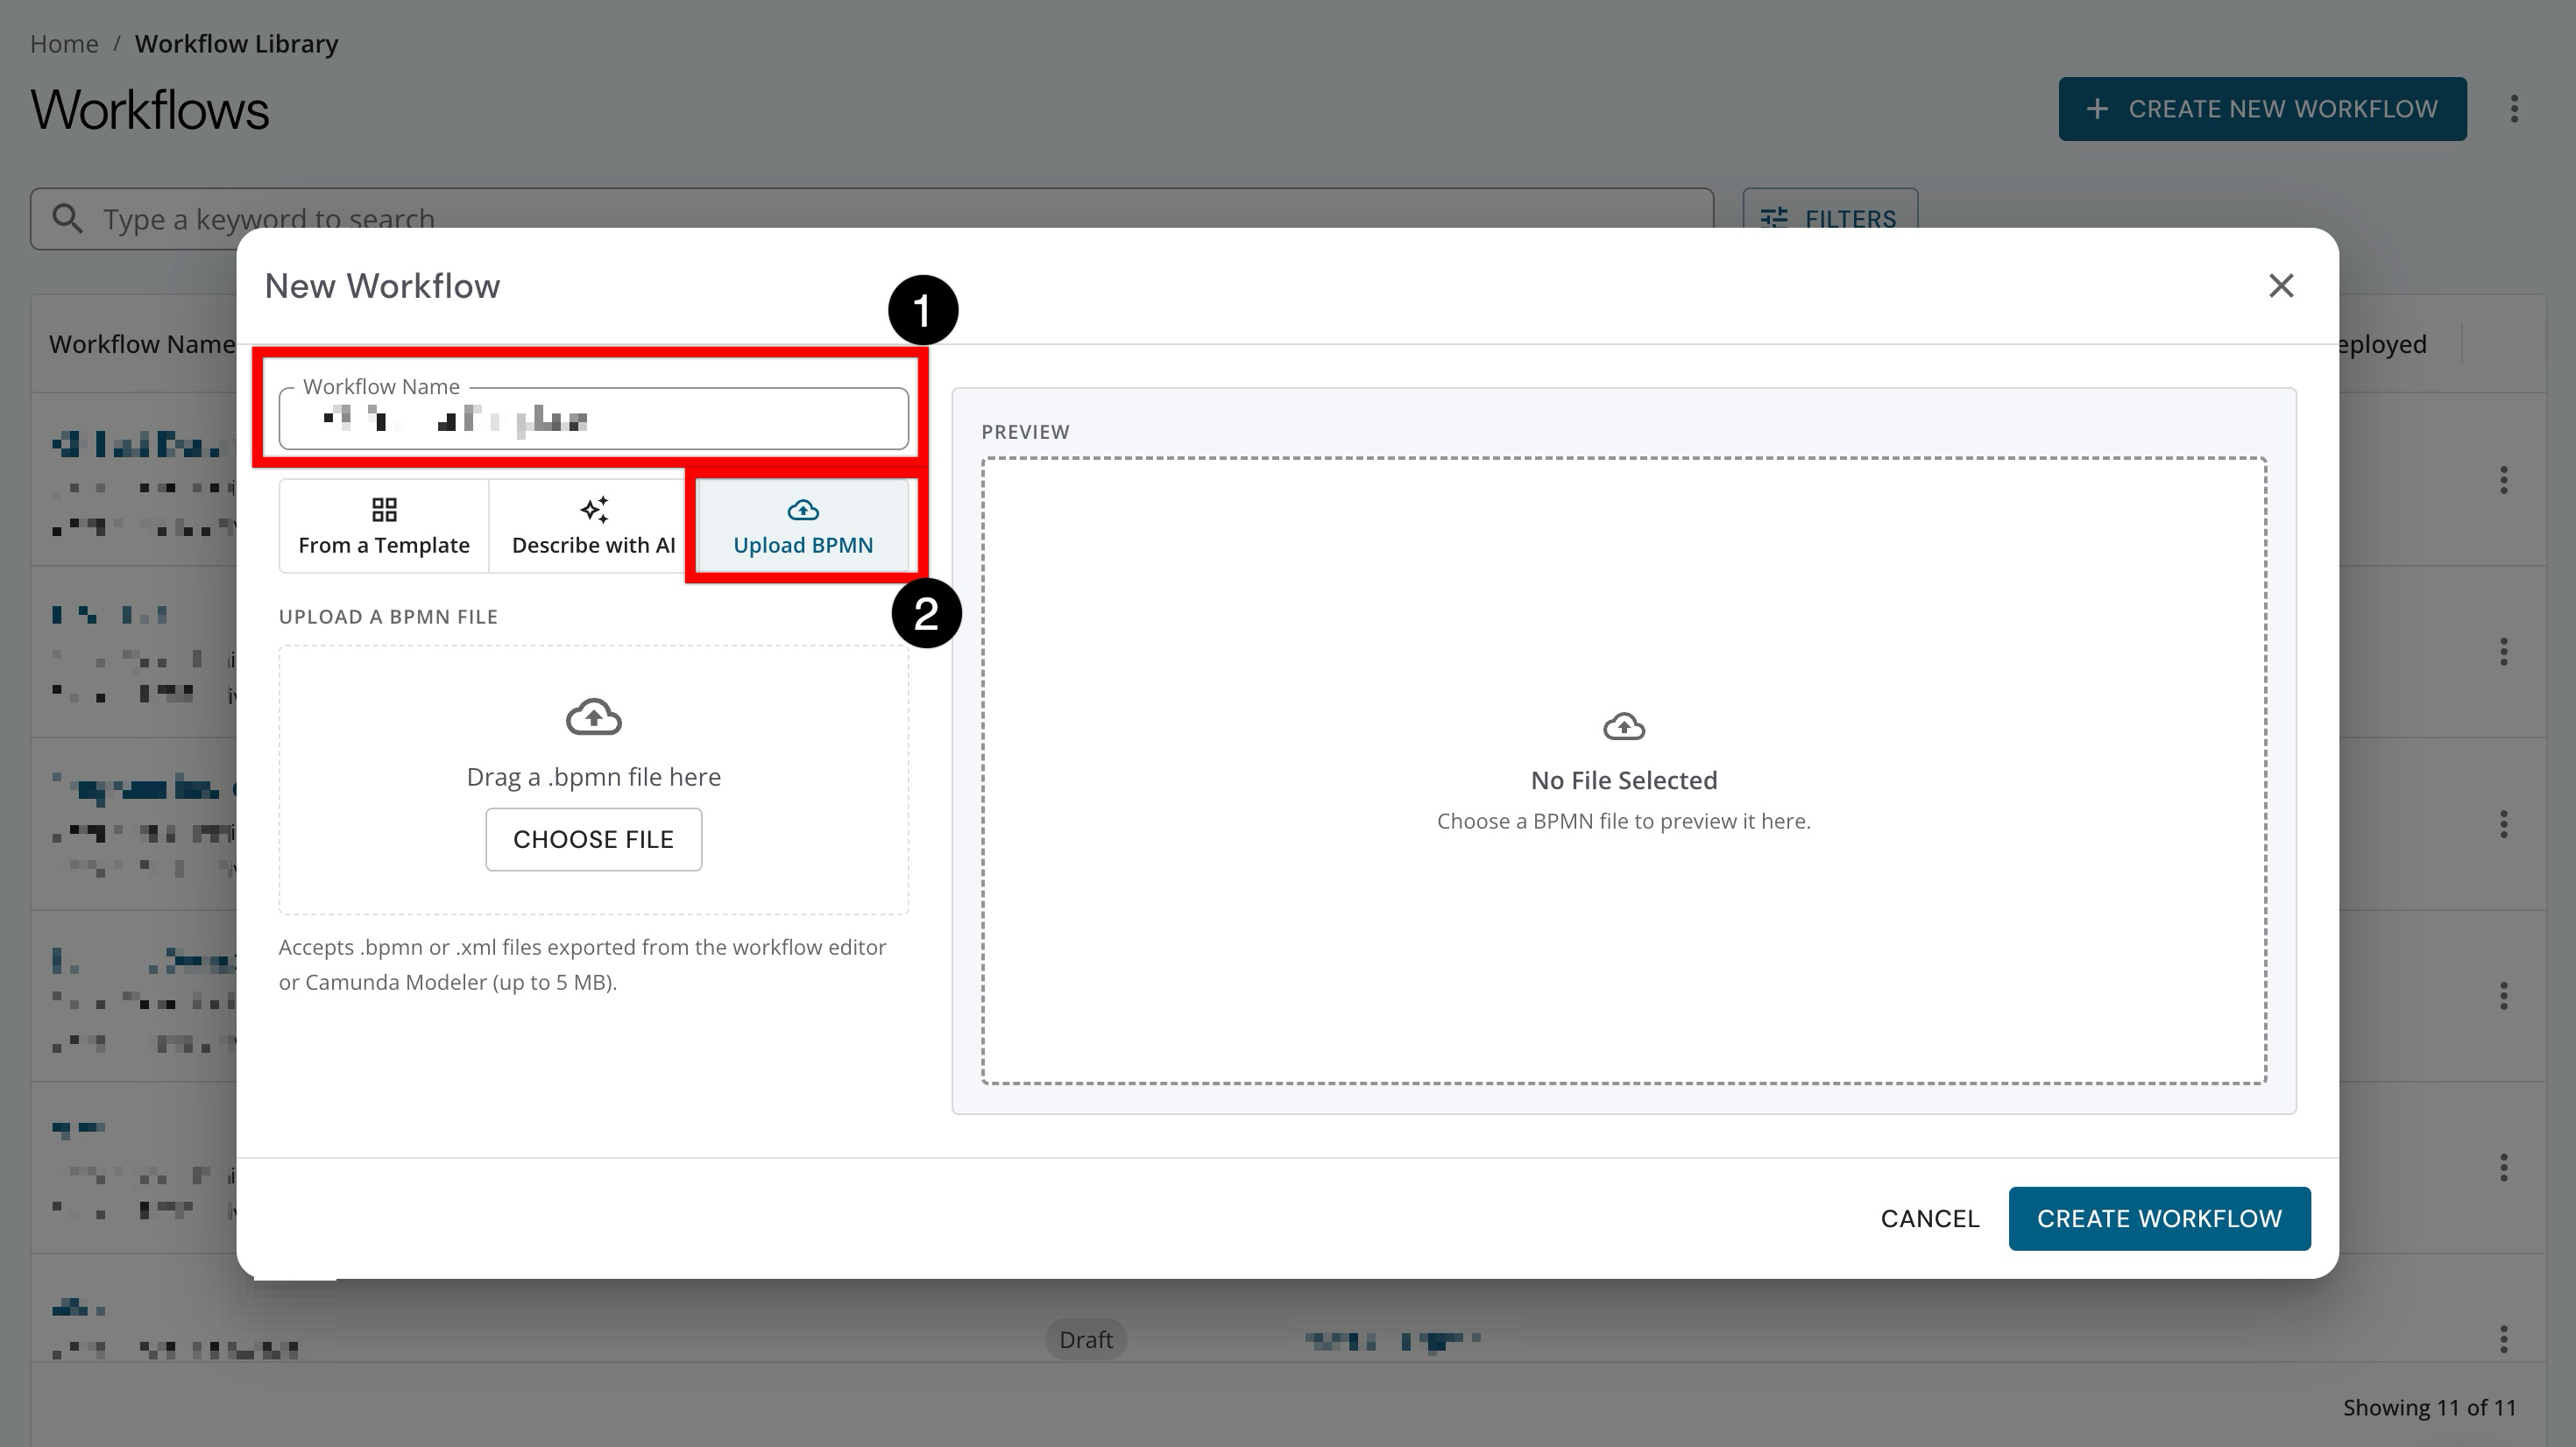
Enter a name for the workflow (1) and select Upload BPMN from the workflow creation options (2). This opens the file upload option.
-
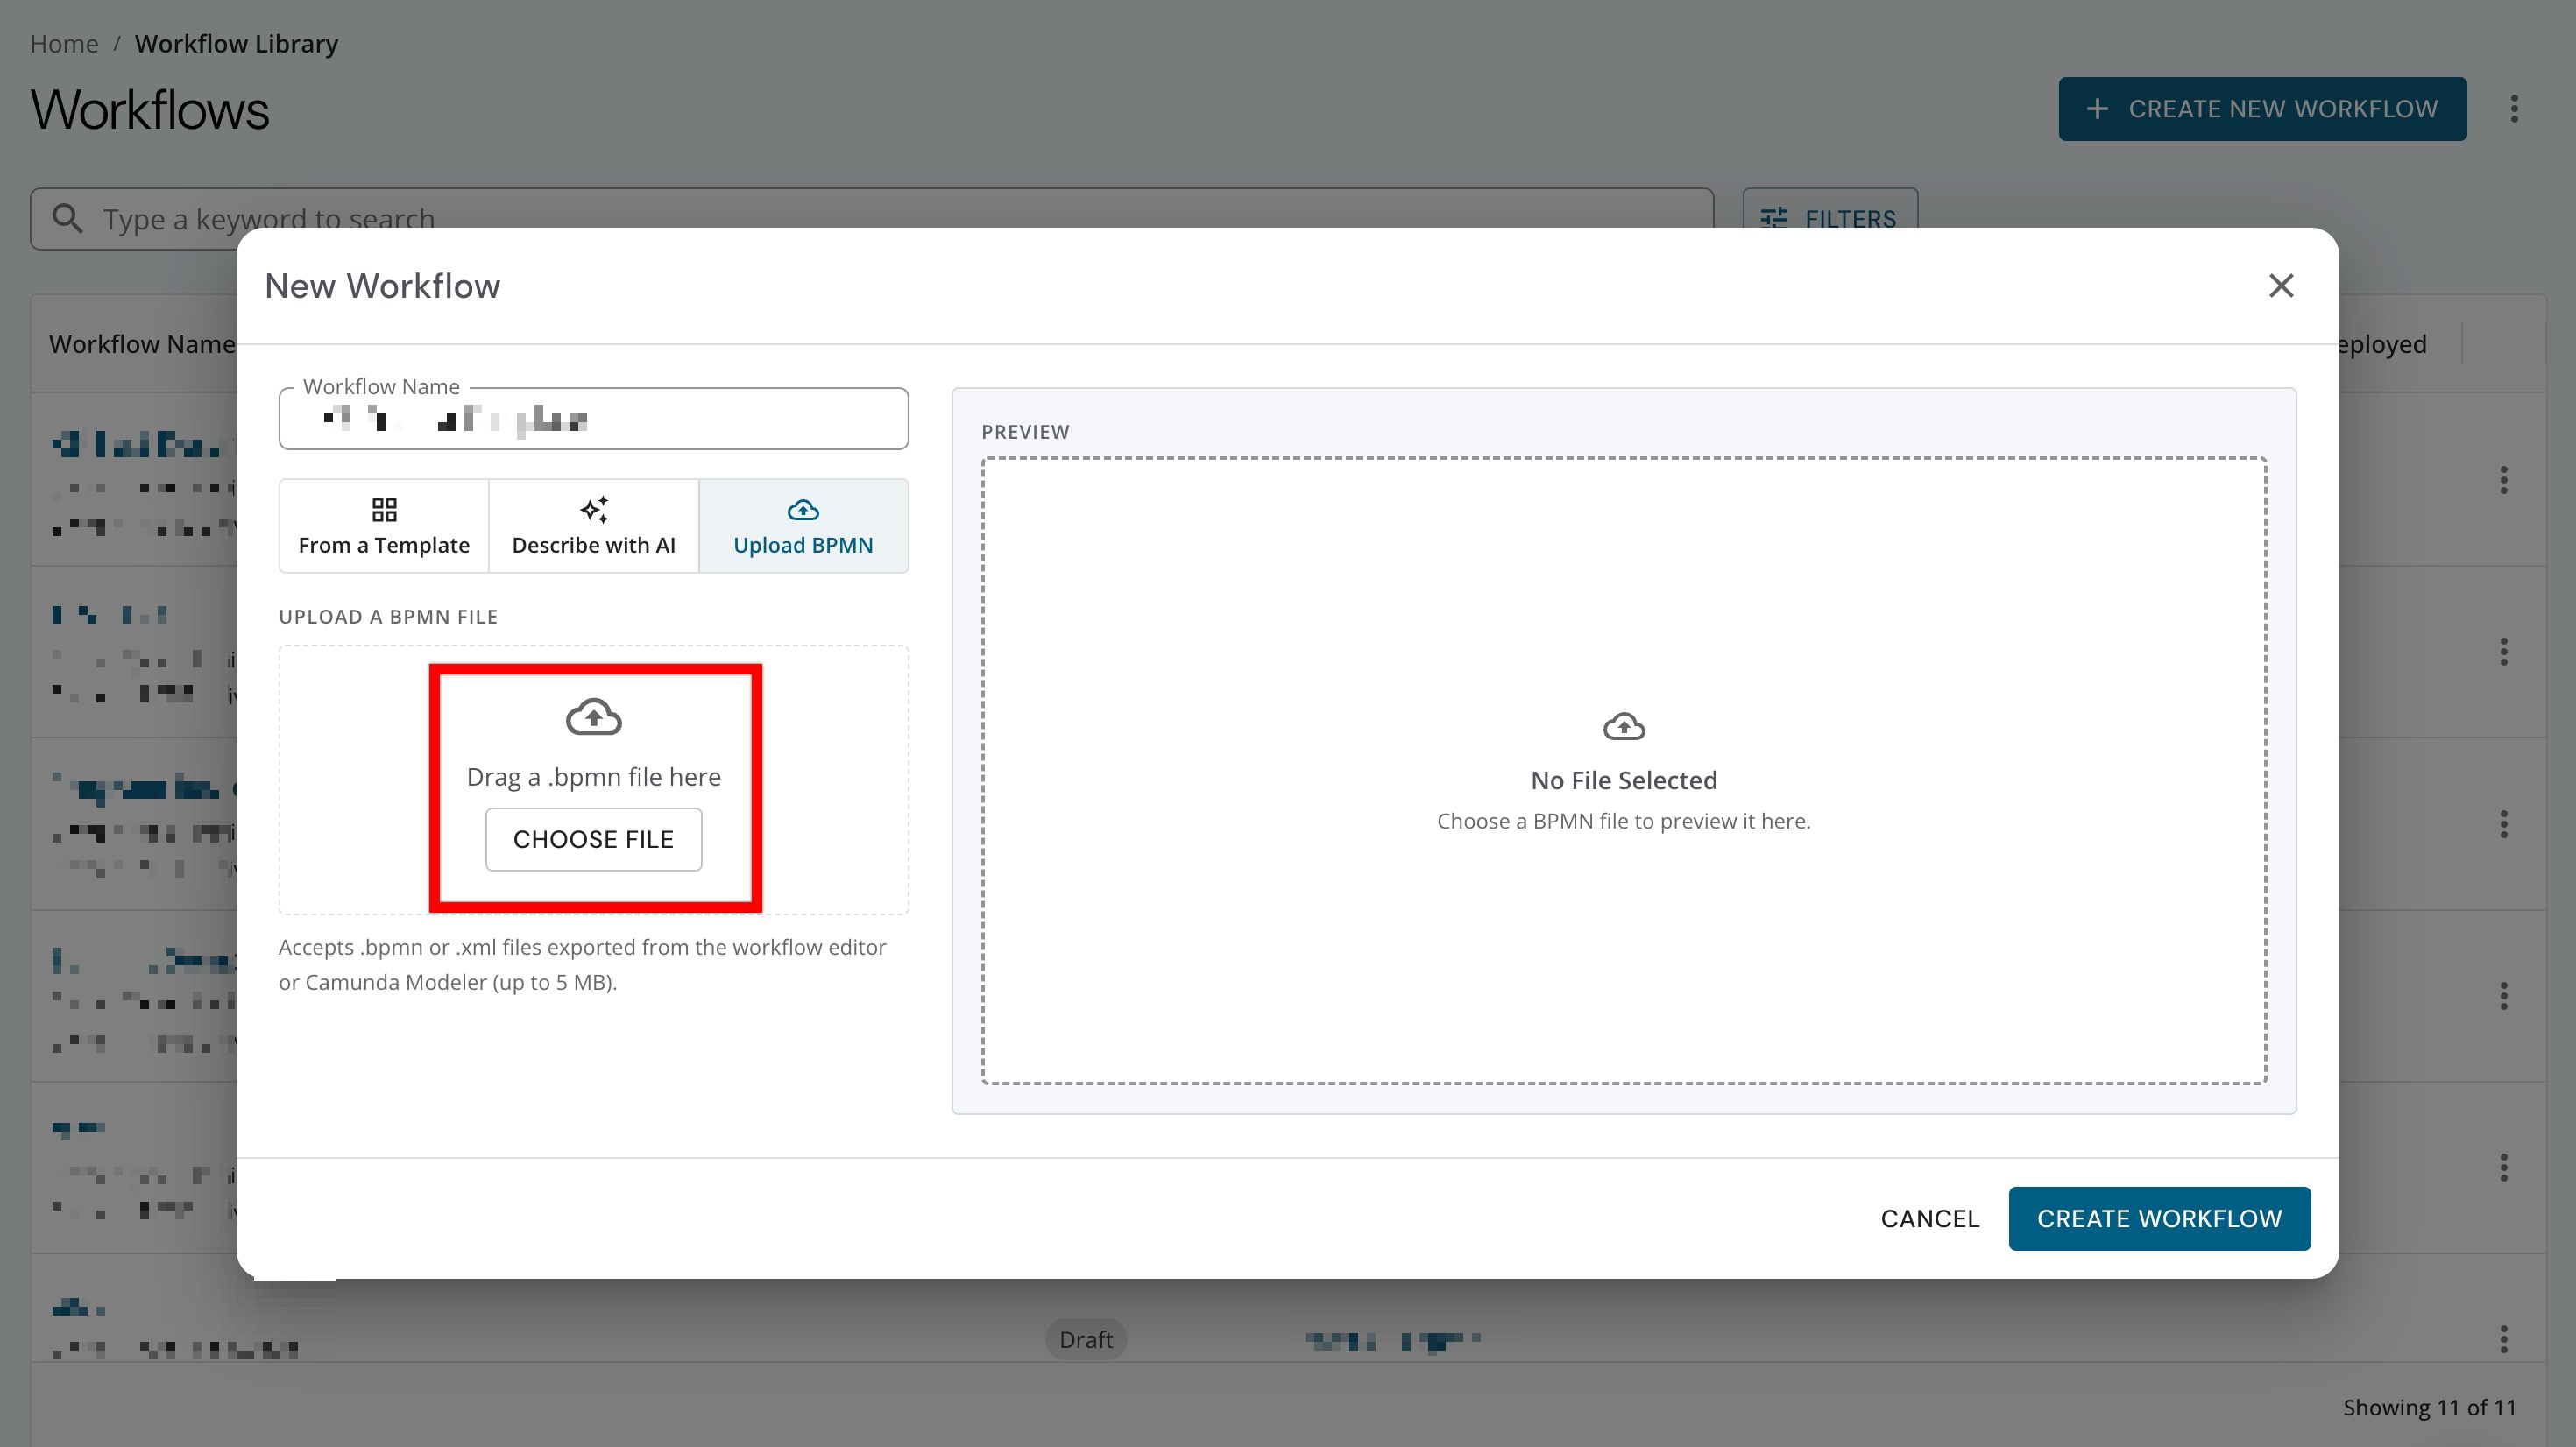
Drag and drop the file, or click Choose File to search for and select the necessary file. The file should be a supported .bpmn or .xml file.
-
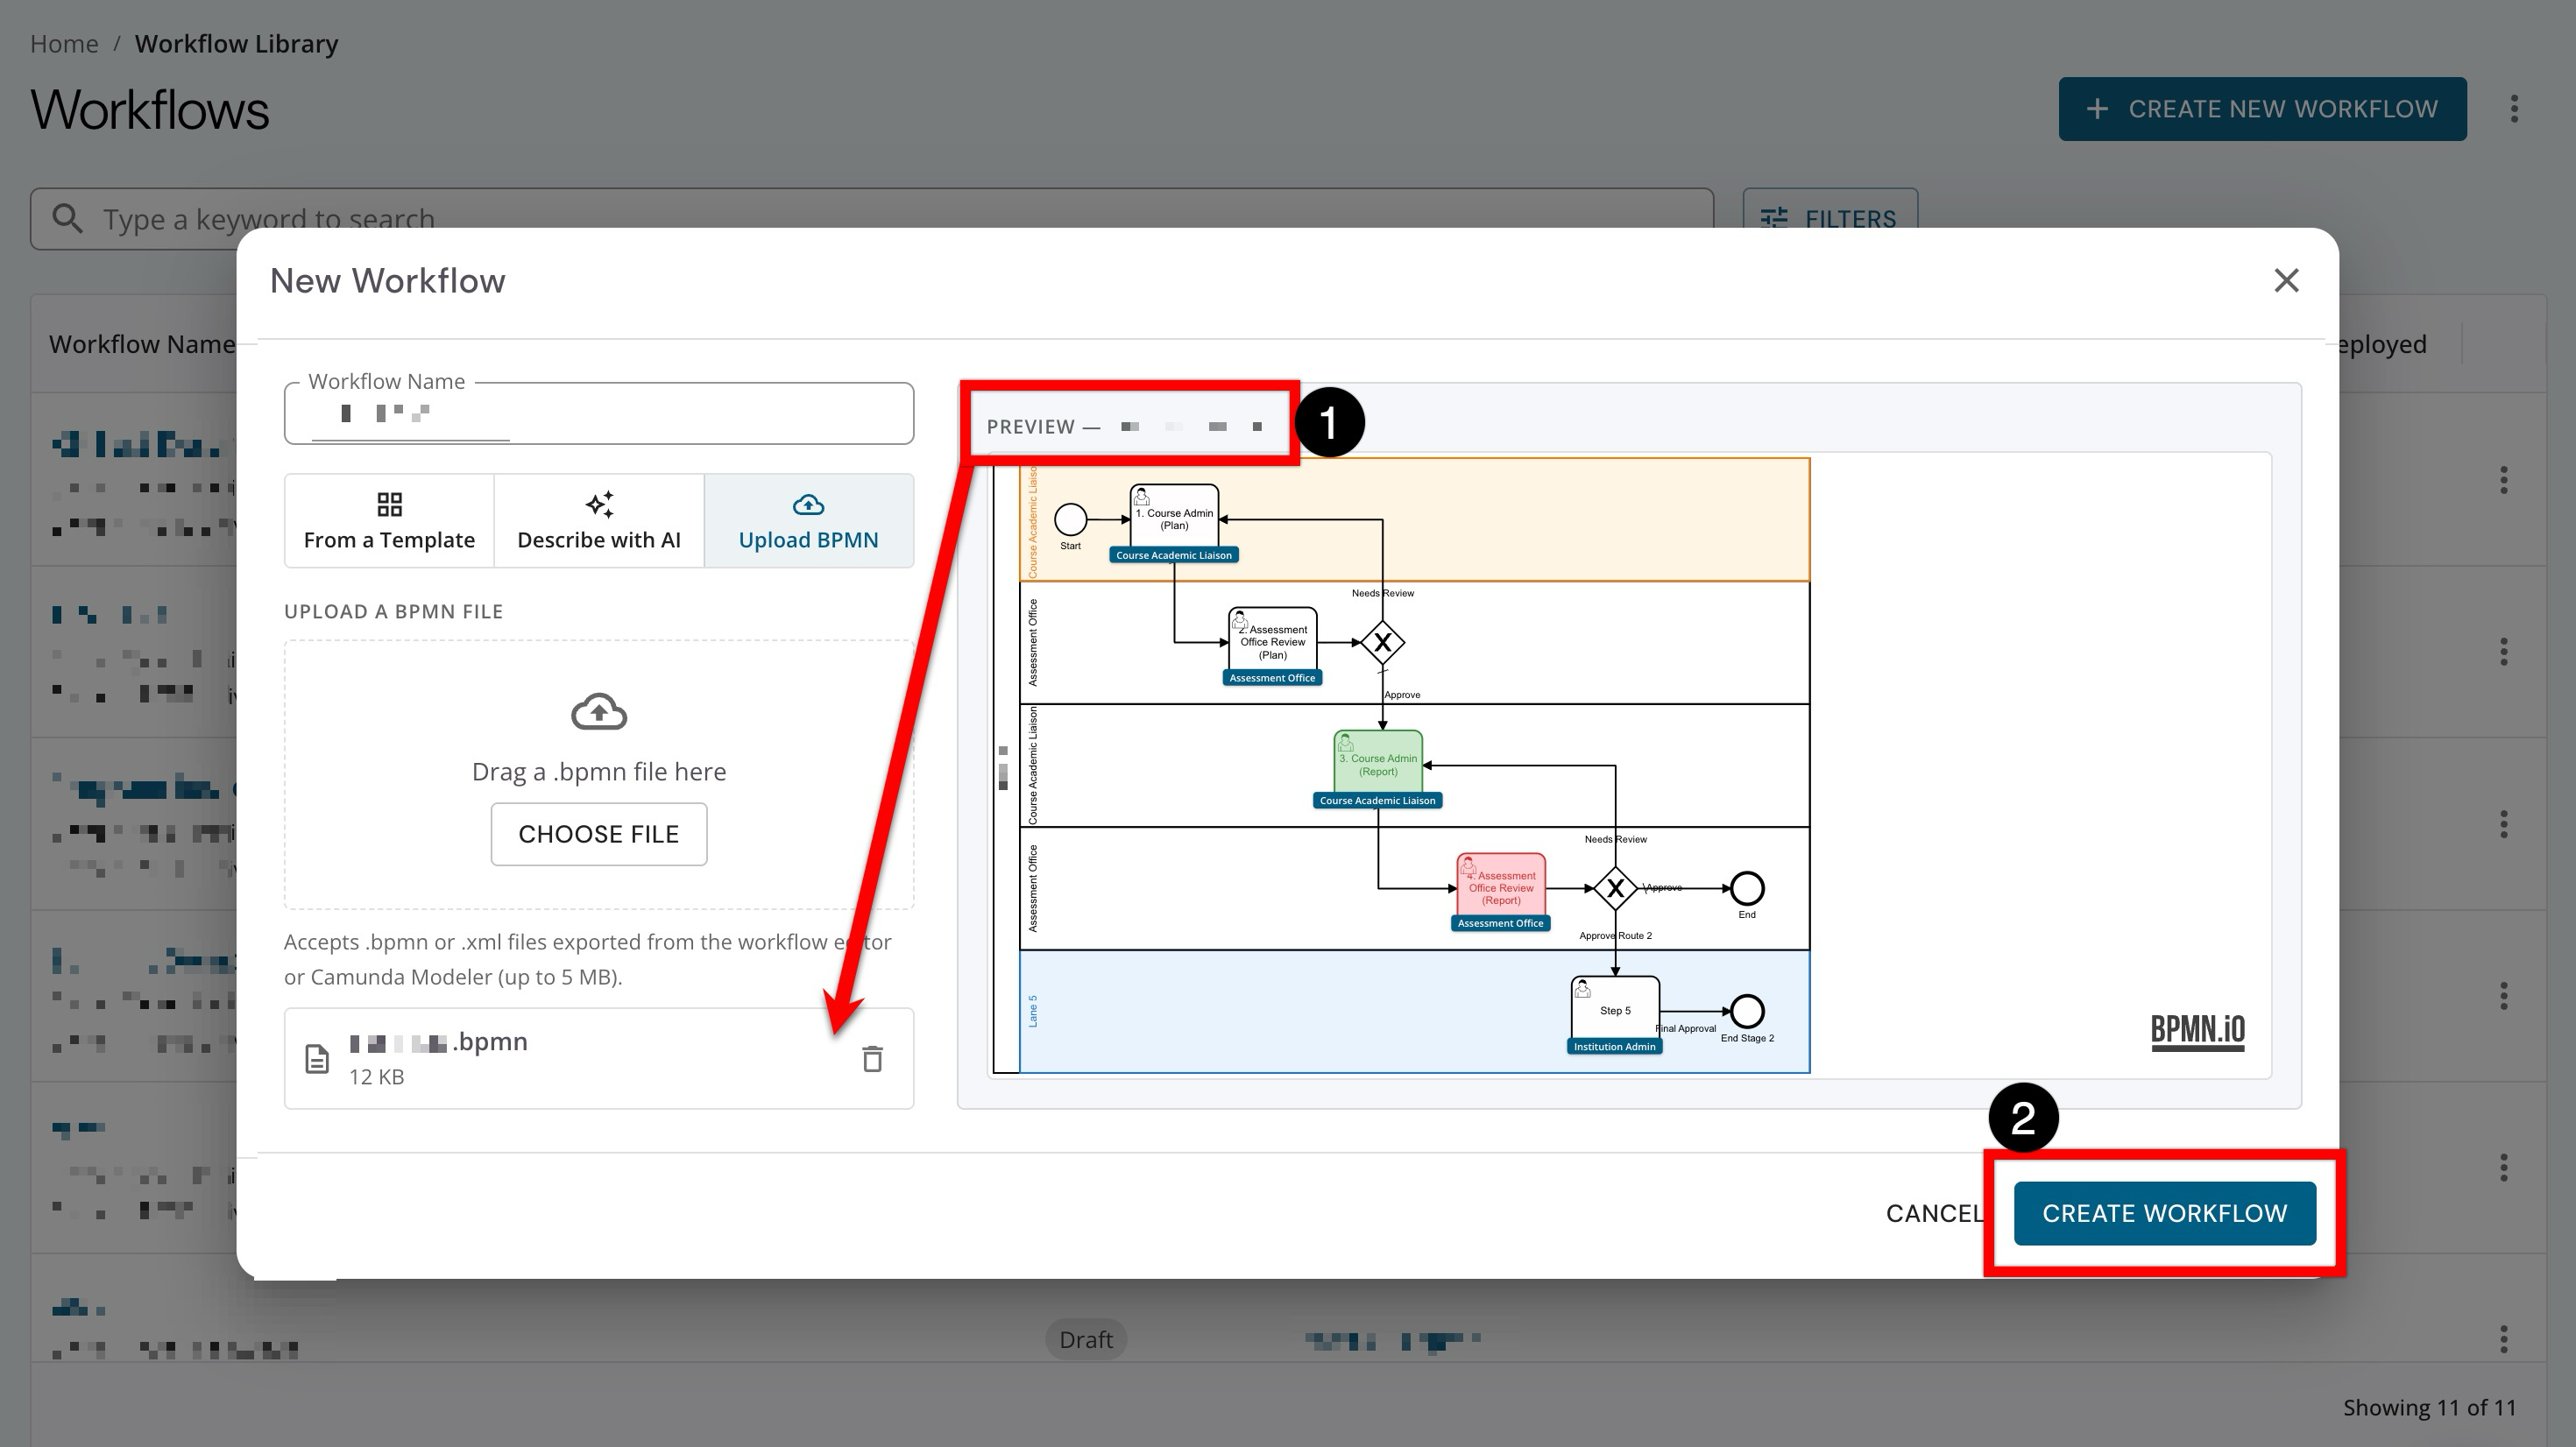
Preview the imported workflow before continuing (1). Use the preview to verify that the steps, connections, and labels appear as expected. Clicking Create Workflow (2) will open the new workflow in Draft status, where the workflow can be reviewed and further edited before publishing.
-